How to Draw a Portrait
In this tutorial, we will show you how to draw a portrait. This portrait drawing lesson will be done in a classic academic way.
What is the academic way and why did we decide to show you how to draw a portrait in this way?
There are many different ways to create a portrait. You can start with one detail, for example, an eyebrow, and gradually add other parts of the face. Or, you can start drawing the face with an oval, gradually adding guidelines and details.
All of these methods are good in their own way and by using them, you can undoubtedly be able to achieve success in drawing a portrait. But it is the method of drawing a portrait presented in this lesson that can teach you how to portray a human face in the most thoughtful and correct way.
When portraying a human face, keep in mind that you are drawing a volumetric subject. Remember that the head has weight, volume, and is located in three-dimensional space, not on a two-dimensional plane.
So let’s get down to the tutorial on how to draw a portrait.
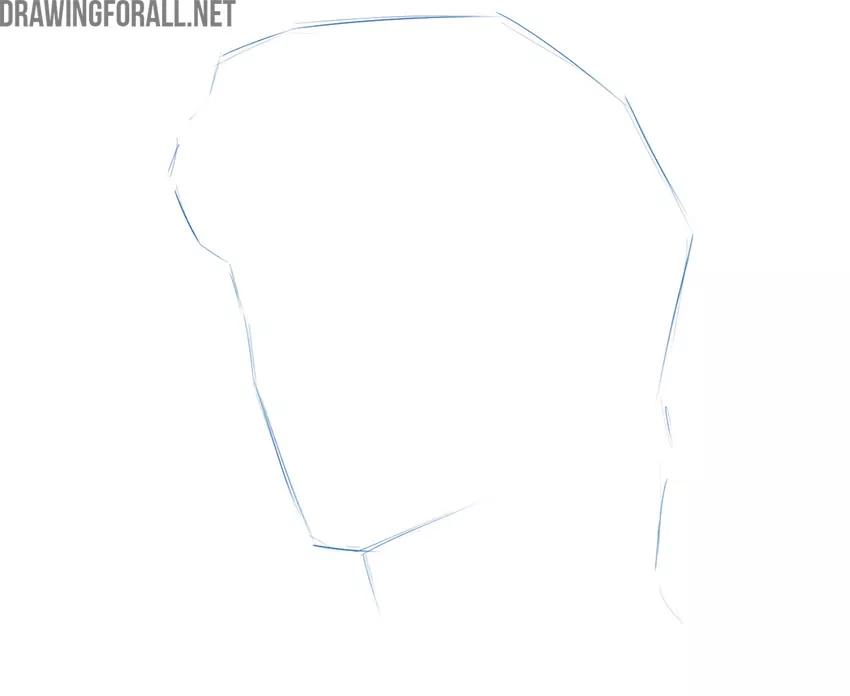
Step 1
Start by creating the general outlines of the head with the help of very light and simple shapes. Keeping in mind the rules of composition, position the head on the sheet of paper so that there is some free space between the outlines of the head and the edges of the sheet. Try to convey the proportions of the head on paper as accurately as possible.
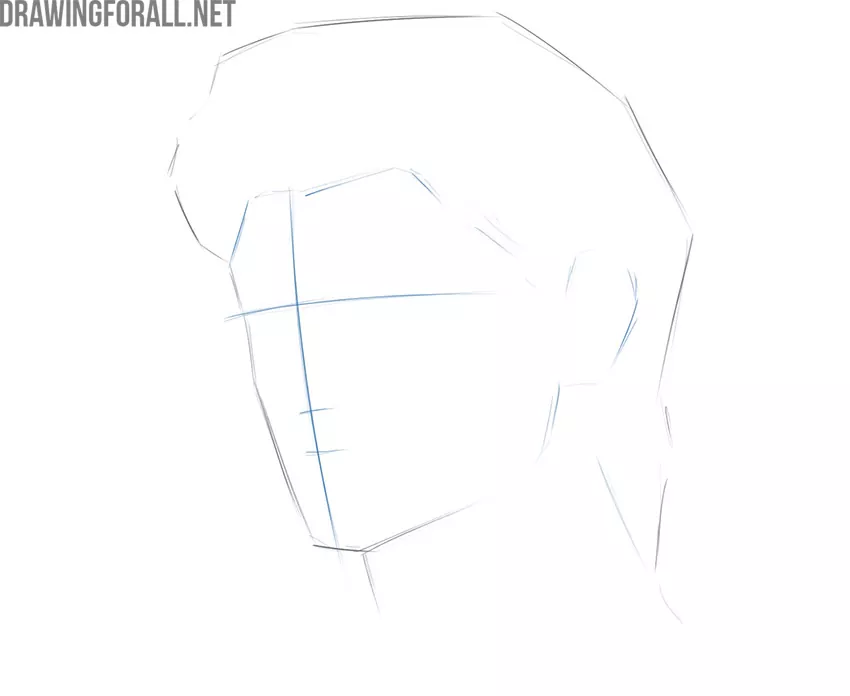
Step 2
Now depict a vertical line that will serve as a guide for us when depicting all the features of the face, helping to make them the most proportional and symmetrical. Sketch the horizontal line of the eyes, which will help to position the eyes on the face most correctly. Depict the line of the nose and mouth.
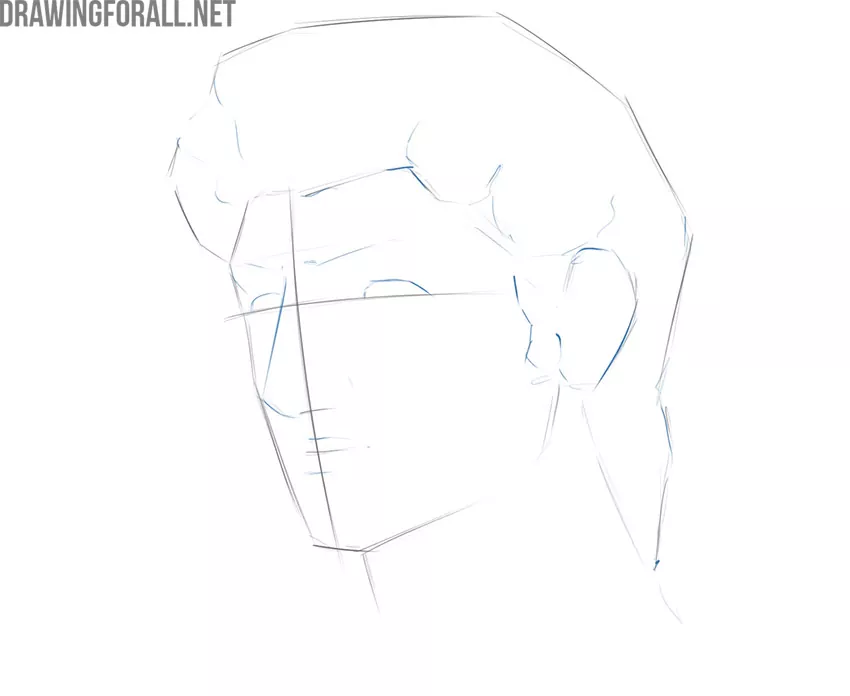
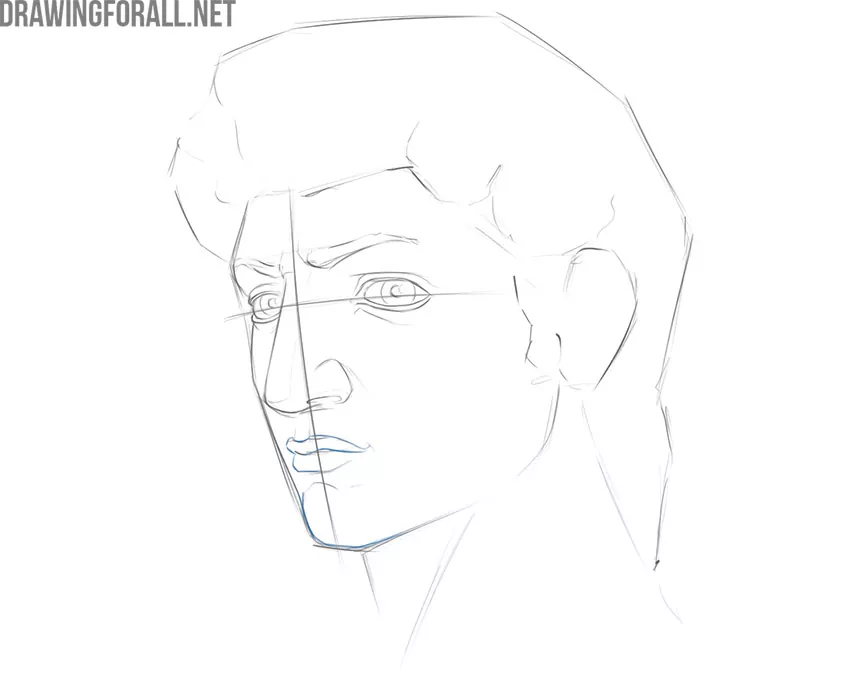
Step 3
Sketch the eyes, eyebrows, lips, ear, and curls on the head with very light and simple shapes. The details should be very generalized. When adding detail, don’t focus on one side. Try to work on the whole drawing at the same time. For example, by drawing a line on the left eye, sketch the same line on the right one. Constantly compare the parts of the face with each other to avoid mistakes in symmetry and proportion.
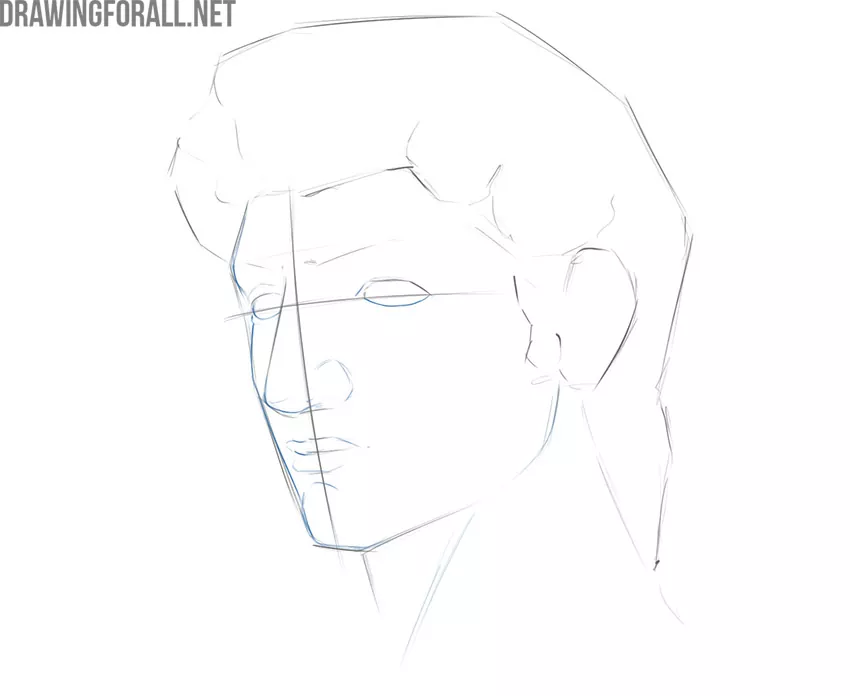
Step 4
Continue adding parts of the face, gradually making them more detailed. Sketch the lower eyelids and visible nostril, and make the lips a little more detailed. Sketch out the outlines of the cheek and chin. Remember to depict details on both sides of the face at the same time. Also, do not forget to move away from the portrait from time to time in order to see it in its entirety.
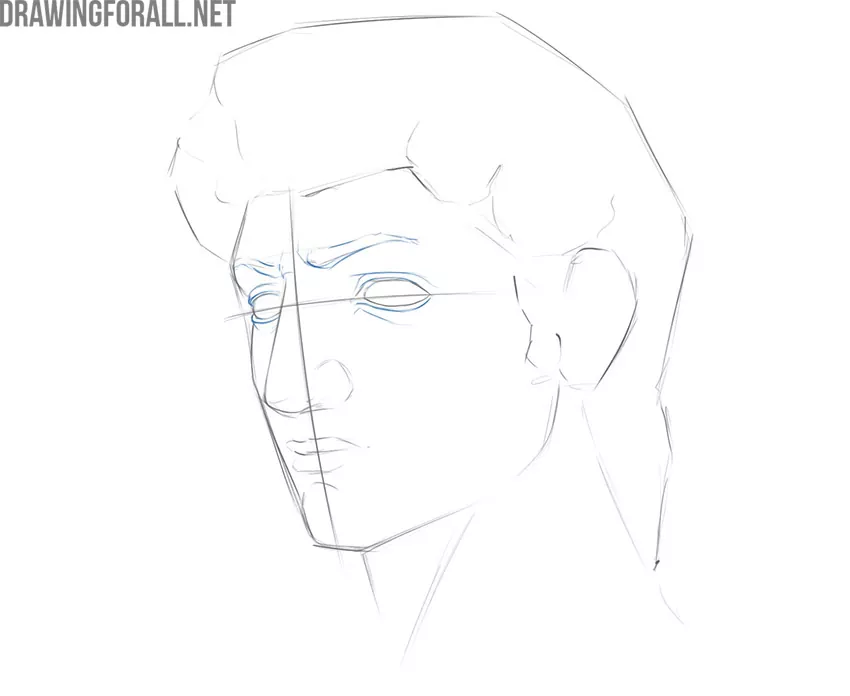
Step 5
Now using sharper lines, carefully draw the eyebrows and eyes. Don’t forget that they have volume. The eye is a ball, and the eyelids have a thickness. This must be conveyed in the drawing. Also, do not forget about the folds around the eyes, which are actually the outlines of the eye sockets. We talked about this in our lesson on how to draw eyes in a three-quarter view.
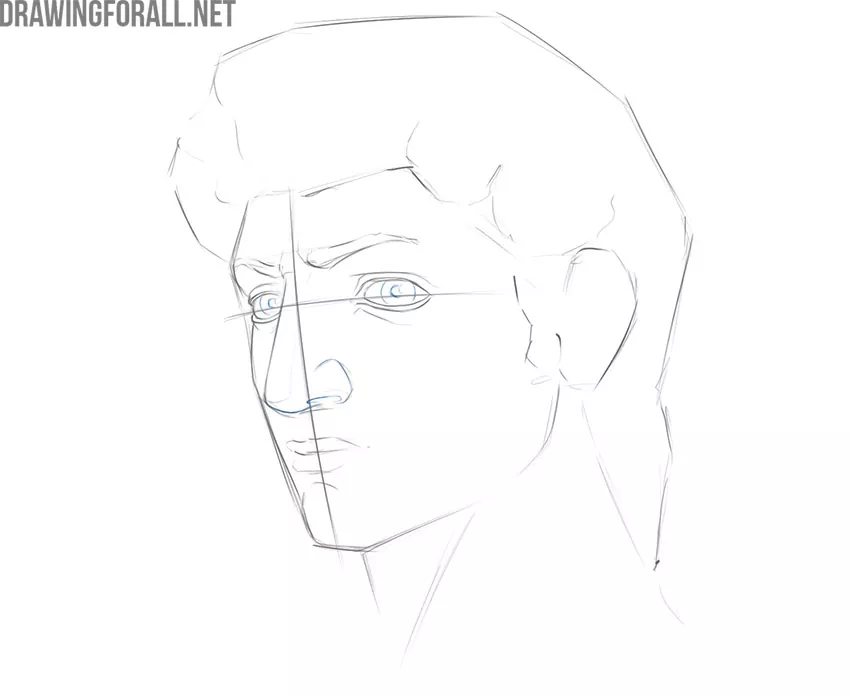
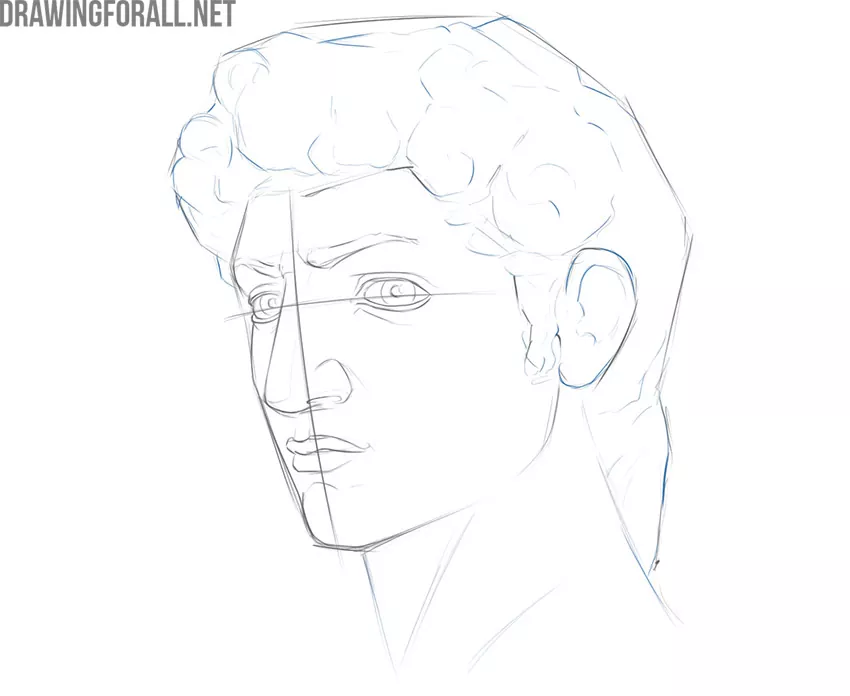
Step 6
Draw the pupils, not forgetting to sketch out small round highlights in them. Next, go to the nose and give it more detail. When creating a portrait, do not forget about the rules of aerial perspective, and in particular that the nose should be the darkest and most contrasting part of the face, since it is the closest part to us. In the lesson on how to draw a nose from the three-quarter view, we talked about all this in more detail.
Step 7
Now carefully draw the lips and chin. Following the rules of the aforementioned aerial perspective, make the borders of the lips that are closer to us darker than those that are further away. In the lesson on how to draw lips in the three-quarter view, we talked about this. To check the proportionality of your sketch, and to find possible mistakes in proportion, you can look at it in a mirror.
Step 8
Now sketch the outlines of the curls. Do not draw each hair separately, try to create the general outlines of the curls on the head. After that, carefully depict the details of the ear. Following the rules of aerial perspective, the ear should be lighter and less detailed than the rest of the face, since it is farther away than them. We talked about all this and more in our tutorial on how to draw an ear.
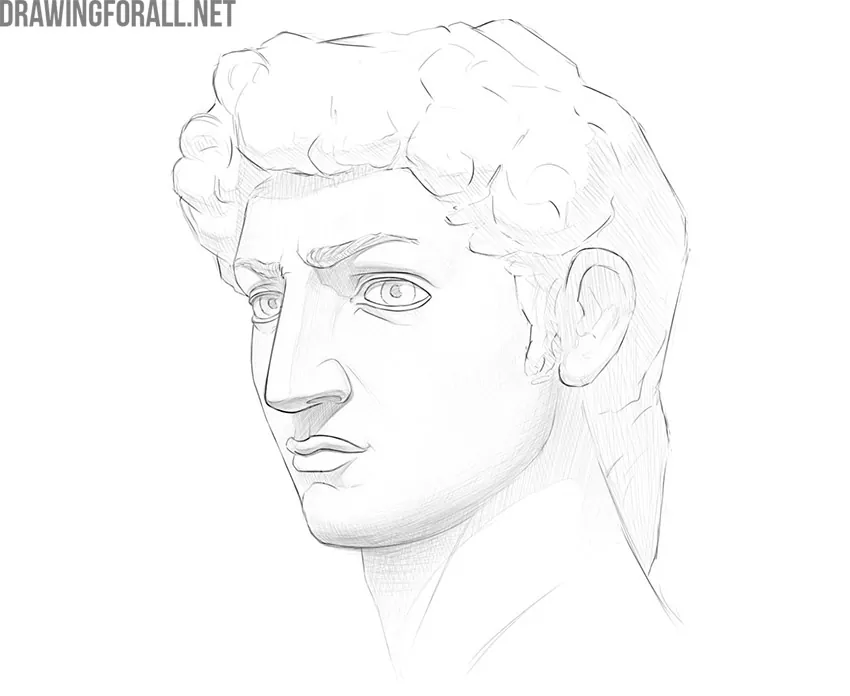
Step 9
Now it’s time to give the portrait a more complete look. To do this, take an eraser and carefully erase all construction lines. Give your artwork more volume by making the closer lines darker and more contrast than the farther ones. Compare your artwork with ours to find all mistakes and inaccuracies, and correct them, if any.

Step 10
To make the portrait more voluminous and lively, you should add shadows. Start from the darkest areas, gradually working towards the lighter ones. Shadows should be depicted taking into account the shape and curves of parts of the face. That is, the hatching lines should follow the curves of the parts of the face on which they are located. To learn more about shadows, their structure, and how to create them, read our article on light and shadow.
In this tutorial, our team tried to collect for you the most important knowledge you need to learn how to draw a portrait.
But in order to create portraits truly professionally and correctly, you need to consolidate the knowledge you have gained.
First, you need to sketch another head using the knowledge gained in this lesson. You can portray your own face, as well as the faces of your friends and acquaintances.
Try to challenge your knowledge and skills by depicting portraits not only from the angle shown in our example but also from other angles. Also, try to create more complex shadows and add more detail to your artworks.
In addition, you can draw portraits with more complex facial expressions such as joy, anger, etc.
All this is necessary so that you memorize the entire sequence of actions, and learn to see and convey volume when portraying a person’s head.