

How to Draw a Female Face
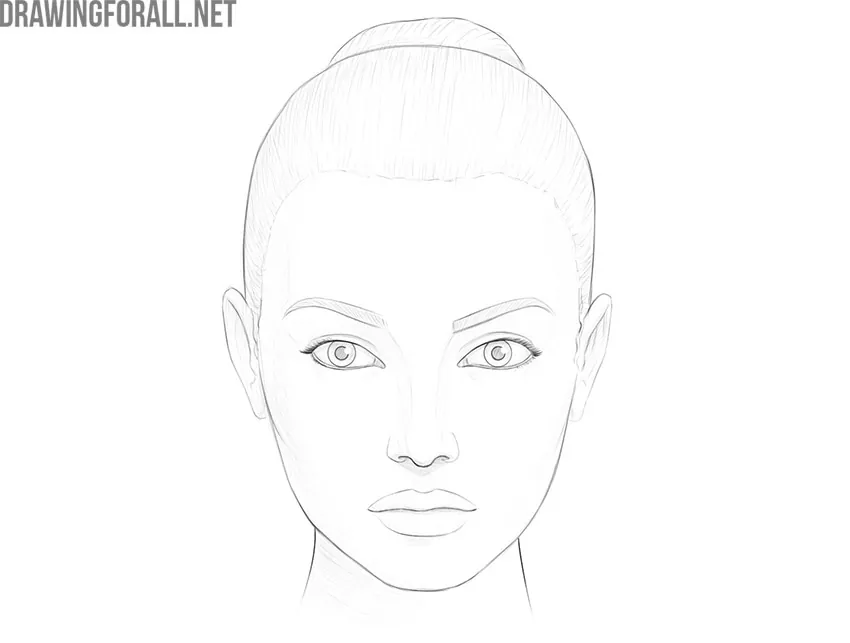
In this step-by-step tutorial, we will show you how to draw a female face. We will try to explain all the nuances of creating a three-dimensional face in simple terms.
As we have said repeatedly in our previous articles, drawing human faces follows approximately the same basic principles. The difference lies in the details.
A person’s appearance is made up of these details, and certain features help us distinguish one person from another. The female face and the male face also have their own characteristics. In this female face drawing tutorial, we will look at these characteristics and nuances in detail.
So let’s get started.
How to draw a female face step by step
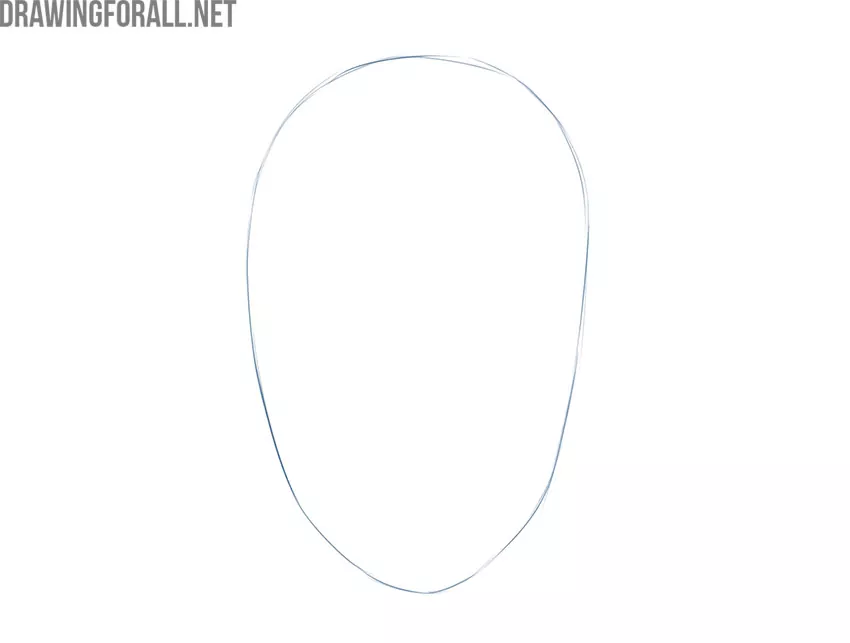
Step 1: Sketch the head shape
To avoid mistakes in the head proportions, first outline the basic shapes. The human head is basically an inverted egg. Sketch this geometric shape using barely visible lines. To check your drawing, you can look at it in a mirror from time to time. The mirror reflection of your female face drawing will help you notice mistakes.
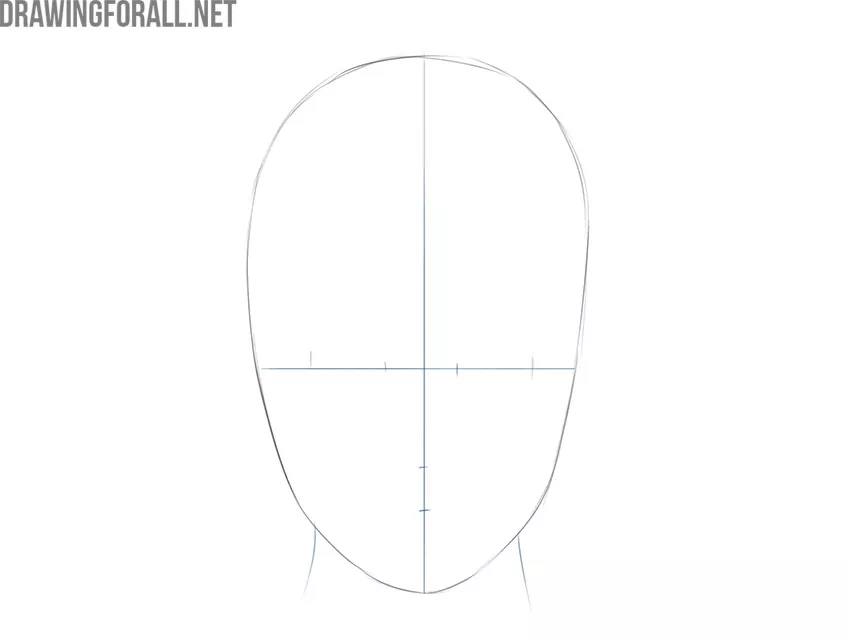
Step 2: Mark the facial guidelines
Now sketch a vertical line running exactly through the center of the face. This line will help keep the facial features symmetrical. Then draw a horizontal line for drawing the eyes. Mark the borders of the eyes on this line. Their width is approximately equal to the distance between them. About halfway between the eye line and the chin, sketch the line of the nose. Draw the line of the mouth just below.
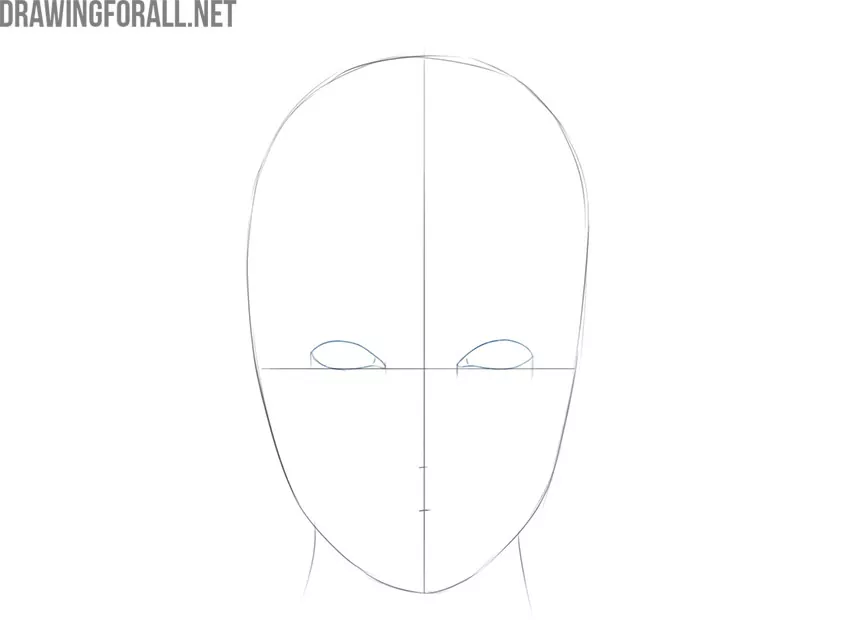
Step 3: Draw the female eyes
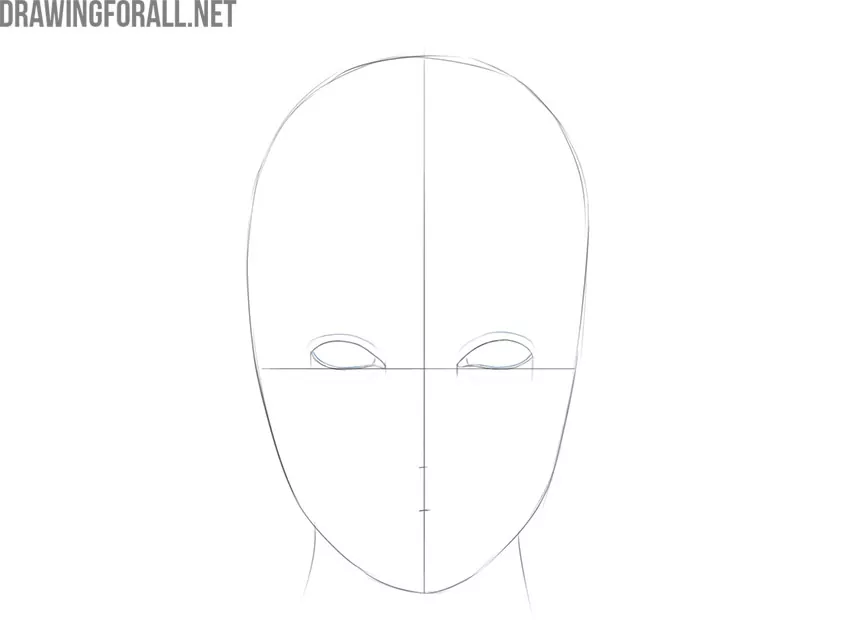
Now let’s start detailing the female face drawing. Start by drawing the female’s eyes, carefully outlining them using the guidelines above. When drawing the eyes, be sure to outline the inner corners. This will give your female face drawing a more realistic and natural look.
Step 4: Refine the eyelid lines
Now carefully draw the inner lines of the lower eyelids. Don’t forget that the eyelids have thickness, and showing it in your drawing gives the eyes a more natural look. Just above the eyes, draw the folds that follow the shape around them.
Step 5: Add irises and pupils
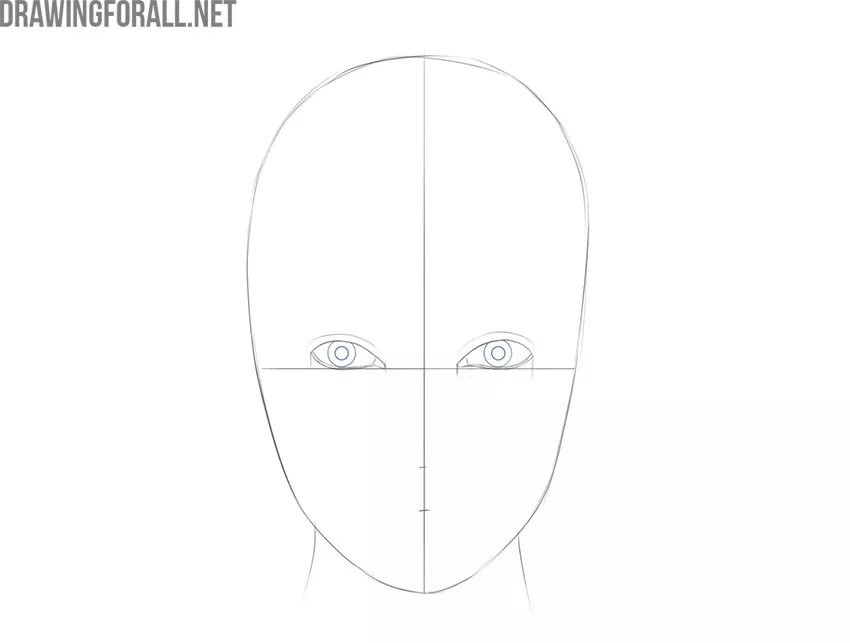
Now it’s time to draw the pupils and irises. Start by sketching the outlines of the irises. The upper parts of the irises should be slightly covered by the upper eyelids. Next, draw the pupils exactly in the center of the irises. The irises, as well as the pupils, should be round.
Step 6: Draw eyelashes and eyebrows
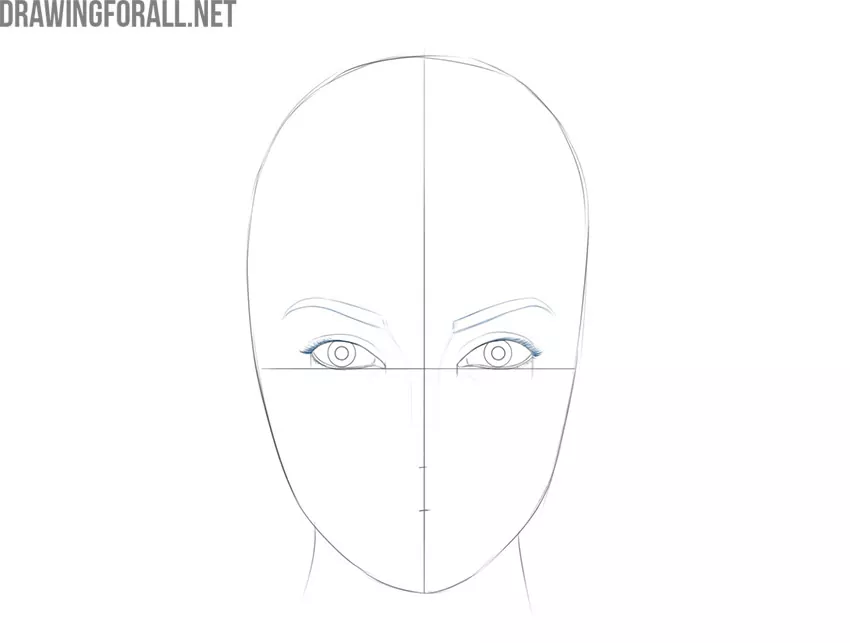
Using dark lines, draw the upper lashes. Don’t draw the lower lashes too heavily, since they are smaller and lighter. Draw the eyebrows just above the eyes. When artists draw a female face, they often make the eyelashes thicker and the eyebrows slightly higher than when drawing a male face.
Step 7: Draw the female nose
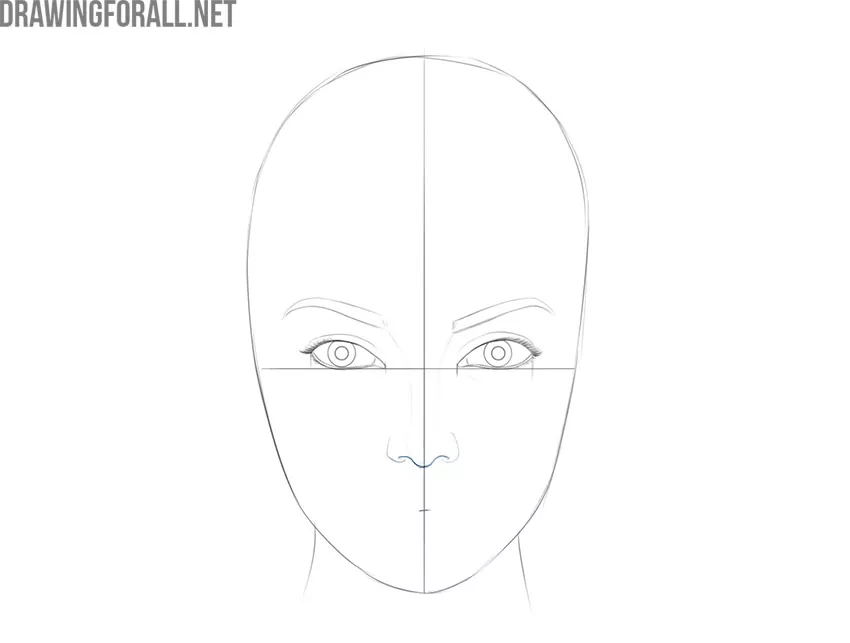
Now, using the line sketched earlier as a guide, draw the nose. Start with the tip of the nose, then smoothly draw the wings and the bridge. Another common difference when drawing a female face is that the nose is usually drawn slightly smaller than on a male face.
Step 8: Outline the female lips
Now draw the lips. First, draw the center line of the mouth using the guideline sketched earlier. Then, with smooth lines, outline the upper lip and then the lower one. Another common difference when drawing female and male faces in art is that female lips are usually drawn fuller than male lips.
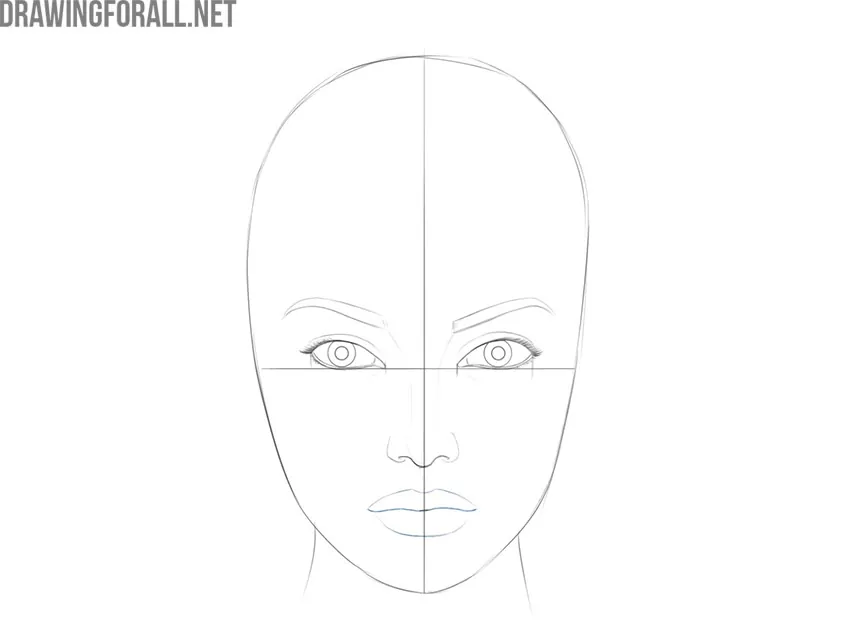
Step 9: Add ears and jaw
Draw the ears with smooth lines. The upper tips of the ears are level with the eyebrows, and the lower tips are level with the tip of the nose. Next, draw the outlines of the jaw. To check your female face drawing, you can not only look at it in a mirror but also step back from it a short distance.
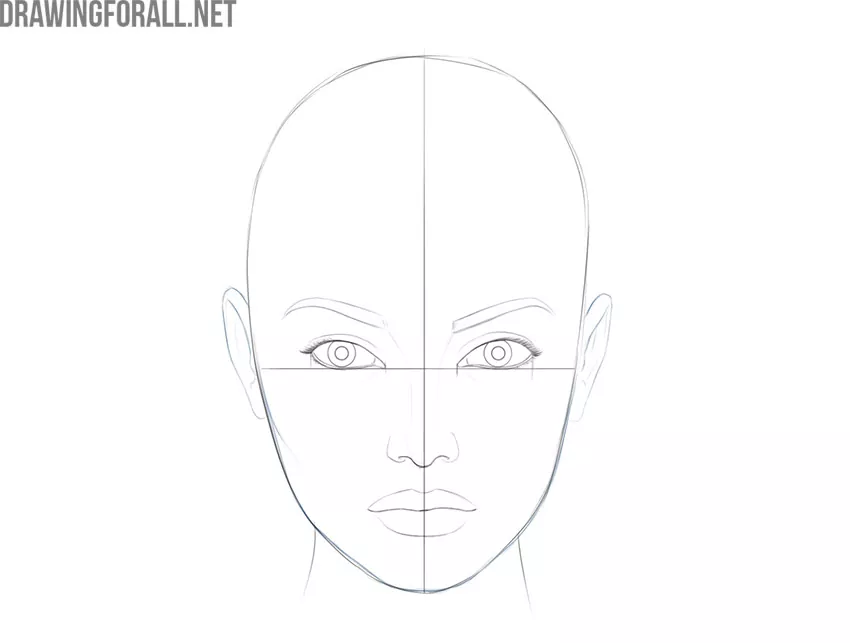
Step 10: Draw the female’s hair
Draw the outlines of the hair on the head. Use numerous long lines to draw the hair texture. Pay special attention to the hairline. There should be slightly more lines in this area than on the rest of the hair. The distance from the hairline to the bridge of the nose is equal to the distance from the bridge of the nose to the tip of the nose.
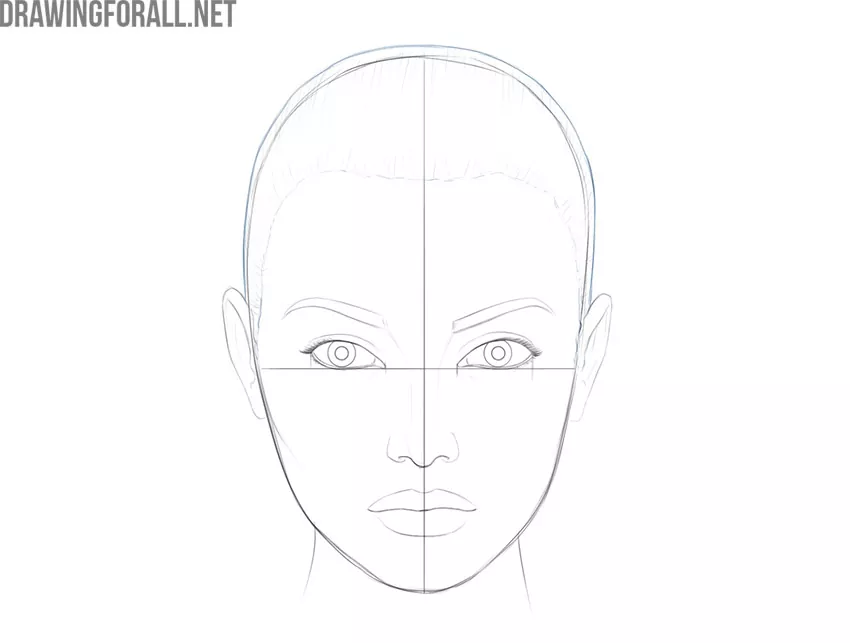
Step 11: Clean up the line drawing
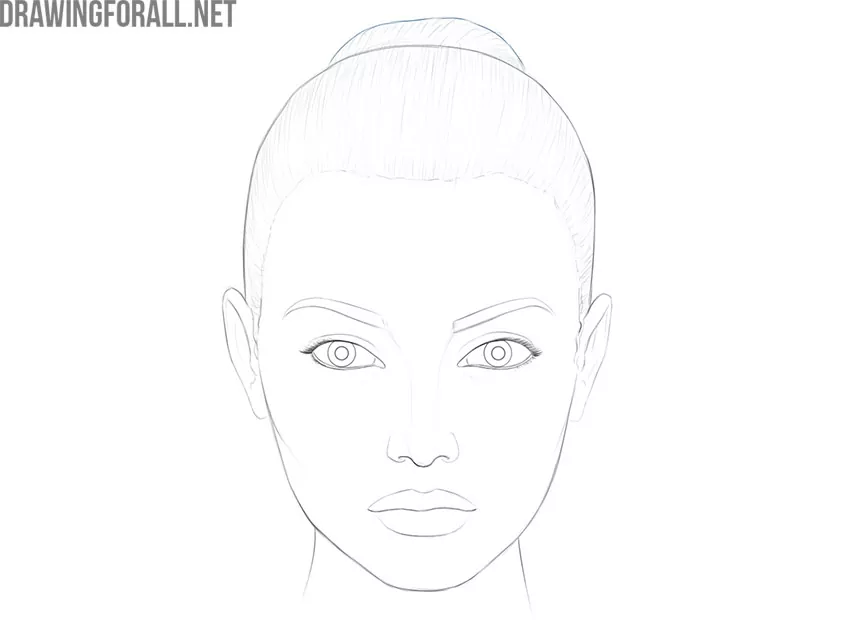
Now erase all unnecessary guidelines from your female face drawing. To give the drawing a more three-dimensional look, make the details that are closer to us a little more contrasting than those farther away. This will make the female face drawing look more realistic.
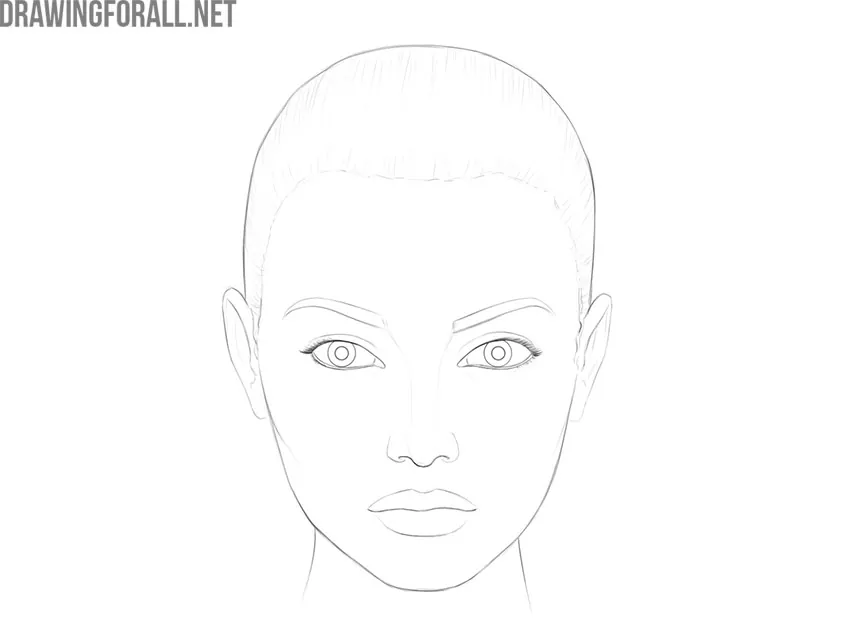
Step 12: Add the hair bun
Draw the visible part of the bun behind the head. Add more light lines in the direction of hair growth to create a realistic hair texture. Here you can add some additional details, such as earrings or moles.
Step 13: Add shadows and highlights
To make the female face drawing more lively and three-dimensional, you need to draw the shadows. Using hatching to draw them, start with the darkest areas and gradually move to the lighter ones. Don’t forget to darken the pupils, leaving round highlights in them. This will make the eyes look more lively.
To consolidate the knowledge gained in this female face drawing tutorial, try some drawing exercises.
First, try drawing a similar face but with different features. Try to make the girl younger or older. Try drawing interesting details on her face.
Next, try drawing a female portrait from a slightly different angle and under slightly different lighting.
All these exercises will help you consolidate the knowledge gained in this female face drawing tutorial and make it possible to draw more diverse faces without copying the same version each time.


Great tutorial! I will try to draw some celebrity with this method to practice
woah great idea = ) I will also try to draw a celebrity
Cool! I did Demi LOvato and Cardi B with this face!
great my drawing was near to perfect on my first go ,,,,thanks to this tutorial.
Can you sort of do an easier version of the face without the guidelines?
I’m doing C!Niki Nihachu with this face!
It was really fun and useful!
hello it cute i draw that
Cool thanks