How to Draw a Face from the Side
In this lesson, we will show you how to draw a face from the side. This instruction is part of a series of our series on drawing a face from all angles.
To learn how to draw a face from the side, you first need to familiarize yourself with the proportions of the head. This will help you depict a face most correctly, giving it the most realistic look.
So, if you already know the basic proportions of the head, and your art supplies are in front of you, then let’s get down to the lesson on how to draw a face from the side.
Step 1
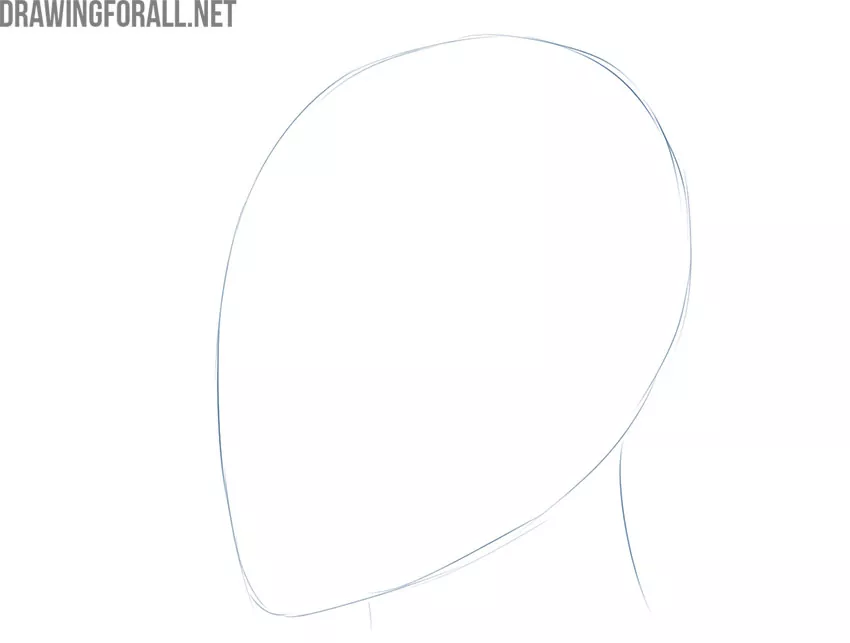
As always, you should start with the basic shapes of the head. As we have said many times, the head is somewhat reminiscent of an inverted egg. Sketch out the outlines of this very inverted egg. In the same stage, depict the contours of the neck.
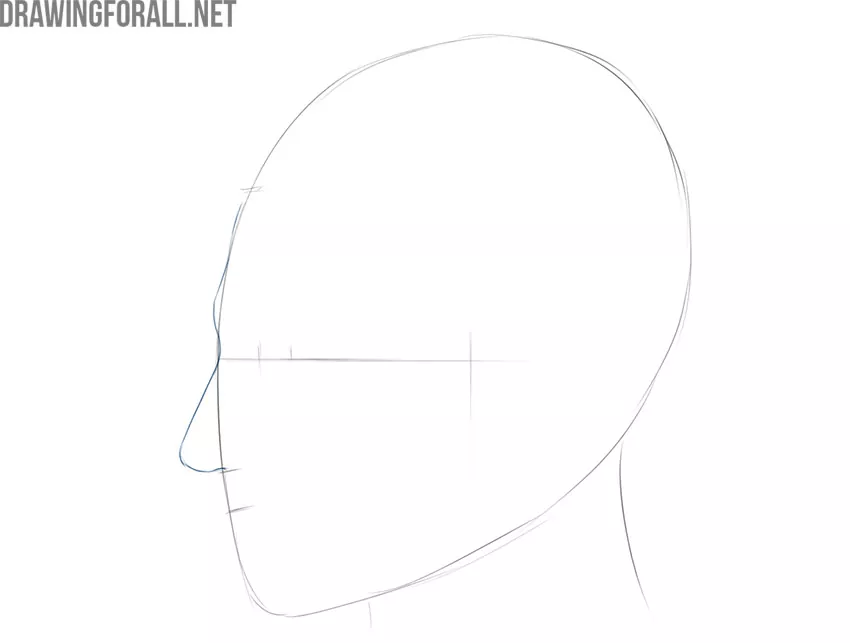
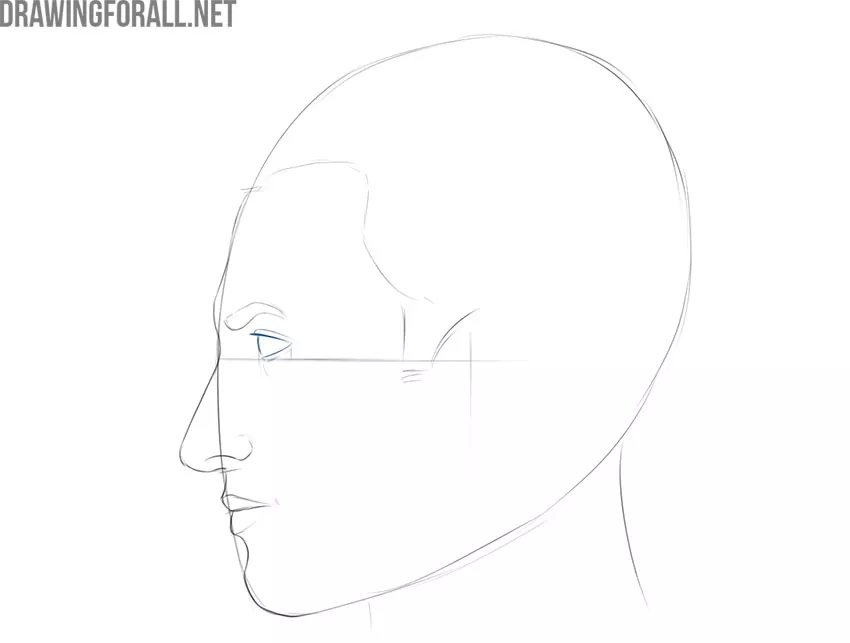
Step 2
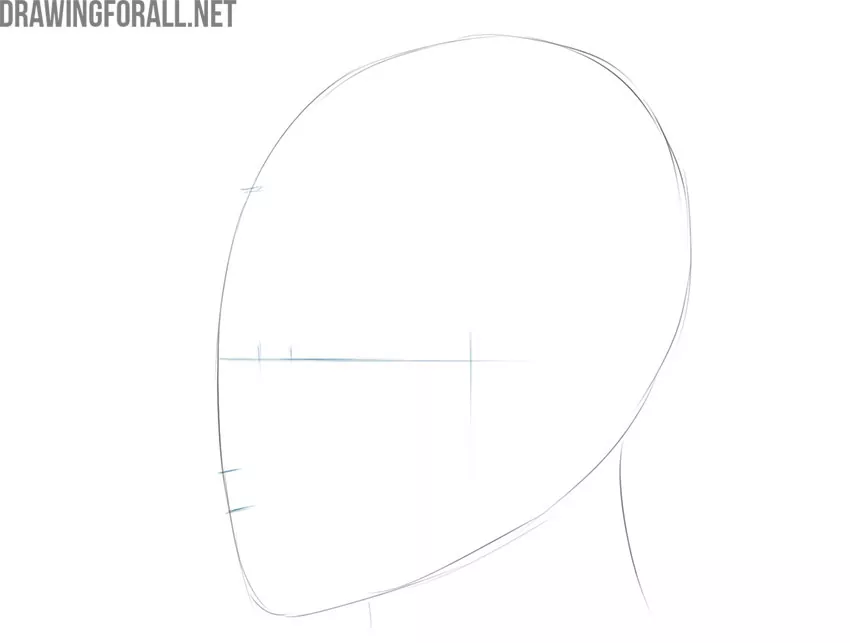
Now sketch out the guidelines with which you can later depict the features of the face. First, sketch out an eye line that goes through the center of the head. After that, sketch the location of the nose, mouth, and hairline with short lines. Mark the inner and outer edges of the eye on a horizontal line.
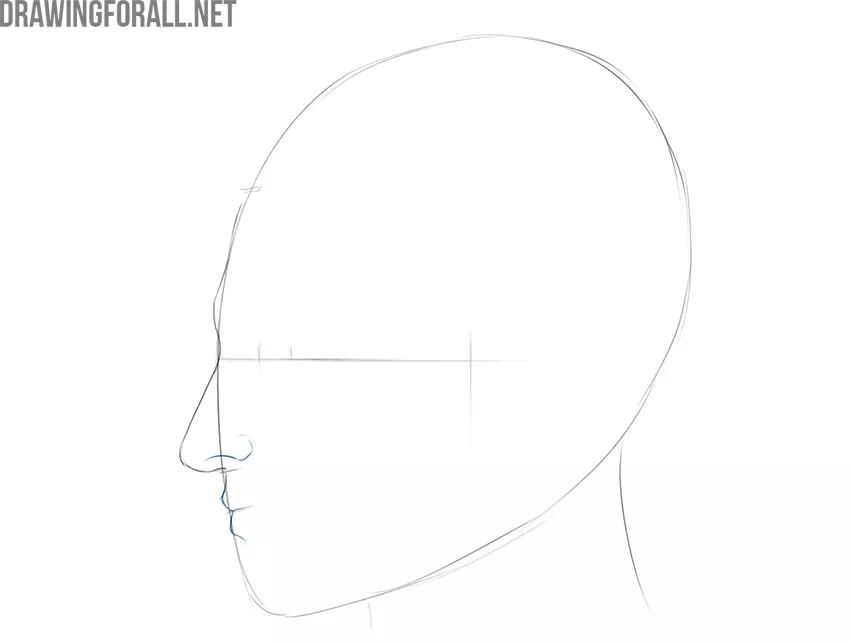
Step 3
Now it’s time to start adding the features of the face. Carefully depict the forehead and the outlines of the browbone. Next, draw the bridge of the nose and the nose itself. We talked about this in our instruction on how to draw a nose from the side.
Step 4
Depict the wing of the nose with a couple of smooth lines. Next, sketch the silhouette of the lips. When drawing a face, do not forget to constantly compare the parts of the drawing with each other. This is necessary in order not to get confused in proportions and avoid mistakes.
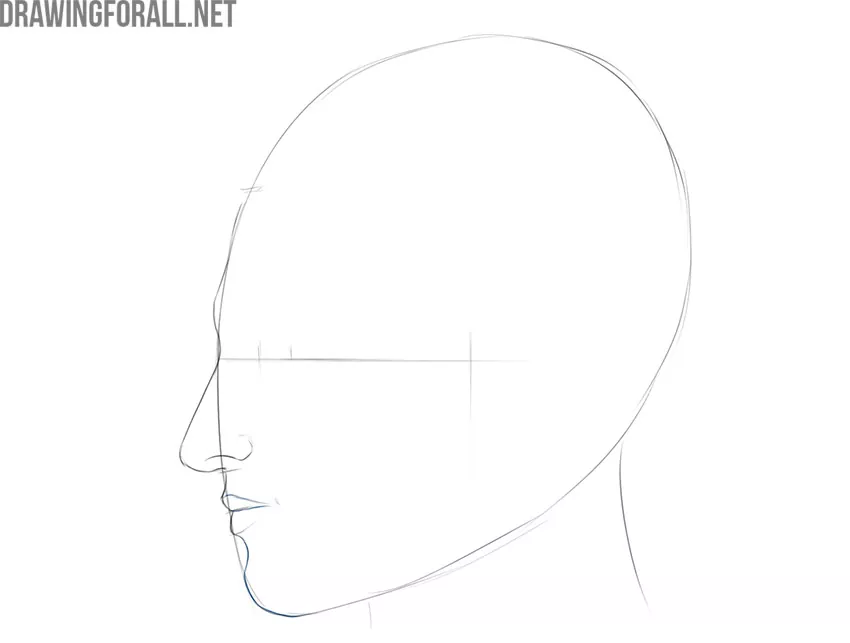
Step 5
Draw the borders of the lips, as shown in our example. By the way, in our guide on how to draw lips from the side, we talked in detail about how to depict them from this angle. Next, continuing the line of the silhouette of the lips, draw the chin.
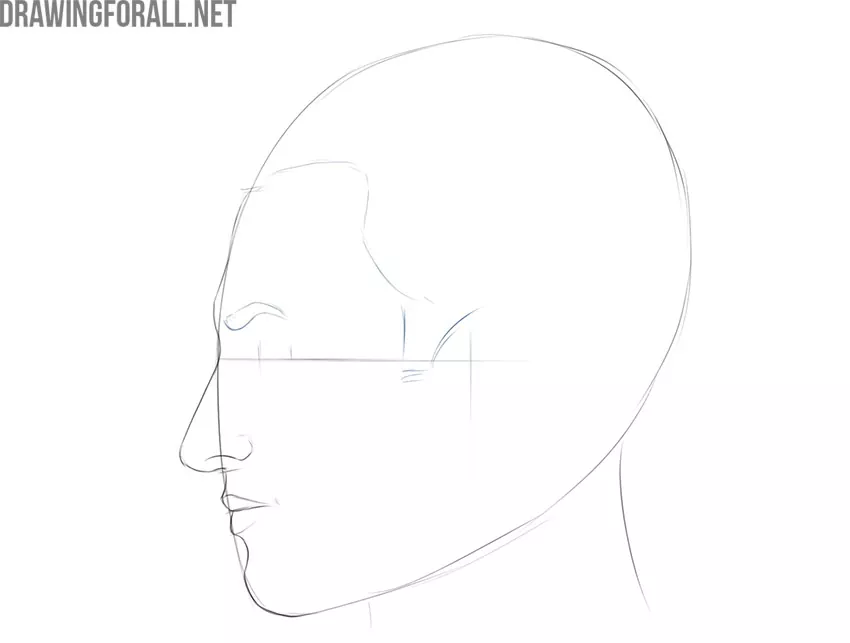
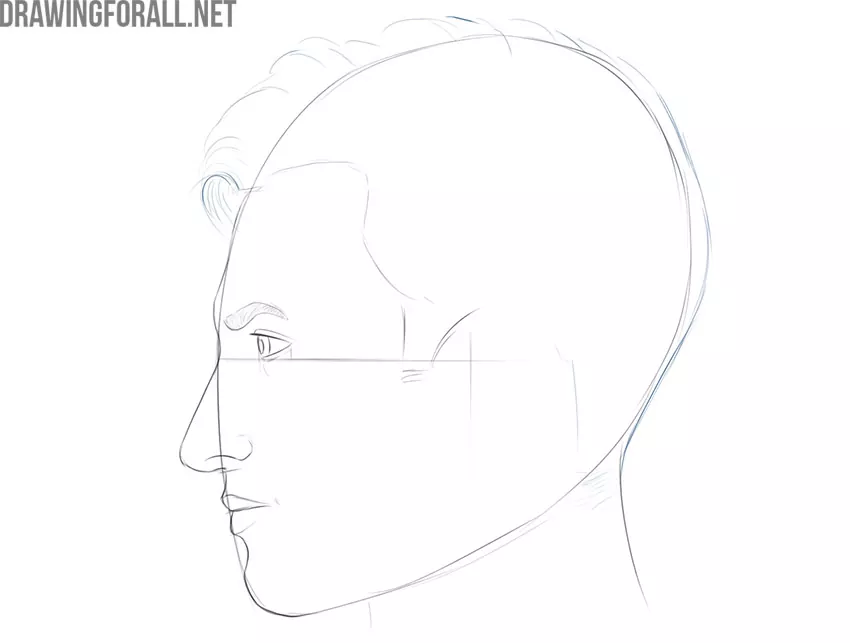
Step 6
Now go back to the top of the head again and sketch a line of hair growth using the previously created guidelines. Draw a visible eyebrow using a couple of simple lines. When portraying a face from the side, it is very easy to make mistakes in proportion. To prevent this from happening, do not forget to look at your work in the mirror from time to time.
Step 7
Now it’s time to draw the eye. First of all, create the outlines of the upper eyelid, then the lower. The upper eyelid should be slightly darker than the lower. Sketch the outlines of the folds around the eye. This will help the face drawing look even more realistic and convincing.
Step 8
Now draw the pupil. Note that the top and bottom of the pupil should be slightly covered by the eyelids. Now go back to the eyebrow, and create the hair texture using a lot of short lines. Eyes, as well as eyebrows, can have a wide variety of shapes, so don’t despair if these details in your drawing do not look like those in our example.

Step 9
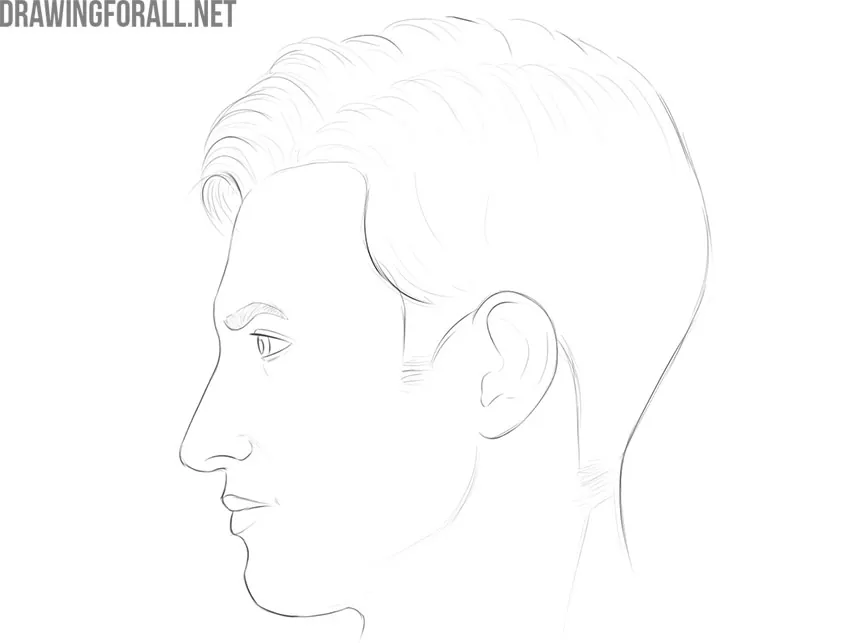
Now it’s time to depict the hair. Start by sketching the outlines of the hairstyle. After that, create the strands of hair with smooth lines. At the top, the hair should be more voluminous than at the bottom. But of course, you can draw any other hairstyle, and add details such as a beard.
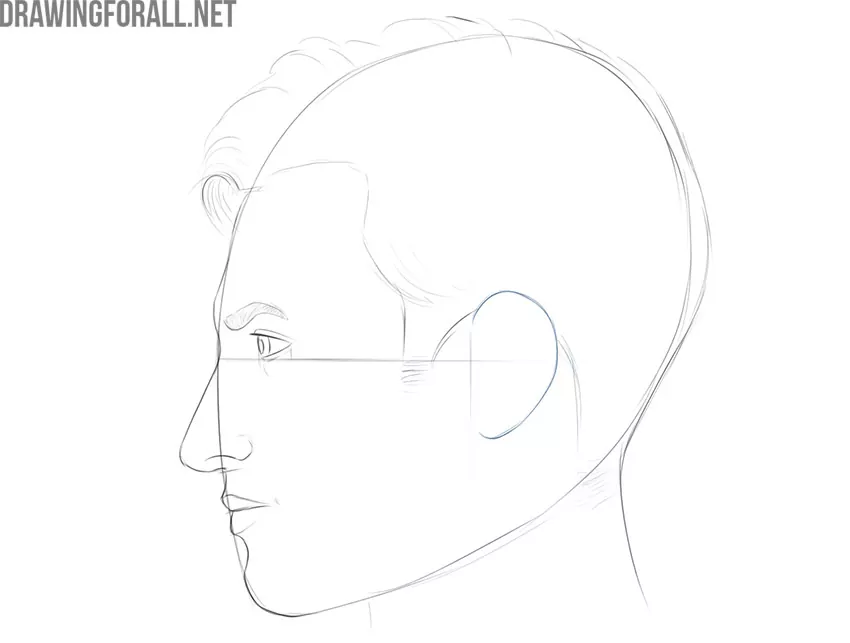
Step 10
Now draw the contours of the ear. The top edge of the ear should be at the same level as the eyebrow and the bottom edge at the same level as the tip of the nose. By the way, to learn about the process of drawing an ear in more detail, you can visit our lesson on how to draw an ear.
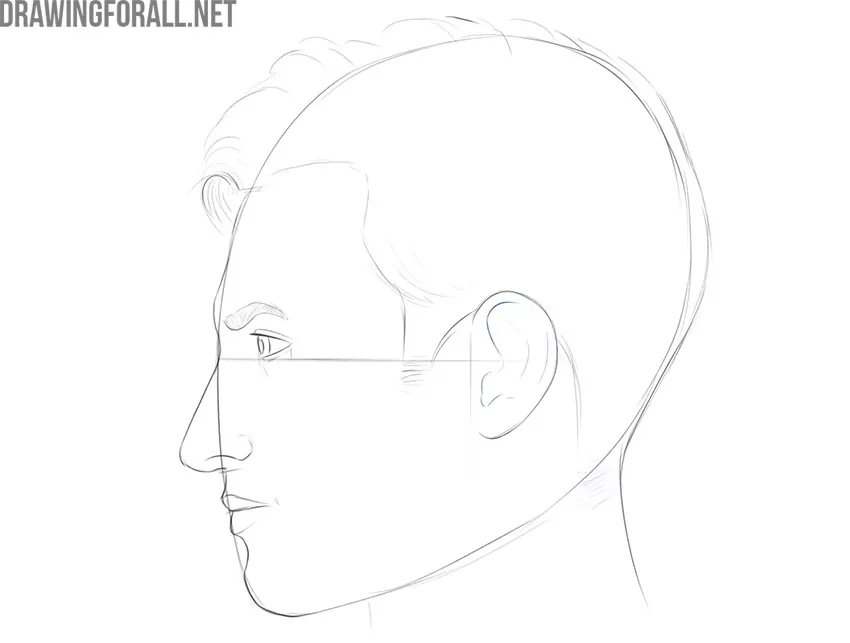
Step 11
If you have already visited our ear drawing guide, then most likely you have studied this process in some detail. But one way or another, let’s briefly recap everything here. First draw the contours of the upper cartilage, then the lower. The lines of the ear cartilages should be very smooth, as shown in our example.
Step 12
Add some detail to the hairstyle by creating the hair texture. To make the hair look realistic and voluminous, it should be sketched from roots to tips. The lines should be long and smooth. Create the contours of the jaw and neck muscles.

Step 13
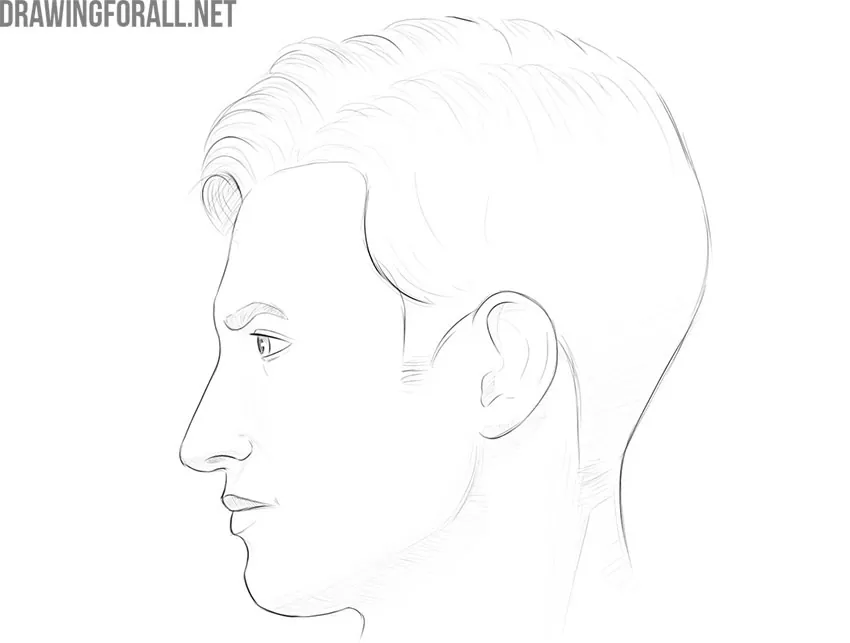
Remove any unnecessary guidelines from the face drawing. Add some additional volume to the drawing by making the closer lines darker than the more distant ones. Compare your drawing with our example, and try to find mistakes to correct them.
Step 15
If there are no mistakes in your drawing of the face, then it’s time to draw shadows. With the help of smooth and even hatching, start adding shadows from the darkest areas, gradually moving to lighter areas. Paint the pupils, leaving small highlights in them.
If you want to delve deeper into the topic of drawing a face and take your skills to the next level, then try drawing a face from other angles, for example, from the front, and in a three-quarter perspective.
Other than that, you can try to delve deeper into the anatomy of the face. In our article on facial anatomy, we talked about the muscles of the face and those details that are most important for an artist.
The knowledge gained from this article will help you to understand well what parts a human face consists of, and how to most correctly reproduce these parts on a piece of paper.