How to Draw a Face Easy
In this guide, we will tell you how to draw a face easy. This is a very important basic tutorial that we created so that an artist of any level can try to paint a portrait. To do this, you need to repeat the steps from these eleven steps that we have prepared for you.
Step 1
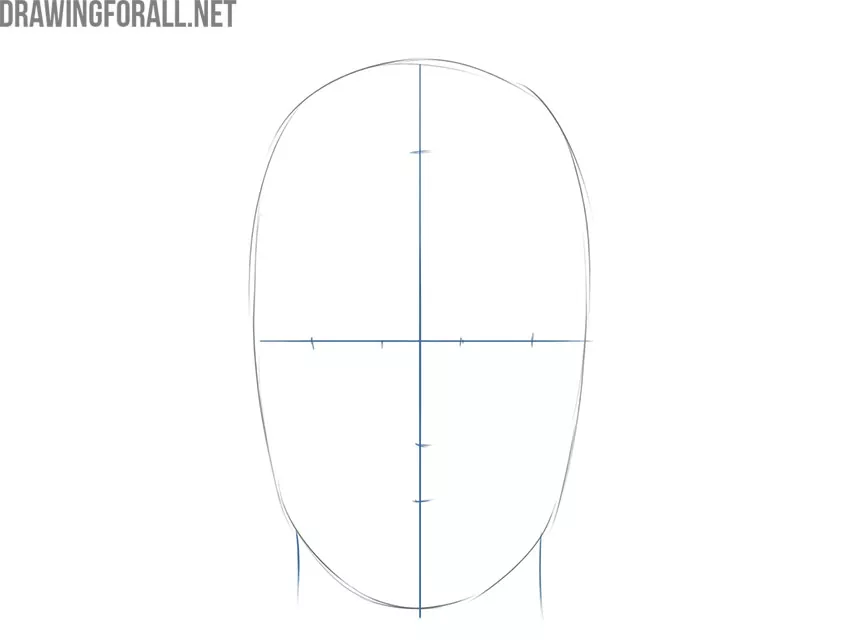
So, we start this guide on how to draw a face easy. If you are our regular reader, you probably know that we love to represent complex drawings in the form of simple geometric shapes. Therefore, in this step, we will draw a large, elongated shape that resembles an oval. If you are drawing a portrait, place this shape in the center of the piece of paper.

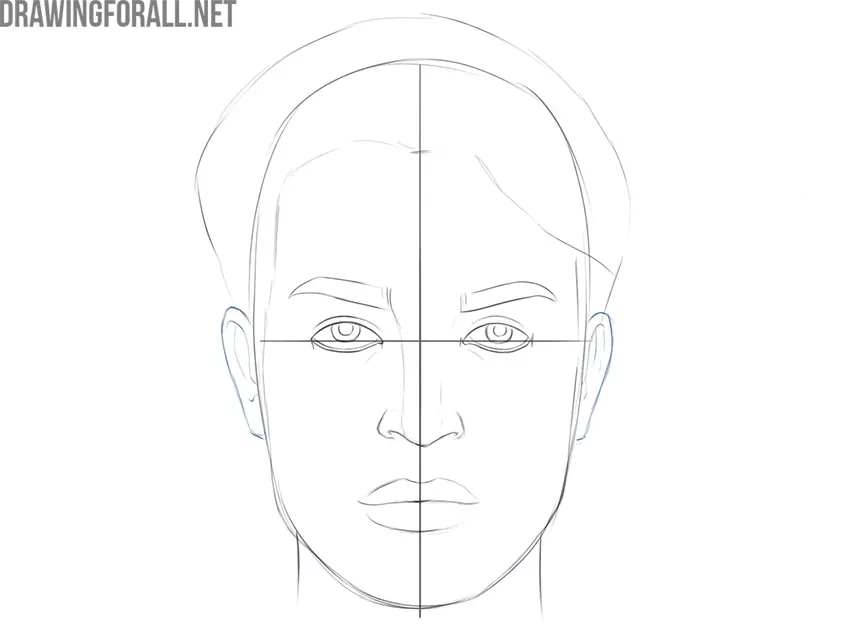
Step 2
Now let’s draw the construction lines inside our oval shape. As you know, the vertical line indicates facial symmetry and the horizontal line marks the location of the eyes and eyebrows on the face. Also, with the help of short strokes, do not forget to more accurately outline the size of the eyes, the localization of the nose and mouth, and the hairline.
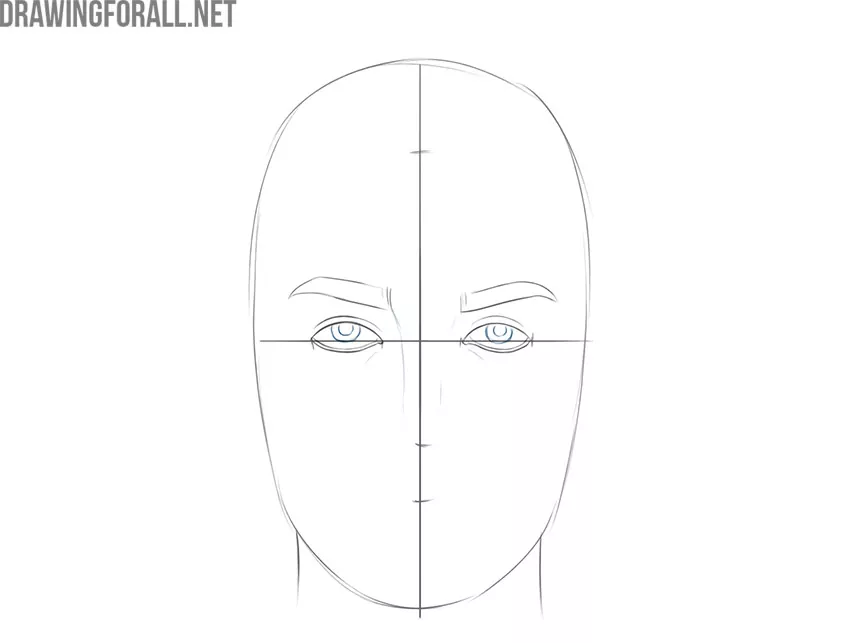
Step 3
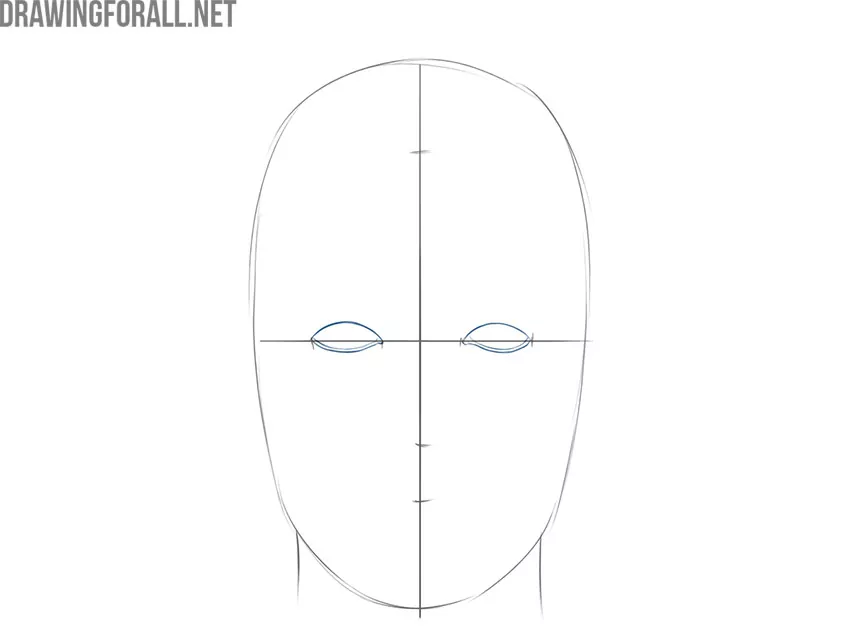
The last step was really important. If you have followed all the actions of this step correctly, you will not encounter difficult tasks here. Using smooth, rounded lines, draw the approximate outlines of the eyes, which look like two elongated lemons. Note that the lower edge of the eye is made up of two parallel lines.
Step 4
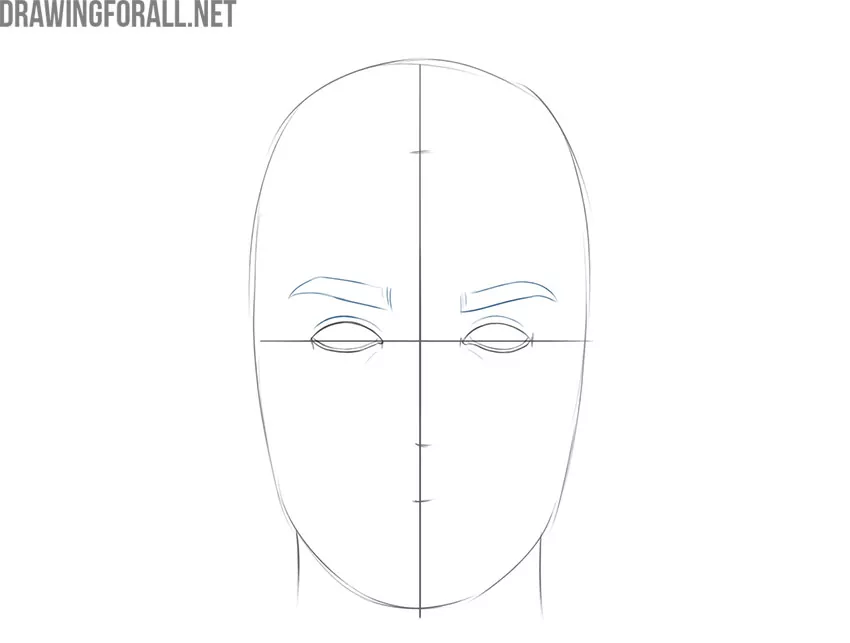
Choose any eyebrow shape for your character. We decided to choose large enough symmetrical bushy eyebrows that are not far from the eyes. Remember that eyebrow placement is very important for conveying emotion.
Step 5
In this step, using light lines, we outline the basic contours of the nose. Don’t forget to draw a couple of pupils. The location and size of the pupils affect the direction and emotional color of the gaze.
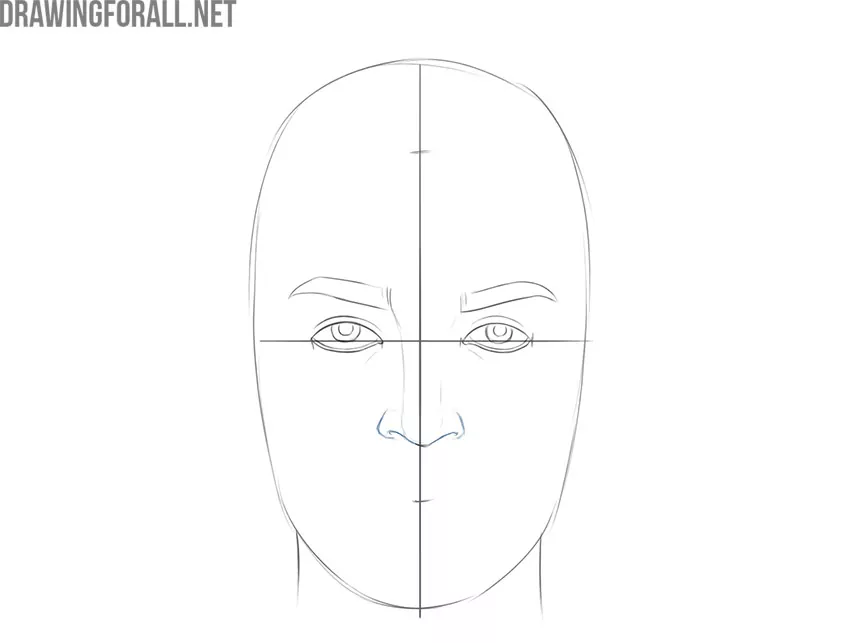
Step 6
So, we continue the guide on how to draw a face easy. Now let’s take a closer look at the lower part of the nose. In order to draw a great nose, follow the auxiliary stroke from the previous step. Draw the nose, which consists of an obtuse angle and two vertically spaced short oblique lines.
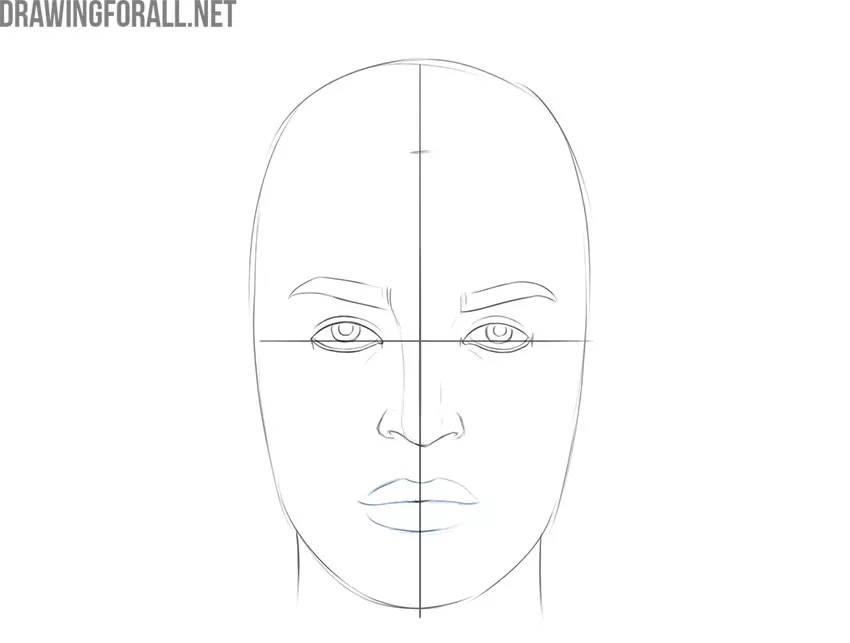
Step 7
In this step, we will draw the lips. Here you can also choose the shape and size of your character’s lips yourself. We have depicted rather large lips. To draw such lips, use three smooth horizontal lines that are at the same distance from each other.
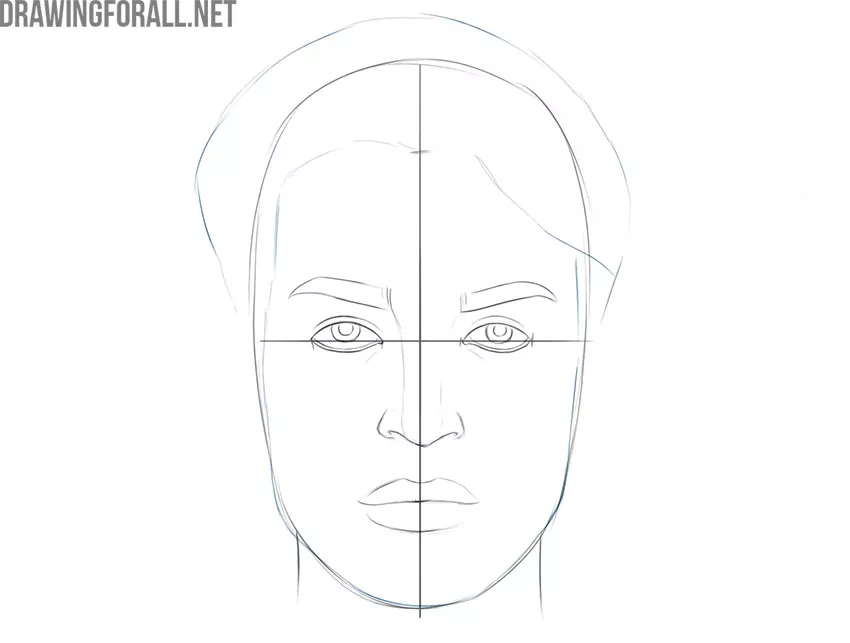
Step 8
We are already nearing the end of this guide. In this step, we will draw the outlines of our character’s hairstyle. The further the contours of the hair are removed from the head, the larger and more magnificent the hairstyle will appear.
Step 9
There’s something missing in our face drawing, isn’t there? We need to draw the ears to make our character look more realistic and complete. The upper edges of the ears line up with the lower edges of the eyebrows, and the lower edges of the ears line up with the tip of the nose.
Step 10
So, this easy face drawing tutorial is coming to an end. Let’s erase the helper lines because we won’t need them anymore. Draw the hair on the head and eyebrows using short smooth lines. If you do not want to create a very detailed drawing, then avoid a lot of such lines. Draw the hairlines from the roots to the ends.
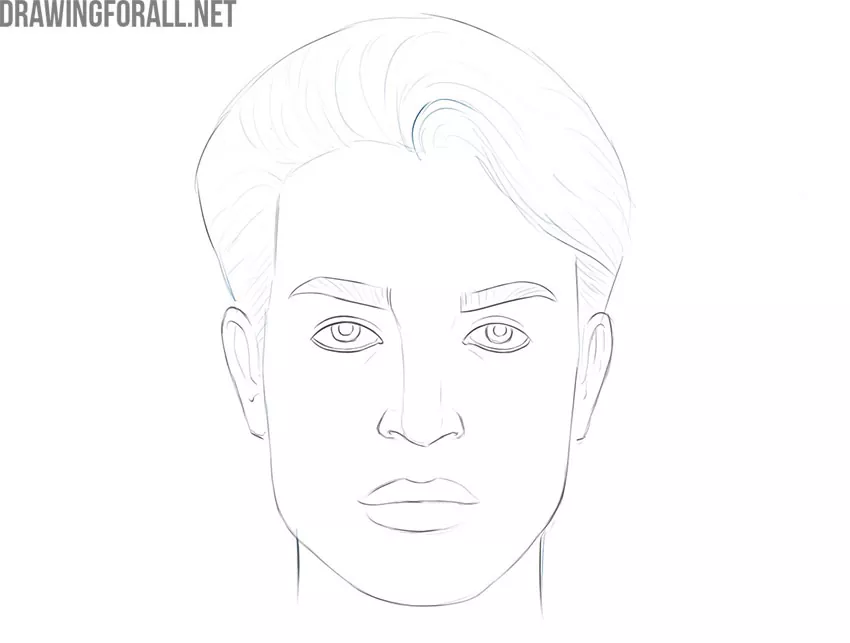
Step 11
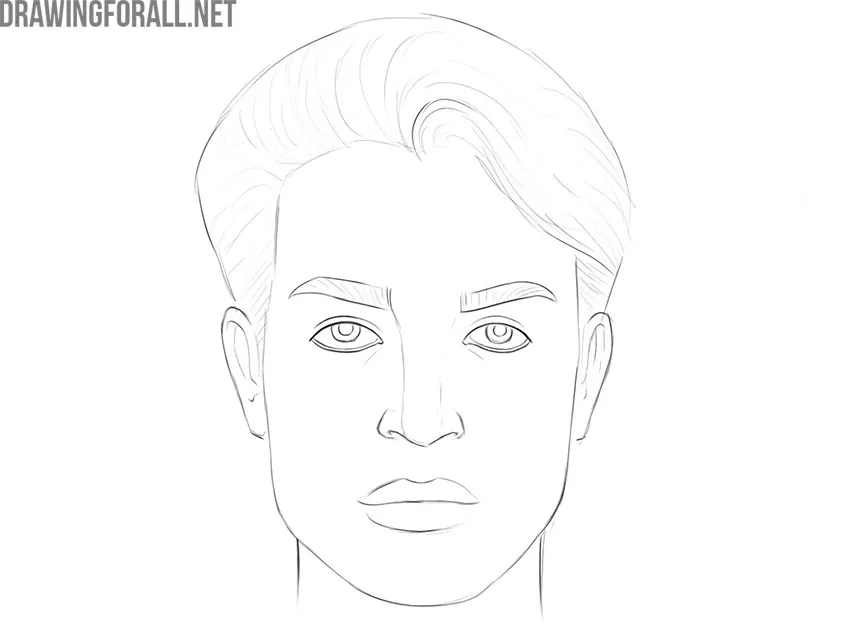
Pressing harder on the pencil focus on the details you want to highlight. Check again that all the lines and shapes of the previous steps are correct. Congratulations, this is a great job!
So we have completed this drawing guide. We really tried to create a very simple tutorial for the most convenient drawing. If you liked our work, do not forget to write to us about it in the comments. We are also looking forward to your criticism and your comments. This greatly improves our work and the quality of our lessons.


Hey! I remember this Lesson from my days back in Art School, and I never was able to get it right! That is until I tried to do it with Your Instructions! This thing I just Drew actually looks like a Person! Good Job, Thanks!
ARLAN
Many thanks.
lol so funny best tutor
What’s so funny about it
Nice keep up the good work
IS SO COOL