How to Draw a Face

In this drawing lesson, we will show you how to draw a face. This is probably one of the most important tutorials on the pages of Drawingforall.net.
So what does it take to learn how to draw a face? First of all, we advise you to get acquainted with the anatomy of the skull and the anatomy of the head muscles in general terms. This will help you understand the structure of the head in more detail and draw a face more consciously.
Next, you should familiarize yourself with the rules of light and shadow and the rules of linear perspective and aerial perspective. It will help you learn how to create compelling objects, face parts, and details on a piece of paper.
So, if you have studied all this, then let’s proceed to the tutorial on how to draw a face.
How to Draw a Face Step-by-Step
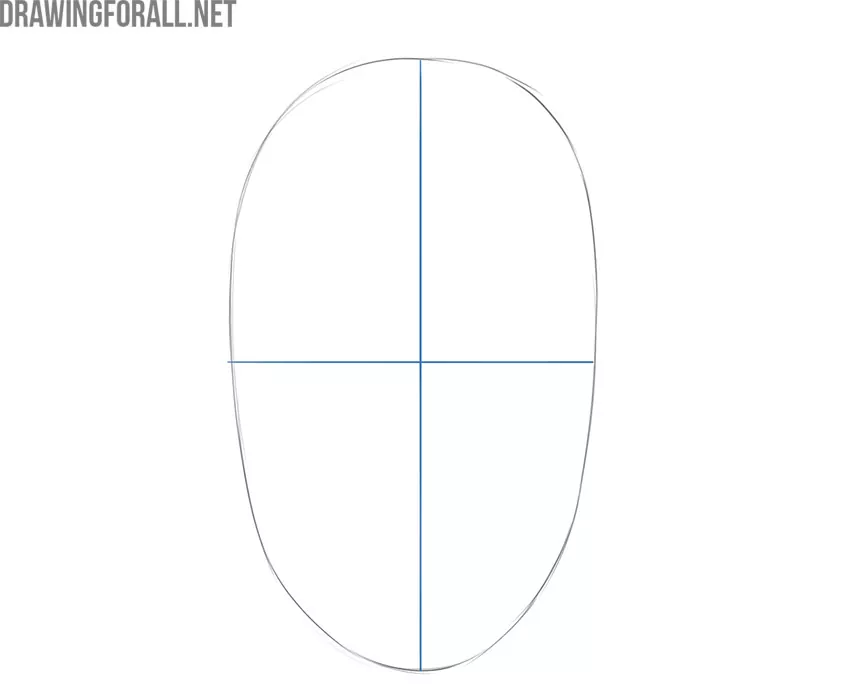
Step 1: Sketch the basic shape of the face
To draw the face correctly and not be mistaken in proportions, first of all, draw the outlines of the head. From the front, it looks like an oval or inverted egg. Please note that all these lines will be erased later, so do not press too hard on the pencil.

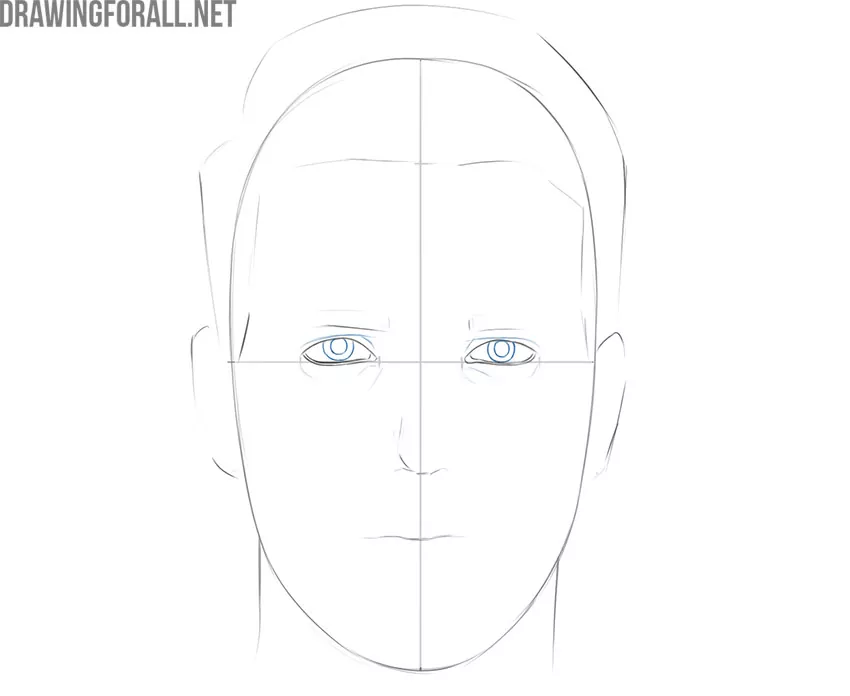
Step 2: Sketch the facial guidelines
In order not to be mistaken in the proportions of the face, and draw the left and right parts of the face evenly, draw the central guideline. To draw the eyes correctly and proportionally, draw a horizontal guideline. These two lines meet in the center of the face, just below the bridge of the nose.
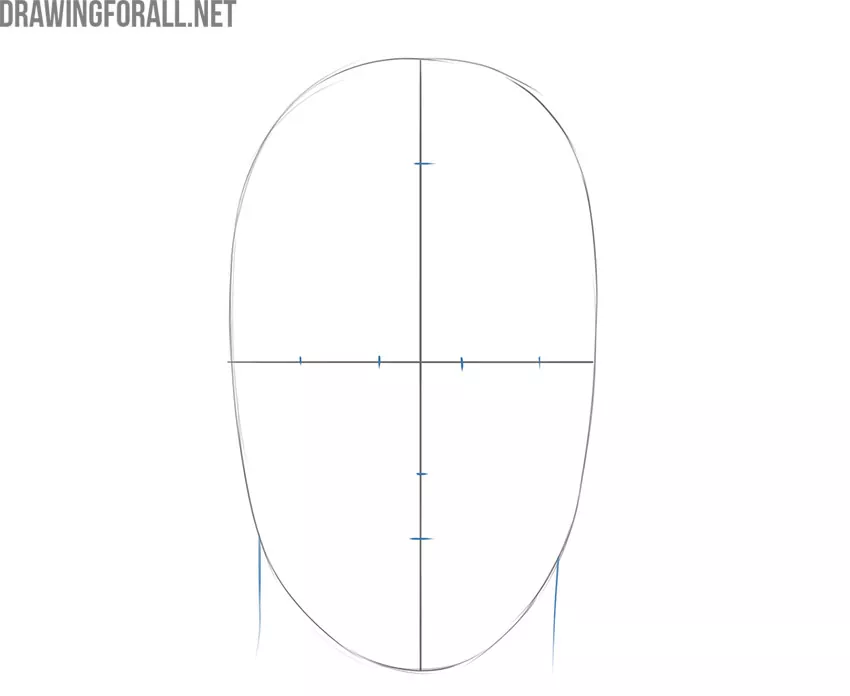
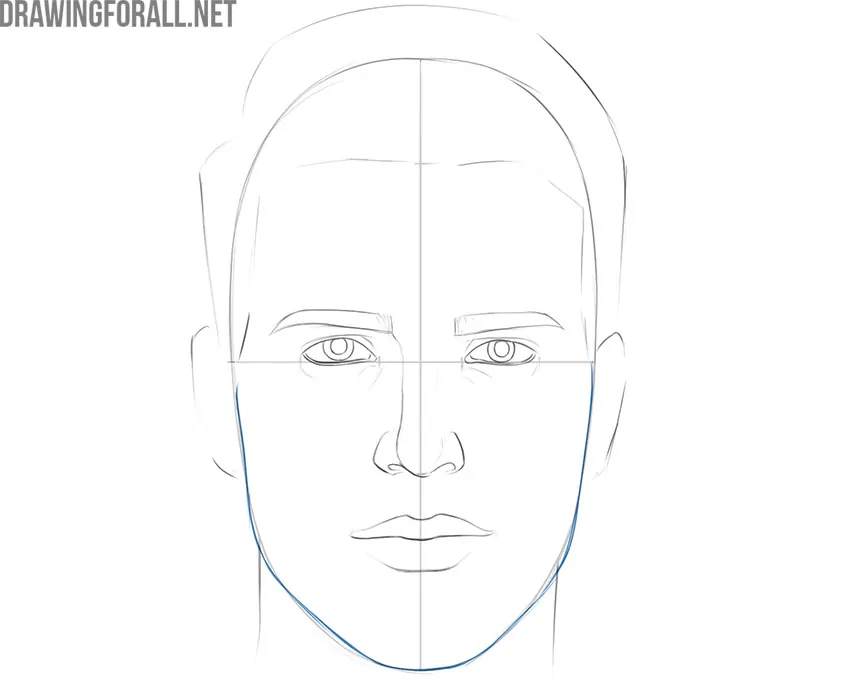
Step 3: Mark the positions of facial features
Now let’s outline the boundaries of the parts of the face. At the top, outline the hairline. Slightly lower, about halfway between the line of the eyes and the chin, sketch the line of the base of the nose, and just below, sketch the line of the mouth. Draw the borders of the eyes on a horizontal line. Note that the distance between the eyes is approximately equal to the width of the eyes.
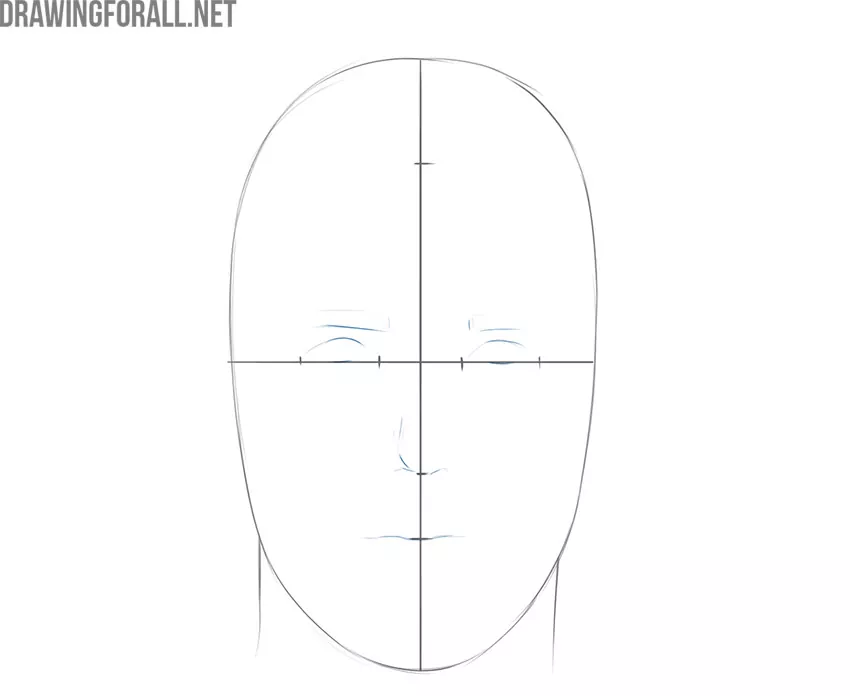
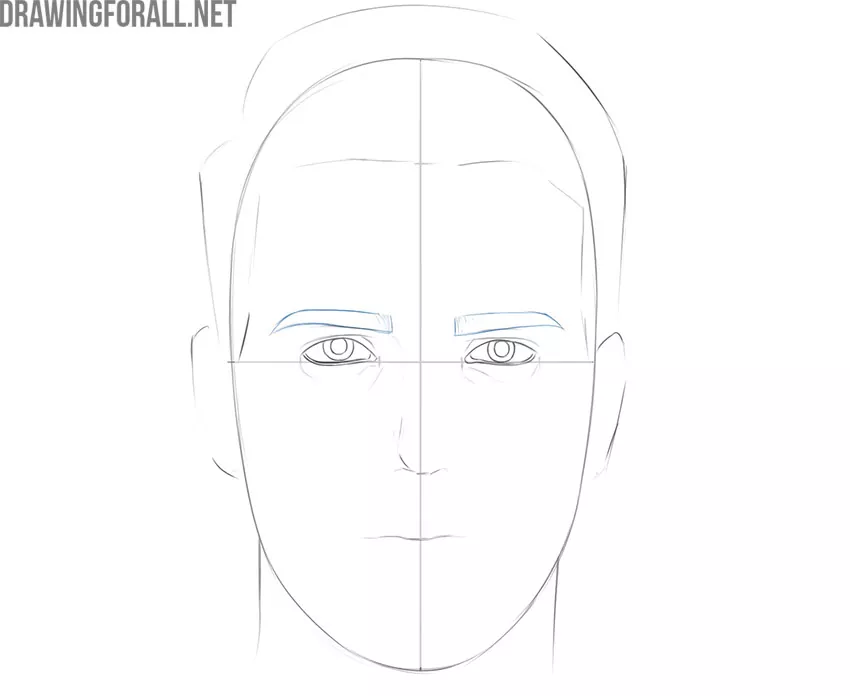
Step 4: Roughly sketch the facial features
Now let’s start creating the details of the face with very general lines using the guidelines from the previous step. First, sketch out the outlines of the eyes and eyebrows above the eyes. Then go down below and sketch the outlines of the tip of the nose and lips.
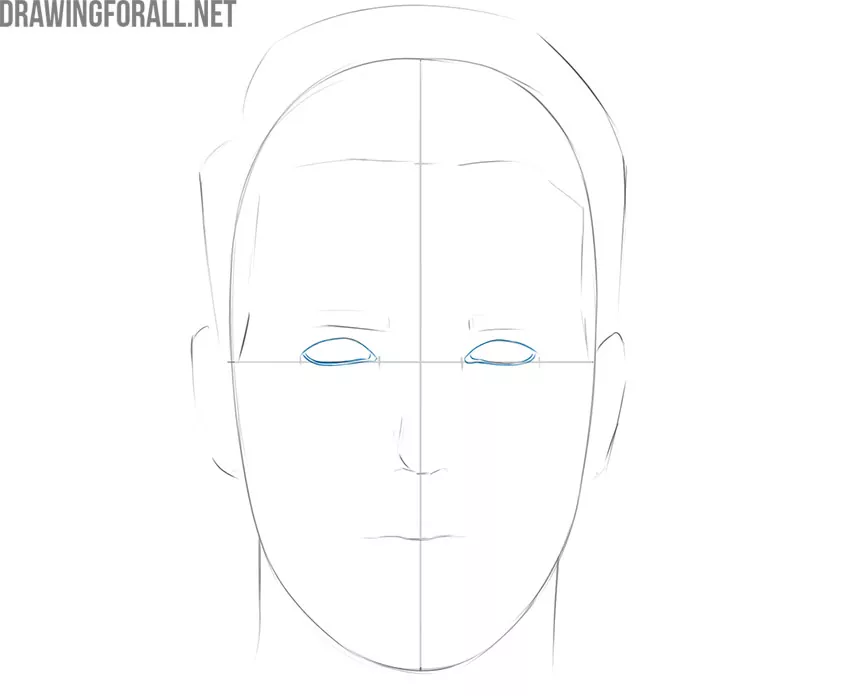
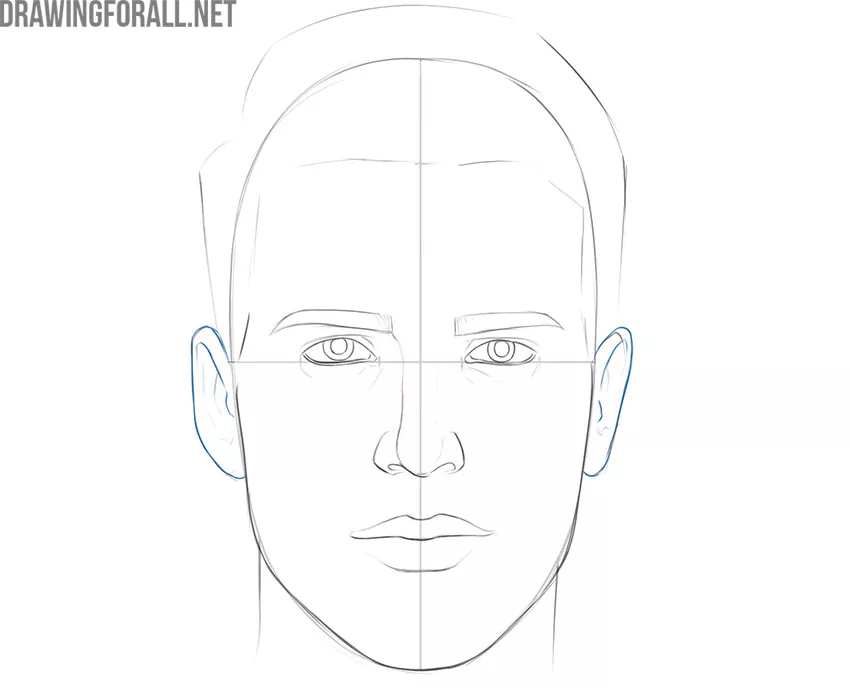
Step 5: Roughly sketch the ears and hair
Now, using the same general and light lines, sketch the outlines of the ears and hair. The upper edges of the ears should be approximately level with the eyebrows, and the lower edges of the ears should be approximately level with the base of the nose.

Step 6: Draw the eyes
So, the general outlines of the parts of the face are ready, and it’s time to start working on the details. First, draw the lines for the upper eyelids, then the lower eyelids. To make the eyes appear voluminous, draw the thickness of the lower eyelid. Do not forget to depict the outlines of the lacrimal caruncles.
Step 7: Add the pupils and irises
To make the eyes look voluminous and natural, draw the skin folds and outlines of eye sockets protruding through the skin. Draw the pupils and irises very carefully. The upper parts of the irises are slightly covered by the upper eyelids, and the lower parts barely touch the lower eyelids. For a more detailed study of the process of portraying eyes, you can visit our tutorial on how to draw eyes.
Step 8: Draw the eyebrows
Now go up a little higher and draw the eyebrows using the guidelines we drew in the fourth step. Remember to constantly compare the parts of the face to each other. For example, when drawing the left eyebrow, constantly compare it with the right one in order to avoid mistakes in proportions.
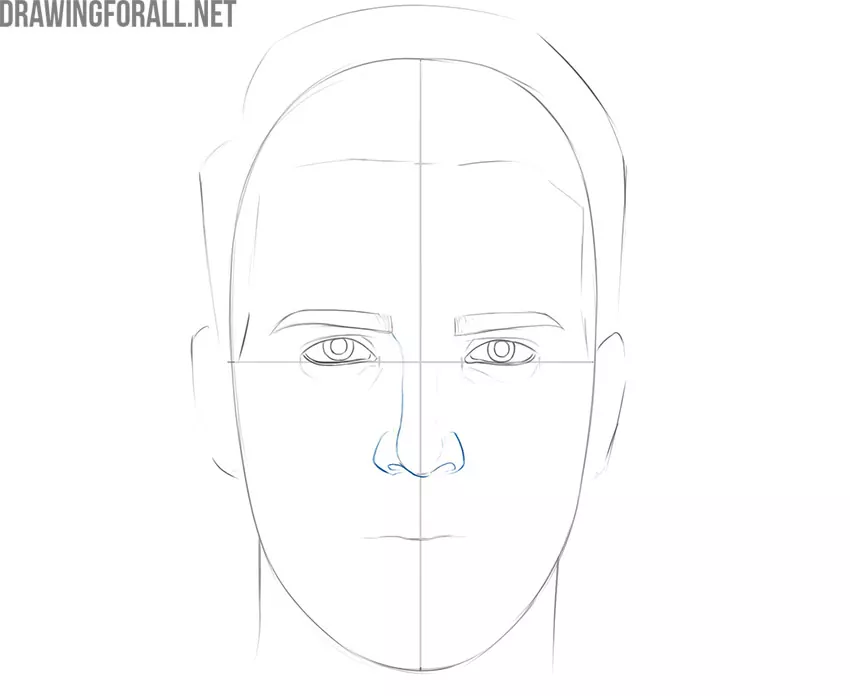
Step 9: Detail the nose
Now with neat lines draw out the outlines of the back of the nose, tip, and nostrils. Do not forget that the parts of the face closer to us should be slightly darker than the distant ones. To learn more about the process of drawing a nose, visit our article on how to draw a nose.
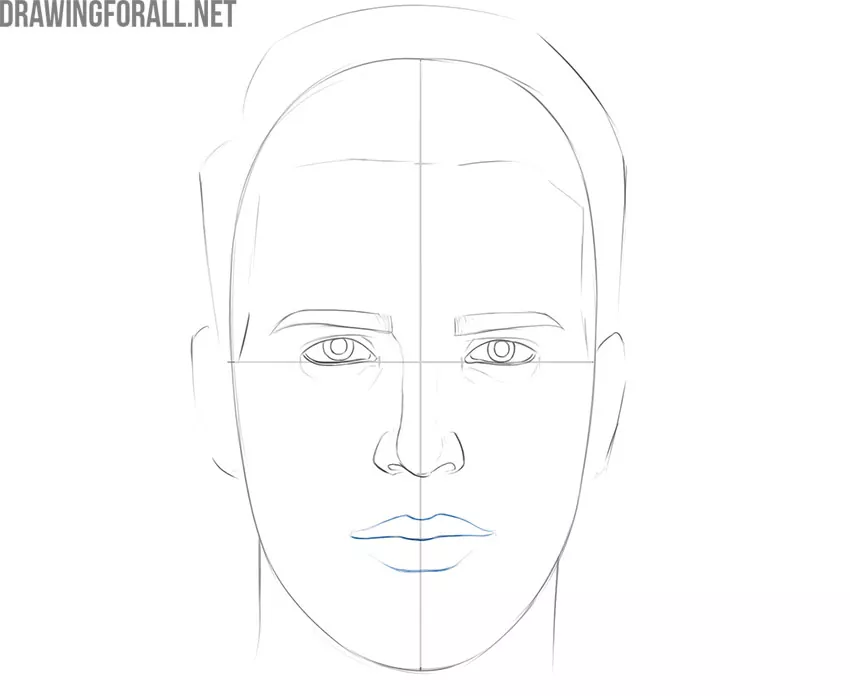
Step 10: Detail the mouth
Continuing the lines we drew in the fourth step, carefully draw the lips. Start with the upper lip, then draw the outlines of the lower lip. It is also extremely important here not to be mistaken in proportions and constantly compare the left and right parts of the mouth with each other. We talk about this in great detail in our tutorial on how to draw lips.
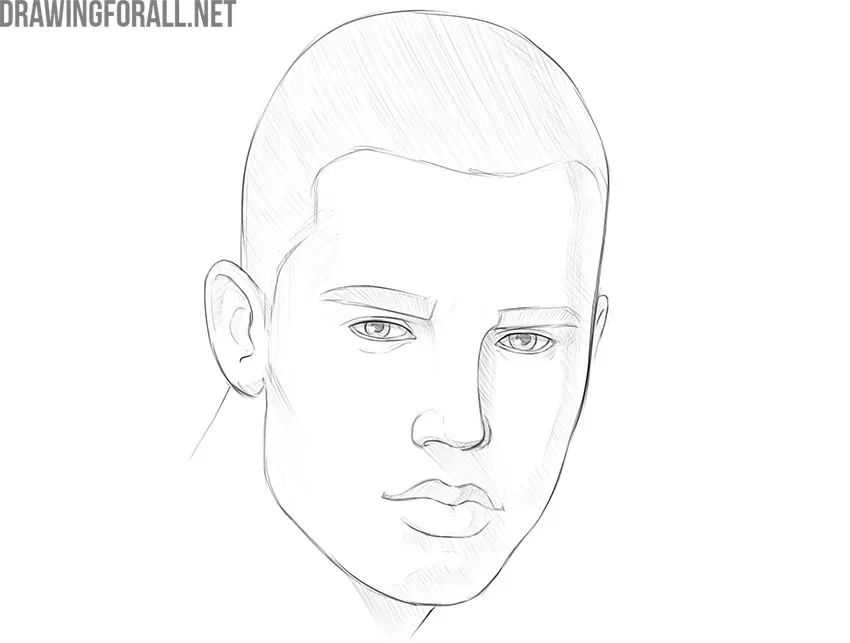
Step 11: Refine the jawline
In the first stage, we very roughly depicted the outlines of the head, and now it’s time to bring these outlines into a more complete and realistic look. The jaw is located in three planes. In the upper part on the sides, these are two almost vertical lines, then below there is a sharp narrowing at an angle of about 45 degrees, and then the two halves of the jaw are connected in the horizontal plane of the chin.
Step 12: Draw the ears in detail
Now let’s move on to the ears and draw them in detail. Start by drawing the outlines of the ears. Then, using neat and smooth lines draw out the outlines of the cartilage inside the ears. In our tutorial on how to draw an ear, we talked about this in great detail.
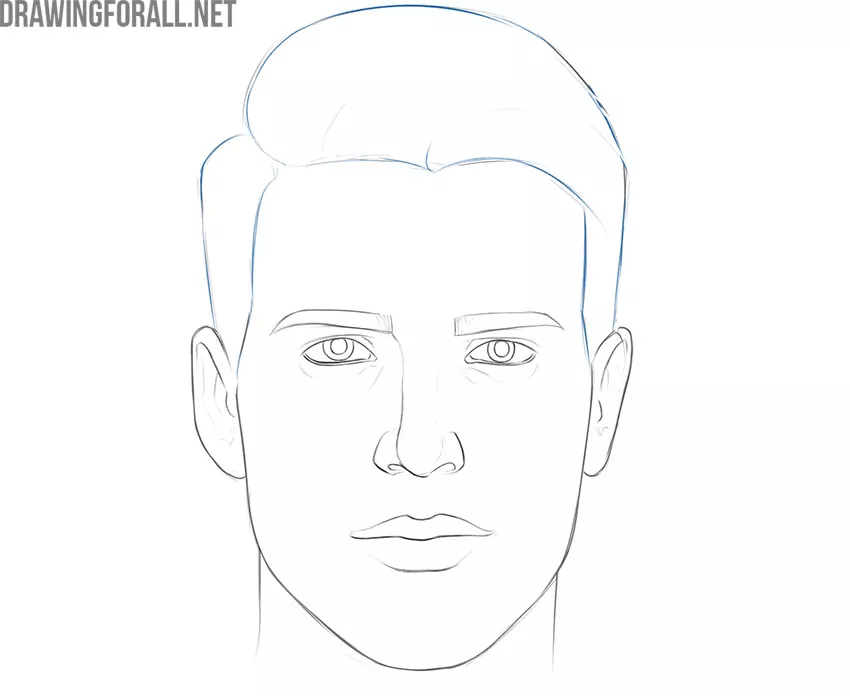
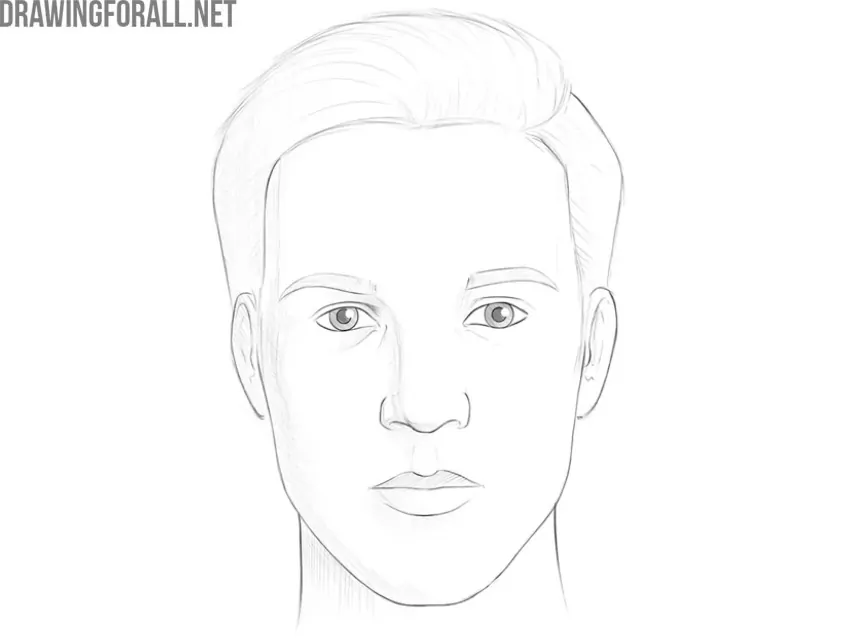
Step 13: Outline the hair and erase the guidelines
Now let’s move on to the hair. The hair forms the upper volume of the head, and the general appearance of the drawing depends on them, no less than on the details of the face. With neat and smooth lines, draw the outlines of the hairstyle, guided by the guidelines drawn by us in the first steps.
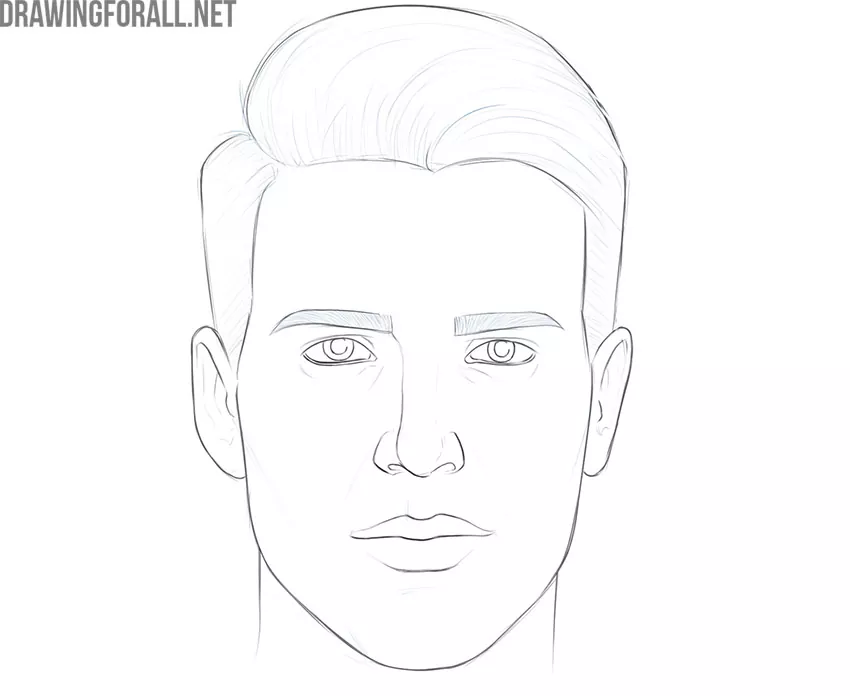
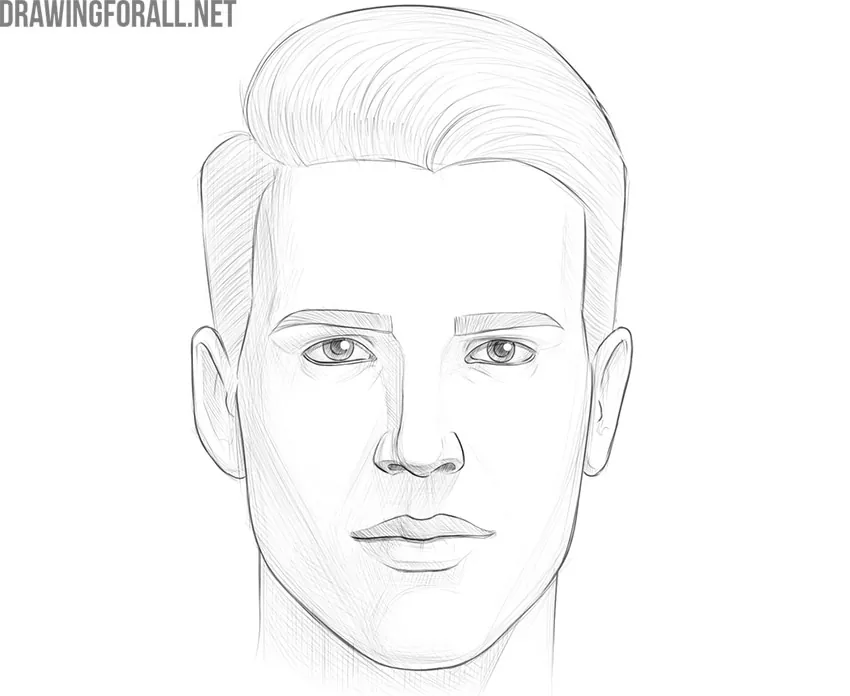
Step 14: Add texture to the eyebrow and hair
To make the face look more realistic and convincing, you need to add details. Start by sketching out the nasolabial folds and slightly visible cheekbones. Next, use short strokes to draw the texture of the eyebrows. Use longer and smoother lines to draw the texture of the hair.
Step 15: Add shadows and highlights
Now let’s add some volume to the face drawing. With the theory of light and shadow in mind, start drawing the shading from the darkest parts of the face. Then gradually add mid-tones and lights. In order for the shadows to emphasize the volume, they should be drawn taking into account the curves and bulges of the face.
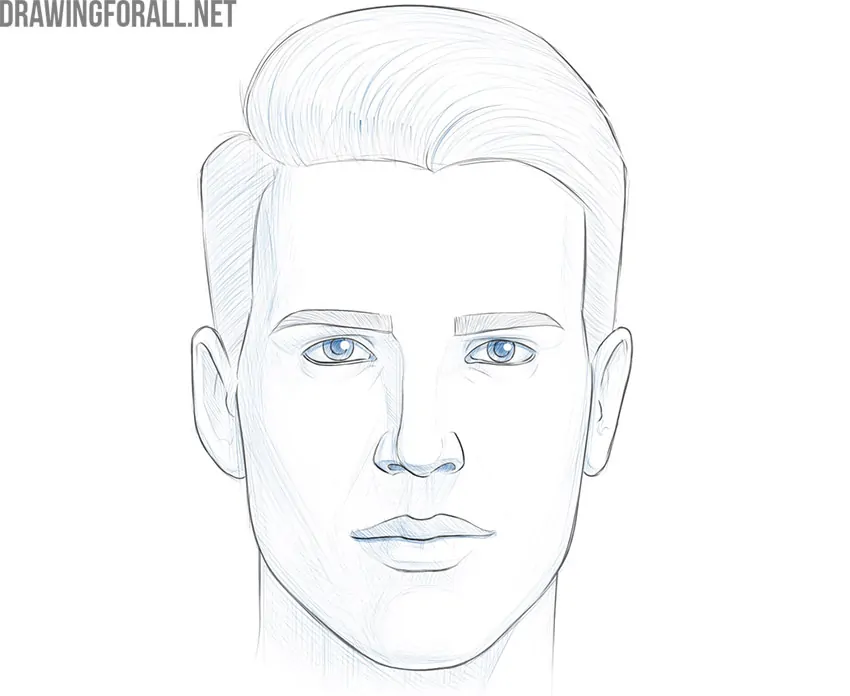
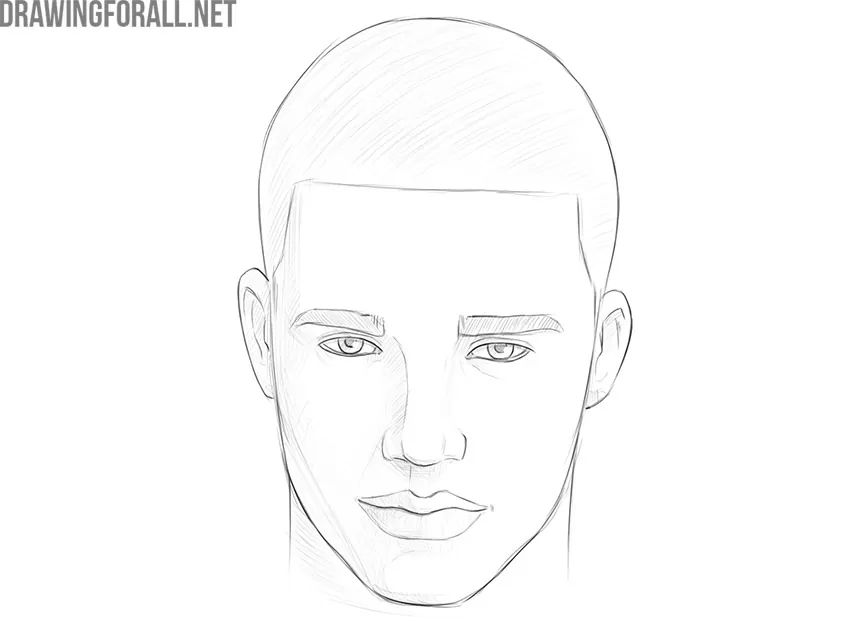
Step 16: Complete the face drawing
So, it’s time to check your face drawing again by comparing it with our example. To find all inaccuracies, bring the drawing to the mirror or move it away from you. If you find any mistakes, then go back to the step where you made it and try to fix it.
If you drew a face and you like the result, then it’s time to consolidate the skills. Try repeating all the steps several times, drawing different faces with different features.
Once you’ve practiced how to draw a face following the basic construction method, it’s helpful to start exploring variations. Try drawing the same face at different angles to observe how the structure changes with perspective. All these actions will help you to learn more comprehensively the process of drawing a face and bring this skill to automatism.
Customize the Look of the Face
Try Drawing a Face at Angle
To draw the face from a different angle, first, draw the head and neck at a different angle. Then, tilt the vertical and horizontal guide lines according to the angle. This will help you reposition the facial features correctly. Keep in mind how perspective changes the proportions – the farther eye will appear slightly smaller, and the nose may cover part of the other side of the face. Even a slight turn of the head gives your drawing more variety.
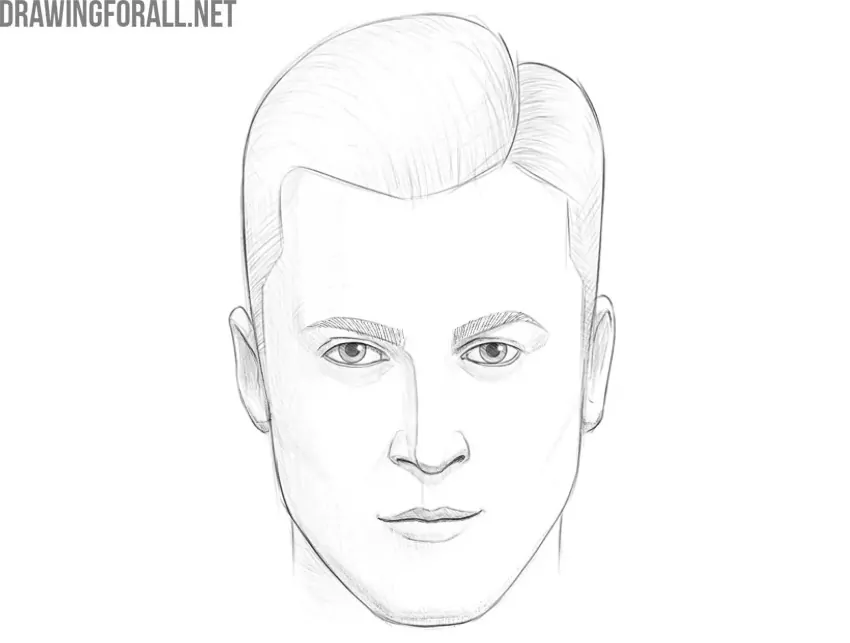
Change the Shape of the Face
Another effective way to expand your skills and learn how to draw a face from a different perspective is to experiment with modifying the head shape. You can adjust the position and angle of the jawlines and the curve of the cheeks to shift the overall structure. For example, a more angular jaw gives the face a stronger look, while a rounder shape creates a softer impression. These changes work well if you want to vary your portrait without altering the basic construction.
Adjust the Facial Features and Hairstyles
You can customize the face drawing and the character of the portrait by modifying the individual features and hairstyles. Try narrowing or widening the eyes, shortening the nose, or giving the lips a fuller or thinner outline. These changes don’t affect the structure of the head but significantly impact the personality of the drawing. Also, you can change the hairstyle, making it shorter or longer.
Add More Realistic Shadows
After completing the line work, you can make the face drawing look even more realistic by adding more detailed and professional looking shadows. Use soft, smooth strokes to darken areas like the sides of the nose, under the eyebrows, around the cheekbones, and below the lower lip. This helps create volume and makes the face appear more three-dimensional.
Drawing a face is one of the most essential and foundational skills for any artist. It requires a clear understanding of structure, proportion, and subtle variation. As you’ve seen in this tutorial, building the head step by step – from the basic shape to refined features and final details – creates a solid base for consistent, accurate portrait work.
Once you’re comfortable with this construction process, begin to learning variations in expression, angles, and facial features. The more you study and repeat these exercises, the more intuitive your understanding of the human face will become. Mastery comes with observation, precision, and practice – so return to these steps often and challenge yourself to refine your technique with every sketch.


i actully did it by just looking at the person that was fun and if you need and drawing avice ask me.
that was fun but if you need any drawing avice ask me to please.
yessssss
sure