How to Draw Eyes

This tutorial on how to draw eyes will teach you the most important fundamentals of drawing eyes and creating a convincing human portrait.
In this lesson, we will not only demonstrate the process of drawing eyes, but also how to create volume in the image and give the eyes the most correct and realistic look.
We will show you the basic principles of creating this part of the face using a professional, but very simple technique.
By learning how to draw eyes, you can create more convincing and dimensional human drawings, and to draw eyes correctly, you need to know its structure at least in general terms.
To do this, visit our article about anatomy of the eye, where we explain in simple language everything an artist needs to know about the eye structure.
How to draw eyes step by step
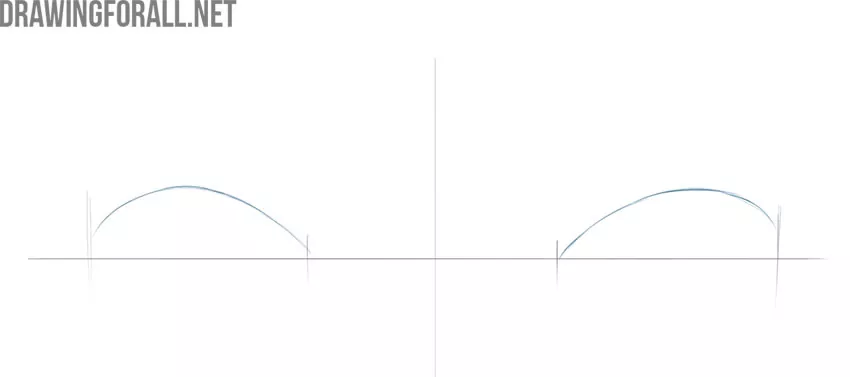
Step 1: Draw the guidelines for the eyes
To draw the eyes correctly, you first need to create auxiliary lines. First, draw a vertical line that is the center of the face. Then draw a horizontal line that goes through the central part of the eyes, or more precisely, through the lacrimal caruncles.

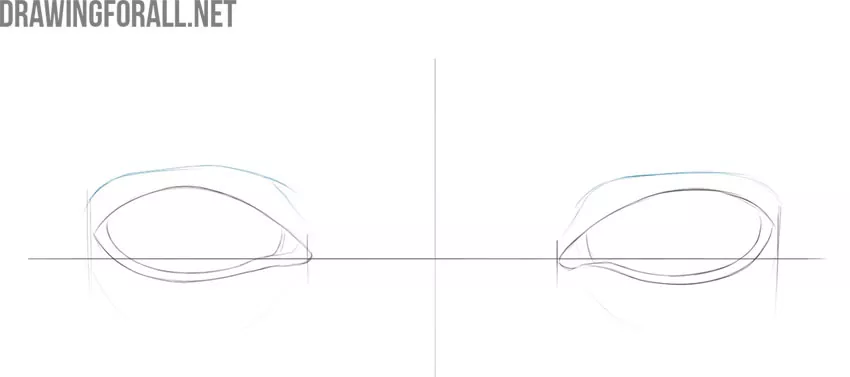
Step 2: Define the eye boundaries
Now outline the edges of the eyes on a horizontal line in order not to be mistaken with their size in the future. The height, width, and location of the eyes are different for each person, but there are certain rules by which the eyes of all people are drawn. For example, the width of the eyes is approximately equal to the distance between them.

Step 3: Draw the upper eyelids
Now, using two arched lines draw the outlines of the upper eyelids. Remember, that the eye is actually a ball, and the eyelids are the thick shell of this ball. The bending of the eyelids is influenced not only by the circumference of the eye itself, but also by the pupil, which has an additional volume.
Step 4: Add the lower eyelids
Now, with the help of a couple more arcuate lines, draw the lower eyelids. At the same step draw the outlines of the lacrimal caruncles. Note that in our example the inner angles of the eyes are lower than the outer ones, but this is only an individual feature.
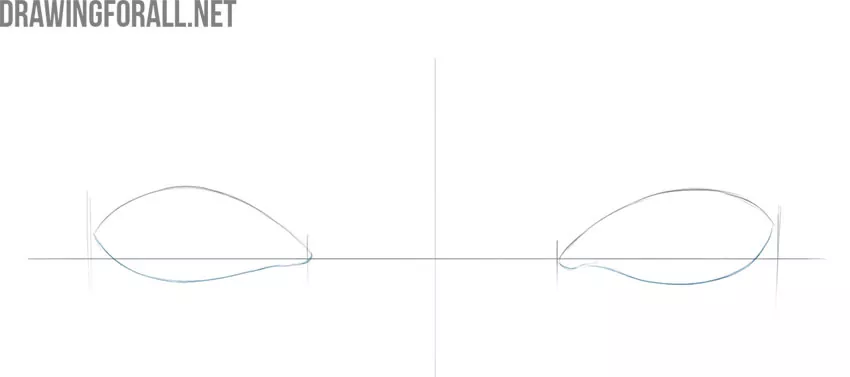
Step 5: Sketch the inner edges of the lower lids
As we already wrote above, the eyelids have their own volume, and this must be depicted in the drawing. The lower eyelids are at a greater angle than the upper ones, so we see the transverse edges of the lower eyelids. So, draw the lower lines of the eyes inside the eyelids, not forgetting to draw the inner edges of the lacrimal caruncles.
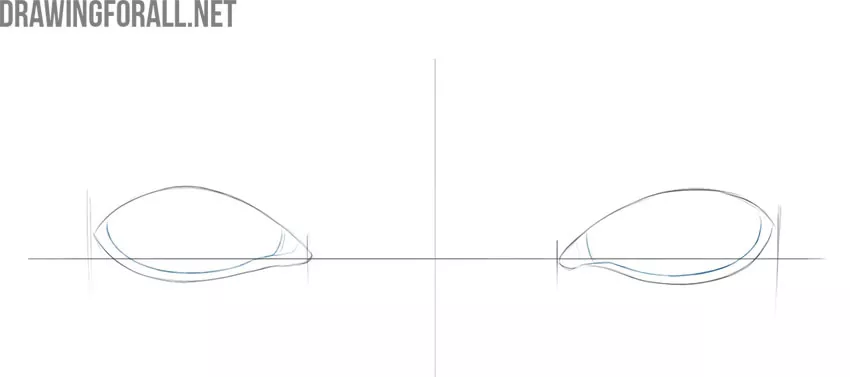
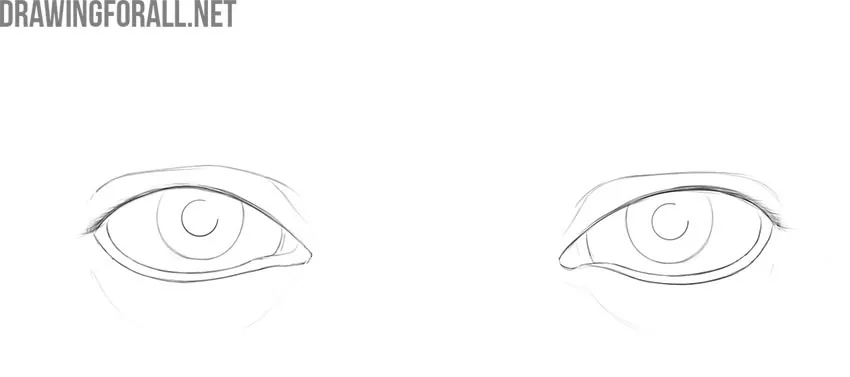
Step 6: Add the upper eye orbital lines
As already mentioned, the eyes are balls. These balls are located inside the orbits of the eyes, which are to be depicted. Just above the upper eyelids, draw the lines of the upper parts of the eye orbits. Their shape is also very individual, and depends on many factors. Under the lower eyelids, depict the barely noticeable outlines of the lower edges of the eye sockets.
Step 7: Draw the irises and pupils inside the eyes
Now, using perfectly round lines, draw out the outlines of the irises and pupils. The upper parts of the irises are not visible because they are covered by the upper eyelids. There should be a noticeable distance between the lower edges of the irises and the lower eyelids.

Step 8: Add the eyelashes
In order for the eyes to look more dimensional and convincing, it is necessary to draw the eyelashes. The upper eyelashes are thicker and tighter. This part of the eyes, like all others, is also very individual, and depends on many factors. Eyelashes can be both thicker than in our example and less thick.

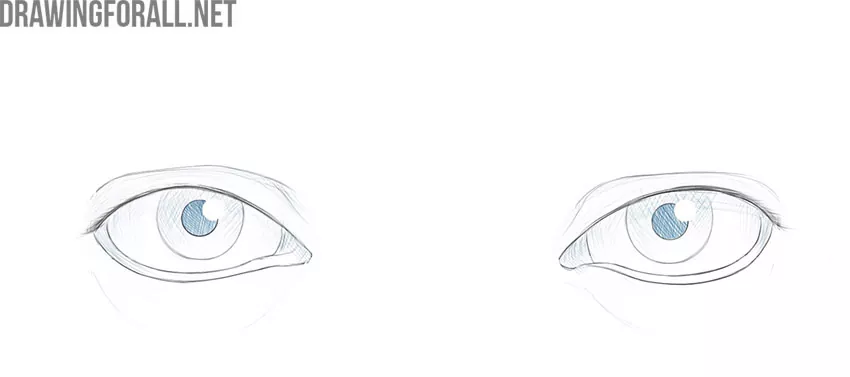
Step 9: Erase the guidelines
To give the eye drawing a more finished and realistic look, erase all unnecessary auxiliary lines. To make the eyes look more expressive, erase small areas of the pupils, as shown in our example. In the future, this will turn into glare.
Step 10: Add shadows and highlights
Use hatching to paint over the pupils and irises, leaving round highlights as in our example. Next, using hatching, add shadows, taking into account the rules of light and shadow and the shape of the eyes themselves.
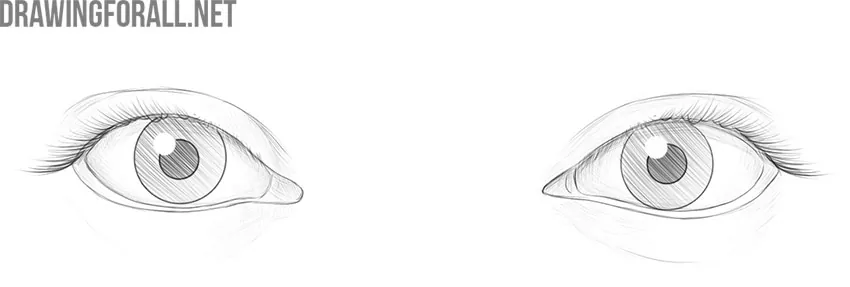
Step 11: Review and finalize the eye drawing
Make all the finishing touches, correct any inaccuracies if any. If you did everything correctly, then your eyes drawing should be approximately similar to our example.

Eye structure and form
We have just gone through the process of drawing the eyes step by step. Now let’s take a closer look at the structure of the eyes to better understand both their anatomy and how to construct them more confidently in your drawings.
The eyes are essentially two spheres positioned inside the eye sockets and covered by the eyelids. The eyes are volumetric spheres, not flat shapes, and the eyelids also have thickness.

This is critically important when drawing eyes, because it directly affects the sense of volume in your drawing.
Keeping the principles of artistic vision and eye anatomy in mind, and remembering that the eyes are three-dimensional forms, will make it much easier to give your drawings a convincing appearance.

It is also important to remember that the eyes of a real person do not exist separately from the surrounding facial features.
The eyes are framed by the brow ridges above, the eyebrows placed on them, and the bridge of the nose in the center.
Each of these facial parts also has its own volume, which contributes to the overall structure and visual impression.

Advanced practice in drawing eyes
For an artist, it is essential to be able to draw eyes from different angles and viewpoints. The human face, and the eyes themselves, form a very dynamic and flexible system.
To study the most basic angle – the front view – practice drawing eyes from this perspective. For this purpose, we have a dedicated tutorial on drawing eyes from the front, where we focus specifically on this angle and explain the details that become visible from this viewpoint.

Draw the eyes both separately and together with the surrounding facial structures, including a slight three-quarter turn, carefully conveying rotation and perspective distortion.
For a deeper understanding of this view, we also provide a dedicated lesson on drawing eyes in three-quarter view.

Drawing the eye from the side involves slightly different techniques, which we covered in detail in our tutorial on how to draw an eye from the side.
From this angle, only one eye is visible, and the surrounding structures – such as the brow ridge and the bridge of the nose – also change their orientation and create a different visual structure.

Try drawing eyes of different shapes
You can draw eyes of a different shape by changing the curvature of the eyelids, the tilt of the corners, and the proportions between the upper and lower parts.
In this example, the eyes have a slightly more elongated and narrow form, with sharper inner and outer corners. The overall structure remains the same, but small adjustments in line angles and positioning help create a noticeably different expression and character type.
Use this variation as a reference when practicing alternative eye shapes.

Add more realistic shadows and highlights
Also, you can try to make the eyes even more realistic by adding detailed eyelashes and refining the shadows and highlights.
In this example, the lashes are drawn with individual curved strokes, creating a more natural appearance. The shading around the eyelids is softer and more gradual.
Highlights in the iris and pupil are also more carefully placed, which helps convey a realistic reflection of light. Use this variation to practice more advanced techniques in rendering eyes with a lifelike look.
To improve your eye drawing skills further, try sketching them from different angles, with different expressions and different pupil positions.
Also try adding shadows to suit different lighting conditions. This will train your shadow drawing skills and improve your drawing skills in general.
Next, draw the eyes on the face, depicting all the other parts of the face, that is, the nose, ears, mouth, etc. This will help you understand the structure of the face and perceive the process of drawing the face more holistically.