How to Draw Drapery
In this basic drawing guide, the team of Drawingforall.net will show you how to draw a drape, that is, a fabric. This skill is basic along with the ability to depict simple geometric shapes such as cubes or pyramids.
In the process of drawing various subjects, artists are often faced with the fact that they need to draw fabric. And just like in any other case, fabric drawing has its own principles and important points. In this article, the team of Drawingforall.net will try to tell and show all the important aspects in drawing draperies.
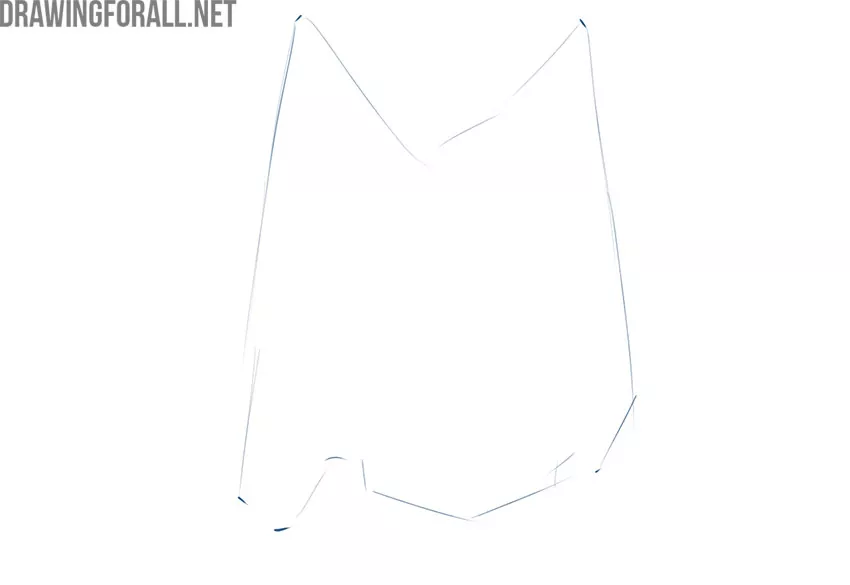
Step 1
In our example, we decided to depict a piece of fabric hanging on the wall. To begin with, de[pict the contours of this very fabric with very light lines. Here we need to mark the boundaries and location of the object in the composition.
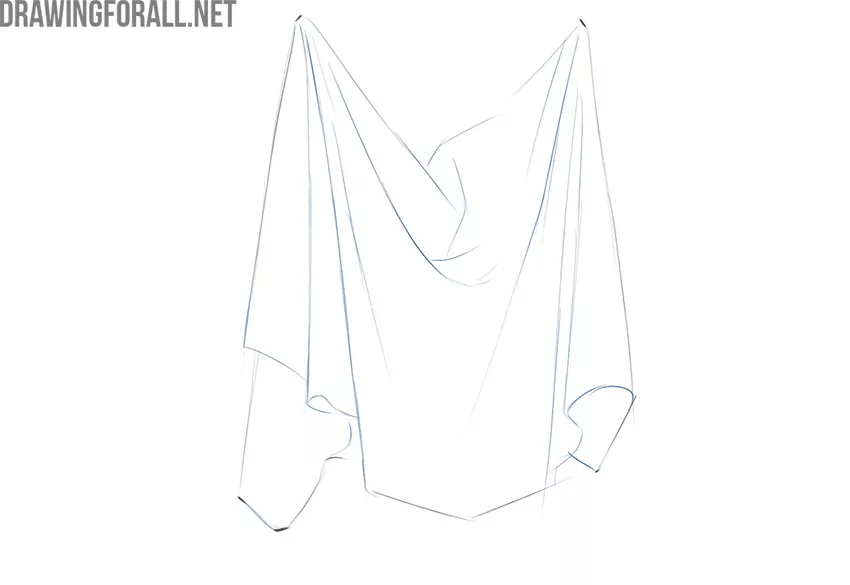
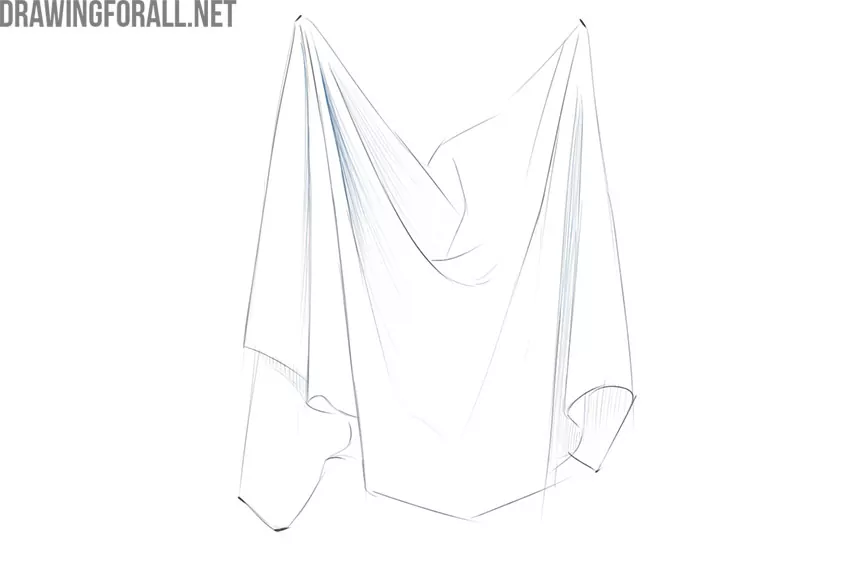
Step 2
With smooth, long lines, begin to depict the folds. First of all, you should depict the largest folds, then move on to smaller ones. Create folds accurately and smoothly, taking into account the shape and volume of the depicted object. Try to convey the smoothness of the contours of the folds, as is done in the image from the artists of Drawingforall.net.
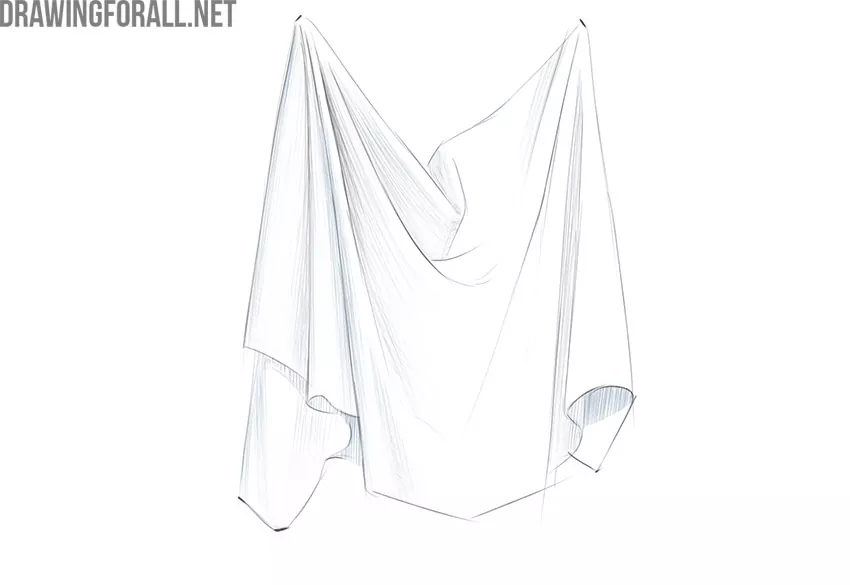
Step 3
The main contours and folds are drawn, and it’s time to start adding shadows to give the drapery drawing volume. Traditionally, start creating shadows from the darkest areas. The hatching should be very smooth and even. When creating hatching, it is necessary to take into account the volume and rotations of the fabric.
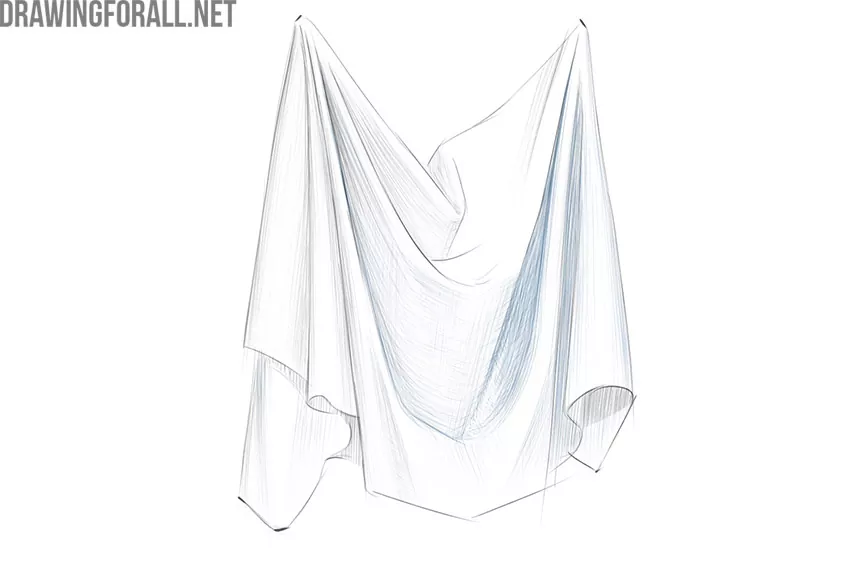
Step 4
Continue adding shadows with hatching. You can darken the shadows by adding additional layers of strokes. Try to depict all shadows, highlights, and cast shadows as correctly as possible. This is described in more detail in our article on light and shadow.
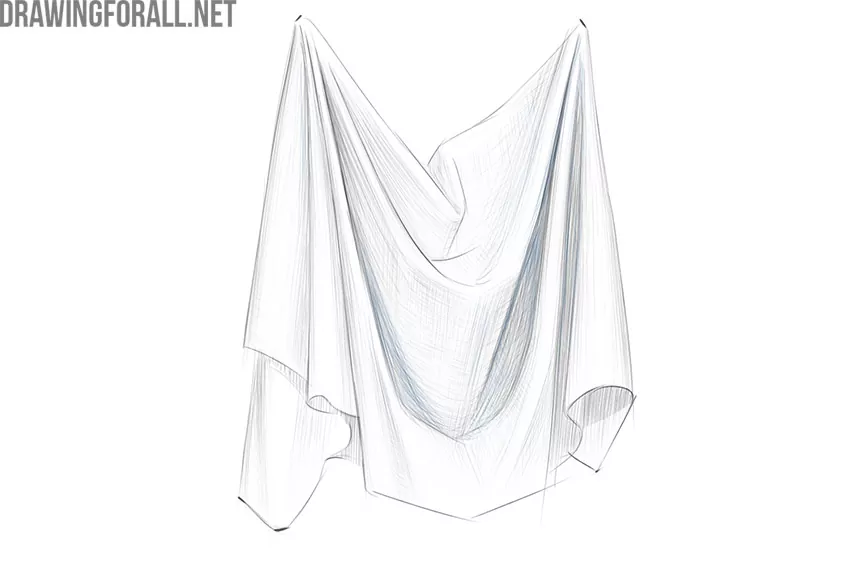
Step 5
As you can see, the process of adding shadows should be smooth and very even. The artists of Drawingforall.net darken the fabric in the darkest areas, constantly comparing different areas, revealing the correct ratios of light and shadow.
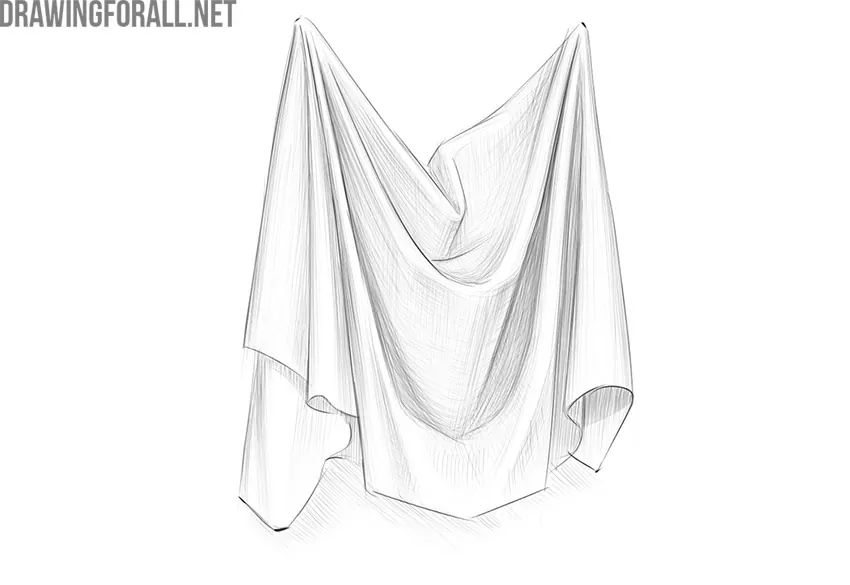
Step 6
Make the parts closest to us more contrasting, and the farthest parts less contrasting. This will give your drapery drawing more volume. In addition, gradually remove unnecessary construction lines that may have been sketched at the very beginning of the work.
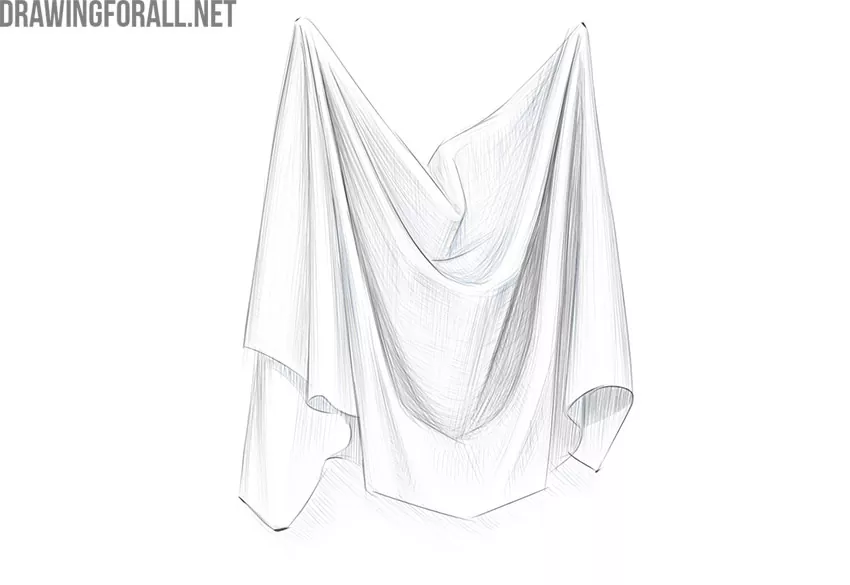
Step 7
Do not forget about the cast shadow, which will make your drapery drawing more voluminous and material. Make the necessary finishing touches to complete the drawing. Do not forget that the drawing should be constantly corrected and improved from the very first to the last step.
So, the tutorial on how to draw a drapery is complete. Be sure to compare your result with that drawn by the artists of Drawingforall.net. If you find any mistakes in your artwork, then either correct the necessary area or try to draw everything from the very beginning. Continuous training like this will allow you to hone your art skills and raise them to very great heights.
If your drapery drawing is perfect, try depicting the fabric at a different angle or with different lighting. Take any piece of fabric, lay it down, or hang it like in our example, light it with a lamp and start creating.
In addition, do not forget to look at other articles from the Basic Drawing Tutorials section on our website. There you will find many useful and truly important tips for any artist.