How to Draw a Realistic Dog
In this lesson, we will show you how to draw a realistic dog. This guide is a slightly more sophisticated version of our previous guide on drawing a dog.
The main difference between this lesson and previous ones is that here we will add volume using shadows in the last step. In addition, this drawing will be more detailed and the outlines of body parts will be more realistic.
This realistic dog drawing tutorial will not seem so difficult if you read our articles about shadows and hatching. There we talk in great detail about the structure of shadows and lights and how to create a volume using hatching.
So let’s get down to the tutorial on how to draw a realistic dog.
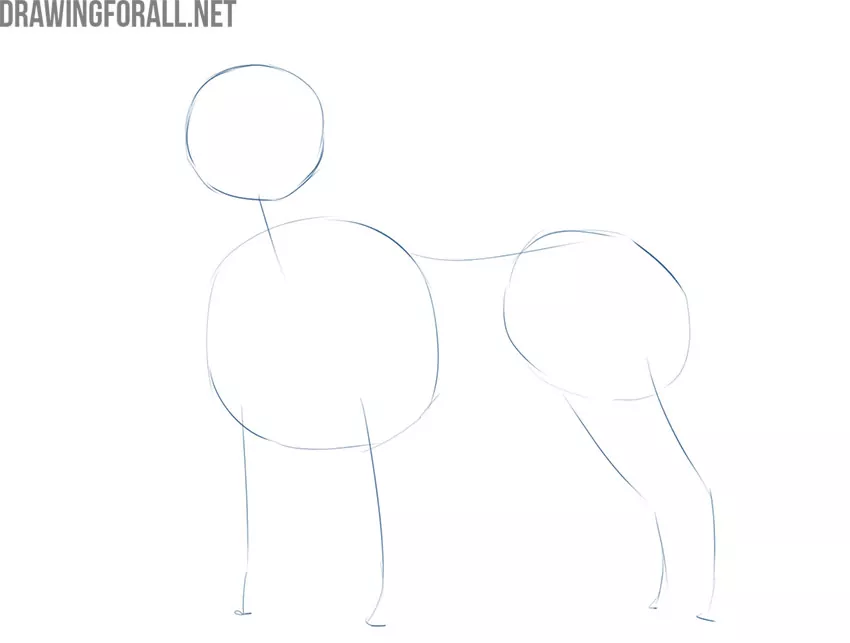
Step 1
Let’s start creating a dog from its skeleton. Use simple and almost invisible lines to depict the head, chest, and pelvis. Use the same simple lines to create the spine, tail, and legs. Note that this tutorial on how to draw a realistic dog starts the same way as our simpler instructions.
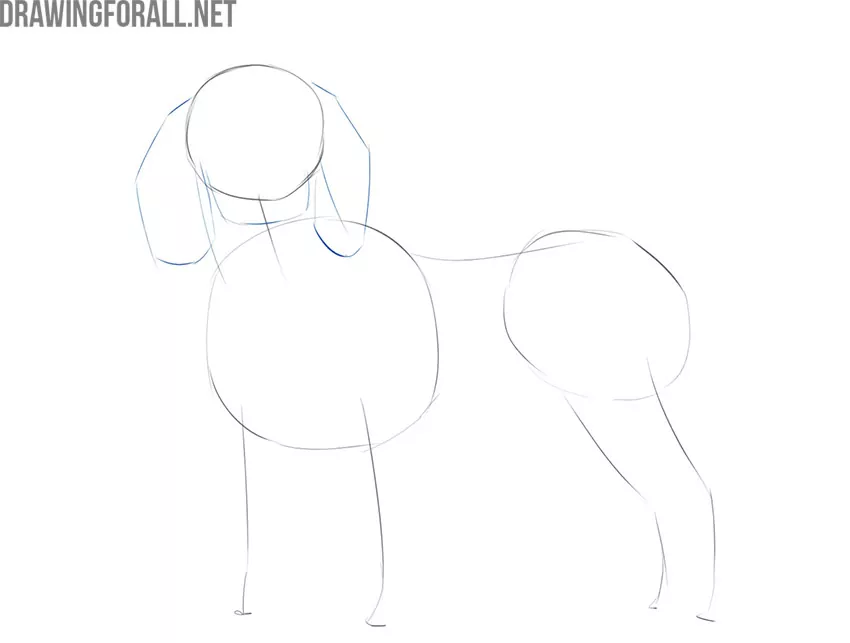
Step 2
Now, using a few light lines, create the outlines of the muzzle and hanging ears. As always, we remind you that we are showing the most typical and canonical example. You can modify your drawing by changing certain details on your artwork.
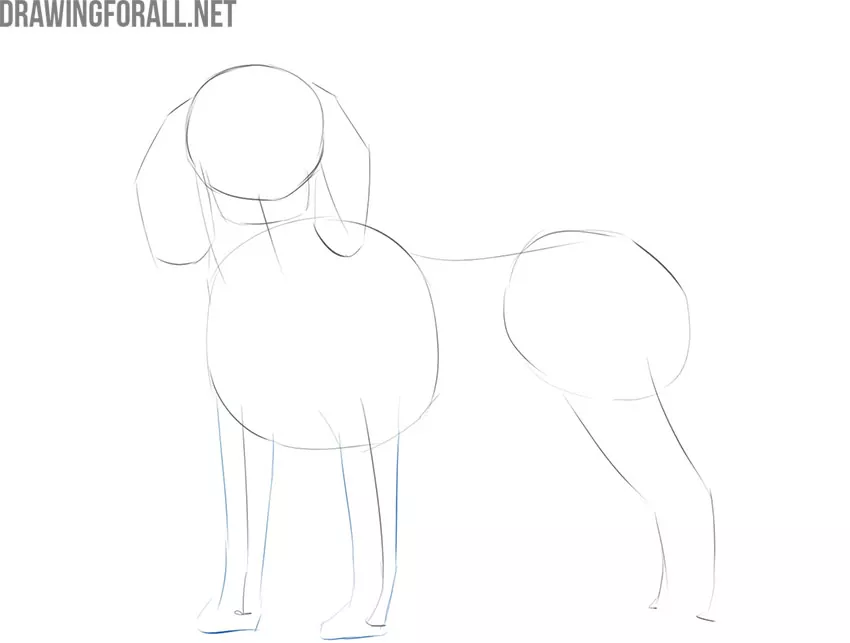
Step 3
Now create the outlines of the front limbs with rough and loose lines. In the future, we will give them a more detailed and complete look. Now, we need to position the front legs in the most correct way, giving them the correct volume.
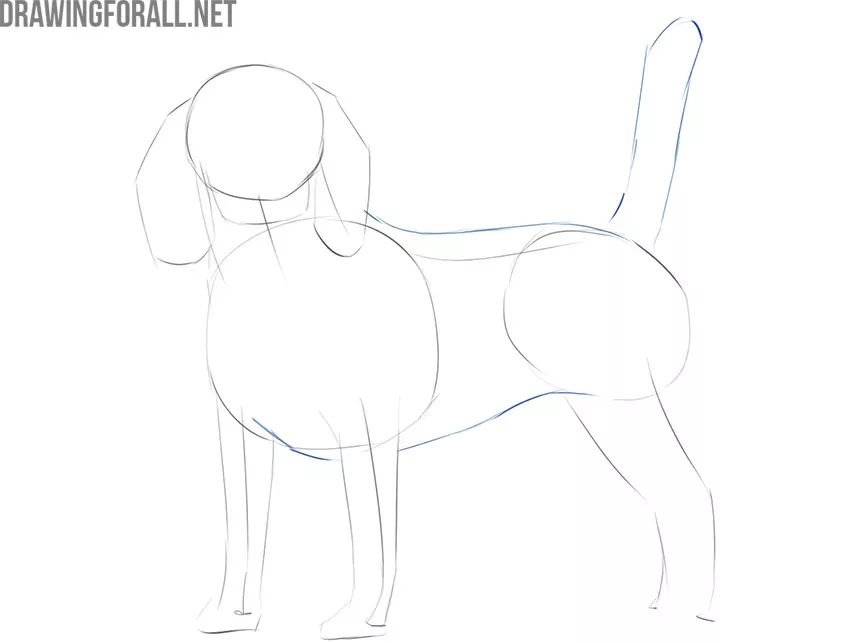
Step 4
Now use a couple of smooth lines to create the top and bottom edges of the torso. Note that the torso should taper slightly at the abdomen. Next, using light lines sketch out the tail. If you want to check the correctness and proportionality of your sketch, then look at it through a mirror.
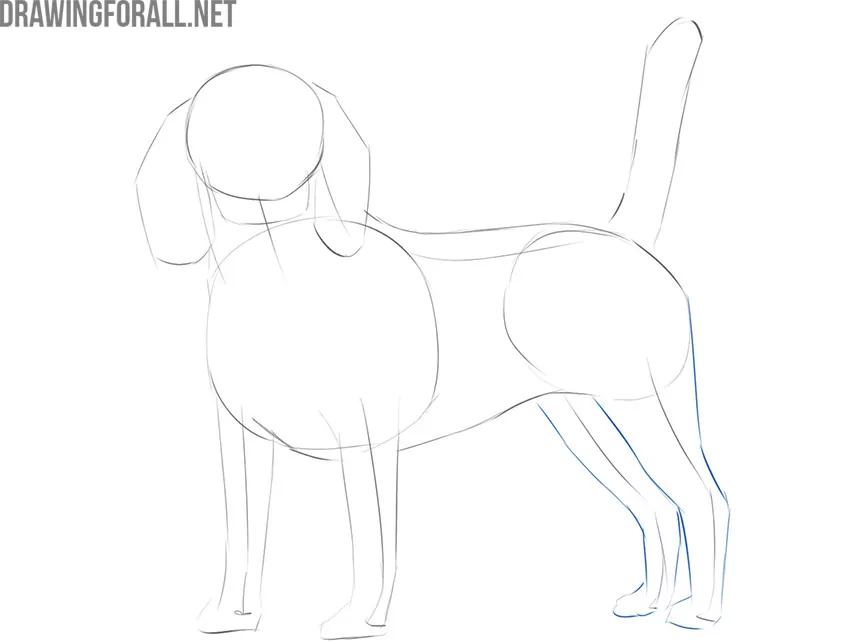
Step 5
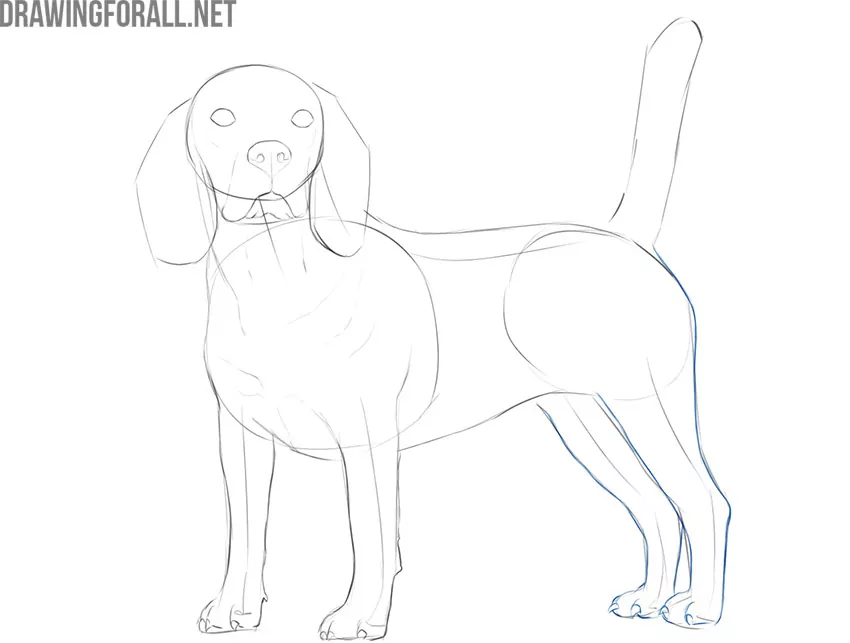
Now let’s move on to the hind legs of the realistic dog, creating them with the help of light lines in the same way as it was done a little earlier with the front legs. The hind legs should be noticeably thicker at the top and taper smoothly towards the middle.
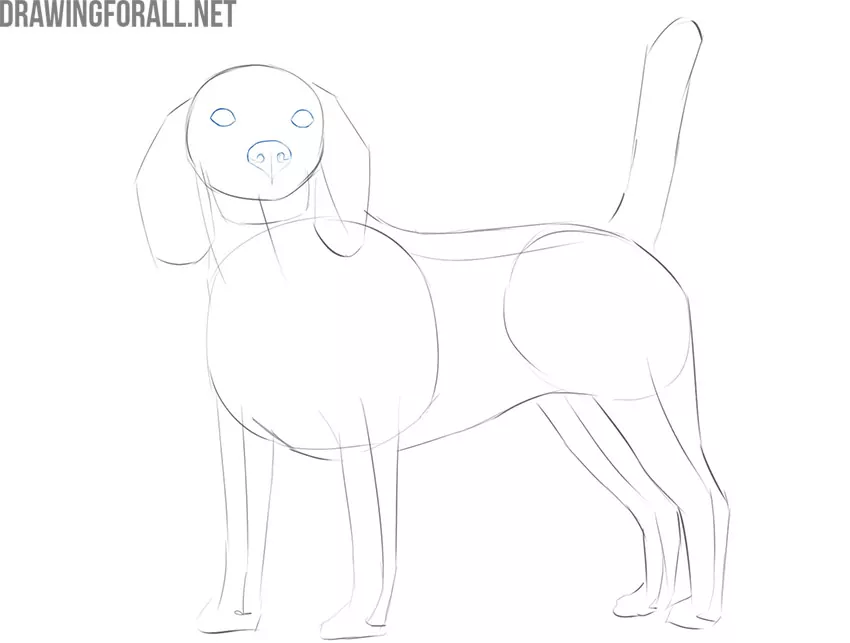
Step 6
It’s time to get down to the details and make the realistic dog drawing truly convincing. Start with the eyes, sketching them in two almond-shaped geometric figures. The eyes should be slightly above the center of the head ball. Draw a nose just below the eyes. In one of the previous guides, we told how to draw a dog nose in detail.
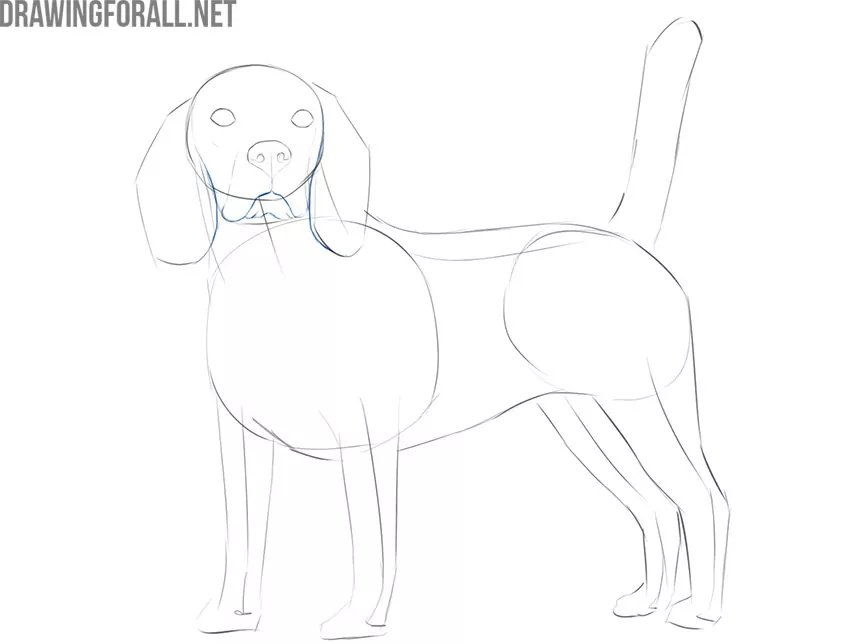
Step 7
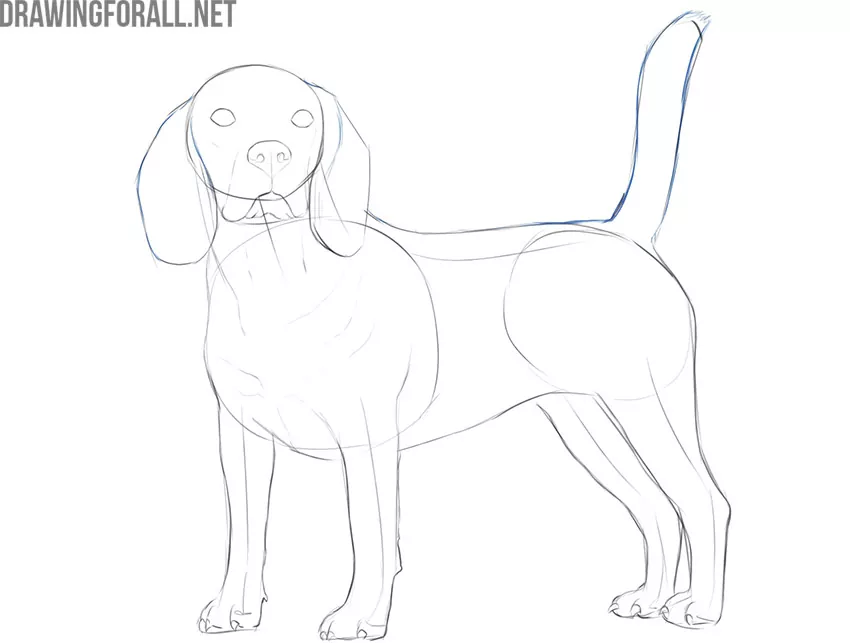
Draw the mouth just below the nose. First, draw the upper jaw, then draw the lower. By adding folds around the muzzle, as in our example, you will make your sketch more realistic and convincing. If you want to learn more about the process of drawing a dog’s head, then visit our article on how to draw a dog face.
Step 8
Now it’s time to add some detail to the front legs. Using darker lines, carefully draw the outlines of the front legs. When creating the details of the front legs, keep in mind the outlines of the muscles and bones under the skin. Draw toes and short claws. To make the dog look more realistic, add folds on the neck like in our example.

Step 9
Now do the same with the hind legs, that is, carefully draw them with sharper and darker lines. Draw the toes and claws. As a reminder, you can add some more volume to your dog sketch by making the closer lines darker than the more distant ones. We talked about this in our article on aerial perspective.
Step 10
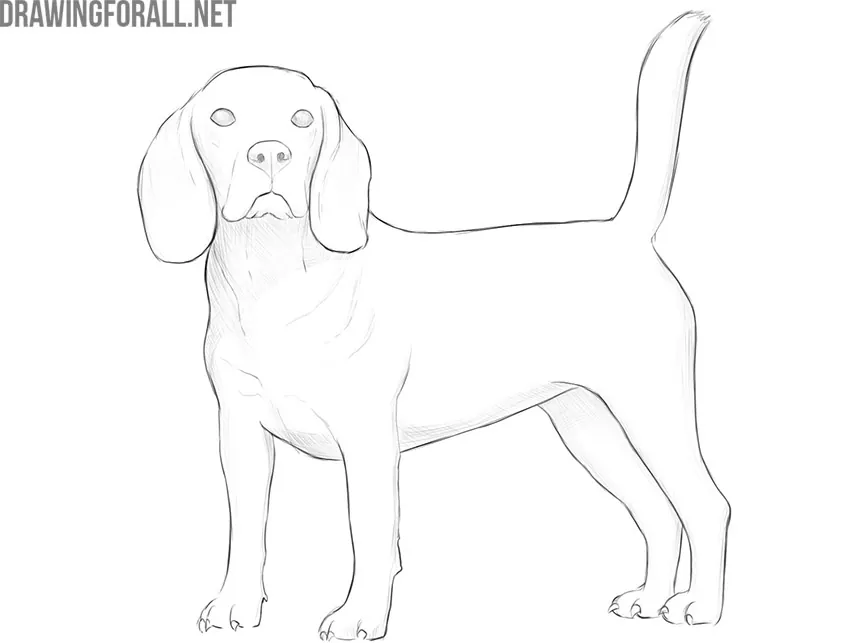
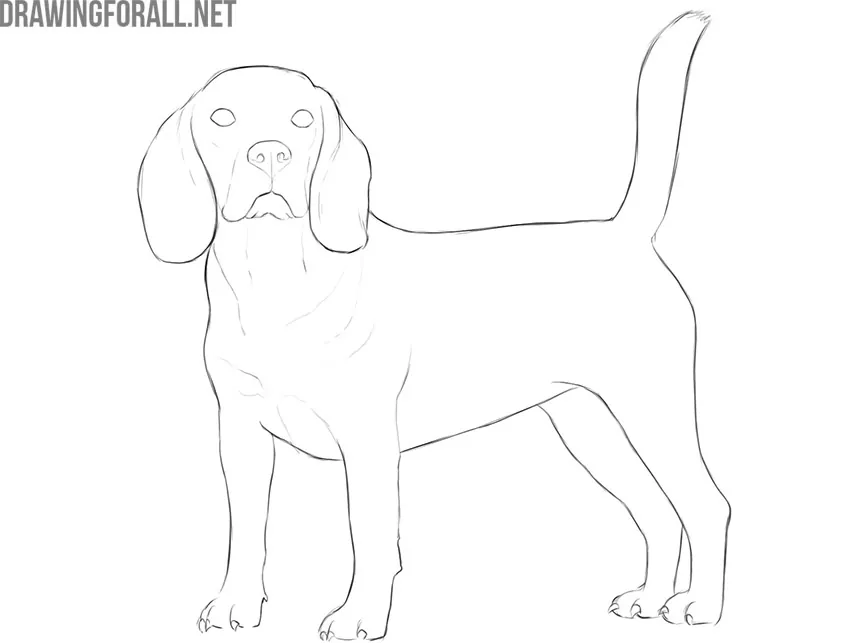
Add some finishing touches. For example, we made the tail more detailed and the ears darker. In addition, you can add even more folds or draw some interesting patterns on the body.
Step 11
Erase all unnecessary guidelines from your sketch. Give the necessary lines a little more tone. Compare your drawing with our example, look at it in the mirror and move away from it to find mistakes, and if they were made, then it’s time to fix them.
Step 13
Now it’s time to make your artwork truly three-dimensional and convincing. To do this, you need to use hatching, and draw shadows, as shown in our example. Start from the darkest areas, gradually moving towards lighter ones. Darken the eyes, leaving small highlights in them.
To make your realistic dog drawing more voluminous, try to create a background. This usually helps to achieve an even greater 3D effect. You can also try making the shadows denser. Add additional layers of hatching, making shadows darker and contrasts even more noticeable.
Of course, this drawing is not detailed and vivid enough to be confused with a black and white photograph of a real dog. Here we have given the most important knowledge for sketching these beautiful animals.
By adding shadows and highlights, you can give your dog as much volume as you want. It depends on perseverance and how well you are familiar with the theory of light and shadow, as well as on how often you practice drawing.
Don’t forget that the main thing every artist should do is practice. The more you practice, the more voluminous your artwork will be. If for several months you draw at least half an hour a day, you can achieve truly significant heights in drawing.

Great
Enjoyed the tutorial very much. And the encouragement in your closing.
Ok
is this a Beagle ???? I think it is