How to Draw a Zombie Warrior
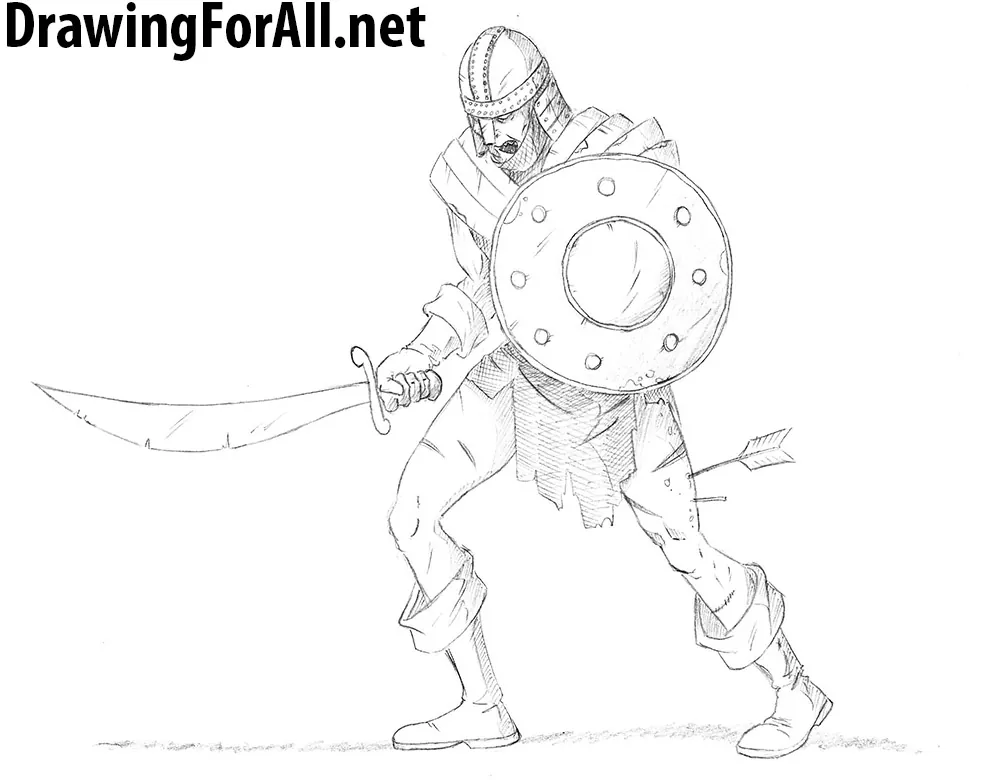
Hello, everybody! In today’s article we decided to return to the theme of fantasy. And today we will show you how to draw a zombie warrior. Such zombie warriors you often met in the books of the fantasy genre, action movies and RPG games.
Step 1
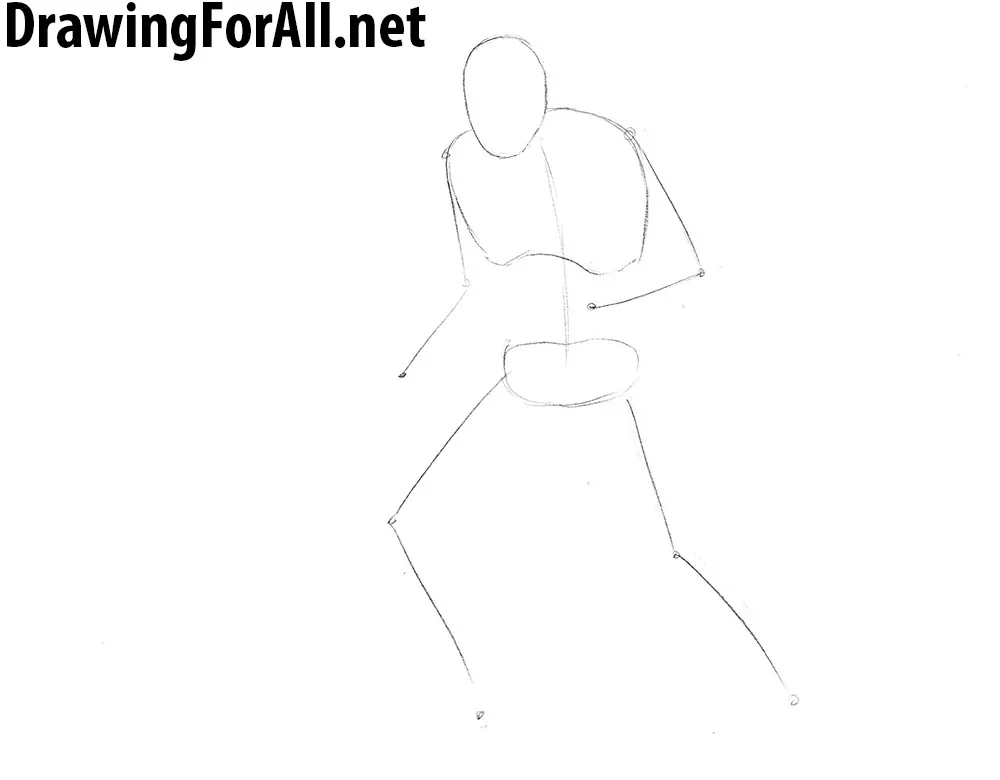
First of all we choose the pose of the zombie. Our zombie is slightly bent. In the future, he will hold a sword in one hand and a shield in the other. We start from the top down – first sketch out the head, then spine, chest, pelvis and limbs.
Step 2
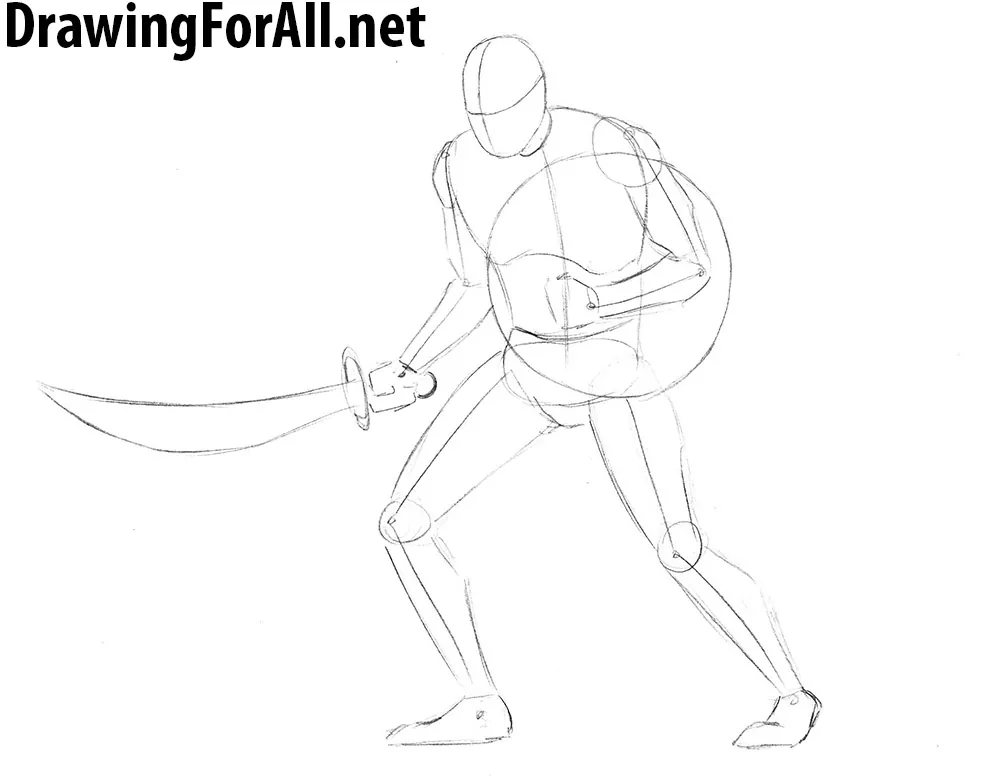
Add volume to the body. Then draw the parts of the body using simple geometric shapes. Sketch out the scimitar sabre and shield. Don’t forget to draw the lines of the facial symmetry. Already in this step you can make the overall shape of the muscles.
Step 3
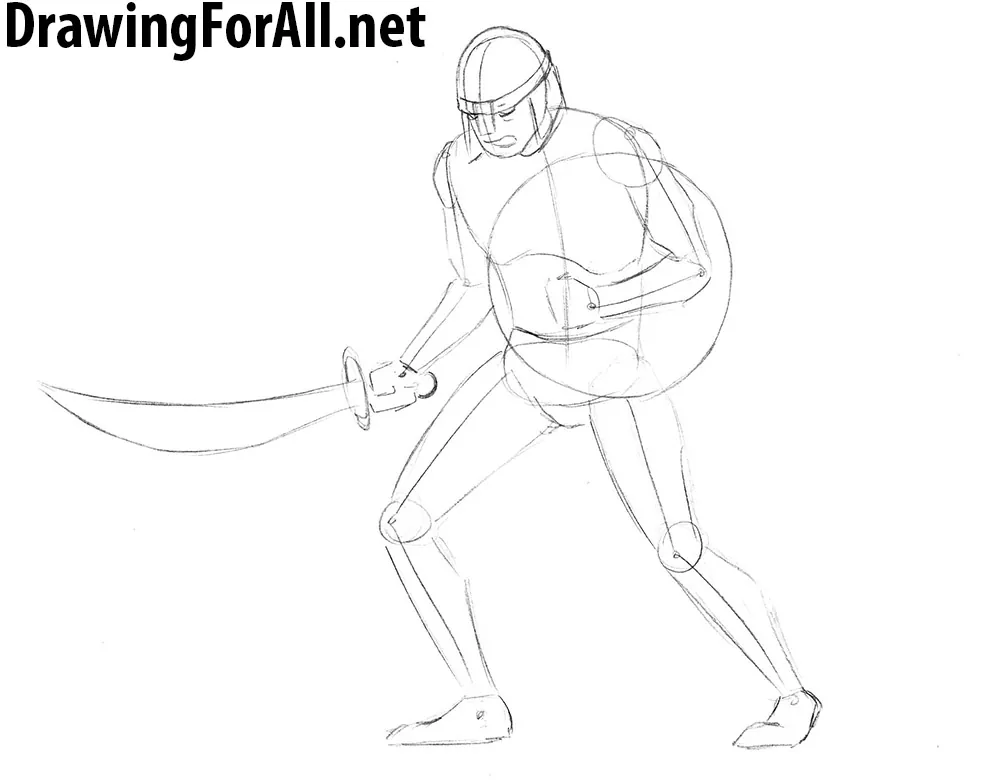
In this step we work with the head, rather with the helmet and face of zombie warrior. At first draw the main, i.e. the upper part of the helmet. Sketch out the nose protection and ear protection. In this step also draw the eyes and mouth. Please note that our zombie look very gloomy.
Step 4
Here we continue drawing the head of the zombie warrior. Erase the guides. Draw out the lines of the helmet and face. Draw the teeth and add some wrinkles of the face. Also you can draw some wounds or other details on the face.
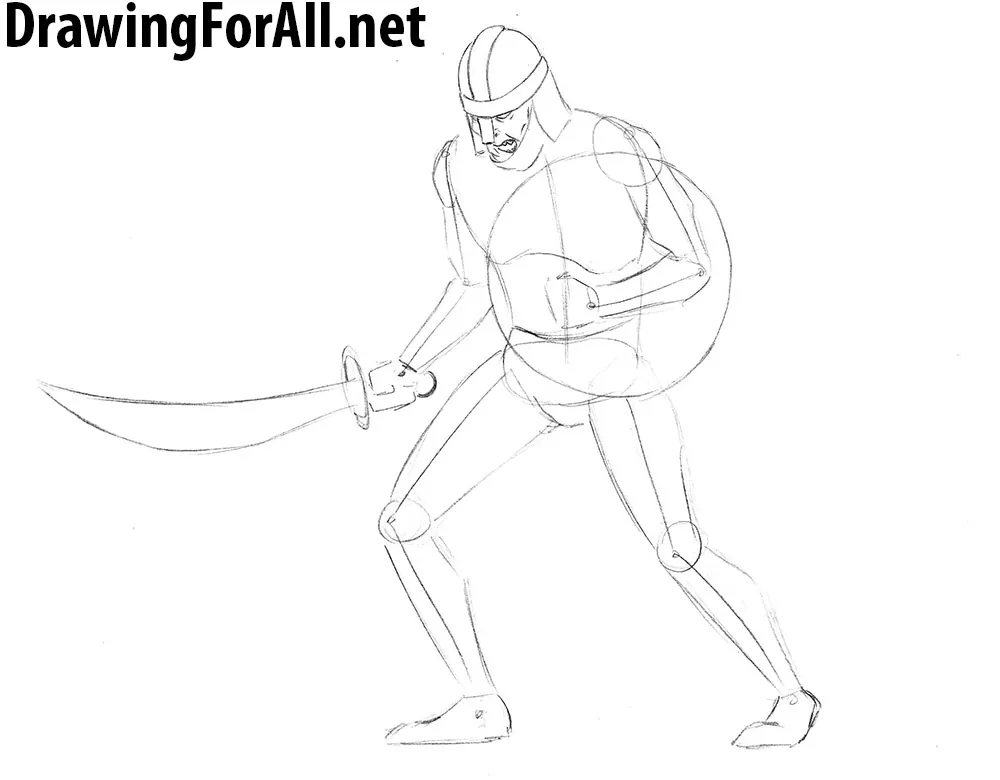
Step 5
In this step we finish drawing the head of the zombie warrior. First draw the rivets on the helmet. Add some scratches and dents. At the area of the chin draw chainmail using cross hatching.
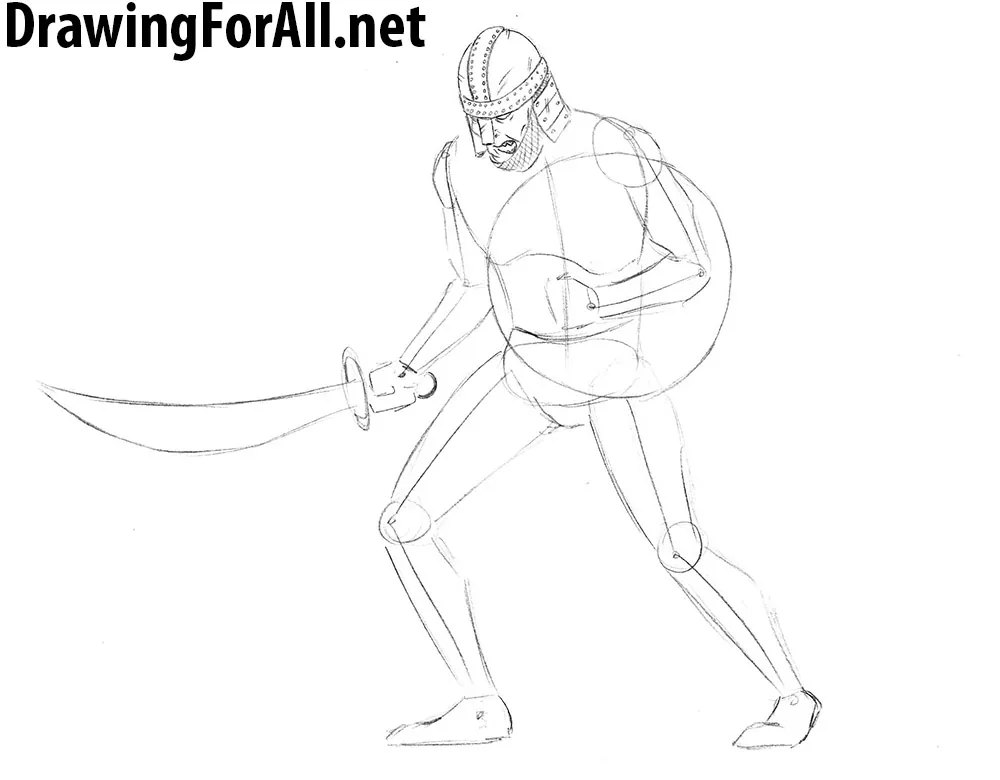
Step 6
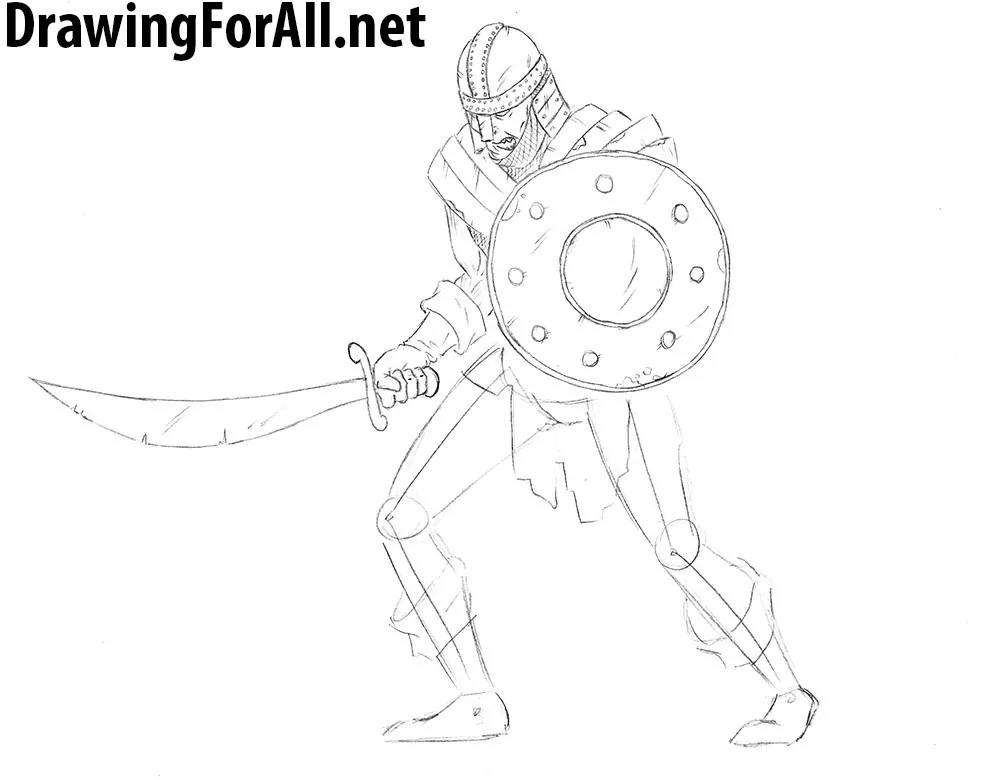
We on the middle of the lesson on how to draw zombie warrior. Add armor in the area of shoulders. Erase everything from the shield. Sketch out the gloves and boots. At the area of pelvis draw torn chainmail. Do not forget that you can draw any other clothing and armor.
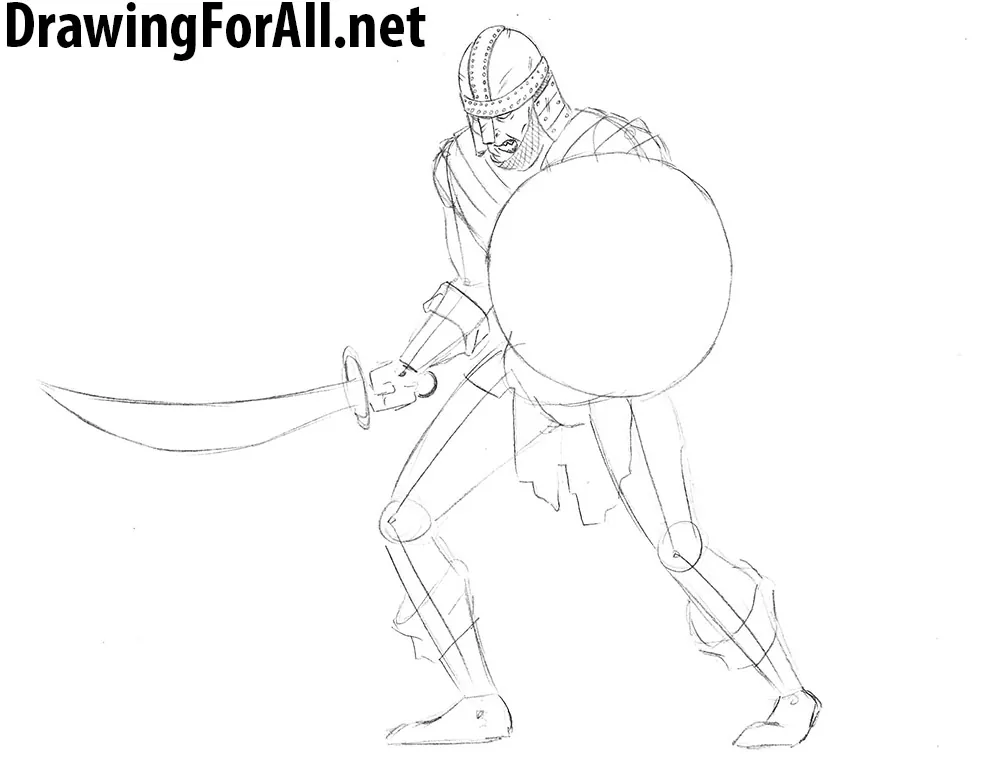
Step 7
Here we finish drawing the torso of zombie warrior. Erase the guidelines from the torso and shield. Draw out the lines of armor on the torso and shield. Draw details on the shield, such as rims and rivets. Add scratches and dents on the armor and shield.
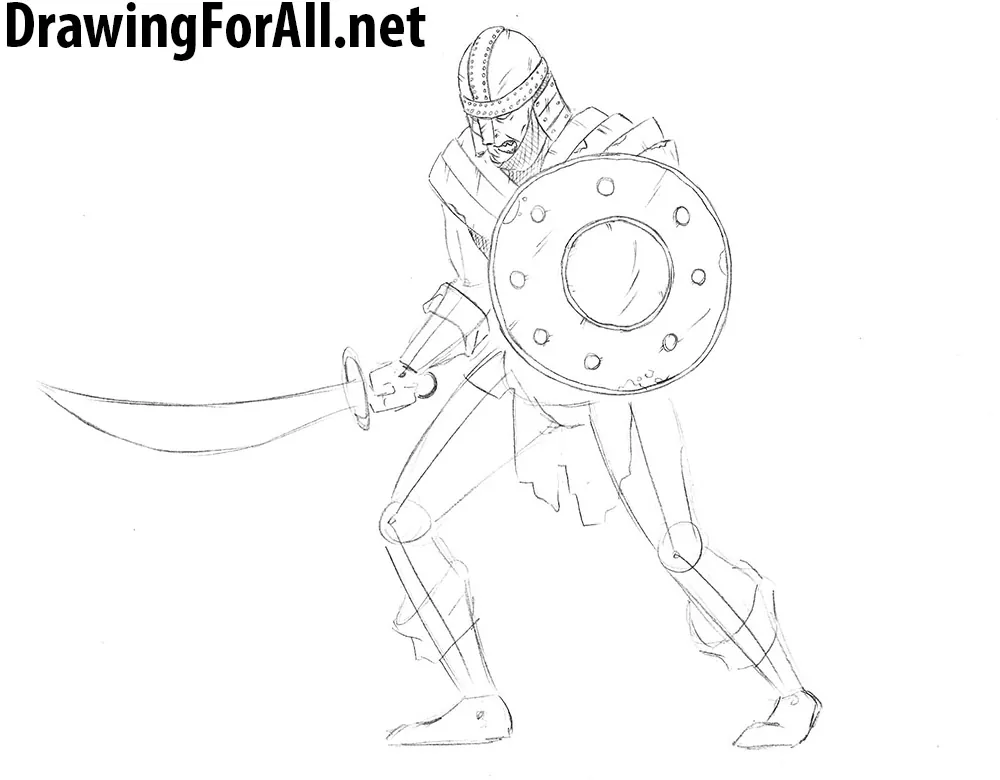
Step 8
Here we draw the visible arm of our character. Erase the guides and draw out lines of the arm. Add some folds to the glove. Draw out the hand with fingers and sword. Add some cleavages and scratches to the blade of the sword.
Step 9
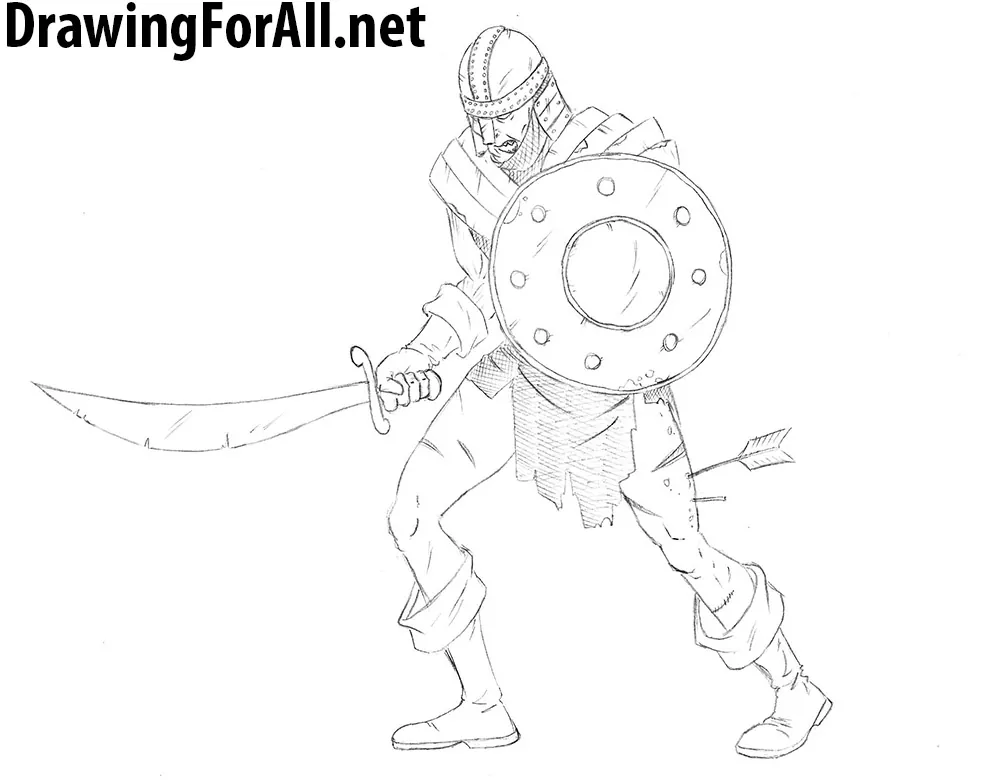
Here we draw the legs of our ancient and terrible warrior. Delete the guides and draw out the lines as in our example. Draw out the lines of the muscles. Add scratches and wounds to the legs. Also you can add a knife or an arrow as in our example.
Step 10
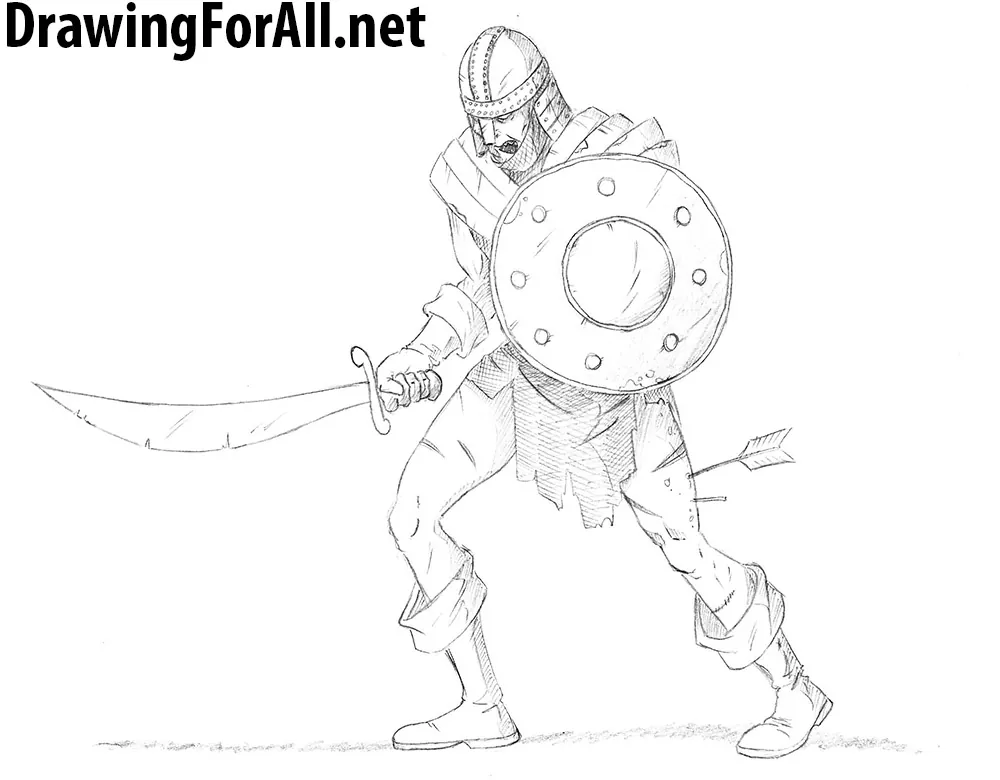
And as always, in the last step, we add shadows. First draw the edges of the shadows, then using hatching draw the shadows themselves. You can make the shadow softer, for it just a little rub the shadows by using a piece of crumpled paper. You can also add details that are not on our drawing. For example, military bag or warhammer, hanging on the belt.
If you enjoyed this tutorial, you will probably like our other drawing lessons in the RPG theme, such as drawing lessons about a wizard, ogre or dwarf. Like our lesson at least a little? Do not forget to to share this lesson and subscribe us on our social network pages! And if you did not like, write it in the comments and we’ll try to fix it!


