

How to Draw a Wizard
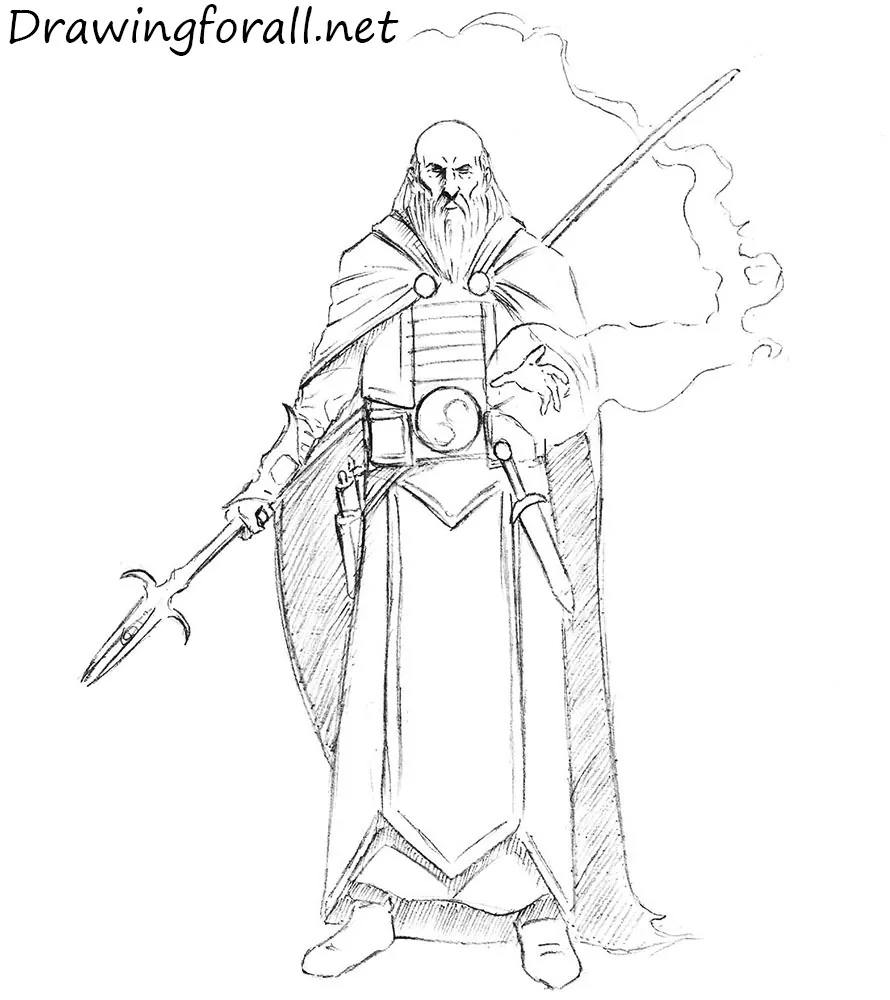
This tutorial will show you how to draw a wizard from classic fantasy stories and RPGs such as Dungeons & Dragons.
How to draw a wizard step by step
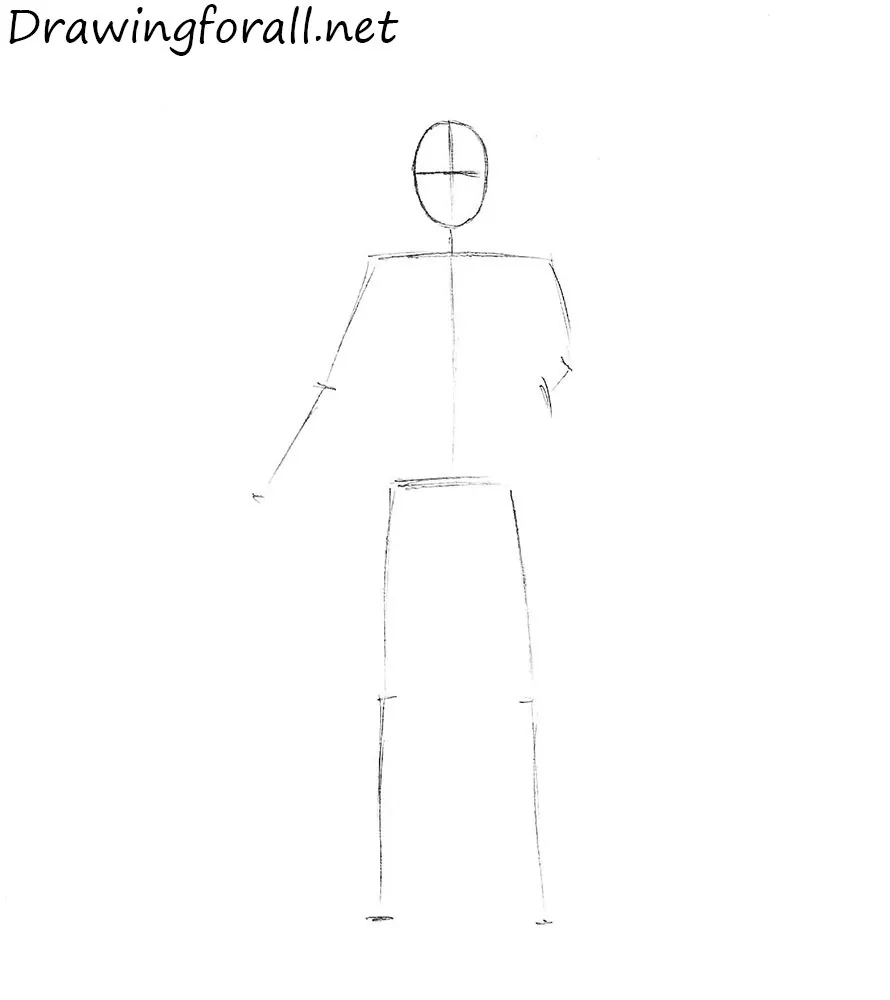
Step 1: Sketch the wizard’s frame
Let’s start with a stick figure. Our hero is an elderly wizard; however, he does not look hunched or feeble. Therefore, you can use the drawing rules for an adult male figure. Here we see a typical figure measuring 7.5 heads in height, with shoulders much wider than the pelvis.
First, sketch the head in the shape of an oval. Then draw the spine, shoulders, arms, and legs. The lines should be simple and very light.
Pay attention to the wizard’s left arm, which looks smaller because of the angle. Mark the facial guidelines: the vertical line indicates facial symmetry, and the horizontal line shows the position of the eyes.
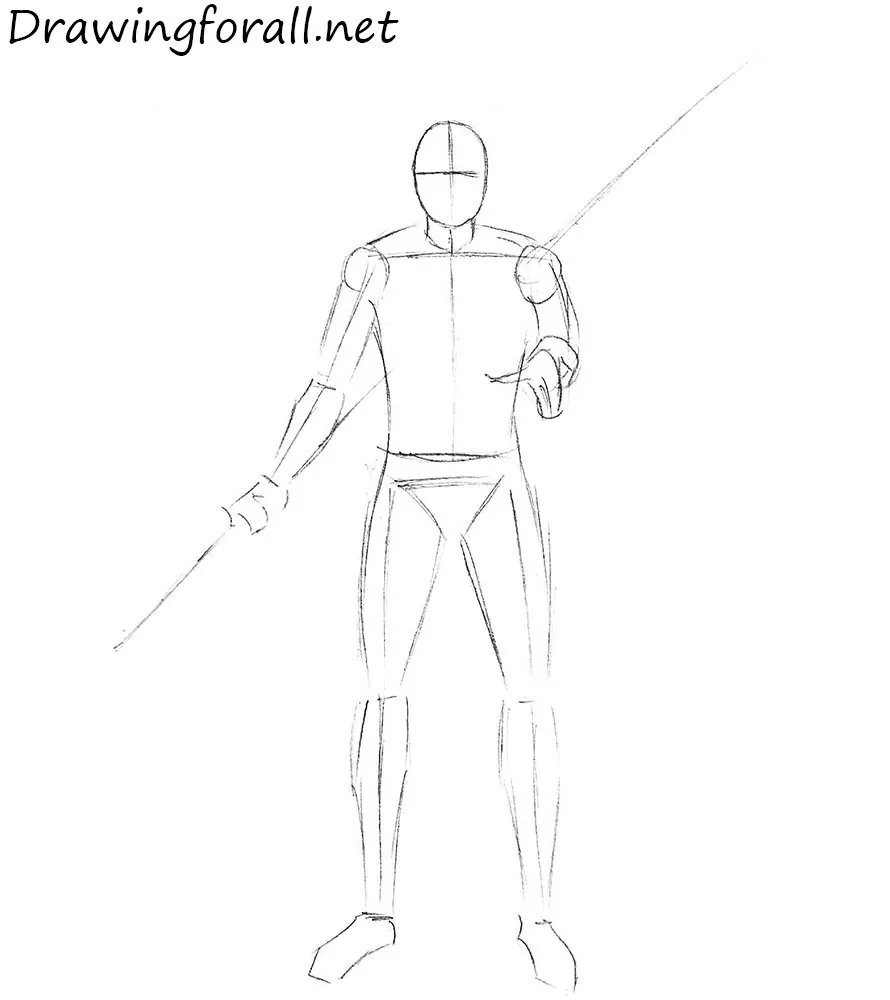
Step 2: Build the wizard’s body
This stage contains many construction lines. Sketch the torso as a cylinder that tapers downward. Note that the torso is not very muscular or frail. Use a pair of circles to mark the shoulders. Then add the arms, dividing them into the upper arms, forearms, and drawing the hands. The arms should be moderately thin.
Mark the pelvis as an inverted triangle. Like the arms, the legs are divided into three main sections: the thighs, lower legs, and feet. The thighs gradually narrow toward the knees. The shins first widen in the middle and then narrow toward the ankles.
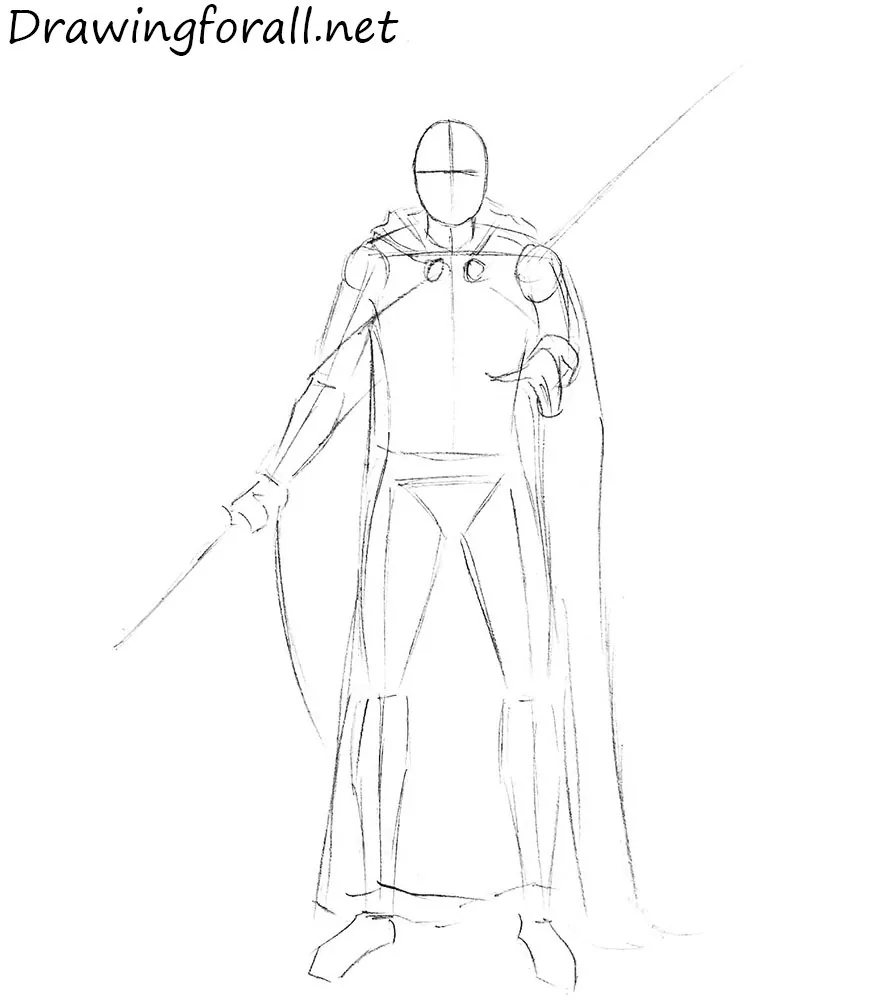
Step 3: Outline the wizard’s cape
Now outline the wizard’s cape. It is fastened by a pair of buckles on the sides of the chest and then spreads toward the shoulders and armpits, forming a shape similar to a butterfly. Draw the edges of the cape using long, slightly curved lines. Behind the shoulders, sketch the hood and add folds to it.
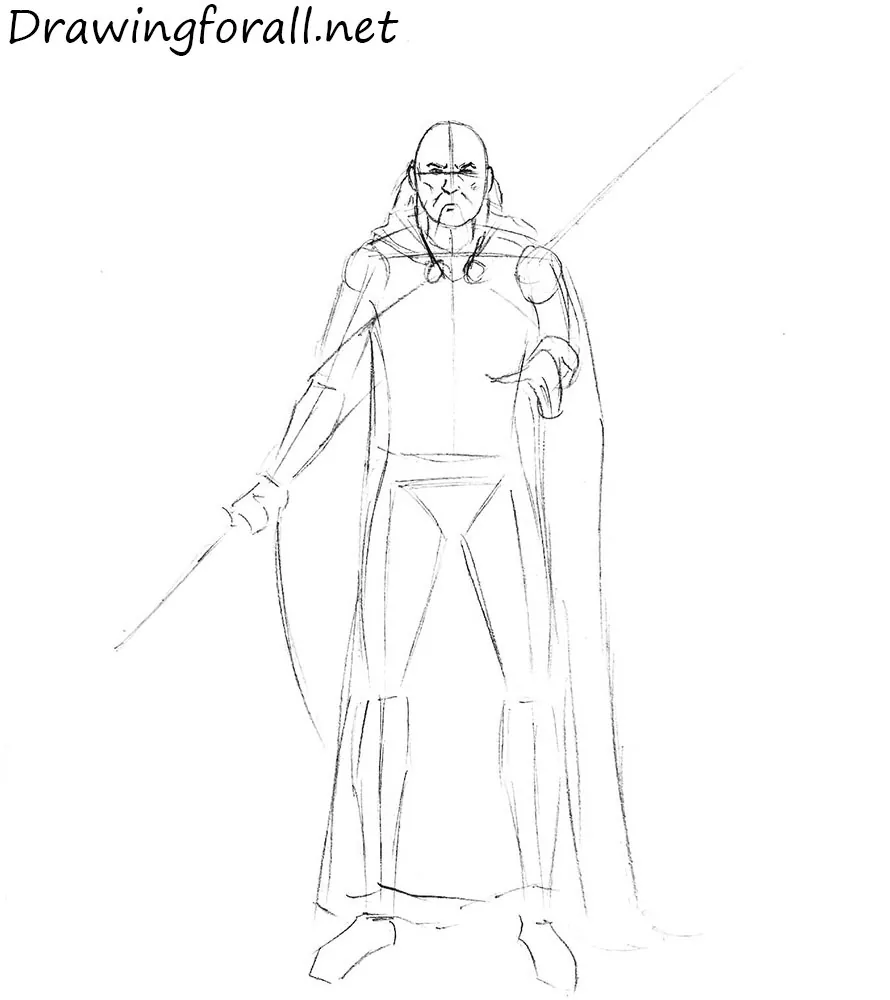
Step 4: Add the facial features
Carefully add the wizard’s facial features. Mark the eyes, nose, mustache, and outline of the beard. Do not forget the lines indicating the cheekbones.
Step 5: Refine the wizard’s face
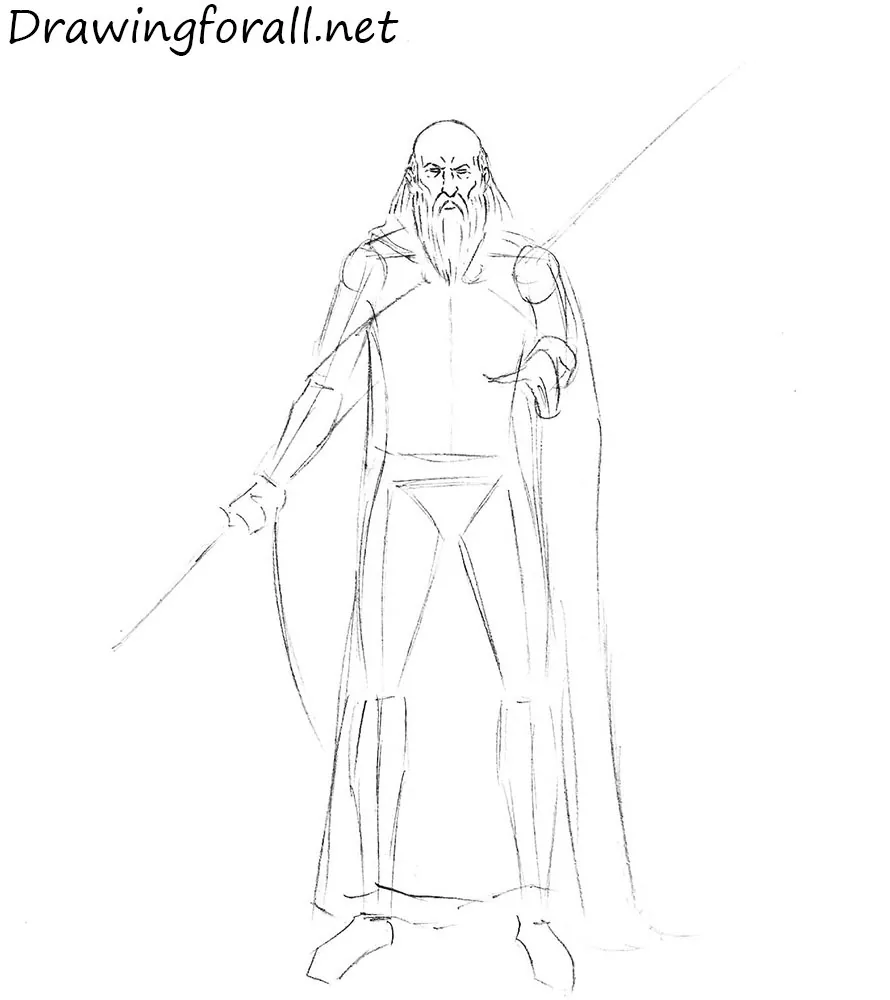
Now that we have prepared the wizard’s silhouette, you can begin adding details. Work from the head to the feet, starting with the face.
Outline the nose and draw a few vertical wrinkles above the eyes. Also, add wrinkles beneath and beside the eyes. Draw the ears, remembering that their upper edges should align with the eyebrows and their lower edges with the tip of the nose. When drawing the beard, remember one more rule: draw the hair from the roots to the tips.
Step 6: Detail the arms and staff
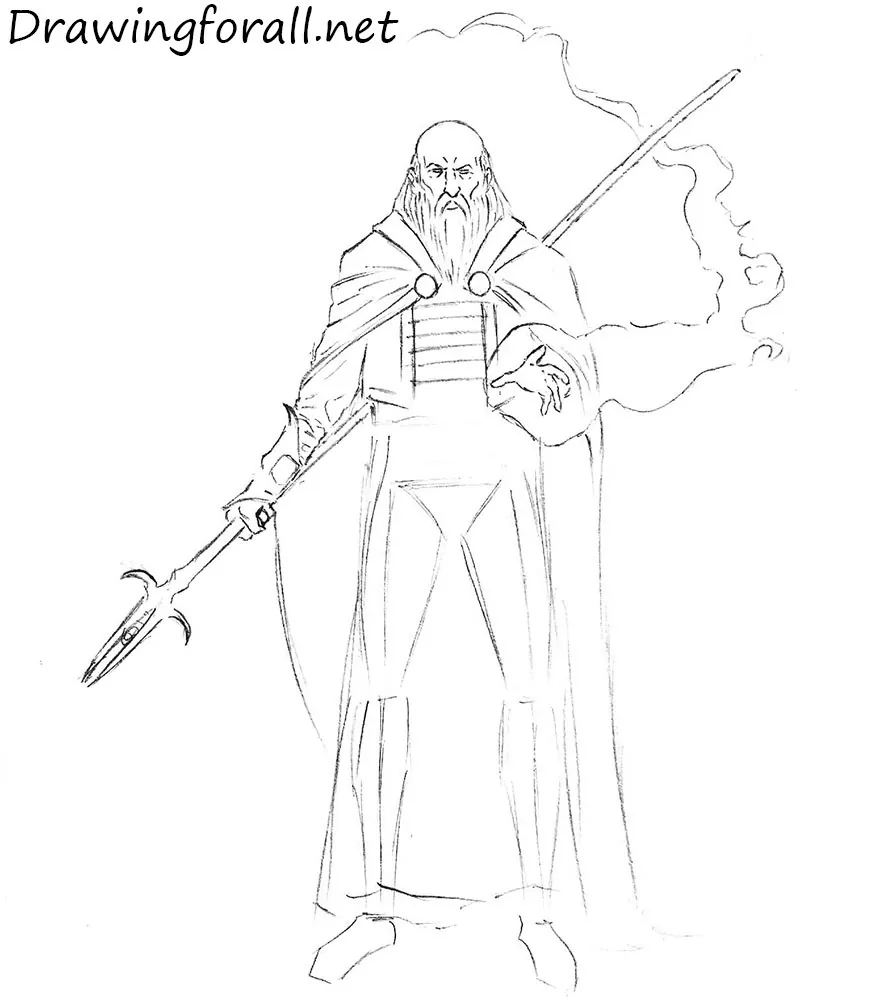
Next, draw the wizard’s upper torso, arms, and staff. First, outline the clothing on the torso that is secured with ropes.
Then draw the bracers, outline the sleeves, and add a few folds. Draw the hands: the right hand holds the staff, while the left hand radiates magical energy. Illustrate the magical energy with uneven, jagged lines. Then draw the staff.
Step 7: Complete the robe and accessories
Add the details of the lower torso and legs. First, draw a large, round belt buckle and a projecting triangular section of cloth beneath it. Do not forget to outline the edges of the wizard’s robe. Draw the wizard’s shoes and add a couple of folds. Finally, add accessories, draw the dagger and outline the bag with scrolls.
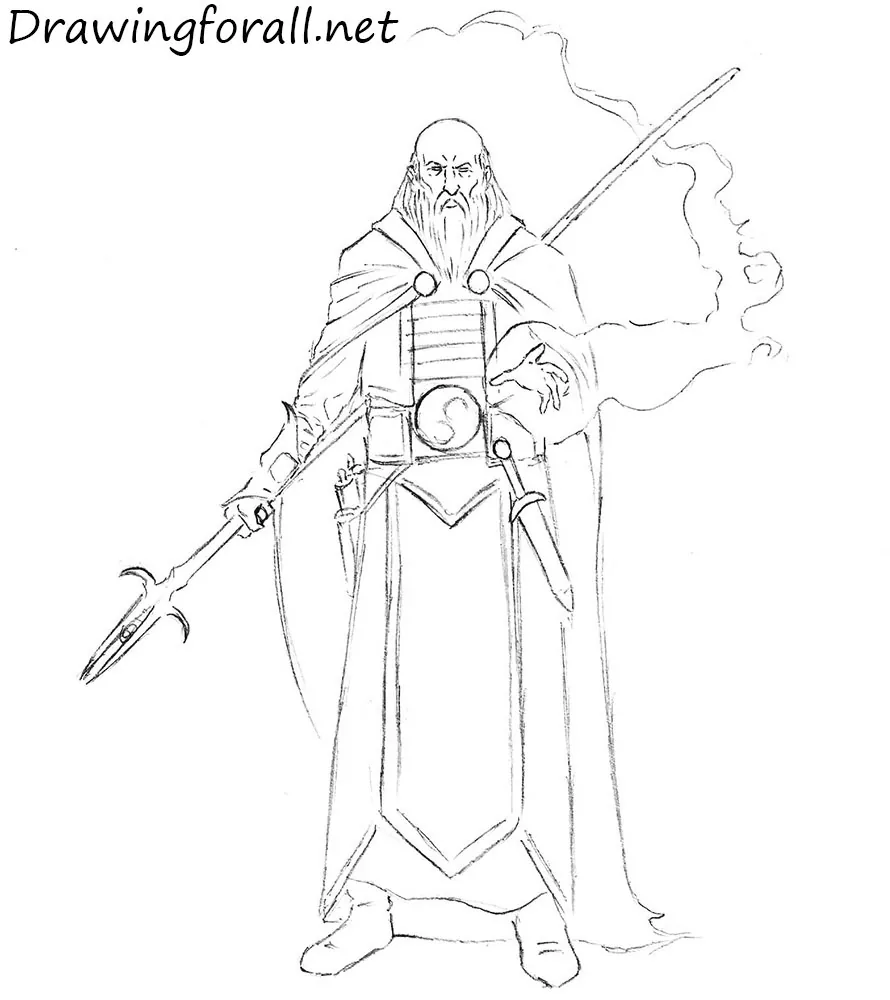
Step 8: Draw shadows and finish the wizard
Now add shadows. Cover the shaded areas with hatching of different intensities, using denser lines for darker shadows. Add shadows to the areas where the light does not fall. The darkest areas are inside the cloak, beneath the beard, and within the folds of the clothing. Also, erase any unnecessary construction lines that remain.
This tutorial showed you how to draw a wizard in the classic fantasy style. If you’d like to continue drawing characters from the same worlds, try to sketch a knight, a character who appears alongside wizards in countless fantasy stories and role-playing games.
You can also continue with drawing a dragon, one of the most recognizable creatures in the genre.
Our fantasy collection includes many other characters as well. You can continue by sketching an ogre or draw a dwarf warrior to expand your collection of classic fantasy characters.

this was very helpful! great art much appreciated!
So much fun, thanks 🙂
I hope its still up and running and that this helpfully minimal out of a site made with great precision is still regularly uploading tutorials
I can’t edit but I ment helpful and miracle
Wow awesome af really nice