How to Draw an Ogre
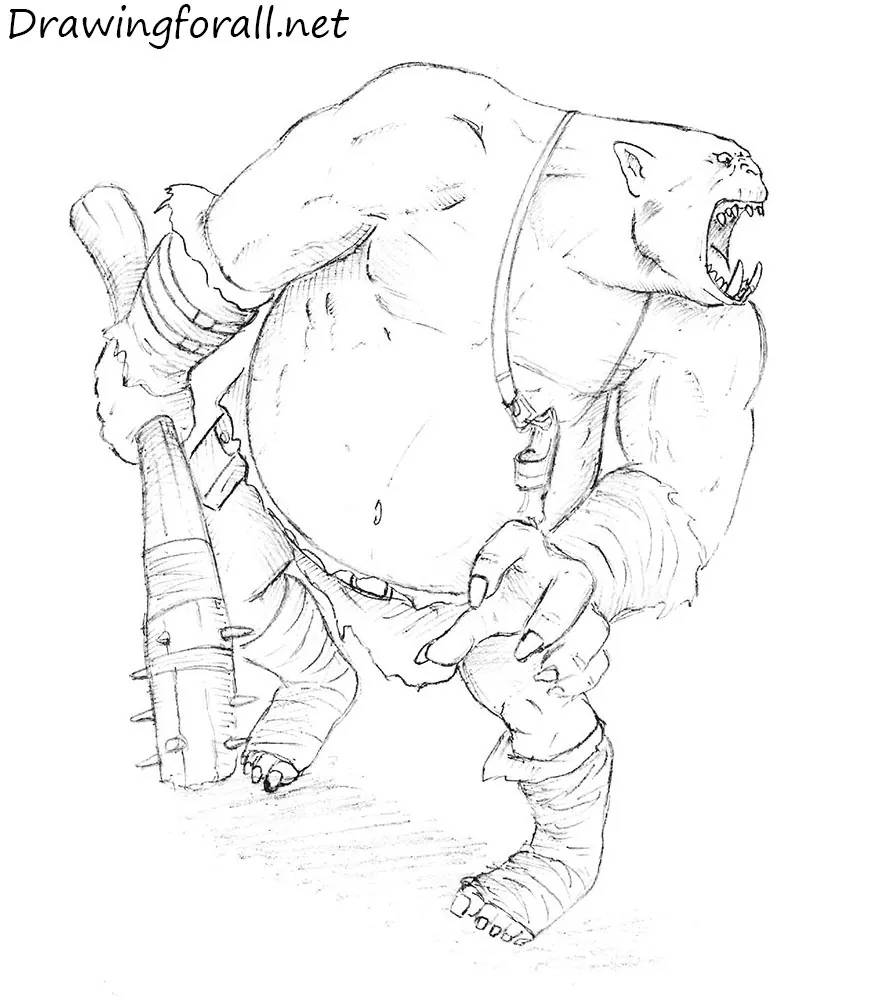
In this step-by-step tutorial, we will show you how to draw an ogre, a giant humanoid creature commonly found in fantasy stories, folklore, and games.
Ogres are large, human-like creatures that mostly live in swamps. They are carnivorous and eat large wild animals and humans. In the vast majority of myths and legends, ogres are negative characters.
The ogre in this tutorial is based on the role-playing game Dungeons & Dragons.
How to draw an ogre step by step
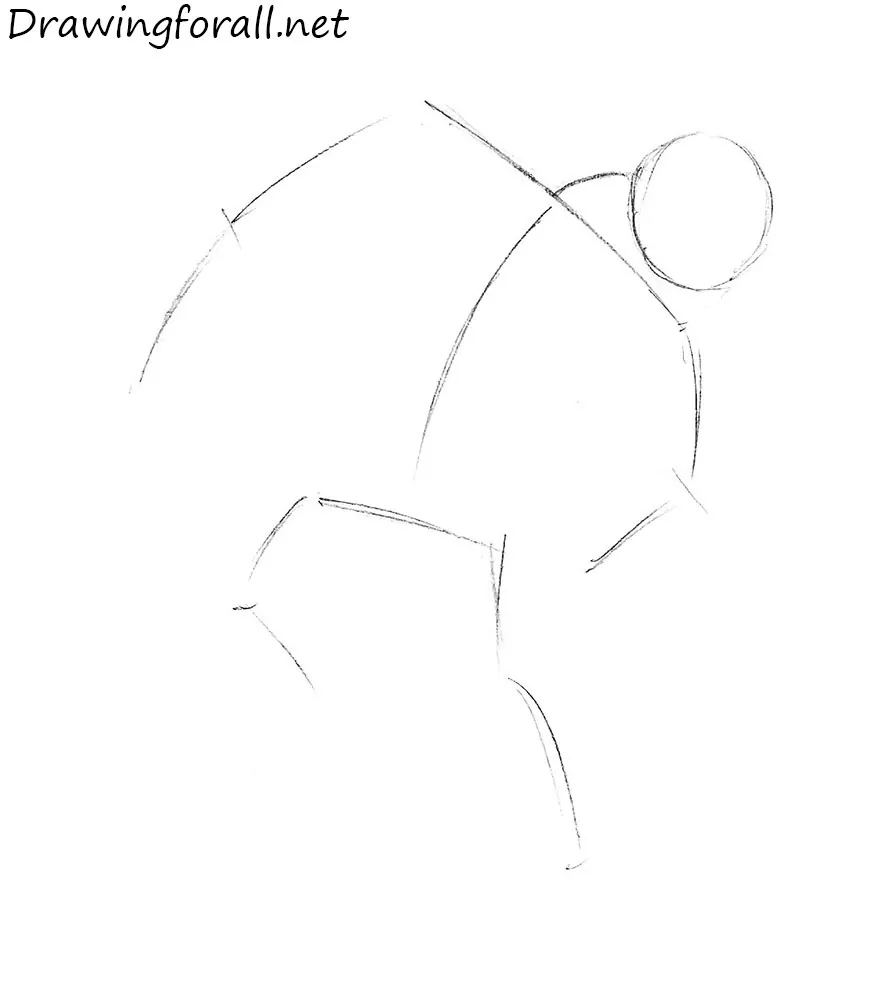
Step 1: Sketch the ogre’s basic guidelines
The stick figure of the ogre should convey his pose and body structure. Mark the turn of the head and the positions of the legs and arms. Also establish the sizes of the body parts, including the large torso, small legs, and round head. Pay attention to the angles of the shoulder and pelvis lines, as they are very important for drawing the pose correctly.
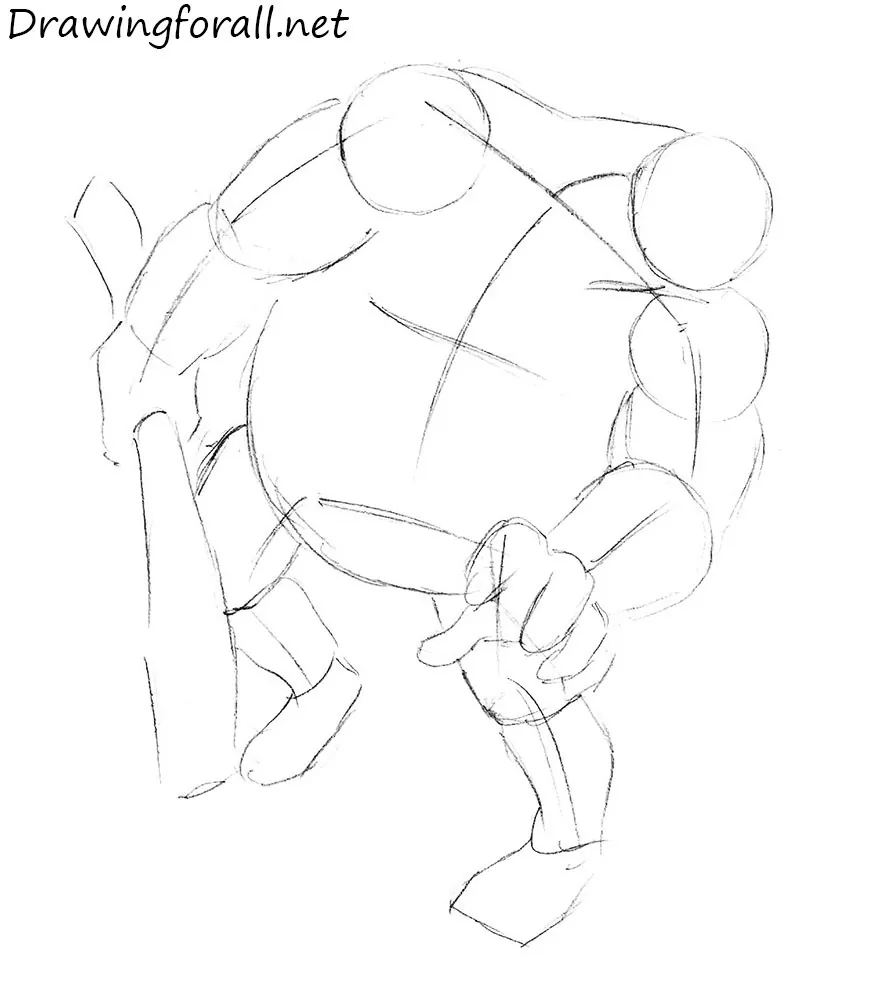
Step 2: Build the monster’s silhouette
Now create the silhouette of the monster. Draw round shapes for the shoulders, then connect them to the head with a pair of lines. Note that the ogre’s shoulders are about the same size as his head. Next, draw the arms as thick cylinders. Sketch the hands and fingers. Use a semicircle to draw the large torso. At the end of the step, outline the legs and the club.
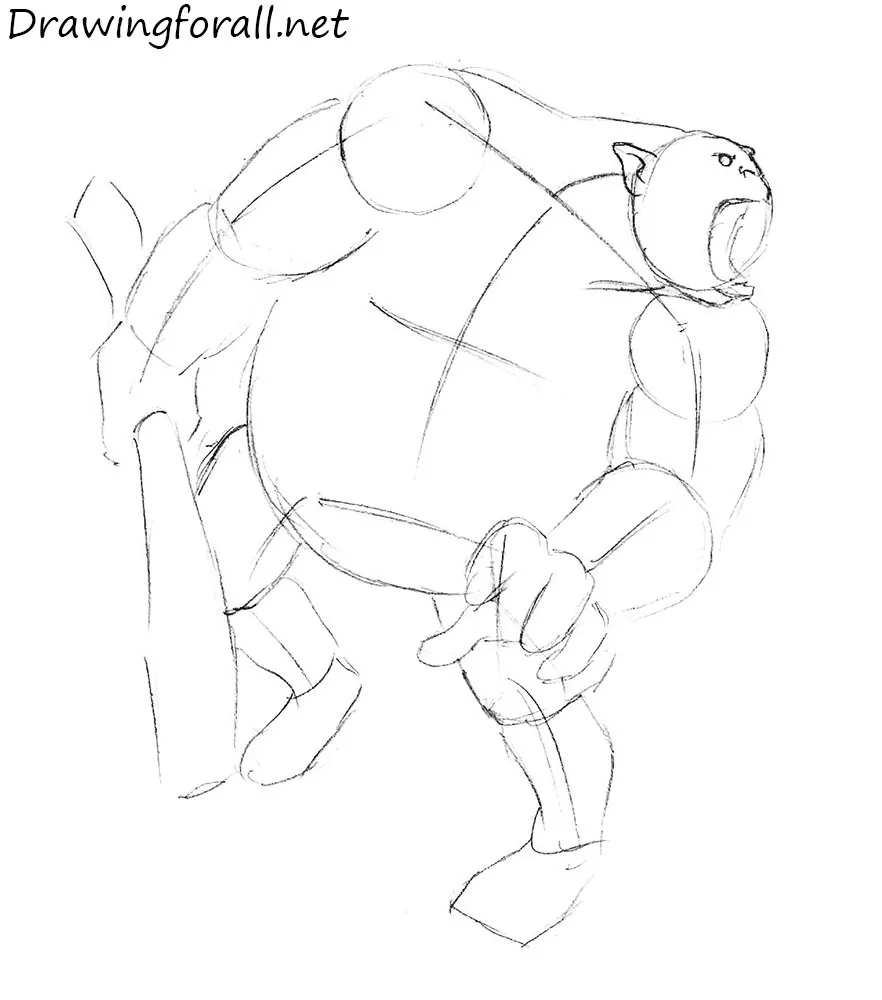
Step 3: Outline the ogre’s facial features
Outline the facial features of the ogre. The large mouth takes up almost the entire width of the head. The ears are pointed, as they are in many other fantasy characters. The forehead is very small, and the eyes are located near the top of the head.
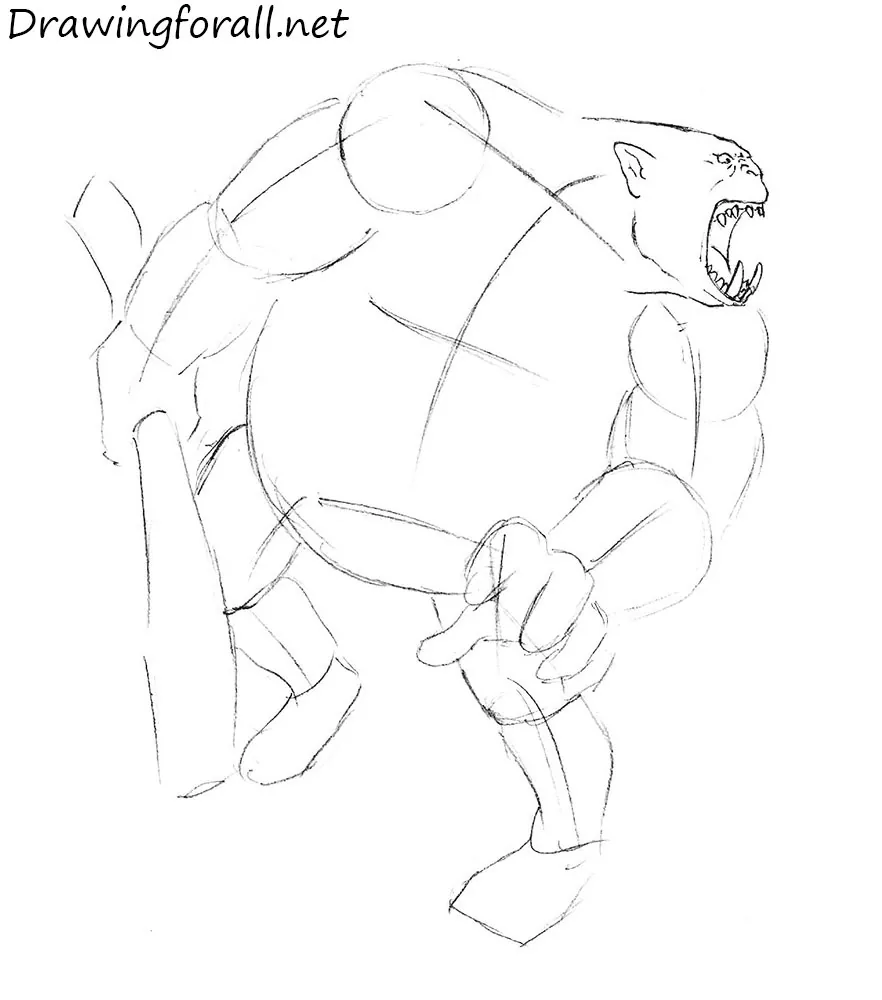
Step 4: Draw the face of the ogre in detail
Now add details to the ogre’s face. First, draw the tongue and the outlines of the teeth. Note that the gums should be visible above the upper row of teeth. Add two large fangs to the lower jaw. Also refine the ear and draw wrinkles around the eyes and across the nose.
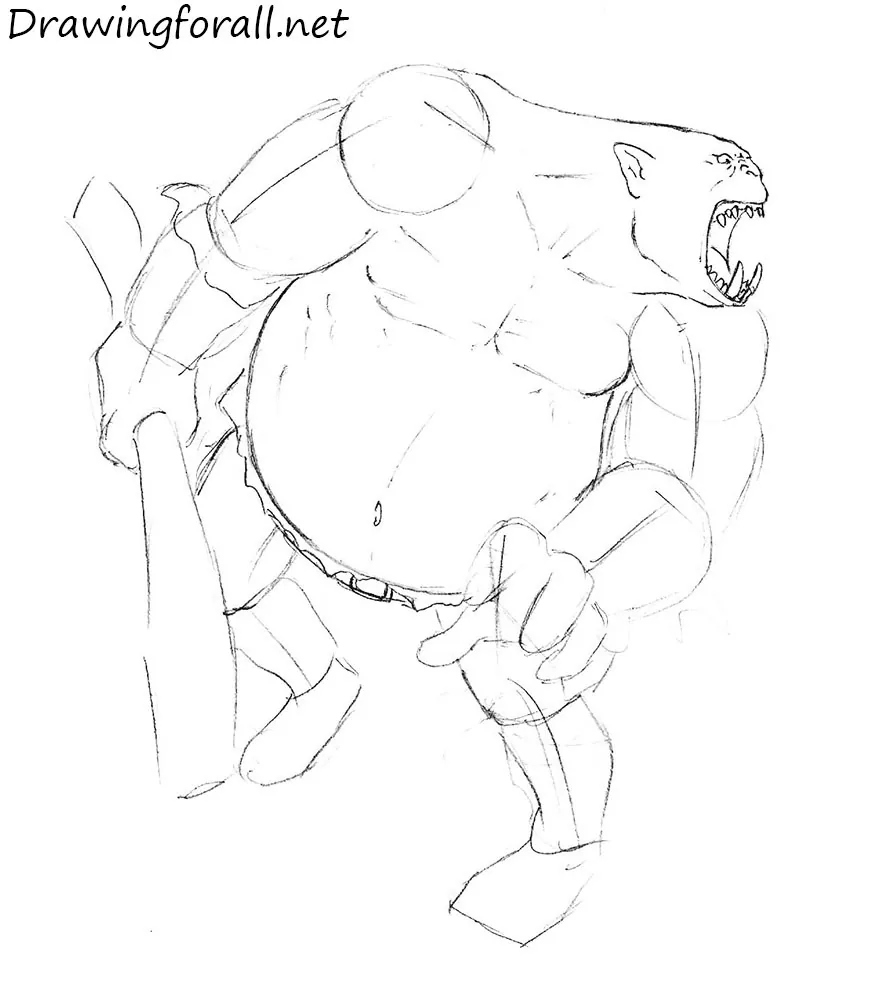
Step 5: Define the torso and clothing
Continue adding details from the head down toward the feet. Mark the ogre’s clavicles with diagonal lines. Below them, draw the pectoral muscles as two plate-like shapes. Because of the ogre’s physique, do not draw the abdominal muscles; simply outline the belly. Add the navel and the oblique muscles along the sides. Then draw the ragged upper edge of the pants and the belt.
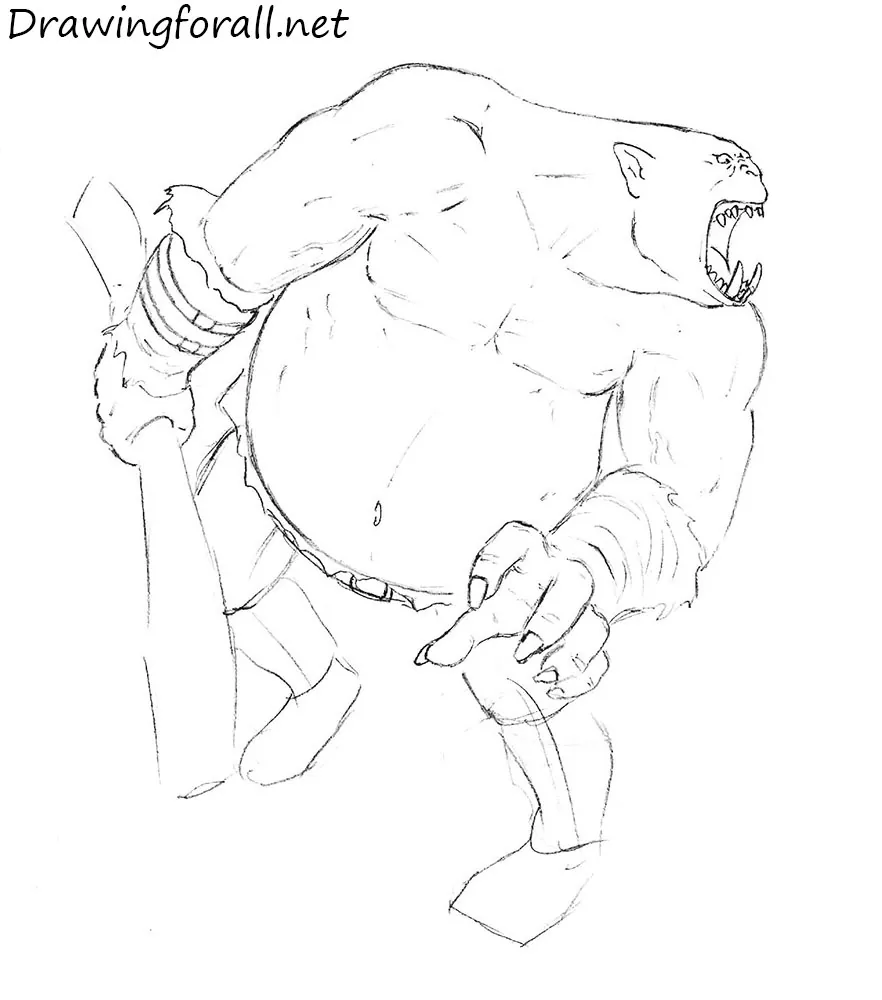
Step 6: Refine the arms and claws
Now add details to the ogre’s arms. They are bare above the elbows, so outline the deltoid muscles, biceps, and triceps. Then draw the skin folds around the finger joints and add the large claws.
Step 7: Finish the creature’s legs and feet
Repeat the same process on the ogre’s legs. Draw the cloth covering the shins and most of the feet. Do not forget the ragged strips of fabric around the lower legs. Add a few muscle lines to the legs and draw long claws on the toes.
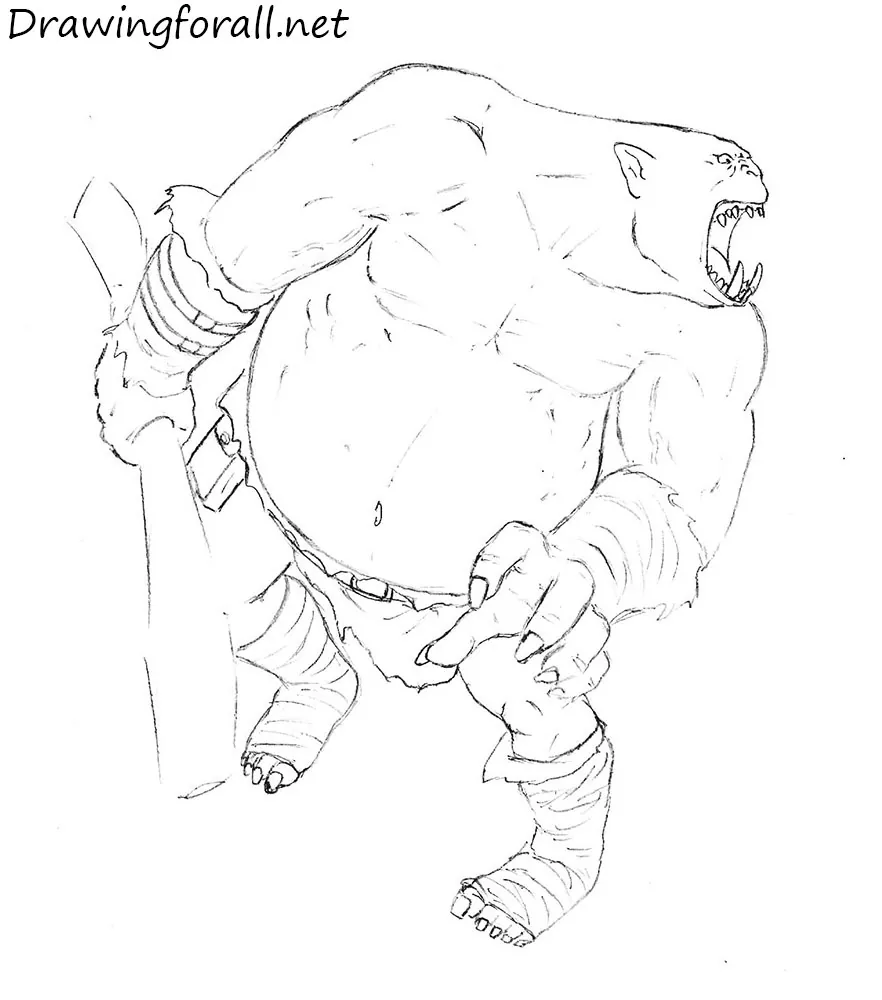
Step 8: Detail the spiked club
Now, draw the spiked club and detail the spikes. Add strips of cloth wrapped around it, then use straight lines to mark cracks in the wood.
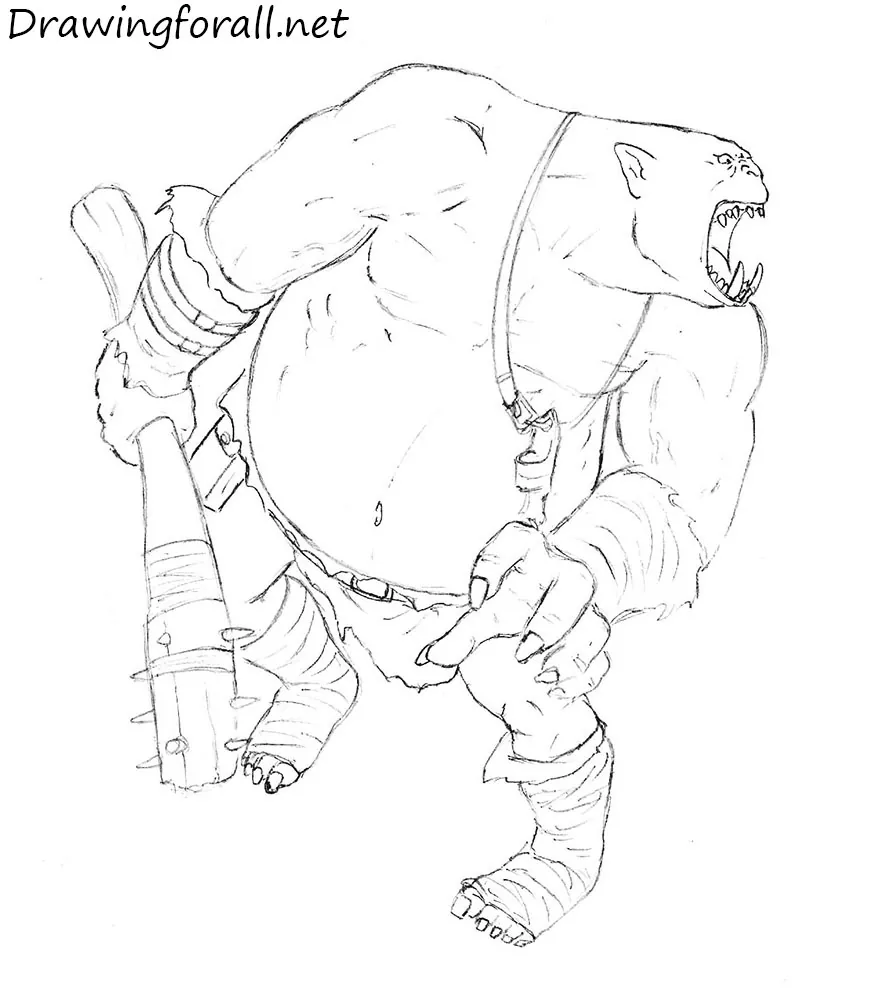
Step 9: Draw shadows on the ogre
Finish the ogre drawing by adding shadows. Use small areas of crosshatching in the appropriate places.
This was a tutorial on how to draw an ogre. If you enjoy fantasy worlds, try drawing a dragon, one of the most iconic mythical creatures.
You can also practice drawing a knight to create a classic fantasy opponent, or continue with drawing a werewolf, another legendary creature found in myths, games, and fantasy stories.