How to Draw a Mouse For Beginners
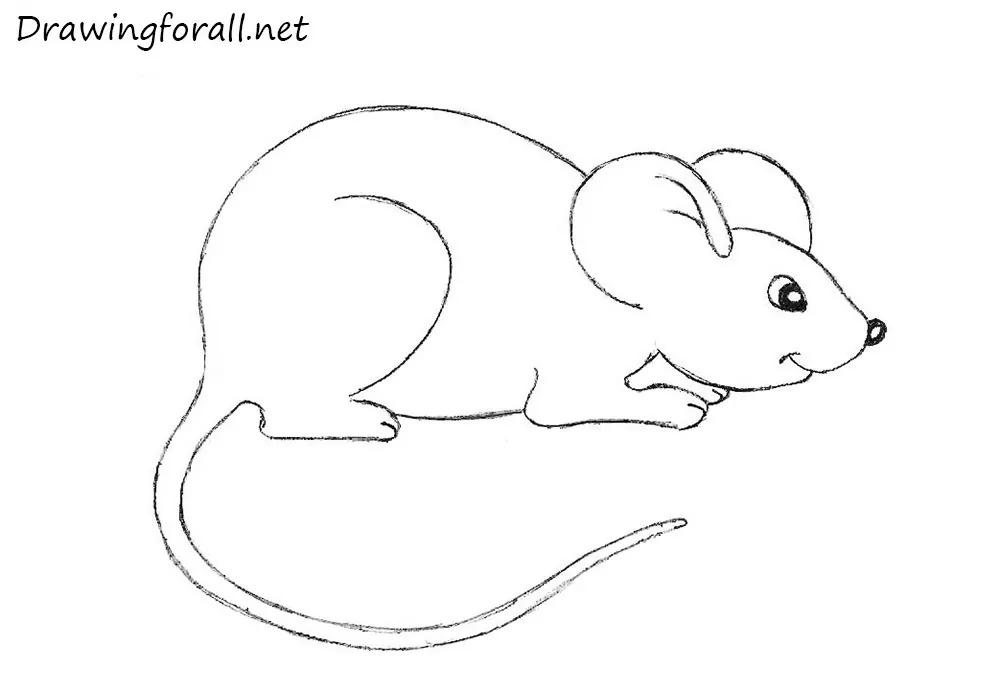
The topic of this drawing tutorial is how to draw a mouse for beginners. This lesson will be really easy, but there are some important details in some steps.
So, let’s start this tutorial and learn how to draw a mouse for beginners!
Step 1
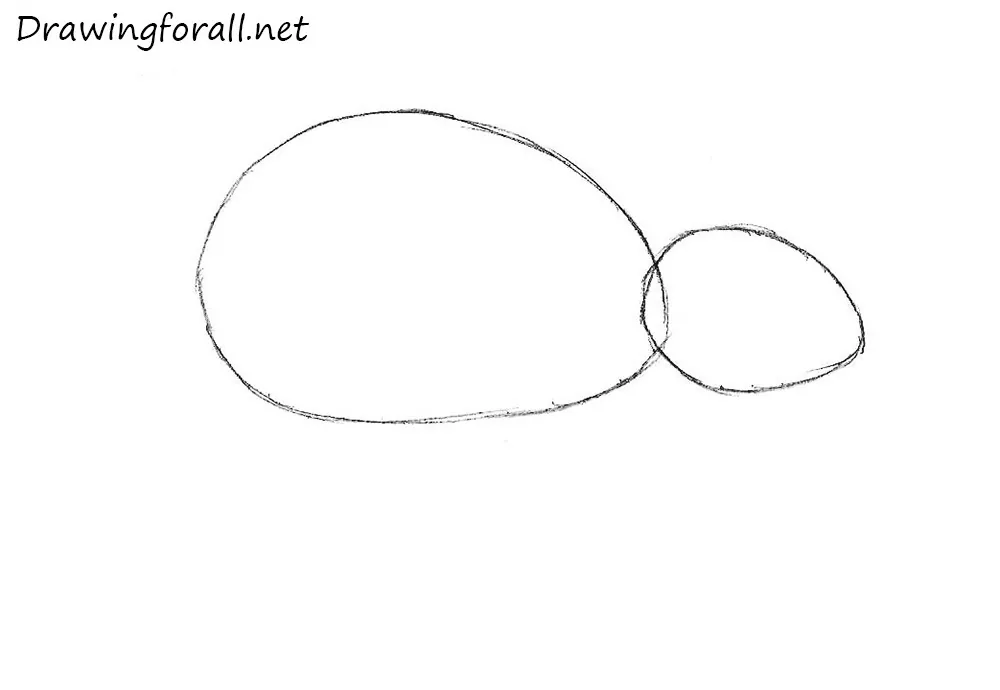
We start this tutorial with two ovals. The left oval must be bigger than the right oval. We want to note that in the first steps you should not press down too hard on the pencil.
Step 2
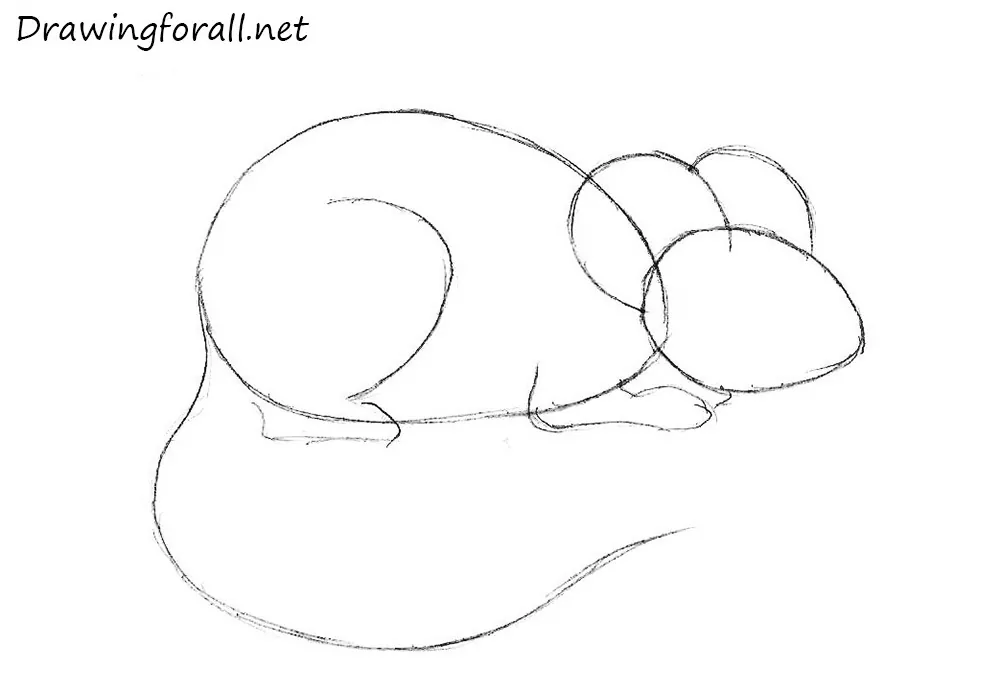
Draw the ears (they look like a pair of ellipses on the upper part of the mouse’s head), feet, and long, bent tail. Note, that the line of the tail is practically longer than the mouse’s body. By the way, if you like more complicated tutorials, we recommend our drawing lessons about how to draw Wolverine or how to draw Sub-Zero.
Step 3
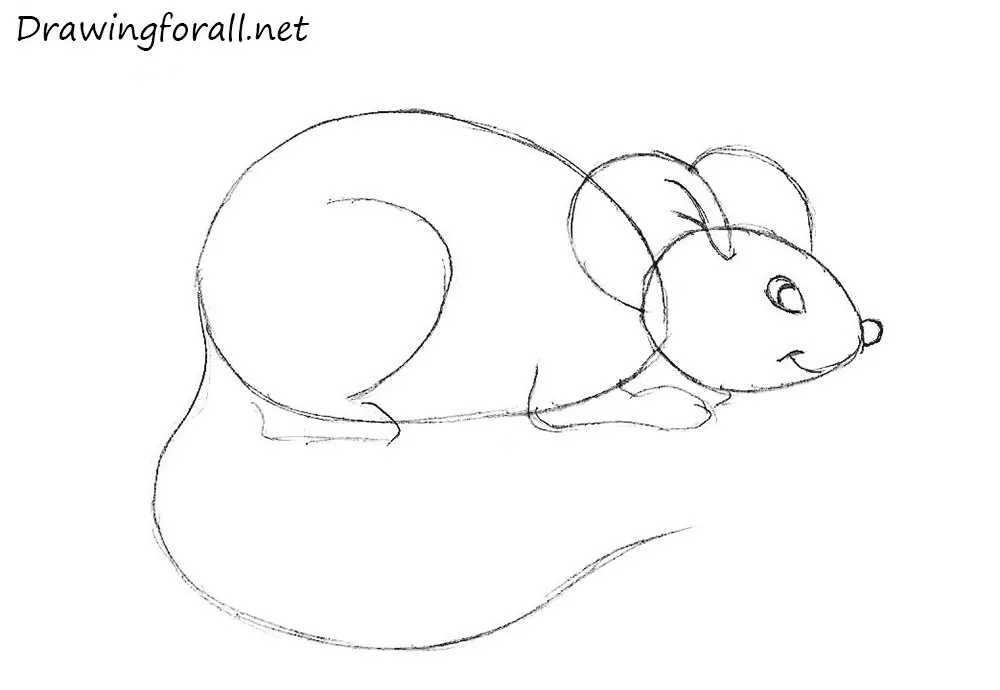
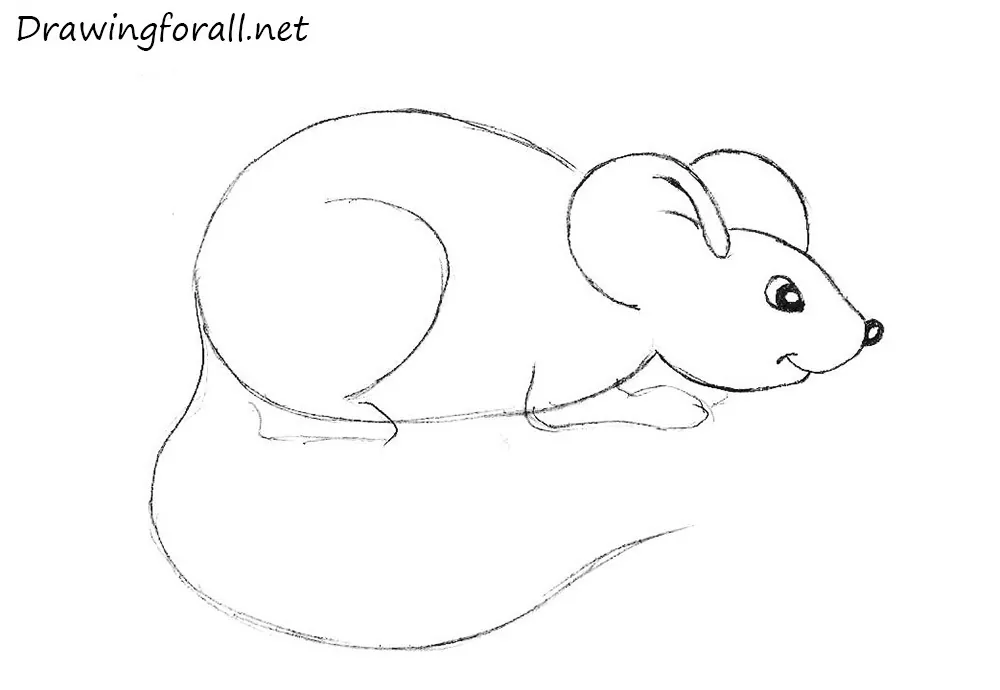
Ok, and we continue our tutorial about how to draw a mouse. Add details to the mouse’s head. Draw the eye (it should look like an oval). Sketch out the line of the ear, nose, and mouth using a curved line.
Step 4
Erase the unnecessary guidelines from the previous steps. Paint the eye and nose in black (like in Rolling Stone’s song). Don’t forget to keep unpainted glares. It’s a little detail, but details like this will make your art more realistic.
Step 5
Ok, now darken all the lines of our mouse. It must look pretty, like in our illustration. Using dark and smooth lines draw the tails of the mouse. You can try to make your mouse drawing more voluminous by adding shadows with hatching.

It was a tutorial about how to draw a mouse for beginners. We hope this drawing tutorial was interesting and informative for you. Share this tutorial with your friends and subscribe to us in social networks.




Awesome
Hi. Can I use this image in one of my research paper?
Yes, you can use it. And we will be very grateful if you specify the source of the image.
nice
It is so awesome thank you
hello
GOOD, BUT I WOULD LIKE FOR THEM TO PUT MORE INFORMATION ON DIFFERENT MOVEMENTS OF THE MOUSE. THANK YOU?