

How to Draw a Princess Dress
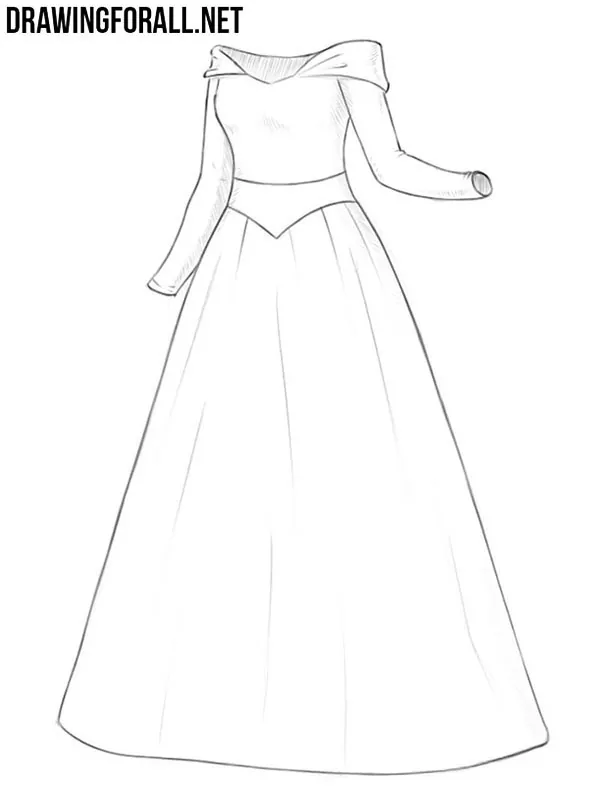
On the pages of Drawingforall.net, we have already shown you how to draw a princess, and here, continuing this subject, we decided to show you how to draw a princess dress.
We decided to create this tutorial on drawing a princess dress in a fairly realistic style, with all the necessary details and shadows.
How to draw a princess dress step by step
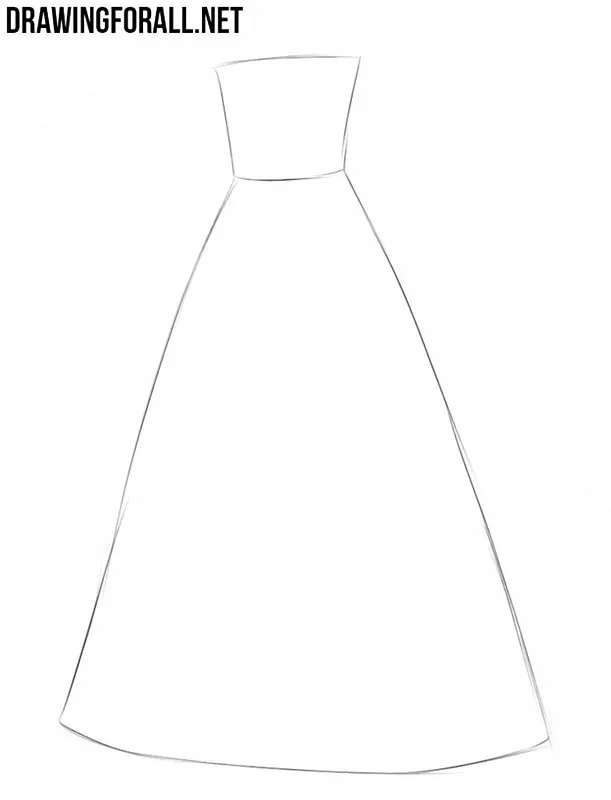
Step 1: Sketch the basic dress shapes
Begin drawing the princess dress with two very simple trapezoidal geometric shapes. The upper trapezoid covers the torso and expands upward, while the lower trapezoid covers the lower part of the body and expands greatly downward. Draw these shapes with light lines because they will only serve as the basis for the dress.
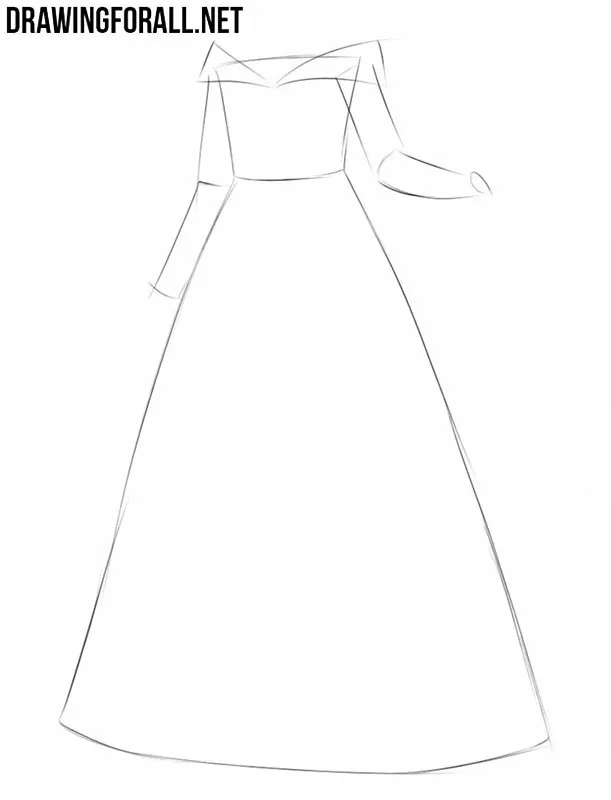
Step 2: Sketch the sleeves and collar
With the help of four simple cylinders, depict the sleeves of the gown. In the upper part, sketch the outlines of a wide collar lying on the princess’s shoulders. At this point, the basic sketch of the princess dress is complete. Starting from the next stage, we will actively depict the details using clear and dark lines.
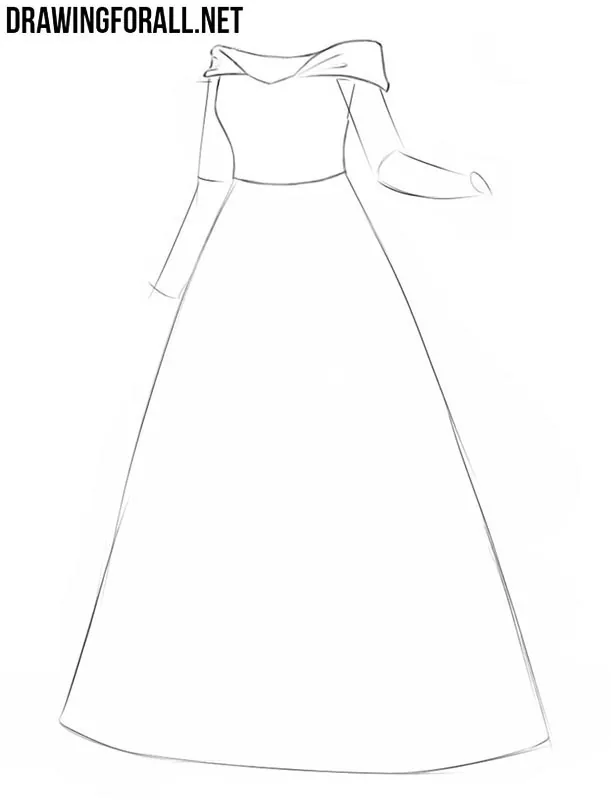
Step 3: Refine the upper dress
Let’s start depicting the details from the upper part of the princess dress. First of all, trace the wide collar and add the necessary folds to it. Next, draw the torso, taking into account the curves of the body under the dress. Clean up this part of the drawing by removing unnecessary lines with an eraser.
Step 4: Draw the flowing sleeves
This step will be as simple as the second stage. Using flowing lines, trace the arms, taking into account all the curves under the sleeves. Add the necessary folds around the elbows and sleeves. Then remove all unnecessary guidelines from the arms.
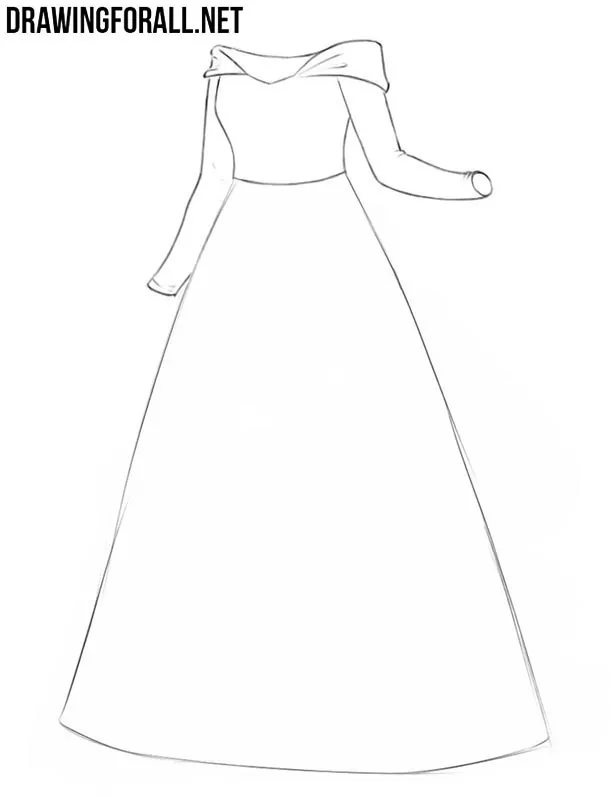
Step 5: Finish the long skirt
This stage will probably be the simplest in the tutorial on drawing a princess dress. With several long and smooth lines, trace the lower part of the gown and erase any remaining unwanted lines. Add a few long vertical folds running down the skirt. These folds will help show the shape and direction of the fabric.
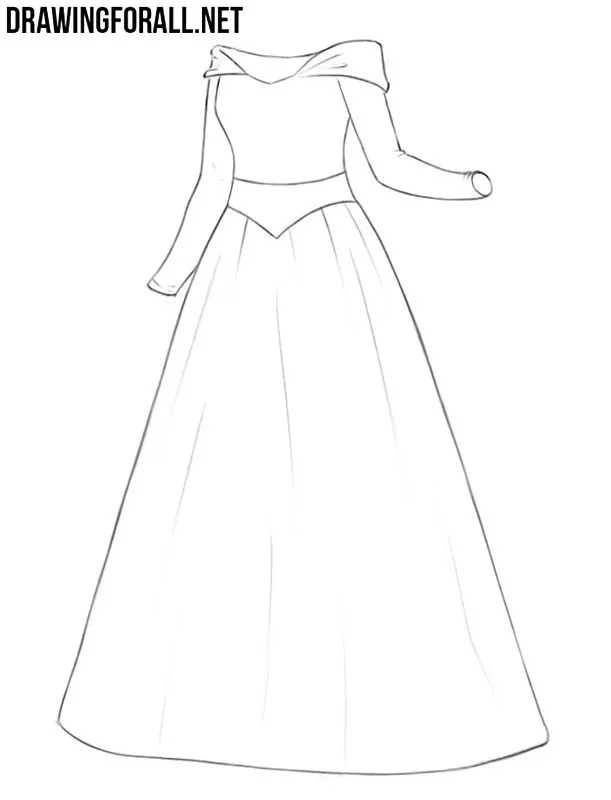
Step 6: Add shadows and hatching
Now let’s get to the shadows. They will help the princess dress look more dimensional and give the folds greater volume. Add shadows to the areas where the light falls less directly, using hatching. To make the dress drawing more contrasting, add a few more layers of hatching in the darkest areas.
Princess dresses can have very different shapes and details, so the version shown here is only one possible example.
Try changing the shape of the sleeves, make the skirt wider or narrower, or add some additional details, following the same sequence of steps.
For further practice, try to draw a prince, another character with characteristic royal clothing but a completely different appearance.
Or draw a chibi princess if you want to depict a similar character in a much simpler form.

this a good dress very understanding
Thank you.
easy way to draw dress
this is great but i would add the body too