How to Draw a Flashlight

This step-by-step lesson will show you how to draw a flashlight and teach you how to use basic geometric shapes in more complex drawings.
A flashlight essentially consists of several simple geometric shapes, primarily cylinders. So this lesson is largely based on our cylinder drawing lesson. These cylinders, varying in thickness and length, form the overall structure of the flashlight.
When drawing a flashlight, it is important not only to place the cylinders, but also to give them the correct proportions and position them accurately in space.
In this lesson, we will show you how to do all of this and how to add realistic volume using classical academic shading.
How to draw a flashlight step by step
Step 1: Sketch the front edge of the flashlight
Any cylinder has a circular cross-section, and a cylindrical flashlight is no exception. A circle, when viewed in perspective, appears as an oval. Therefore, draw the front part of the flashlight as an oval, using very light lines. In this step, you can determine the position and overall size of the flashlight on the sheet of paper.

Step 2: Form the front section
Now create the first cylinder, which forms the front part of the flashlight. It resembles a flat, wide disc. To do this, draw another oval slightly behind the one from the previous step, letting it overlap slightly. Then connect their side edges with two light lines to form a flat, wide cylinder.

Step 3: Draw the handle of the flashlight
The handle of the flashlight looks like a long, narrow cylinder attached to the front section. Draw two extended lines starting from the central part of the previous cylinder to form the body. At the far end, add a small oval to indicate the rear edge of the flashlight.

Step 4: Add the bulb and button
Starting from this step, gradually add the basic shapes in general forms, trying not to focus on small details yet. Begin with the front part and draw the light bulb inside the head of the flashlight. Then add thickness at the joint where the handle connects to the head. Slightly farther along the handle, draw a round button.

Step 5: Add thickness and details
Add thickness to the front edge of the flashlight by drawing the outline of the glass set slightly inside. Then draw lines on the head of the flashlight, following its rounded form. Refine the handle by making some of the edges slightly angled to give it a more realistic and authentic appearance.

Step 6: Draw the front of the flashlight in detail
Gradually begin finalizing your flashlight drawing by tracing the main lines and erasing any unnecessary construction sketches. Start with the head: remove excess lines that are no longer needed, then carefully redraw the shapes with cleaner, more finished contours. Check the proportions and make sure this part of the flashlight is correctly positioned in perspective.

Step 7: Trace the handle and body
Now carefully trace the handle of the flashlight, the button, and the remaining parts of the body, giving them smoother and more accurate contours. Erase all auxiliary lines and make sure that all parts of the flashlight align within the same perspective plane. Draw any additional details to the body of the flashlight if necessary.

Step 8: Add shading to the flashlight
To make the flashlight look dimensional and realistic, add shading by following the principles we discussed in our cylinder drawing lesson. Keep the light source in mind and begin applying hatching to the areas opposite the light, always considering the volume and form of each part and emphasizing them with deliberate strokes. You can also add subtle texture to the handle and other sections for greater authenticity. A few light strokes on the front area will help give it the appearance of realistic glass.

Any complex object is built, in one way or another, from simple geometric forms such as the cylinder, sphere, cube, and others.
In academic drawing, these geometric shapes are studied at the very beginning. As artists progress, they gradually learn to construct simple objects using these foundational forms.
This flashlight drawing lesson is one such simple but very important exercise for creating realistic objects that surround us.
For example, visit our phone drawing lesson to see how flat, cubic forms can create a recognizable image of an everyday device.
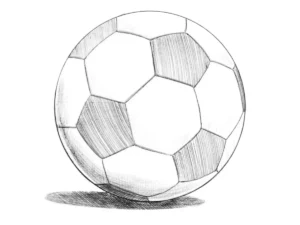
Or take a look at our ball drawing lesson to observe how a simple spherical form becomes a familiar object we encounter in daily life.
To improve your understanding of drawing a flashlight specifically, try depicting this object from different angles and using various approaches to perspective.
For example, you can draw it strictly from the side or from the back. Practicing these variations will not only deepen your understanding of the flashlight’s structure but also strengthen your fundamental knowledge of linear and atmospheric perspective.