

How to Draw an Attacking Dragon
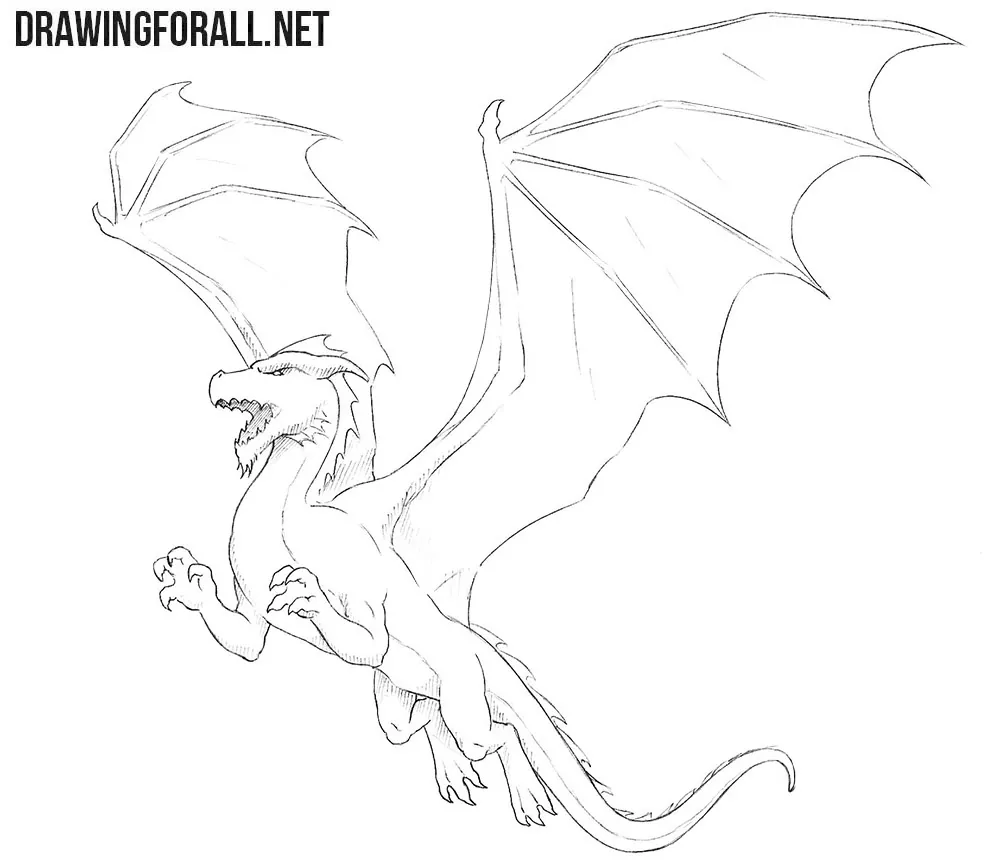
Here we will show you how to draw an attacking dragon as a continuation of our series on depicting these mythical monsters.
In our example, the dragon is in flight and ready to attack. Its wings are spread out to the sides, and its claws are ready to grab its prey. This tutorial largely follows our lesson on drawing a flying dragon but makes the pose more combative.
How to draw a dragon for beginners step by step
Step 1: Sketch the dragon skeleton
The first thing we need to do is outline the skeleton of the dragon. This is easy enough because we will use very simple lines. Start with the head, outlining it as an oval, and draw a long curved line for the spine. On this line, place the chest and pelvis. Make the chest the largest central mass and place the smaller pelvis farther along the same curve. Finish this step by sketching the arms and legs.
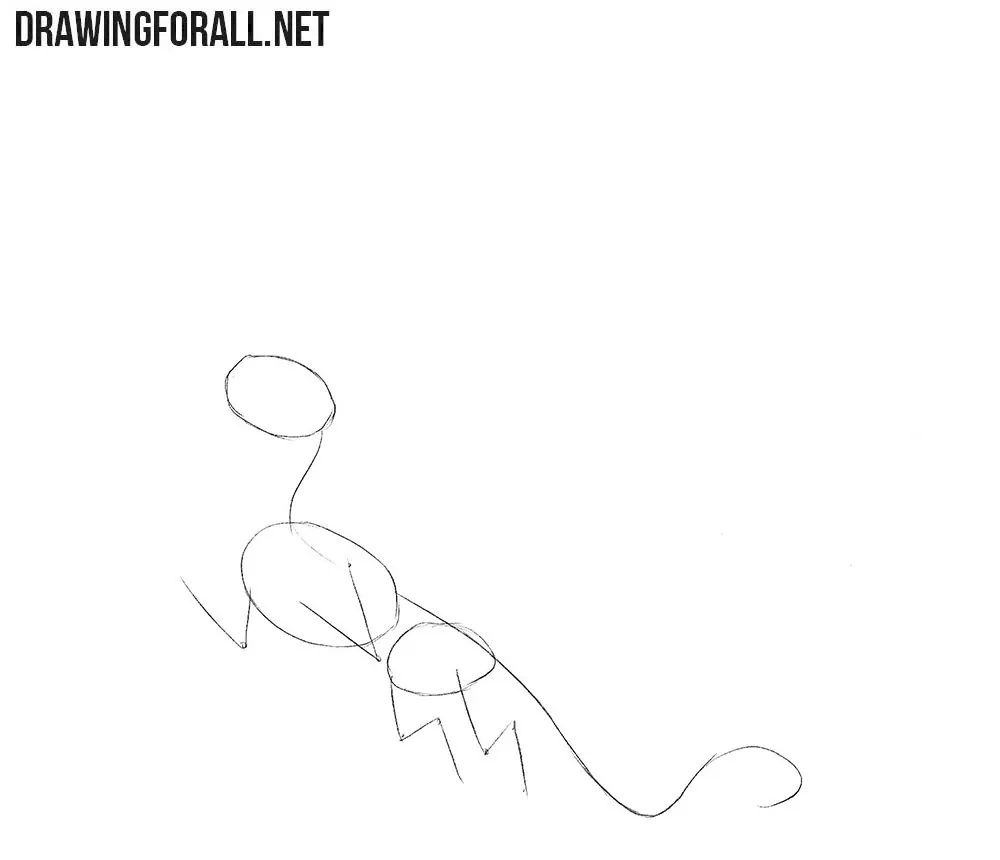
Step 2: Start building the dragon body
The dragon’s skeleton is done, and now we will add some volume. Start from the head, sketching the outlines of the wide-open mouth. Give the muzzle some length in front of the original head oval. Next, draw the curved neck, which flows into the torso and then into a long curved tail. Build the neck around the line from the previous step like a flexible cylindrical form.
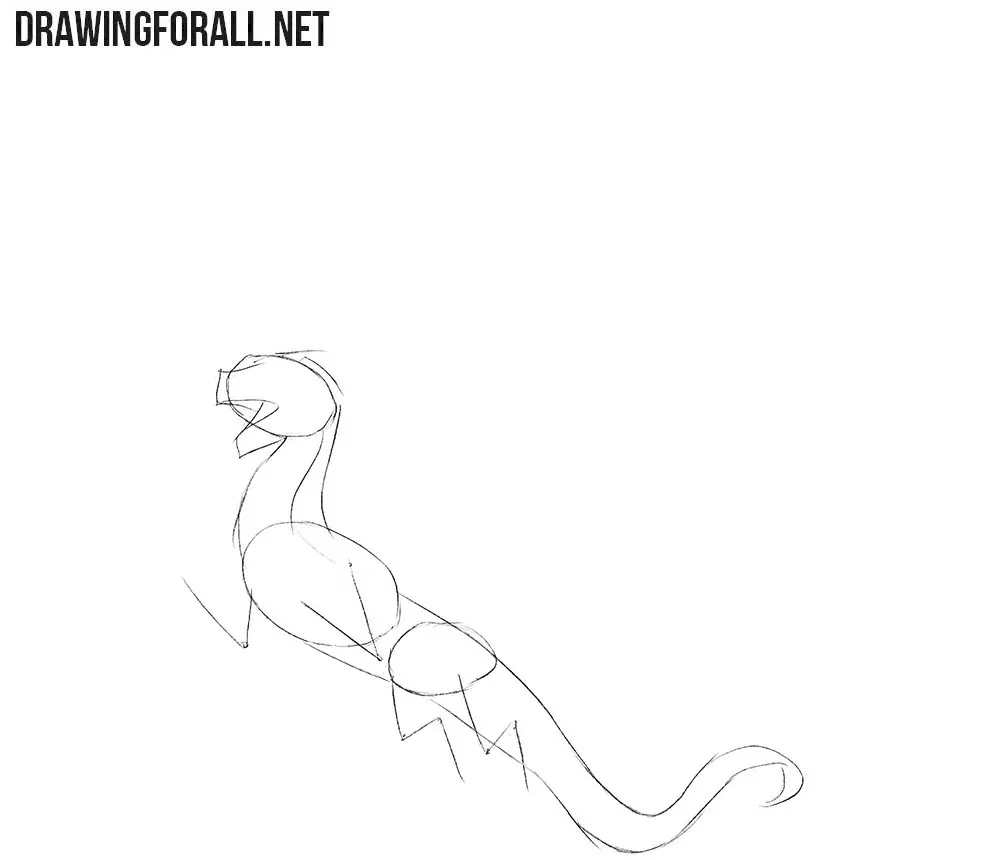
Step 3: Add the limbs and wings
With the help of simple geometric forms, sketch the arms and legs. Make the upper parts of the limbs thicker and gradually narrow them toward the feet. In the same step, outline the huge wings, which resemble bat wings. Start them from the upper part of the torso and use long lines to mark their main direction and span. Notice that the two wings are not shown at the same angle. The wing on the right side of the drawing is spread much wider, while the opposite wing is more compressed by perspective.
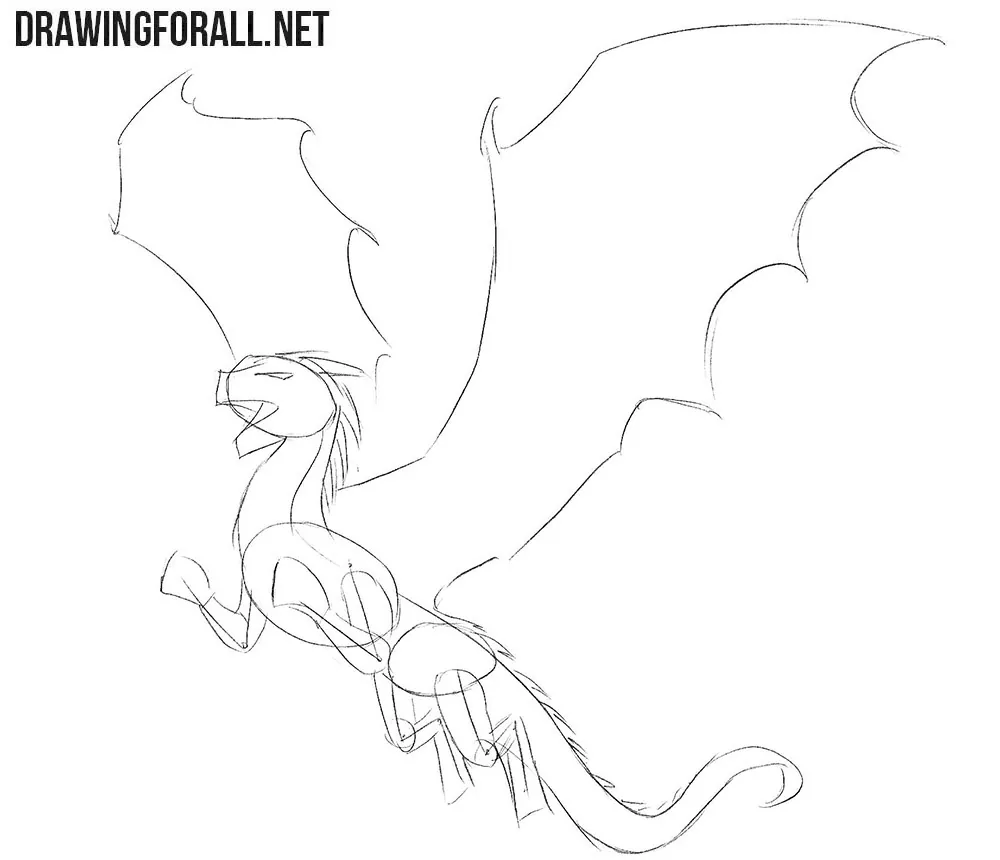
Step 4: Refine the dragon head
Starting from this step, work with the final details. With clear, dark lines, carefully draw the dragon’s face with a wide-open mouth full of sharp teeth. Place the teeth along both jaws and make them different in size. In the same step, draw the dragon eye and the spikes on the head. Refine the nostril and the contours around the eye and mouth. Remove the unnecessary guidelines from the head.
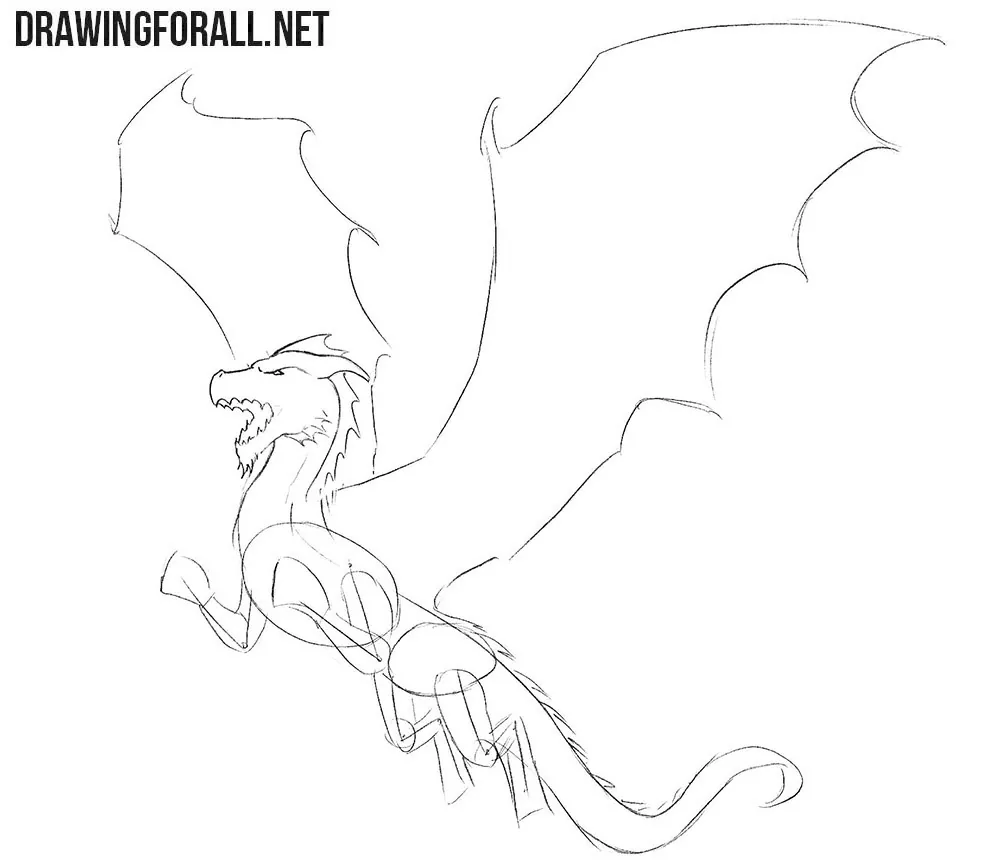
Step 5: Draw the dragon’s neck and arms
Continuing the lines of the head, carefully draw the neck, which smoothly passes into the upper part of the body. Keep the neck noticeably thicker near the torso and preserve its curve from the previous steps. Next, trace the arms with sharp claws. Make the upper arms heavier near the shoulders and narrow the forms as they approach the wrists. Make the fingers long and curved, with the claws continuing their direction.
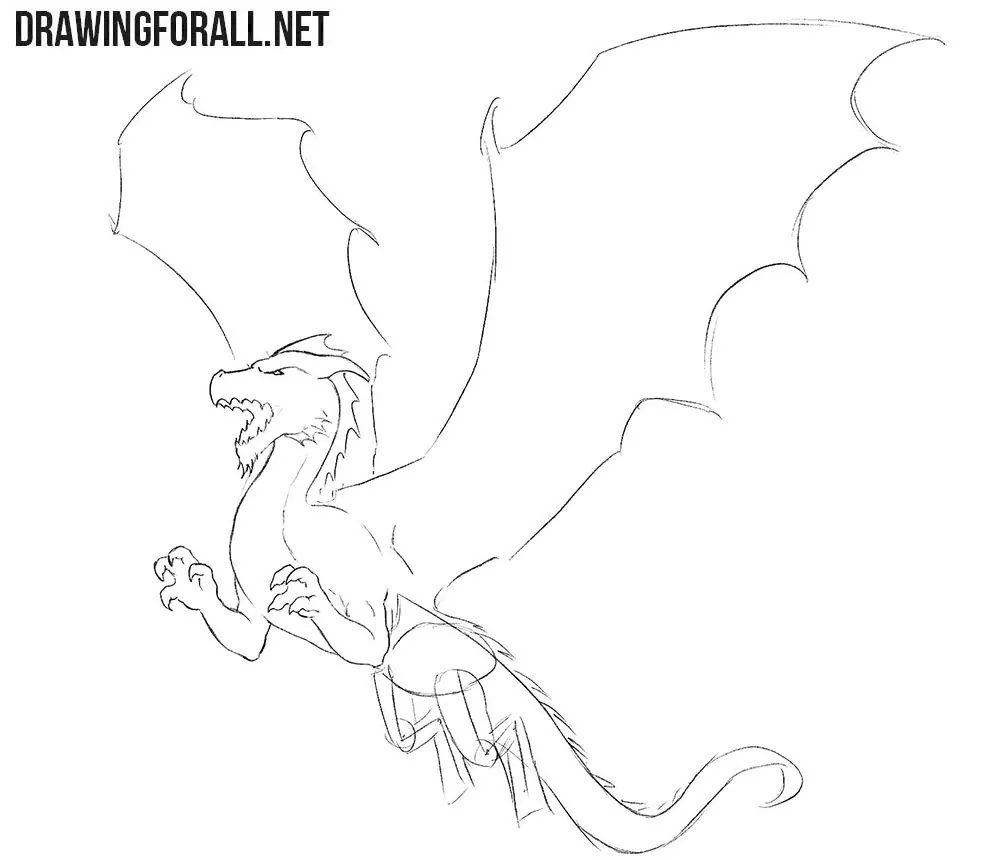
Step 6: Detail the dragon’s legs and tail
Now, continuing the lines of the upper body, carefully draw the lower part of the body and the legs with long, sharp claws. The hind legs should look more massive than the front ones, especially in their upper parts. Next, draw the long curved tail. Along the upper side of the tail, draw spikes that continue the row from the neck. Make them gradually smaller as they approach the end of the tail. Remove the unnecessary guidelines before moving on.
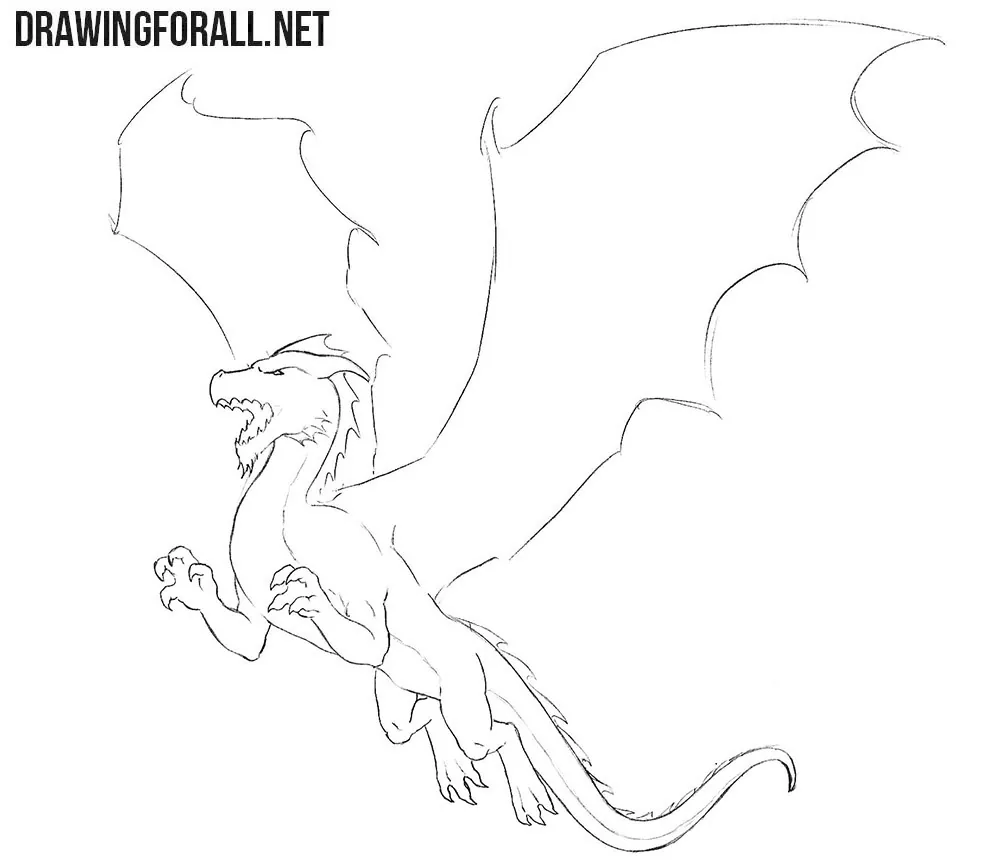
Step 7: Refine the dragon wings
Carefully draw the long wing bones, joints, small claws, and the membranes stretched between them. First, using the construction lines indicated earlier as a guide, draw the upper edges of the wings in detail, gradually erasing the construction lines. Next, draw the long wing fingers and the lower edge of the membrane stretched between them.
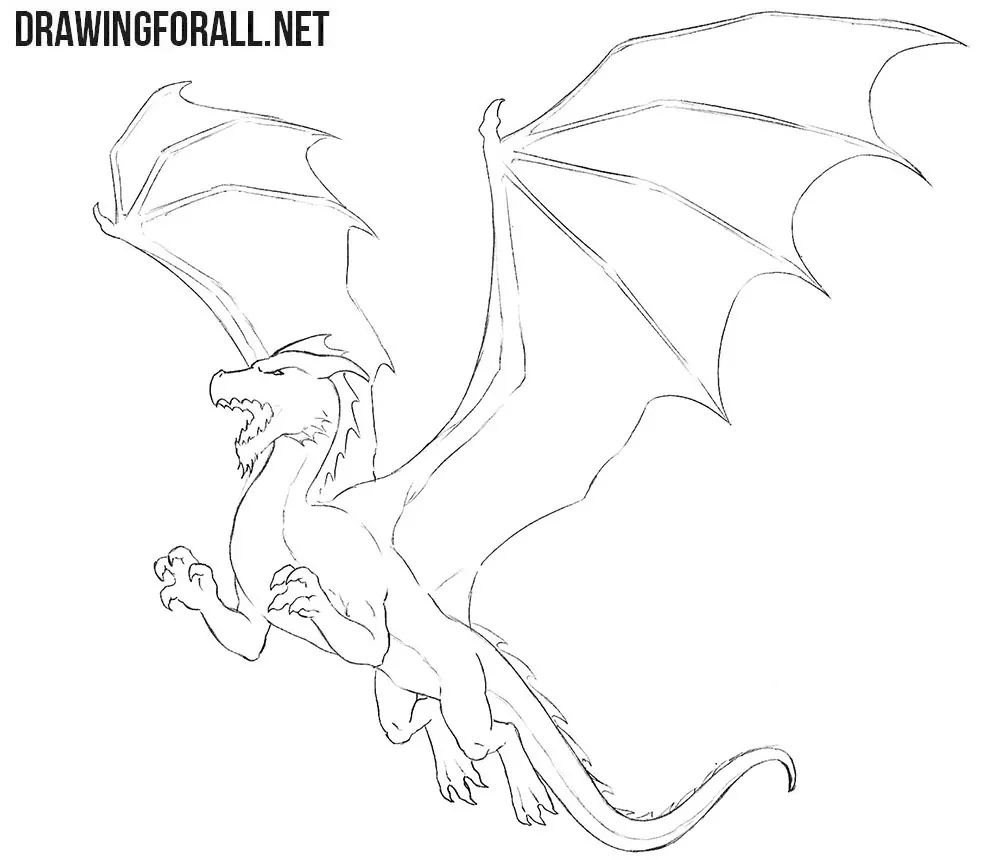
Step 8: Add shadows to the dragon
You can leave your dragon drawing as it was in the previous step or add some shadows. First, determine the light source; here it comes from above. After that, add shadows with hatching to the areas of the dragon that receive less light. Place the most noticeable shadows beneath the head and neck, on the underside of the torso, and on the lower parts of the limbs.
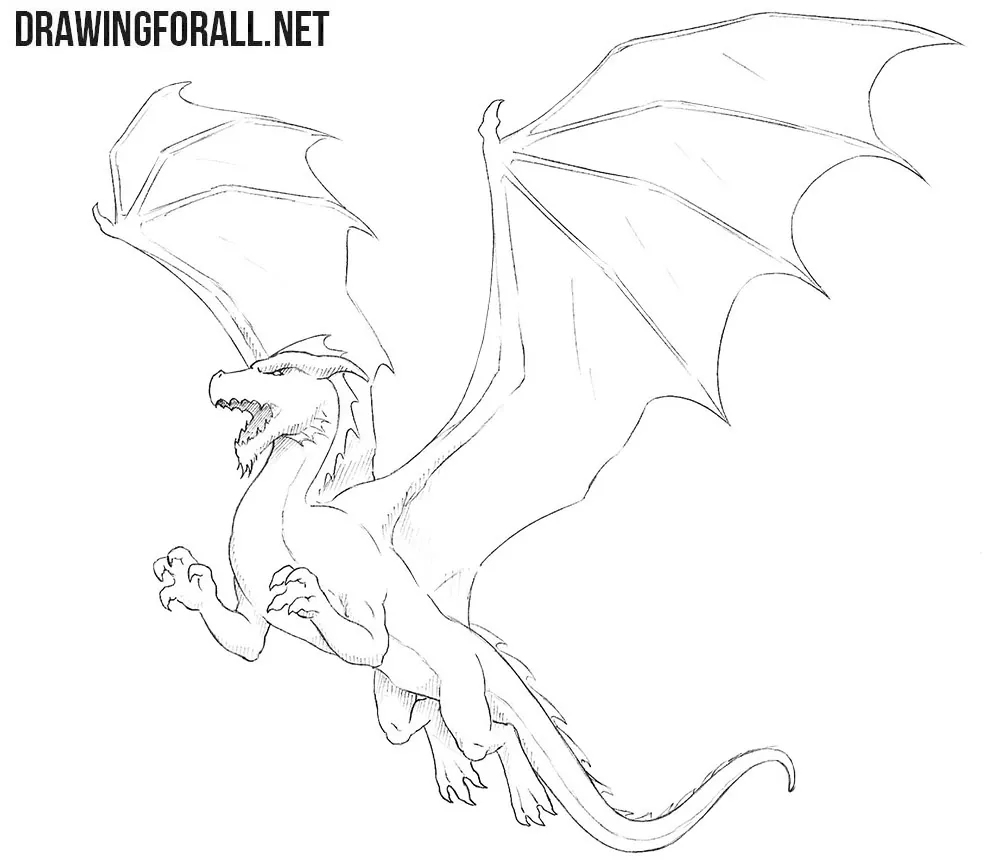
This tutorial fully follows our basic principles of drawing a dragon but shows how to depict this mythical monster in a dynamic pose.
You can also modify this dynamic pose slightly. For example, you can draw the dragon breathing fire or change the position of its limbs. You can also try changing the viewing angle by drawing the dragon from the side in an attacking pose. For this, you can use references or your own imagination.
Here we used the image of a European dragon with four limbs and wings, which we showed in our Western dragon drawing tutoria.
Dragons from other parts of the world can look quite different, so the drawing process will also be slightly different. For example, to draw a Chinese dragon in an attacking pose, you would need to remove the wings, make the limbs noticeably shorter, and make the body and tail much longer.


Hiii I Thought That This Was So Easy And Fun
Thank You!
I think so too.
I so agree
this is a good drawing
It was hard to make the wings, so I think you should make the skeleton of the wings, or maybe that is just me.
yeah
Drawing the hands made me rage quite multiple times
Making the legs makes me fell alive
THis is STUPID…………
just kidding its awesone
just here to say that this kinda looks a bit traced
since the same image is in the for the Red DragonMonster Manuel for Dungeons and Dragons (5th editon)
some of them are probably traced
omg, you’re right-
I was gonna say the same
can we get a hipogriff or a griffin plx
I am 11years old and I have been looking for a website just like this.
And the only problem is all the details you put in.I like that you put in a lot of details but I think its a bit hard for beginners.I love all kinds of dragons and I would like it if ypu mad ethis a bit easier.
Its easy im 11 and coming along just fine on this
hipogriff
thank you for making this it is very helpful
DRAGONS ARE NOT MONSTERS! THEIR MAJESTICAL CREATURES! At least to me, they are. BUT YOU STILL SHOULDN’T CALL THEM MONSTERS! 👿👿👿👿👿👿👿👿👿👿👿👿👿👿👿👿
I completely agree
Just chill 😑
It was very nice though. Stop Arguing. This is createing a new sense. Pls. I likes the dragon a lot
Chill, bro.
Thank u. This helps with me learning the structure of a dragon 10/10
Thank u. This helps with me learning the structure of a dragon 10/10. I have been looking for websites like this
I think that this was very fun and was a great idea to make it step by step.
I am only 11 years old and at first I thought this was going to be extremely difficult, but once I tried, it was just plain easy and fun. So thank you.
I think (In my opinion, I am not trying to change yours) that if any creature or being is evil and cruel, should be considered a monster.
chill
i like cheese…
This is excellent! I can’t draw worth a darn, but i was able to draw this dragon easily using your step-by-step method using just a regular Number 2 pencil. I then colored in the outlines with colored pencils.
I highly recommend this lesson for anyone who wants to learn to draw dragons! I will need more practice, especially drawing the talons, knees and elbows, but I got the essentials right. Soon, i will be able to illustrate my own dragon stories!
Thanks
it was good besides the hands being a struggle.
I Really Love Dragons
I think this is Fun
Nice
Bruh,
The “some” in the 8th step, second sentence is spelled spme so please correct it.
And also nice dragon, I liked it
This was fun to draw and easy! Thank you for making this!
Omg i hate touch screens I love this dragon through. Slay all day.
Omg I love this dragon
this looks good and very easy
it was super cool and easy
this is so cool and easy