How to Draw Perspective
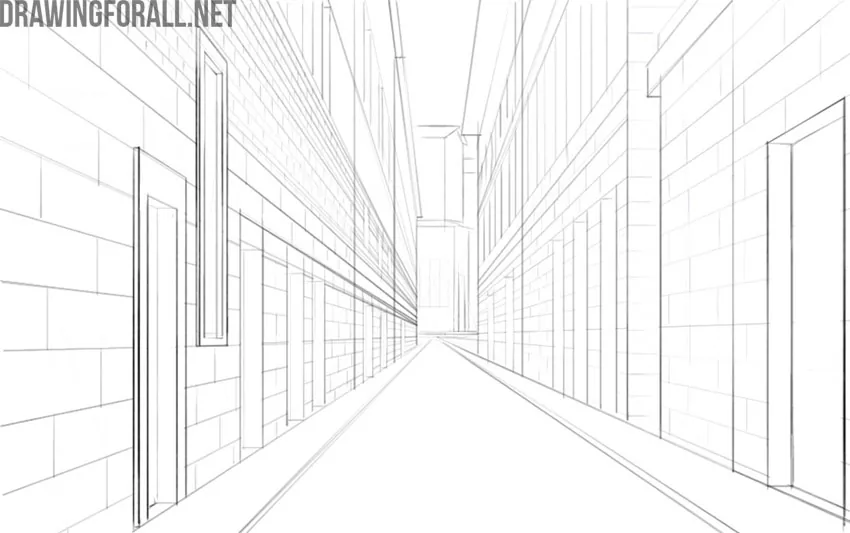
Knowing how to draw perspective is one of the most important skills for any artist.
This skill helps to depict not only simple geometric shapes and buildings but also people because all objects obey the laws of perspective.
In this tutorial, we will show you how to draw perspective using a city street as an example. Here we will take a practical look at how to draw one-point perspective.
How to draw perspective step by step
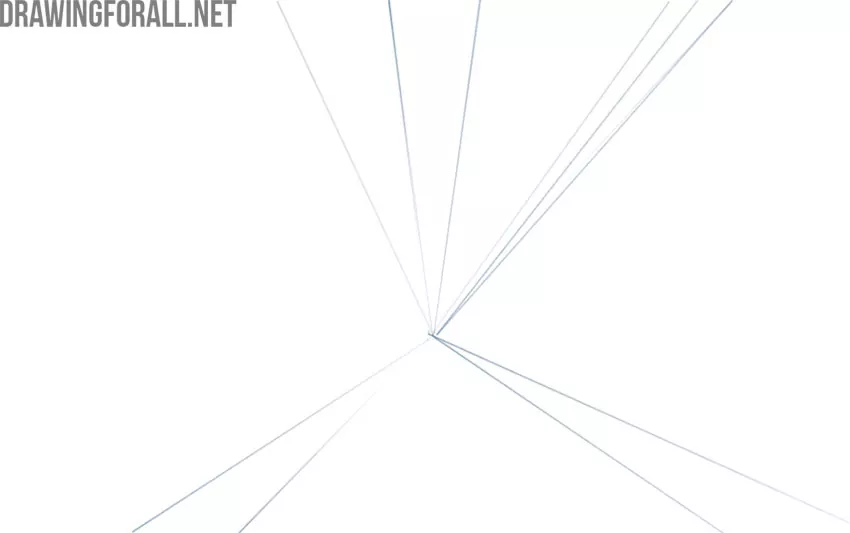
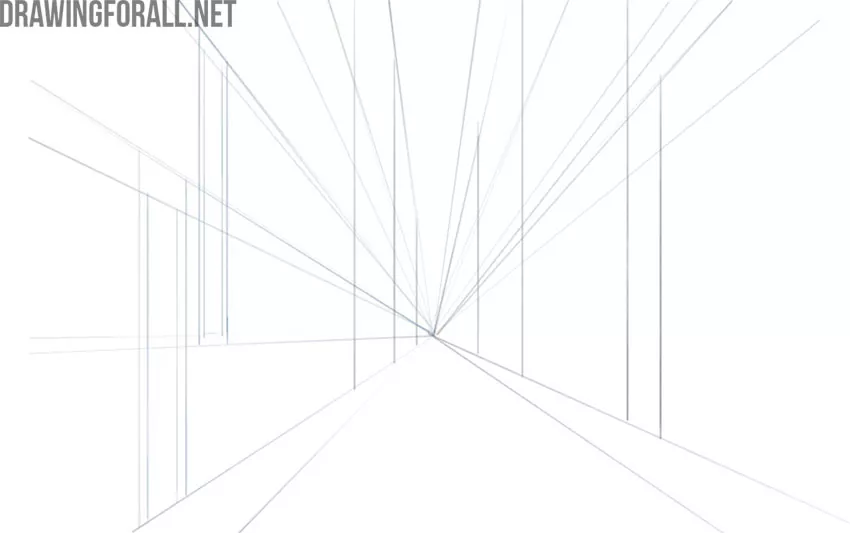
Step 1: Mark the vanishing point
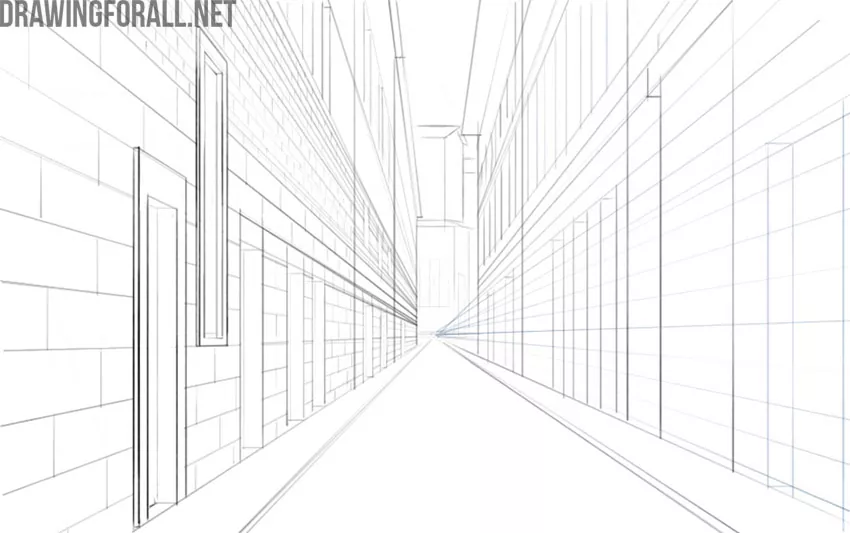
First, draw lines that converge at a vanishing point. The upper lines mark the top edges of the buildings, while the lower lines mark the bottom edges of the buildings and the sidewalks.
Step 2: Outline the buildings
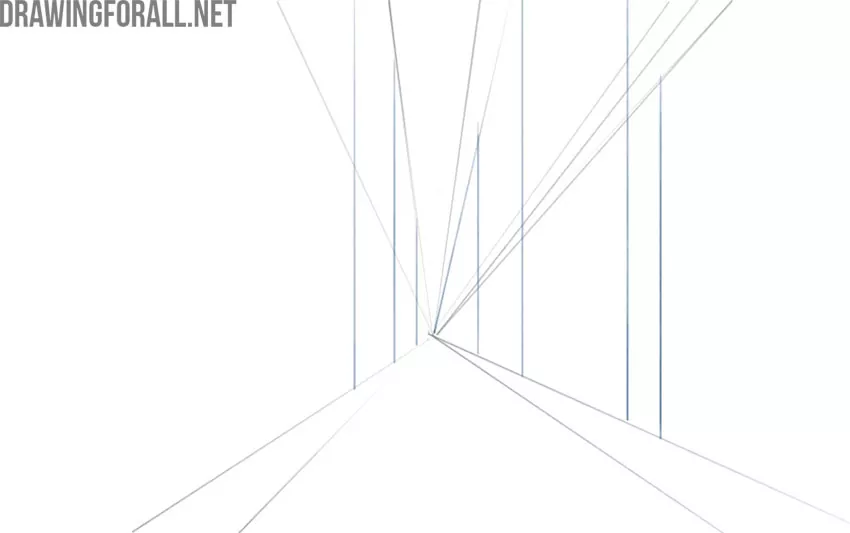
Now use a few vertical lines to outline the boundaries of the buildings. We recommend drawing without a ruler to train your ability to draw straight lines.
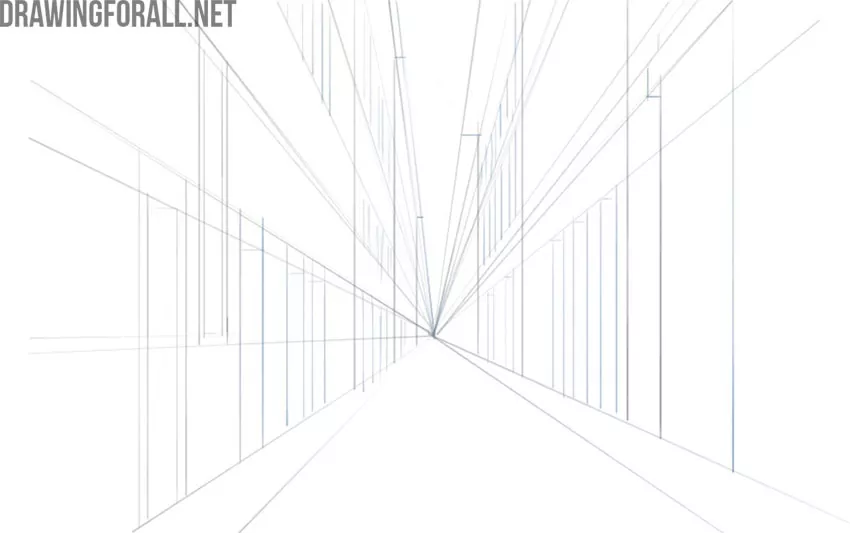
Step 3: Draw the nearest details
Using the same straight vertical lines, draw the door and window in the foreground. Keep these foreground details darker and more contrasting than the distant ones.
Step 4: Add distant doors and windows
In the same way, draw the rest of the doors and windows. As these details move farther away, they should become smaller and lighter.
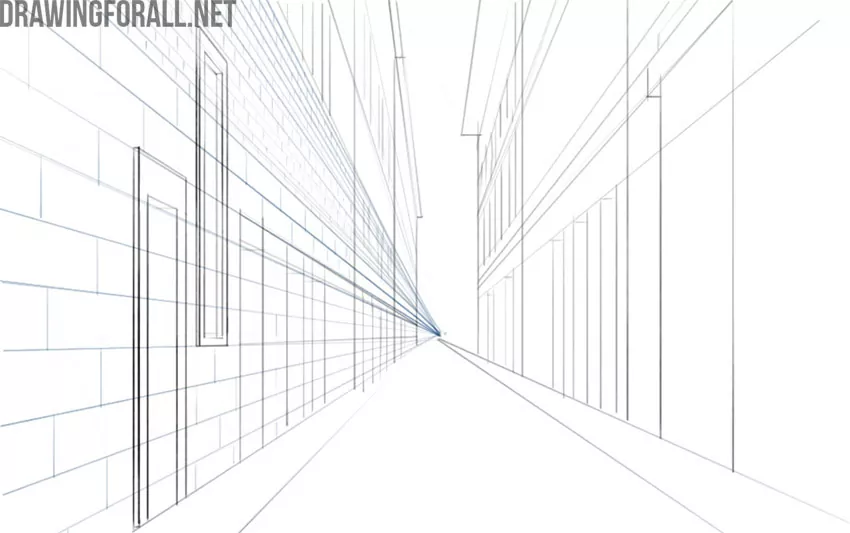
Step 5: Draw the brickwork
Using a series of lines, draw the brickwork on the building. Make the bricks smaller and lighter as they recede into the distance.
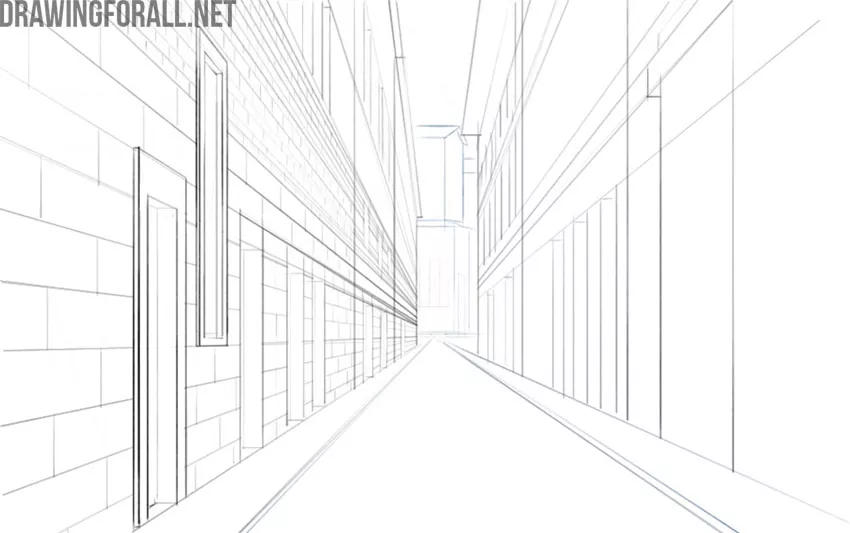
Step 6: Add the distant buildings
Add a couple of lines to the sidewalks to give them volume. Draw the buildings in the center of the composition. They should be very light and have little detail.
Step 7: Detail the right side
Now move on to the right half of the street. Use long lines that converge at the vanishing point to draw the brickwork. Also draw the door in the foreground.
Step 8: Finish the perspective drawing
Erase the construction lines and make the foreground darker and more contrasting. Add the necessary finishing touches to make the drawing clean and complete. You can add shadows to the drawing or colors to make the forms more convincing.
In this tutorial, we showed you how to draw perspective using a narrow European street as an example. Using the knowledge gained in this guide, you can depict other exteriors, interiors, or objects with correct perspective.
The basic principle of perspective remains the same. Imaginary lines visually converge at a single point, and this applies to any object in three-dimensional space.
We cover this principle in more depth in our basic drawing course, where we also explain how to apply it and similar principles when drawing the human figure and the surrounding world.
To truly learn to draw well, you need to practice regularly and draw for at least half an hour every day. For example, you can go outside and use the knowledge gained in this article to draw your surroundings.