How to Draw Yoda Step by Step
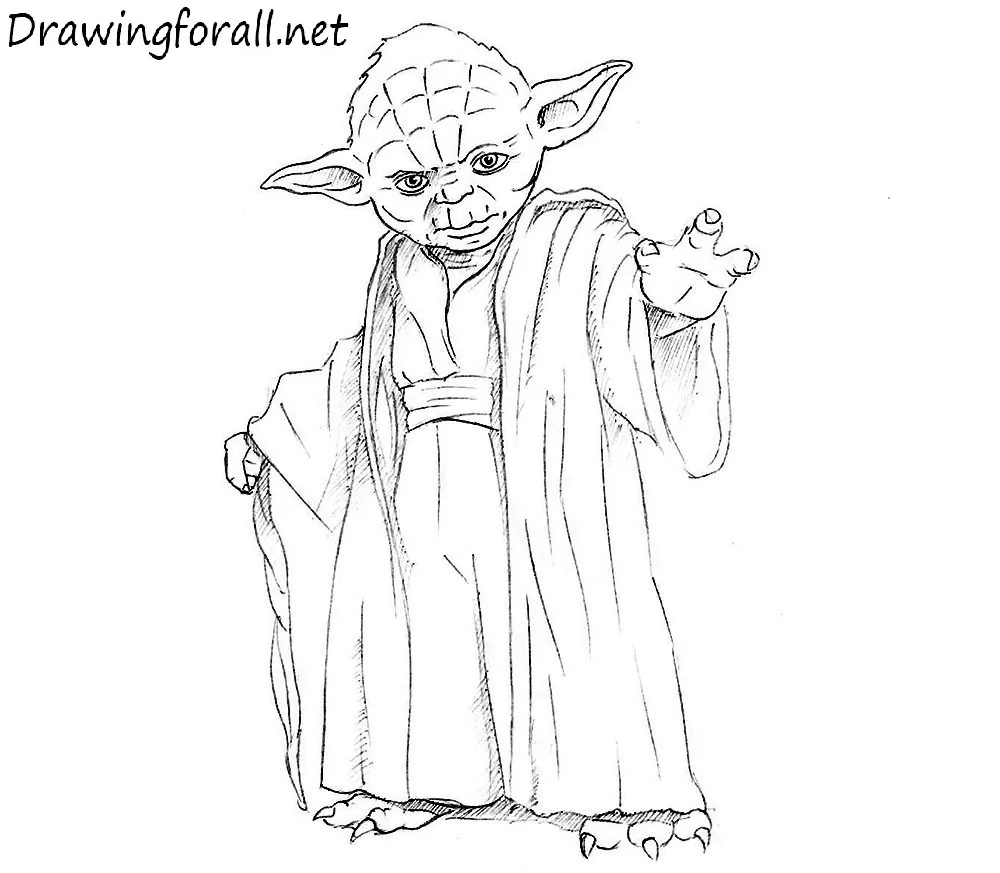
Hi! Today we present a new drawing lesson for fans of Star Wars. We hope it is really good news for every lover of Jedi Knights, because the theme of our lesson is how to draw Master Yoda step by step. It’s really not an easy task to say some words about Master Yoda’s story. George Lucas, the creator of the Star Wars universe, banned to tell or reflect in subsequent films any facts about Yoda’s youth or his parents or another facts from the past days.
Step 1
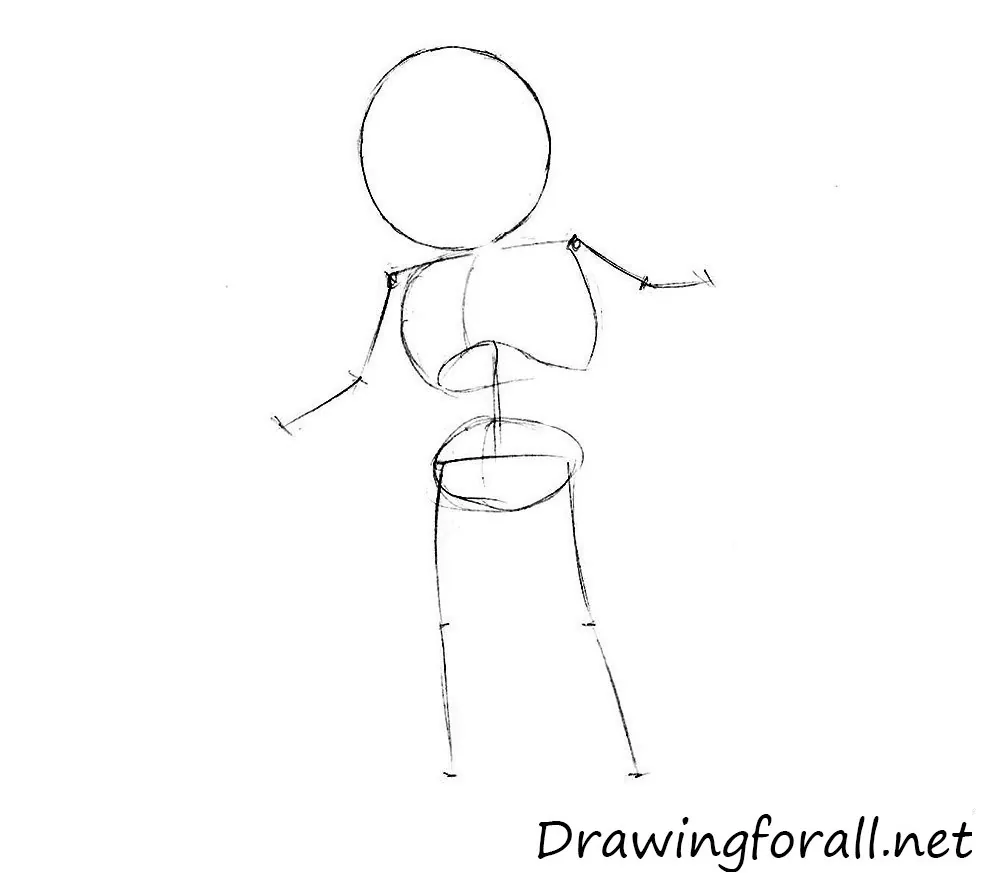
Using circles and sticks draw the stickman. The head is very big, ecpecialy in comparison with the body. The chest and the pelvis have practically the same width. As you can see, our stickman has no neck.
Step 2
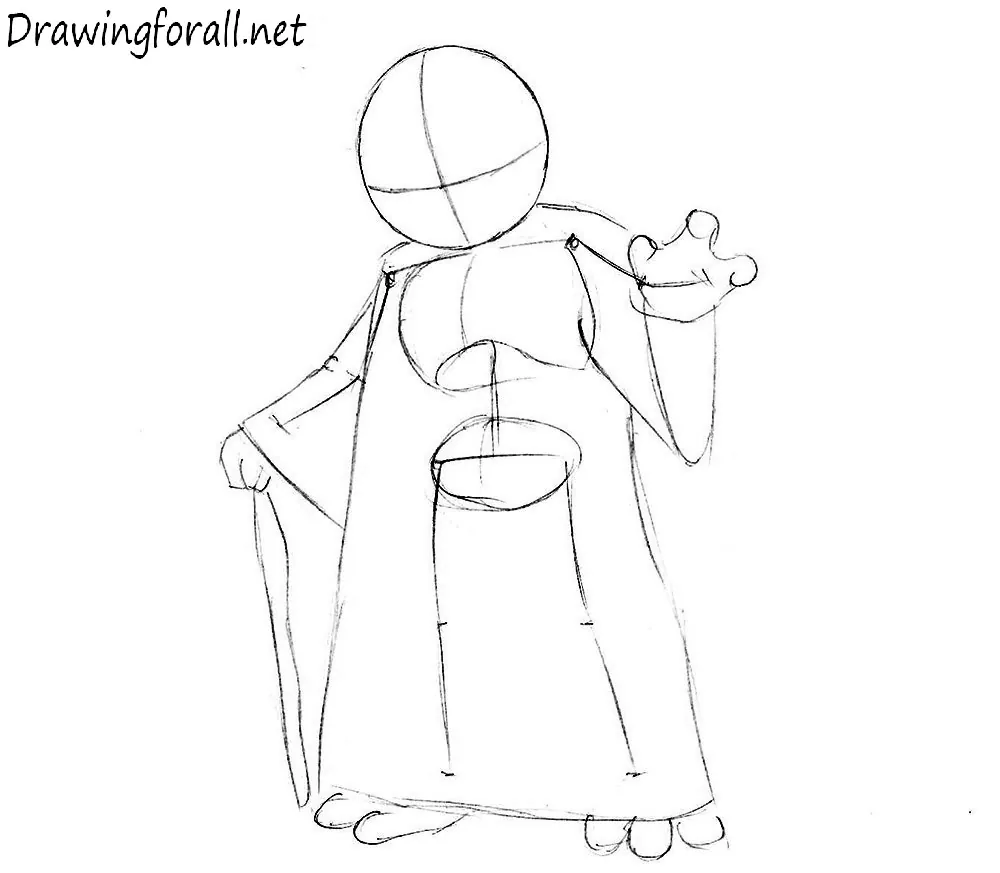
Ok, if you are sure that you drawn good stickman, you may start this step. Let’s draw the contours of the mantle. This part of the vestments have a little narrowing around the waist (only the right side of us). Using the smooth curve lines draw paws. Don’t forget the wooden stick. It’s funny that master Yoda can’t walk withiot a stick, but he can throw away this stick and kill a lot of clones or droids if necessary.
Another action of this step is drawing face lines like in our example.
Step 3
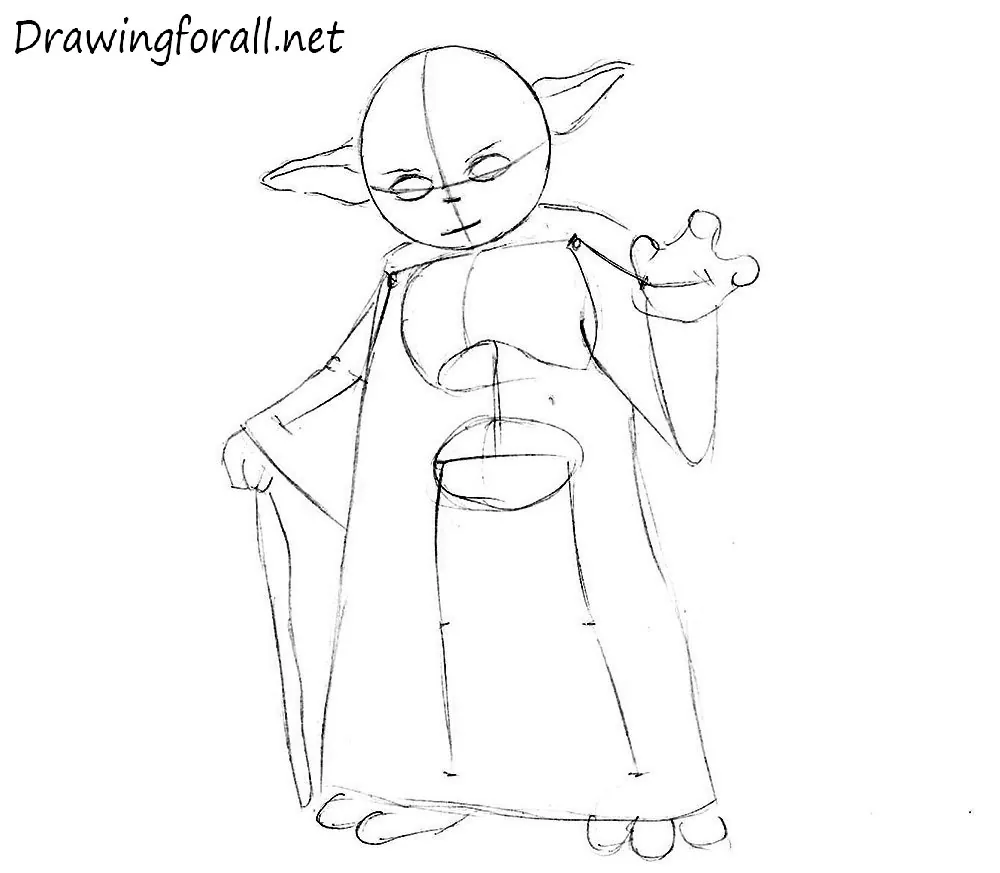
This step will be really easy. Using face lines from the previos step draw the facial features. As you can see, there are almond-shaped eyes and pointed ears sticking out horizontally.
Step 4
Ok, now you have practically prepared sketch. Let’s detail it (in this step – face). First erase unnecessary lines from previous step. After that, draw the contours of the lips, eyes and lips. Don’t forget about lines inside the ears.
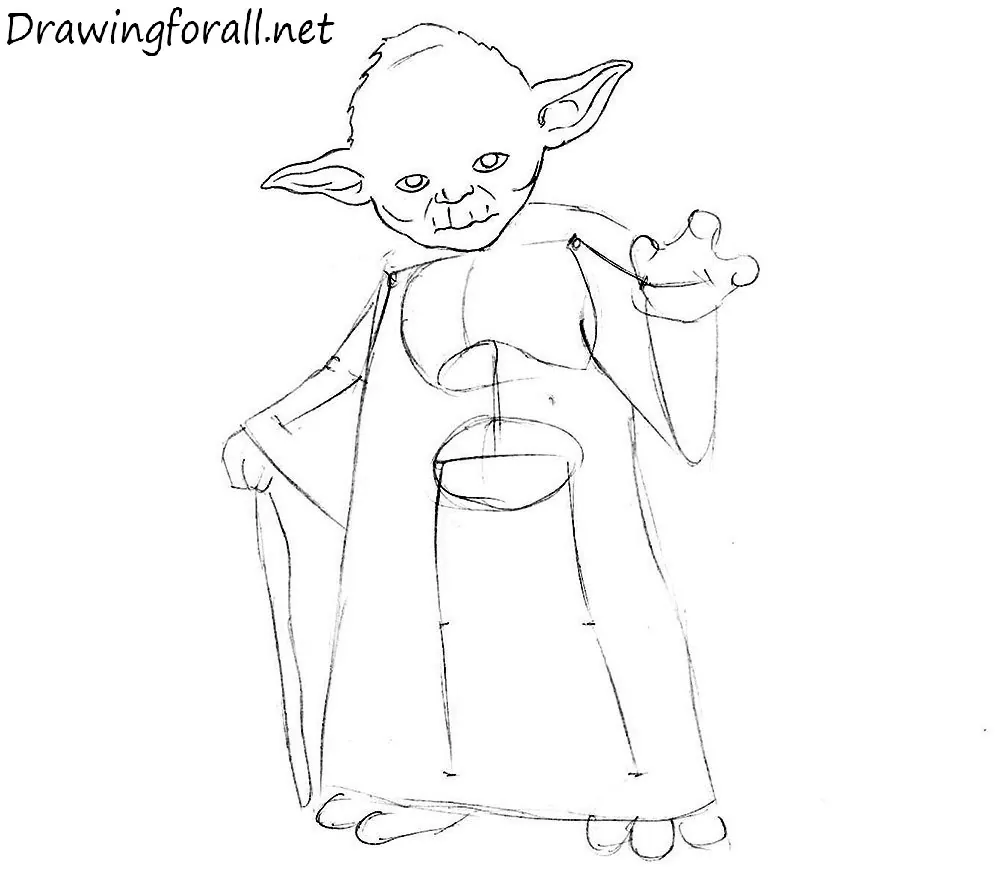
Step 5
Let’s draw the wrinkles of our character. Wrinkles in the forehead really look like the web on the Spider-Man’s mask. Don’t forget about wrinkles between the eyes.
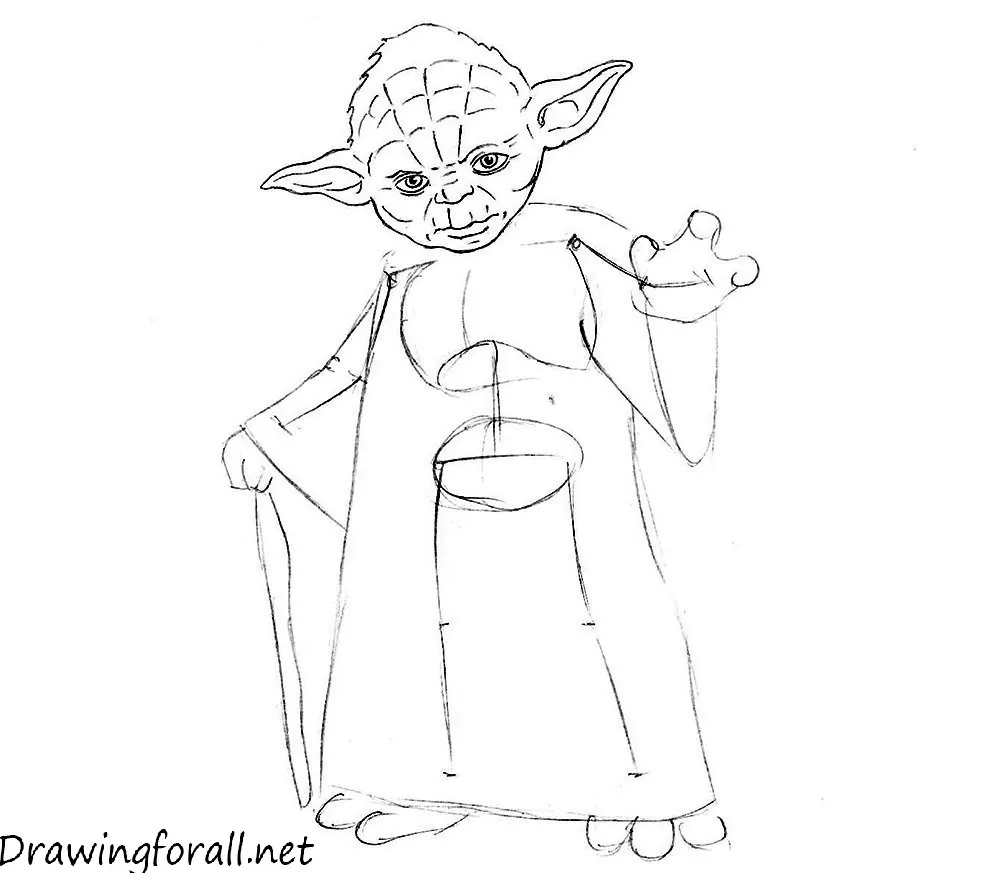
Step 6
Now draw the folds of fabric. When you look at the robe of the Jedi masters, you see a large number of folds of fabric. That’s why we marked in red lines you should draw in this step.
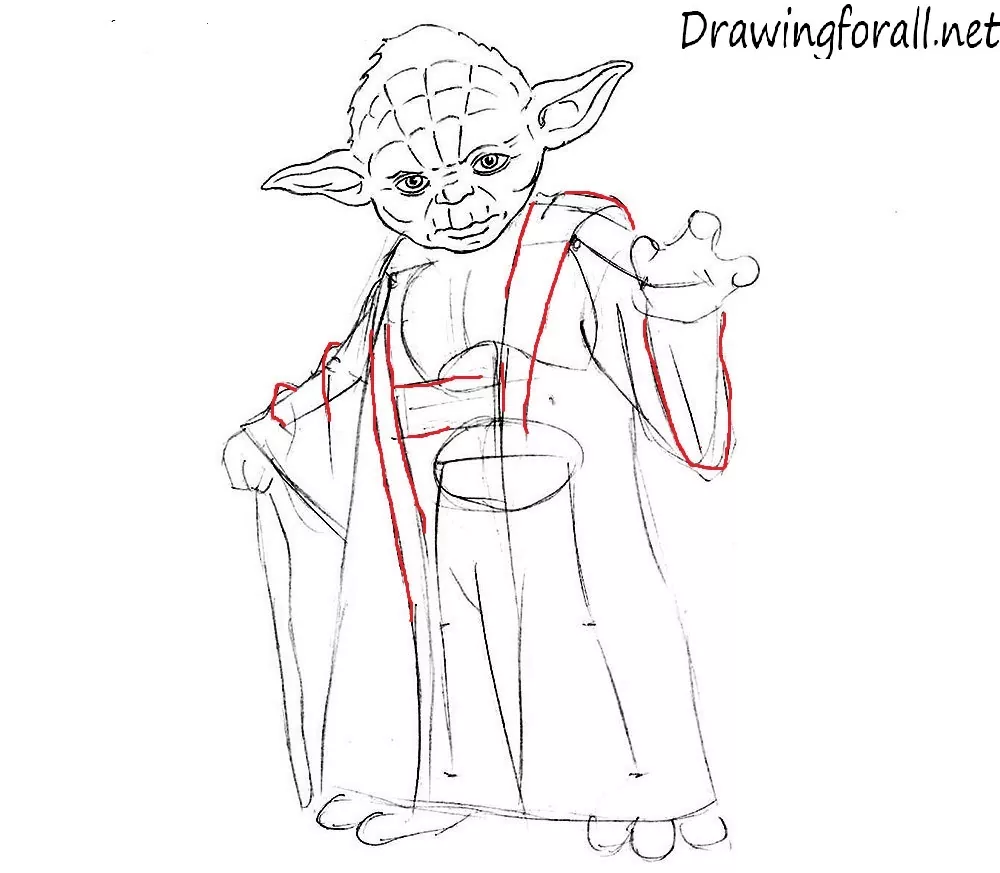
And without red marked lines:
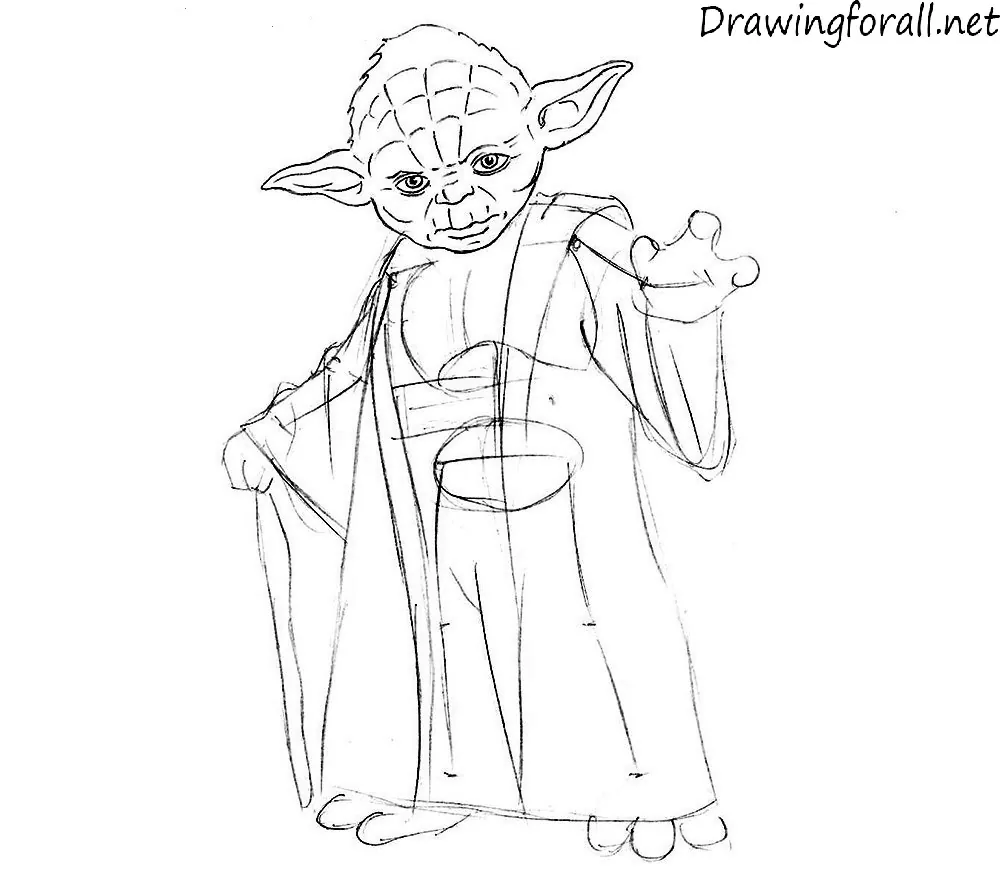
Step 7
Continue to draw the contours of the mantle and the folds of fabric. But first you should erase all remaining lines from stickmen and unnecessary lines from the previous steps to get this:
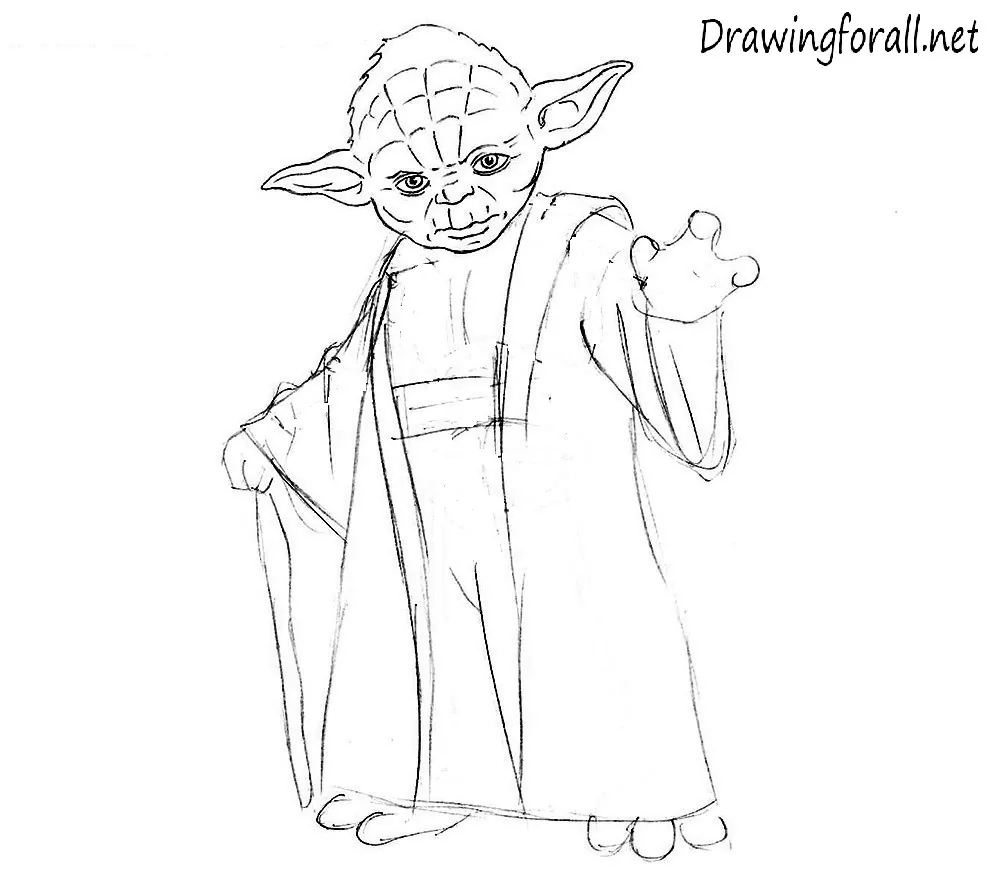
After that you should draw the remaining folds. The final result of this step:
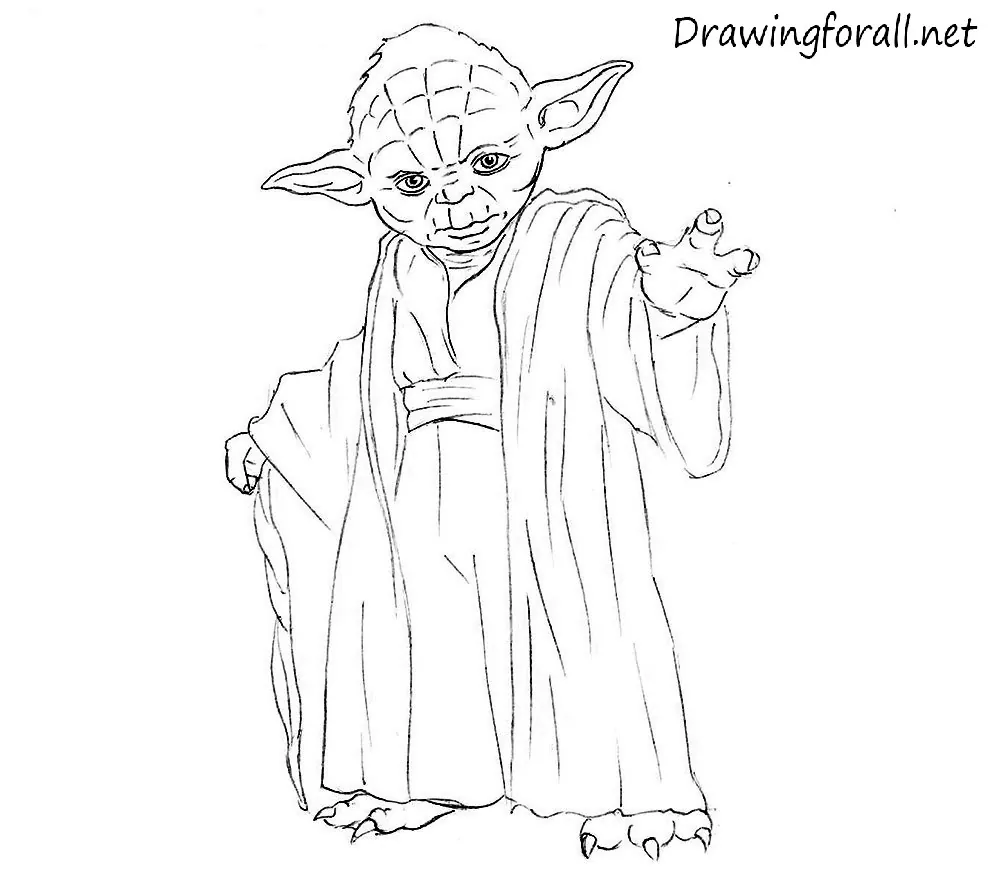
Step 8
Ok, now we have practically completed picture. The last step is working with the shadows.


nice love the wibsites
hiiiiiiiiiiiiiiiiiiiii love the vids
sorry i sleepy
May the force be with you!
should have obi wan