

How to Draw The Mandalorian
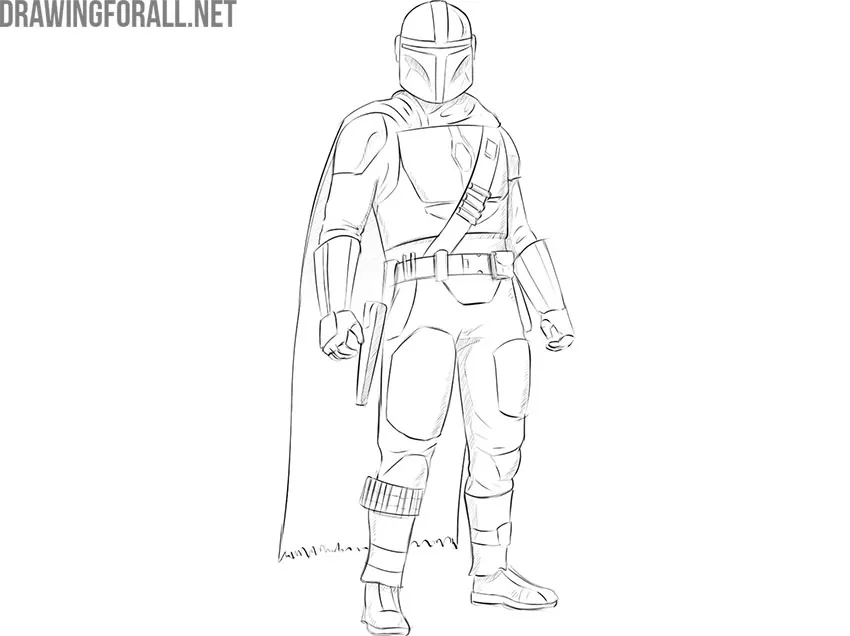
Here we continue with the theme of mercenaries from the Star Wars universe with a tutorial on how to draw the Mandalorian.
How to draw the Mandalorian step by step
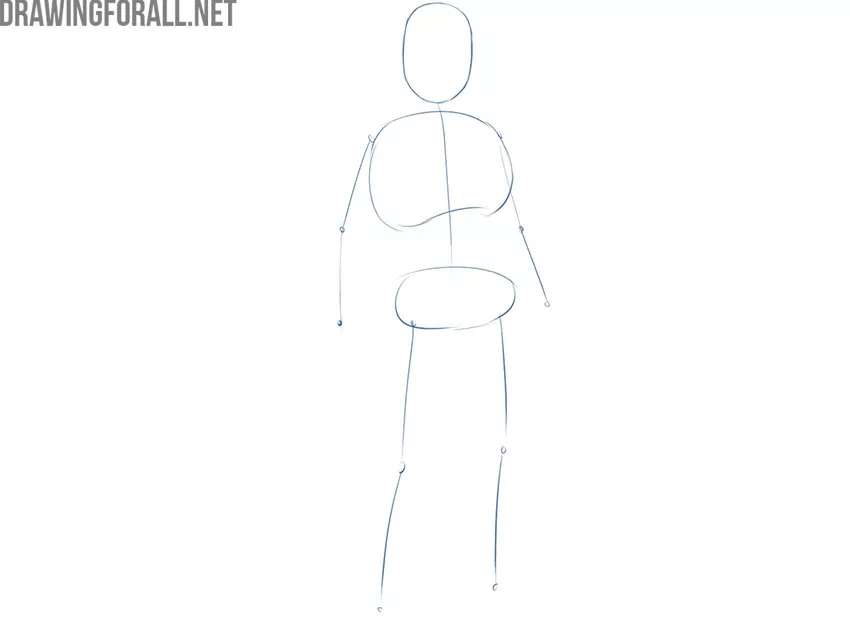
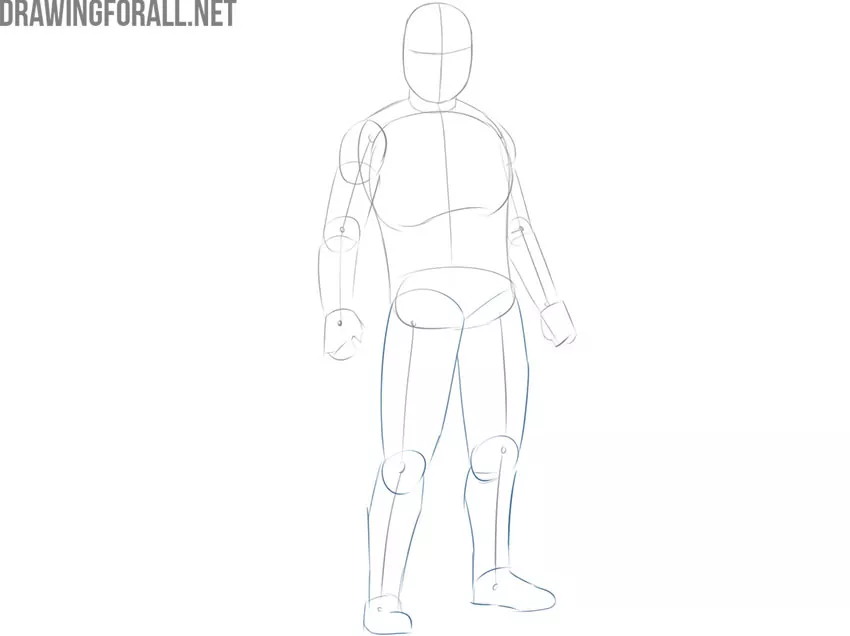
Step 1: Sketch the character’s pose
This is a simple figure made of sticks and circles that helps us outline the pose, proportions, and position of the character on the paper. Here we see an asymmetrical torso, a head shaped like an elongated oval, and a small pelvis. The right arm forms an obtuse angle, while the left arm looks almost like a straight line. The legs have minimal bends. Be especially careful at this stage, since these basic lines determine the pose of the entire figure.
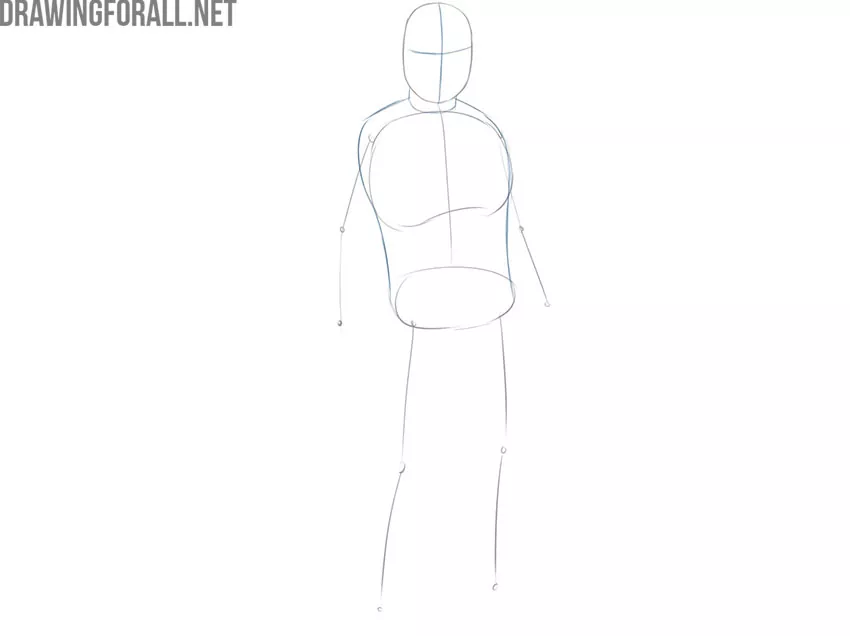
Step 2: Add volume to the torso
Connect the chest and pelvis with smooth curved lines to create a gradual narrowing at the waist. Note the contour that appears across the upper chest. After that, connect the head and chest to form the neck. It should look like a short, sturdy cylinder. Finally, outline two curved guidelines on the face. The vertical line divides the face into two equal parts. The horizontal line indicates the position of the eye opening on the helmet.
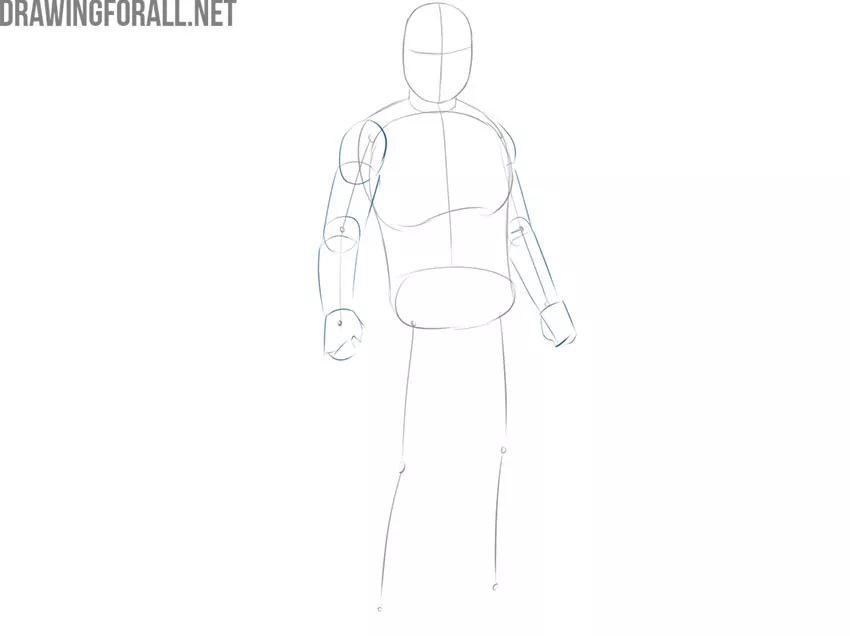
Step 3: Shape the Mandalorian’s arms
Using the lines from the first step, add volume to the Mandalorian’s arms. Outline the upper arms with simple cylindrical forms and the forearms with forms resembling truncated cones. Mark the joints with simple circles and outline the fists as large polygonal shapes. Do not draw the armor or small details yet.
Step 4: Draw the Mandalorian’s legs
Now use the same method to add volume to the legs. Outline the thighs with simple forms that gradually narrow toward the knees. The lower legs first widen slightly and then narrow toward the ankles. At the bottom, outline the feet with simple forms. Note that because of the pose and angle, the feet have slightly different shapes.
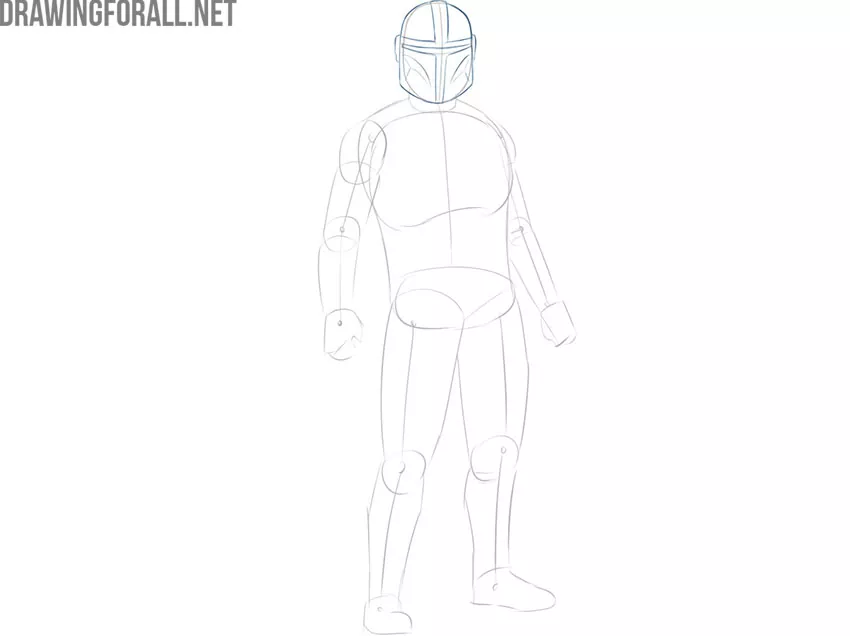
Step 5: Draw the helmet
Now we have the basic silhouette of the character. Let’s give it the recognizable features of the movie character, drawing the Mandalorian’s helmet in detail. First, draw the horizontal eye opening. Then add the vertical section that intersects it to form the characteristic T-shaped visor. Finally, draw curved lines along the lower sides of the helmet.
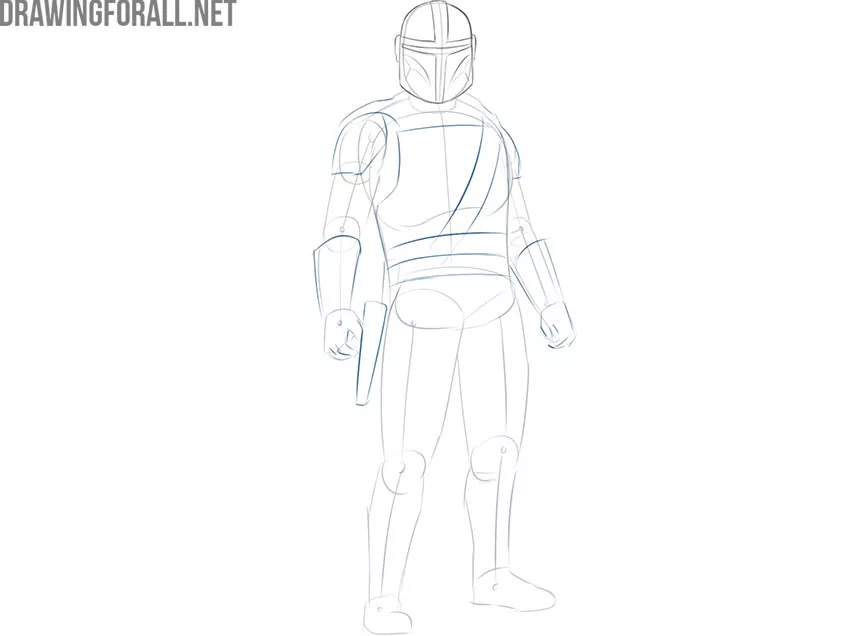
Step 6: Draw the Mandalorian’s armor
Now work on the basic contours of the character’s armor. Outline the armor plate on the Mandalorian’s torso. After that, draw a belt around the waist and another belt running diagonally across the body. Also add short lines inside the fists to indicate the fingers. Do not forget the light armor plates on the shoulders and forearms.
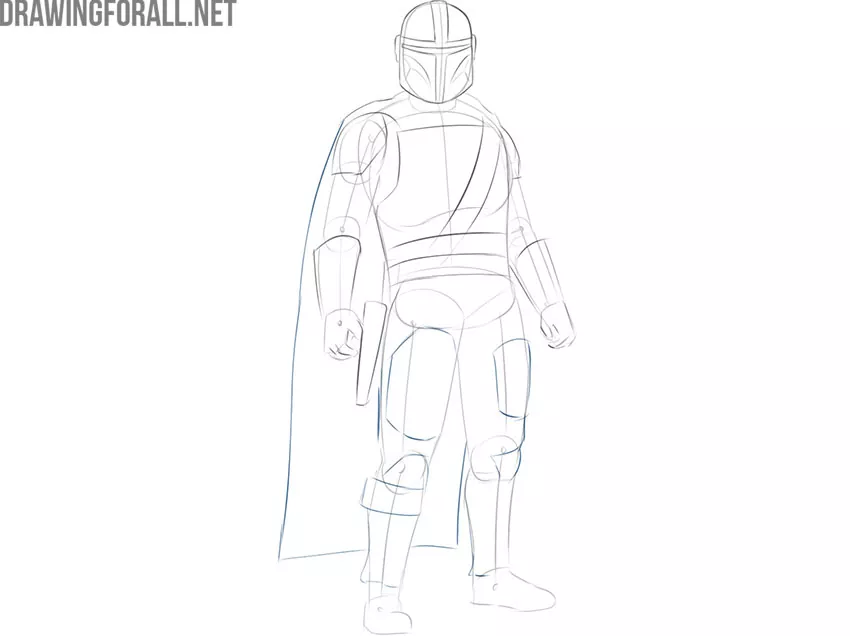
Step 7: Sketch the cape outline
Outline the Mandalorian’s cape hanging behind his back. Start from the shoulder area and sketch its general contours downward. Then move to the lower body and add the armor plates on the hips and legs.
Step 8: Refine the armor details
Now work on the smaller details. First, refine the contours of the armor on the body. Then draw the cartridges attached to the diagonal belt. After that, add the belt buckle and the pouches on either side of it. Finally, outline the small fabric folds on the Mandalorian’s shoulders.
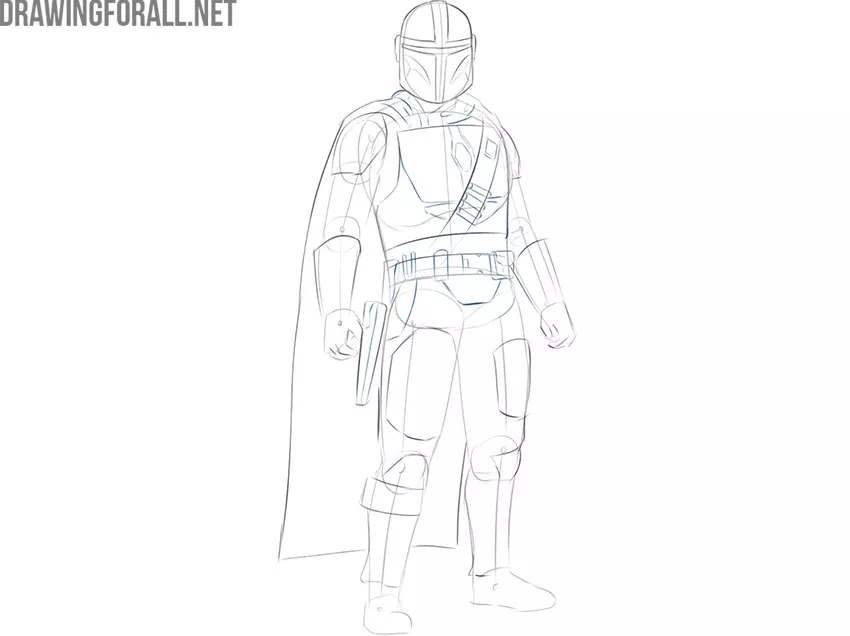
Step 9: Detail the movie character’s limbs
Now refine the arms and legs of the Mandalorian. Add the necessary details, including fabric folds and the final contours of the fingers. Draw the final contours of the armor plates and clothing while gradually erasing the basic cylindrical forms underneath. Then return to the cape and draw its uneven lower edge.
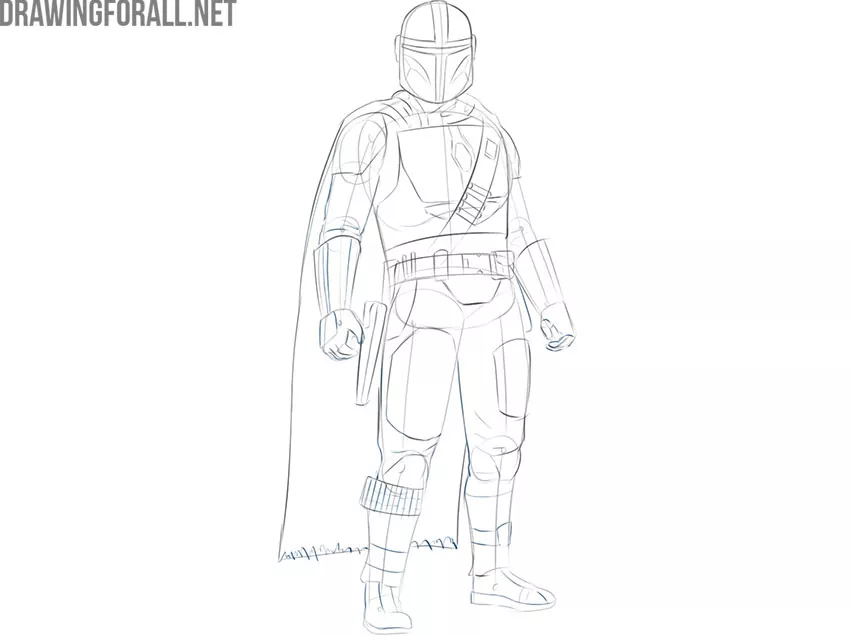
Step 10: Clean up the drawing of Mandalorian
Now look over the entire drawing. Check the proportions, pose, individual elements, and small details. Erase the remaining guidelines and unnecessary construction lines. Refine the main contours where necessary so that the Mandalorian drawing has a finished appearance.
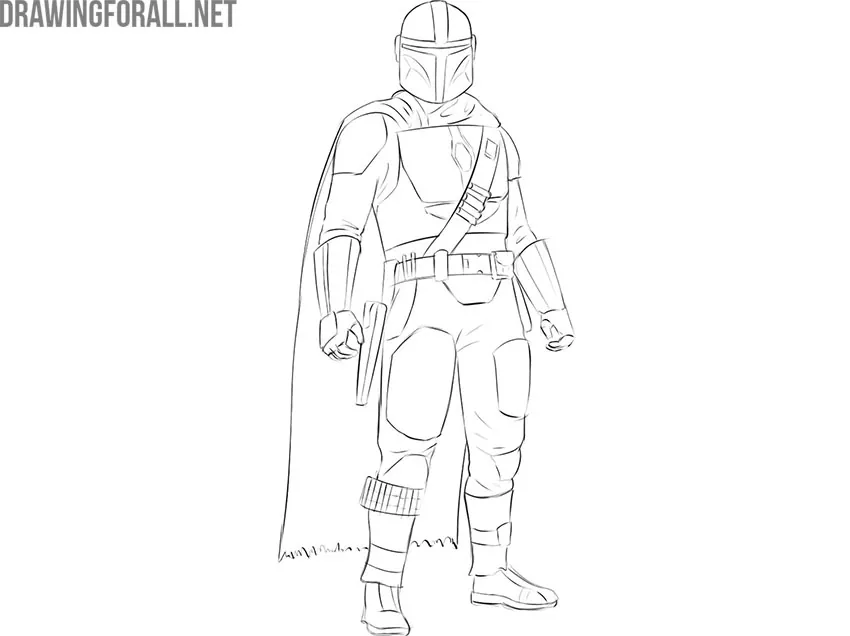
Step 11: Add the shadows
Once the basic contours and additional details are complete, add the shadows. First, determine which side the light source is on. Then outline the approximate boundaries of the shaded areas. Here, the shadows appear on parts of the helmet, as well as along the edges of the torso and limbs.
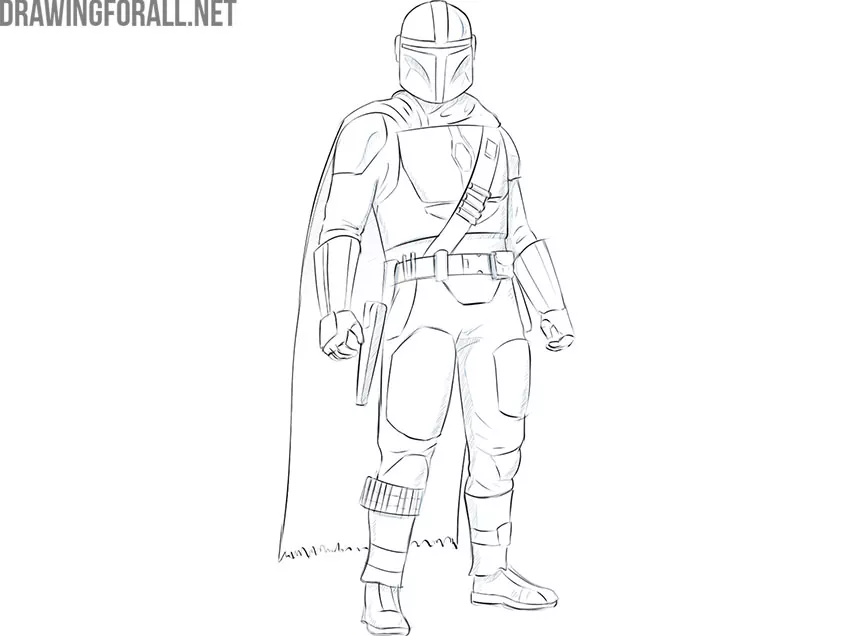
Step 12: Finish the Mandalorian drawing
Finally, look over the entire drawing once again. You can slightly darken some lines of the figure to separate the forms from each other. As a result, you should get a finished Mandalorian drawing with the characteristic details.
This tutorial follows the same basic principles that we use when drawing a human figure. First, we constructed the figure with simple forms, then added the characteristic armor, and other details that created the appearance of the Mandalorian.
Using the same principles, you can draw the Mandalorian in a different pose or change some elements of his equipment.
Use references from Star Wars to study drawing the character from different angles. You can also add different weapons or draw a more complex scene instead of a single standing character.
And of course, you can draw Grogu next to the Mandalorian to create one of the most recognizable combinations of characters from the series.




I made his torso to big :C
same lol
lol i made him look like he was fat….poor pedro…
Lol
sorry
It’s great, helped with lockdown homework but could be simpler.
this is easy when u trace >:)
Why are you tracing it then you are not learning.
i could not do it. got a bit annoying but i am a beginner with drawing comic style
If you weren’t able to draw something the first time, then don’t worry. Practice drawing as much as possible and success will not be long in coming.
can u add a bo katan?
Yes of course. We are planning to create such a drawing lesson.
I am an advanced artist but, the art teacher said I am in an intermediate class. However, I think that the Mandalorian is not that hard to draw (not because of tracing ) but, because if you really focused and know where everything is going to be it’s not that difficult. 🙂
sups easy, then i put a xmas hat on him bc its xmas time lol 🙂
That sounds really cool I like the idea.
Really nice idea.
I loved it but needs some more details.
Thank you.
Many of our readers ask us to draw fewer details, others ask for more details. We always have to find a middle ground in the amount of detail in our drawing lessons.
i did it alright but it was kinda sloppy with all the lines everywhere but i traced the pencil with a pen and then erased the pencil and it looks better!
very easy 😉
This was very easy 🙂
This was very easy and fun 🙂
Thank you!
same
I have been drawing for years and I’m a teenager now, and I tried to draw this and it looked so bad. I have always thought I was good at drawing and then I try to draw something like this and I realize how bad I am at drawing. I even try to trace images and I somehow fail at that. If I trace something I somehow mess up the lines and they are not even. Even If I practice drawing a ton I’m bad at it. I can’t draw anything that looks realistic, but that’s the style I want to draw in. And then even if I start to draw something and it looks good, then it turns out really bad, and the lines are not even and symmetrical.
Good day! First of all, you are a great fellow. You have been training your drawing skills for many years, which means you can become a great artist. Don’t be discouraged if you have setbacks. Just keep drawing, focusing on drawing basic shapes and simple drawings. You may not feel progress in the process, but one day you will feel your level-up. By the way, our category of basic drawing lessons can be very helpful for you. Do not forget to visit this category from time to time.
just cant do it right it impossible
i can’t do it. 4 me i think it’s impossible
This was really fun! It was a bit harder than my normal level, so it took me out of my comfort zone and was a great challenge. It turned out really well and I’m so proud of it, thank you so much!!!!!!
I have been drawing since I was in 2nd grade, and I am now in 6th, and this was the hardest one I’ve done. I have used so many websites to help me, but this one was the best. I like a challenge, Thx u sooo much stepan!
Thank you too.
this is ez I am only 10 and just started drawing this year and I got it!
I’m 10 and I made mine too fat
Can you draw Luke Skywalker Please so i can draw him.
I made mine look like a stick, but overall, this is a very good tutorial
The Mandalorian is so cool!
Ik was a lilt bit hard But I made it and I love it