

How to Draw a Roman Soldier
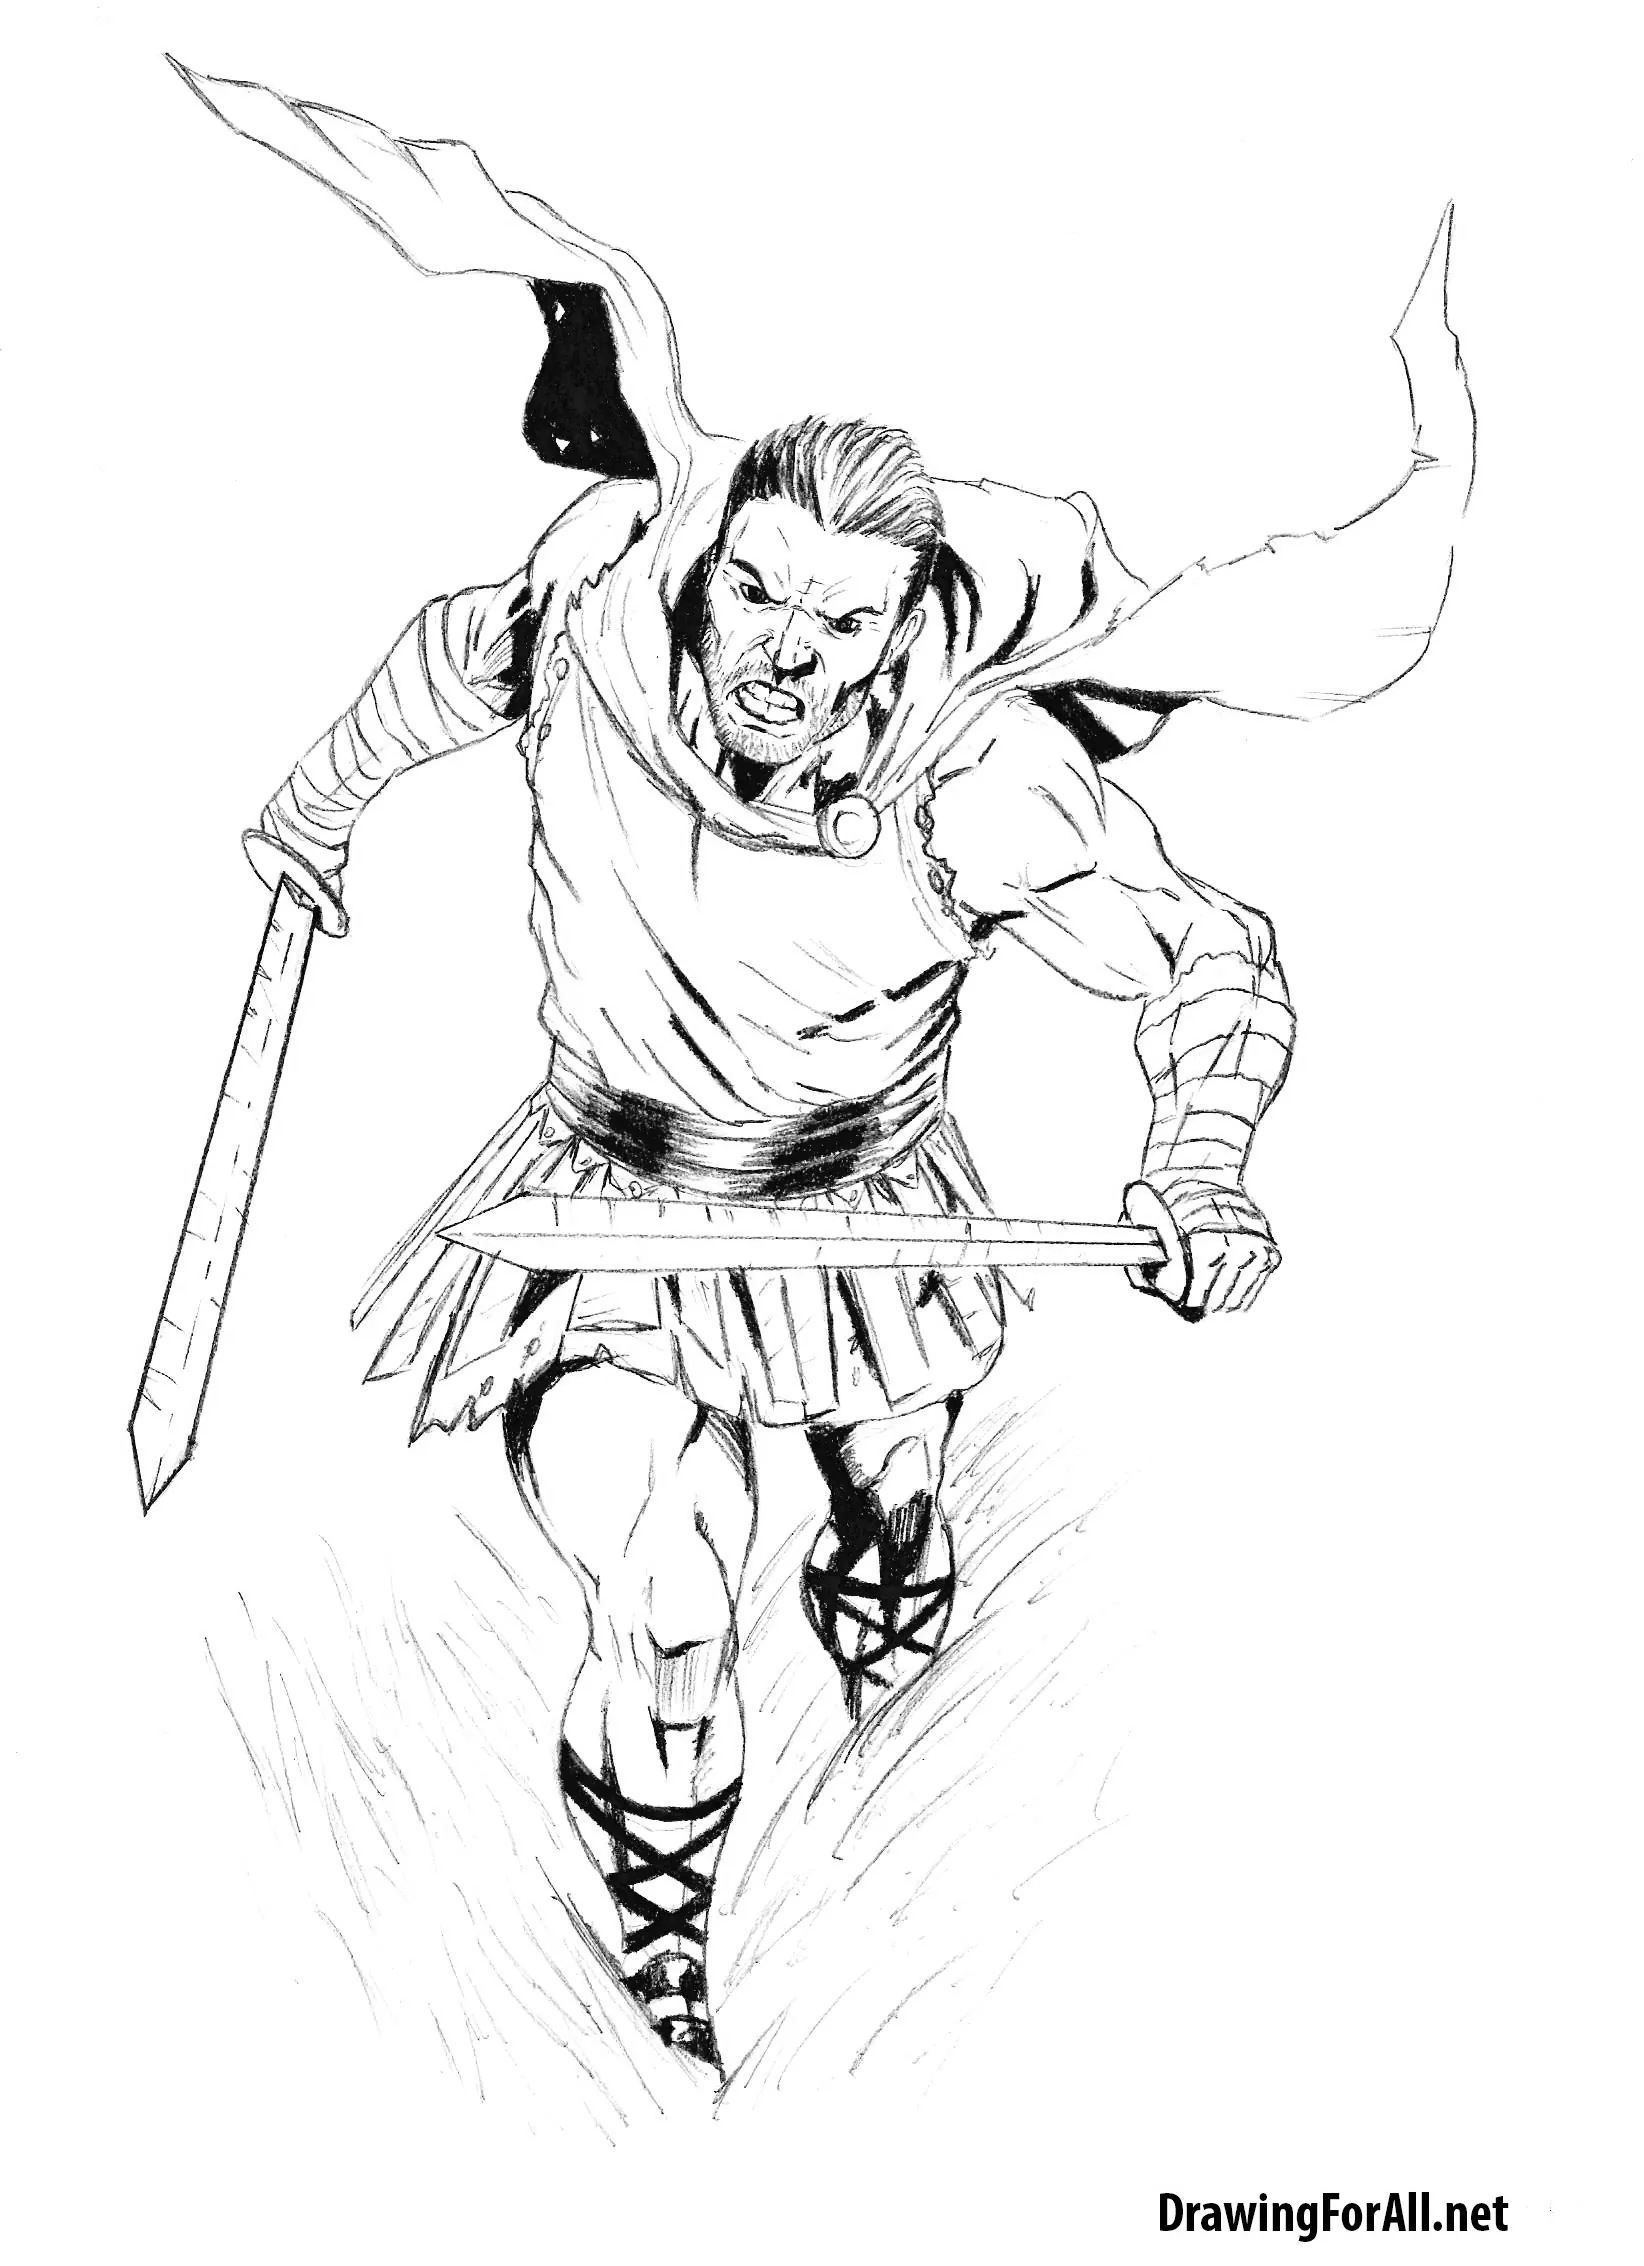
In this tutorial, we will show you how to draw a warrior from ancient Rome.
We drew this warrior in a comic book style, but the drawing still includes many small details. It may look complicated at first, so work through each step carefully and compare the main shapes as you draw.
How to draw a Roman warrior step by step
Step 1: Sketch the warrior’s skeleton
Begin with the basic pose of a tall, athletic man. If he were standing upright, this stage would look much like our tutorial on drawing classic Superman. Here, however, the Roman soldier stands in a running pose, so the body appears much shorter because of the angle.
Pay special attention to the size of the head compared with the rest of the body. A tall man standing upright is usually about seven head lengths tall. From this angle, the warrior appears only about 4.3 head lengths tall.

Another important detail is the shoulder line. It should slope rather than run straight across.

The arms and legs also appear to be different lengths because of the angle of the pose.

Step 2: Build the upper body
If your sketch looks close to this, move on to the face. First, draw the main guidelines across the head.

Then add three shorter guidelines from top to bottom:
- The hairline, placed well above the eye line;
- The nose line, placed below the eye line;
- The mouth line, placed below the nose.
Now outline the warrior’s upper body. After adding the facial guidelines, draw the shapes for the shoulder joints and the large deltoid muscles. Use the lines from the first step.

Draw the large chest muscles marked in red, then add the narrow stomach area extending across the torso.

Next, break each arm into three main parts:
- 1 – The upper arm, the largest and strongest part of the arm;
- 2 – The forearm, connecting the elbow to the hand;
- 3 – The hand, which is clenched into a fist here.

Finally, outline the cloak and sword. Notice that the blade is narrow near the hilt and becomes wider toward the tip.

Step 3: Add the legs and armor
Now draw the Roman soldier’s legs. Divide each leg into two main parts:
- The thigh, the largest and strongest part of the leg;
- The lower leg, with a noticeable curve formed by the calf muscle.
The feet are hidden by the grass, which we will add later.
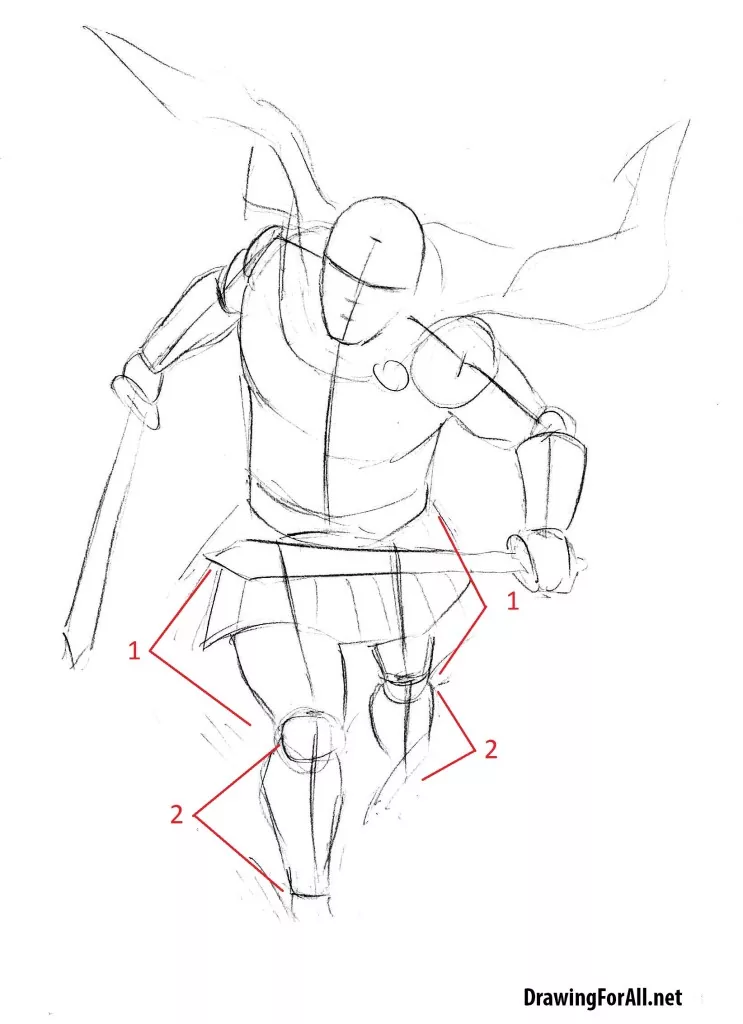
Draw the lower part of the Roman soldier’s armor. It is made of thick leather plates that hang like a skirt. Start with a wavy lower edge, then add several vertical lines running upward toward the torso.

Step 4: Draw the warrior’s face
The basic silhouette is ready, so begin adding details. Draw the warrior’s eyes, nose, mouth, and ears.
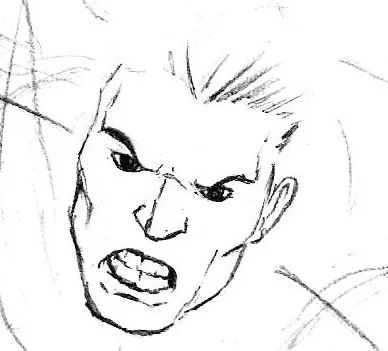
Draw the hair with strokes running from the roots toward the ends. The top of the ear should sit near the eyebrow, while the bottom should line up with the lower part of the nose.
Next, add wrinkles to make the expression stronger and the warrior look older. Draw the folds beside the nose and mouth, across the forehead, and around the eyes.
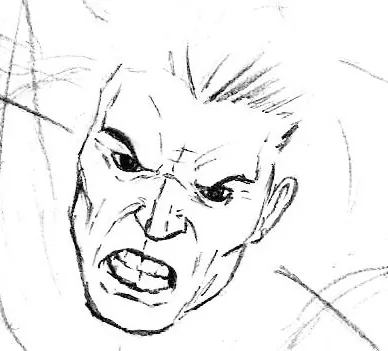
Finish the face by refining the outlines and erasing the remaining guidelines.

Step 5: Refine the hair and cloak
Work on the Roman soldier’s hair. It is short around the temples and much longer above the forehead and across the top of the head, somewhat like an ancient version of an undercut.
The hair around the temples should also be much darker. Draw the strands with straight strokes, placing them closer together in the darker areas. You can lightly shade these parts with a soft pencil.
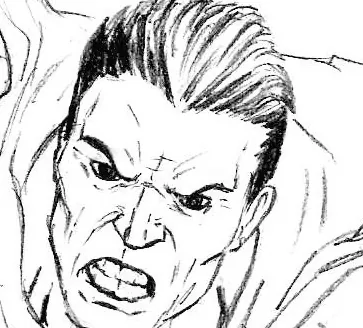
Now draw the neck with a few short, straight lines.

Finish this step by drawing the cloak. Add several fabric folds around the clasp. The cloak is torn along the right side, though you can place the damaged area somewhere else if you prefer.

Step 6: Detail the arm and torso
Now add details to the Roman soldier’s left arm. Begin with the two large muscles of the upper arm:
- The deltoid muscle, which forms the rounded shoulder. Refine its outline and erase the extra lines from the earlier steps;
- The biceps, which forms the large curved area below the shoulder. Refine its outline in the same way.
The forearm is covered with fabric, so its muscles are not visible. Add the sword blade and make sure it becomes wider toward the front edge.

Next, add details to the upper torso. Draw a few lines over the chest to suggest the pectoral muscles. You can see similar forms in our tutorial on drawing Captain America in step 6.

The lines marked in red curve across the upper chest. The lines below them run more vertically down the torso.

Step 7: Refine the other arm
Continue adding details to the Roman soldier’s body. This time, work on the arm on the right side of the drawing. The main visible muscles are:
- The deltoid, which forms the rounded outer edge of the shoulder;
- The triceps, which runs along the back of the upper arm;
- The biceps, which forms the front of the upper arm;
- The brachioradialis, which runs along the forearm. The arm is tense, so this muscle remains visible through the fabric;
- The extensor muscles along the outer forearm, which can also be seen through the fabric.
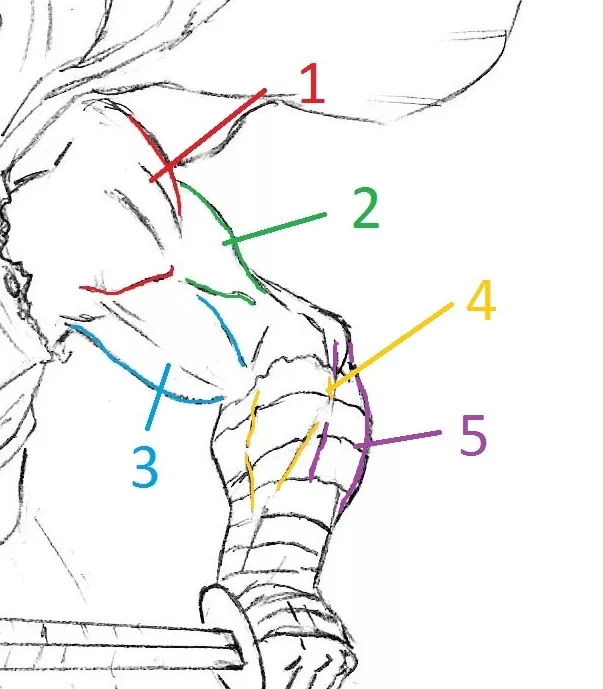
Now draw the clenched hand, keeping the fingers pressed tightly into the palm.
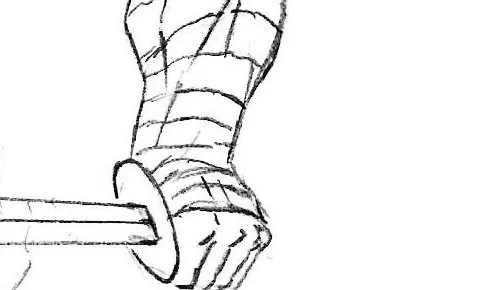
Refine the outlines of the entire arm and erase any lines you no longer need.

Step 8: Draw the warrior’s armor
Draw the belt using four horizontal lines. Below it, outline the outer row of leather plates. Add a second layer beneath them, using softer folds to make it look like fabric.

Step 9: Finish the legs and grass
Now add details to the legs. The quadriceps cover most of the front of each thigh and are marked in red. The kneecap, marked in green, sits over the knee joint.

Draw the straps wrapped around the lower legs, then add several slanted lines for the grass around the warrior’s feet.

Step 10: Add the final shadows
This drawing has many details, but the shadows are simple. Outline each shadow first, then fill it with a dark, even tone.



This was really good thanks.