How to Draw Rocket Raccoon
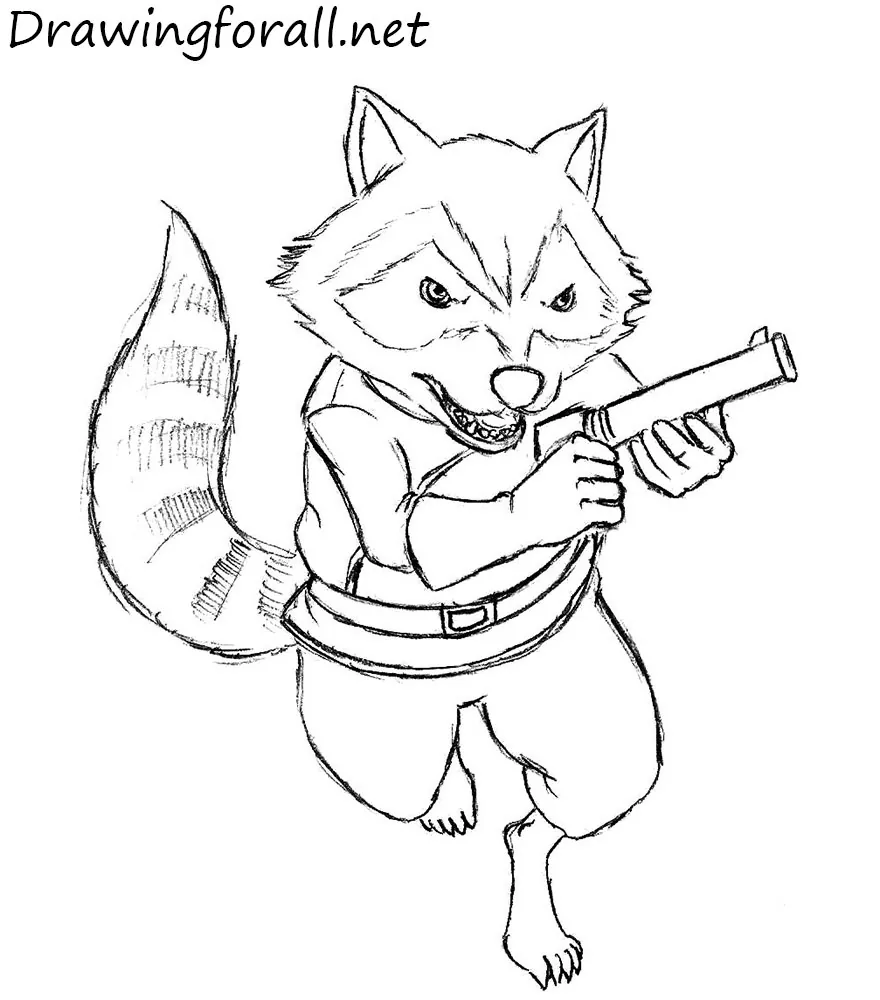
Hello! Today we’ll show you how to draw the a team member of “Guardians of the Galaxy”, Rocket Raccoon!
Many of you probably know the Guardians of the Galaxy due to the movie released in 2014. But in fact, this charming superhero was invented much, much earlier – back in 1982 Rocket Raccoon was first presented at the court of comics readers of “The Incredible Hulk”.
As you can see, this character looks very unusual, especially when compared with superheroes such as Spider-Man, The Punisher and Wolverine. So, how to draw Rocket Raccoon from Guardians of the Galaxy? Let’s start the lesson, and learn how to do it!
Step 1
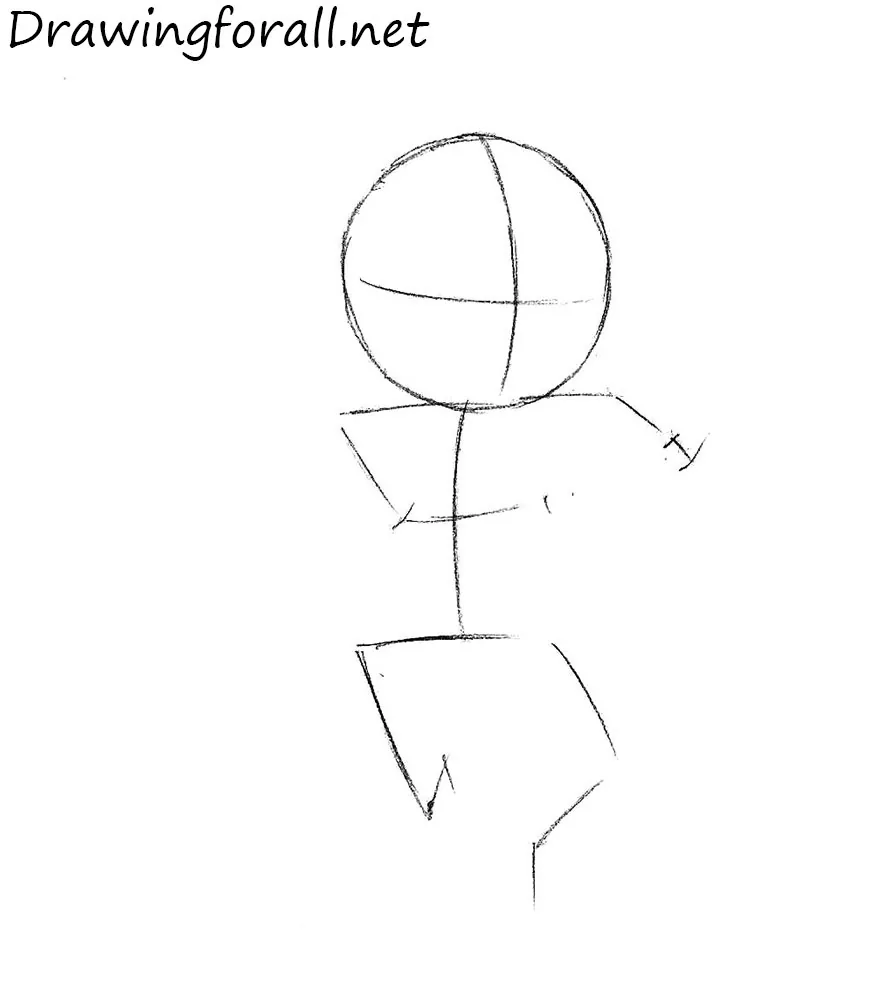
We begin, as always, with a stickman – man made of sticks and circles, which we draw in order to indicate the proportion of the character, his pose and position on the sheet of paper.
The proportions are, of course, very far from the proportions of adult man, here stickman will be much closer to the lessons about very young children. Compared with the head body looks very small. Incidentally, the head should be marked by two lines – the vertical will indicate facial symmetry, and the horizontal – line of the eyes. Note how these two lines are bent – bend is necessary in order to pass the slightly tilted position of the head.
Step 2
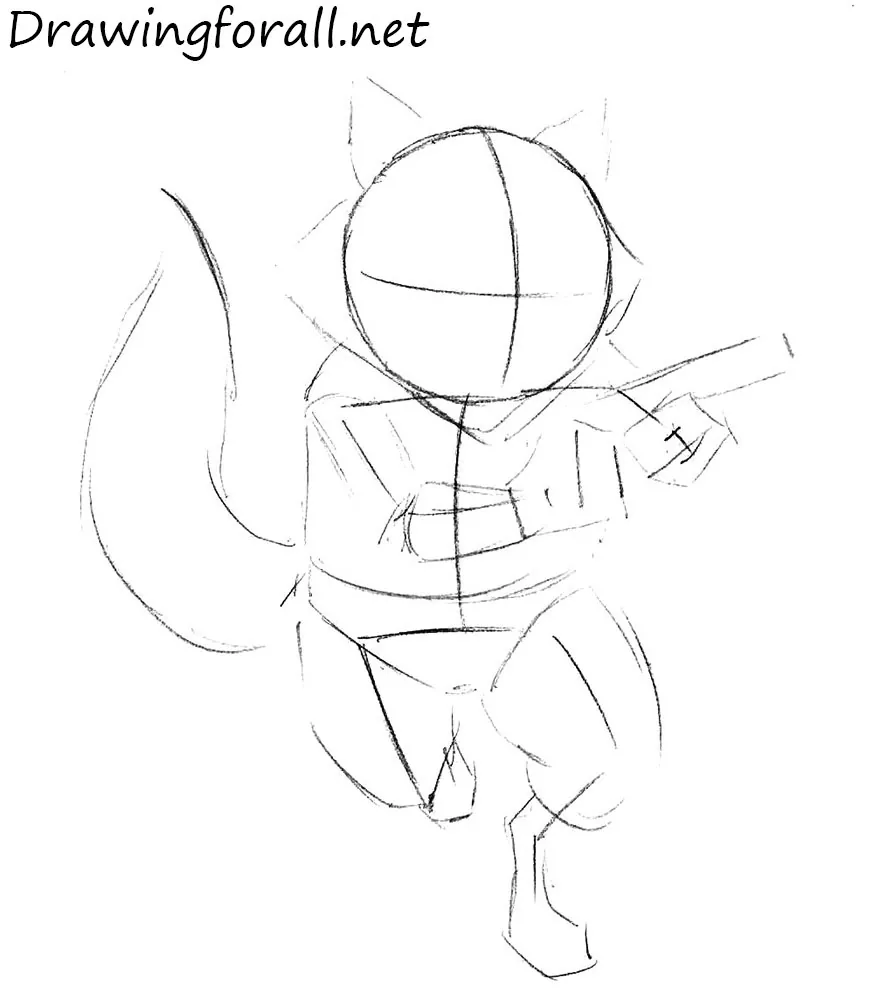
Before proceeding to this step, be sure to check all the proportions of the previous stage, because it will be very difficult to fix the mistakes. Using a diamond-shaped figure outline the face, and then draw angular contours of the ear. Then we go down and outline the contours of the body (it looks like a rectangle) and groin (looks like a triangle).
Focusing on lines of stickman, draw the outlines of arms and weapon. We can not see the muscles of Raccoon, but the hands themselves very explicitly and clearly divided into three parts – the upper arms, forearms and hands (here palm are clenched, pay attention to their size).
It remains to draw the legs, the upper parts of which look like cylinders, and the bottom (we can see the entire left leg of Raccoon) is much sleeker and thinner. Note the bends of lower legs and try to redraw them as accurately as possible. Sketch out he contours of the tail, and move next.
Step 3
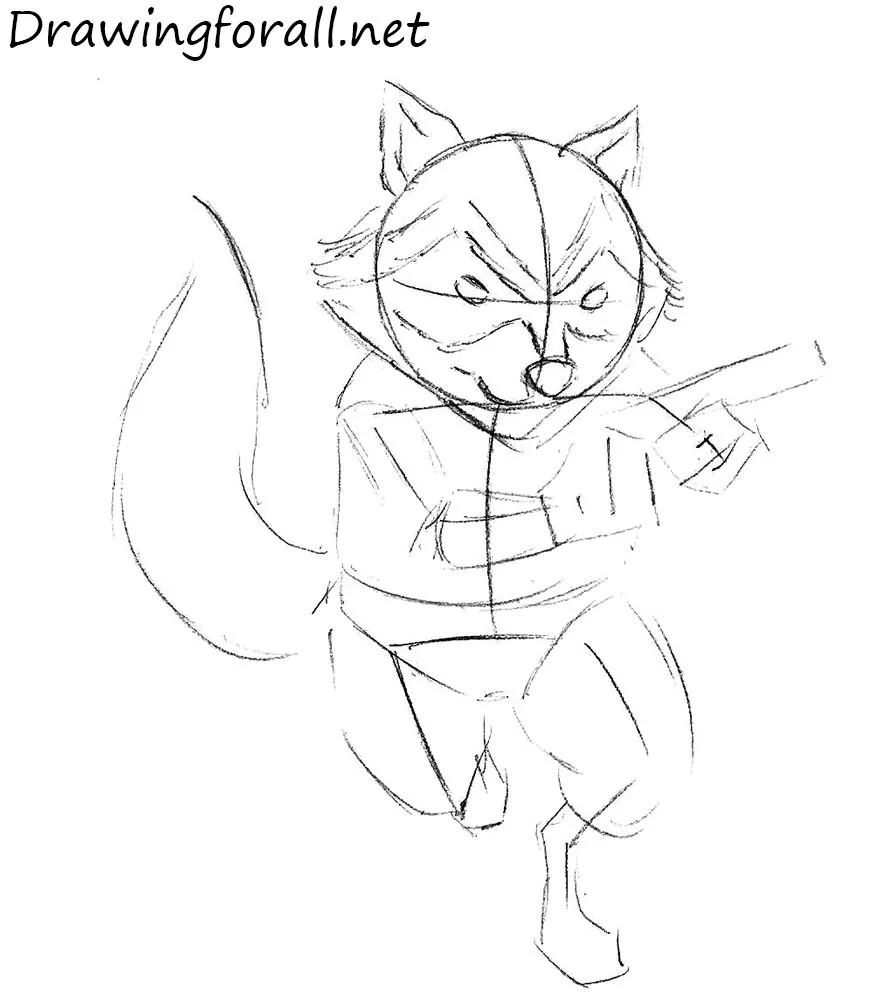
Now, since the figure is ready, you can begin to detail. We begin, as always, from the top, that is from the face. Using stickman lines, outline the position of the eyebrows, eyes, nose and mouth. Note that the angles of the eyebrows on the right side from us a few sharper the same place on the left – it is because of head turning. In the same step draw the lines of the ears.
Step 4
In this step of the lesson on how to draw Rocket Raccoon we finish the head. Draw the tousled hair on the sides of the head. Draw small and angry eyes. Draw the parted lips with small teeth.
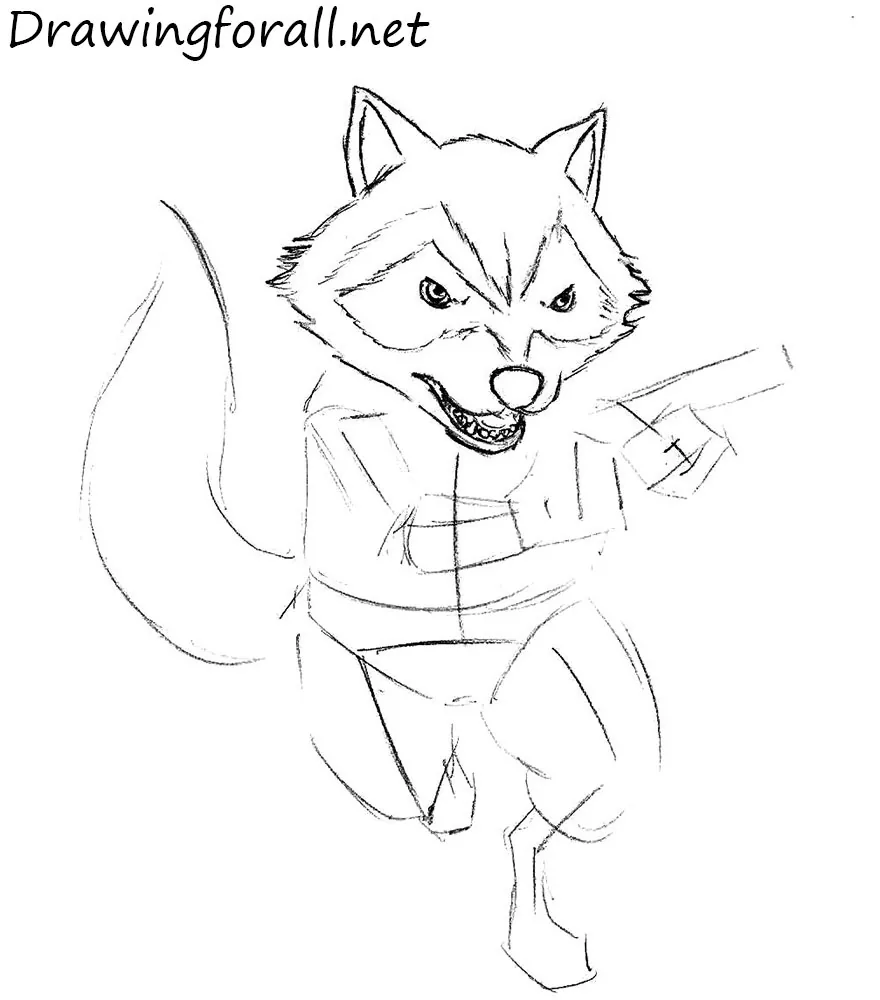
Step 5
Draw the outlines of the arms and body, draw the small strap with a buckle. Circle the contours of the arms – pay particular attention to the gloves, they are very high (completely covers the forearm). Sketch out he fingers and knuckles as in the example below. And you can visit the lesson on how to draw hands, to learn more.
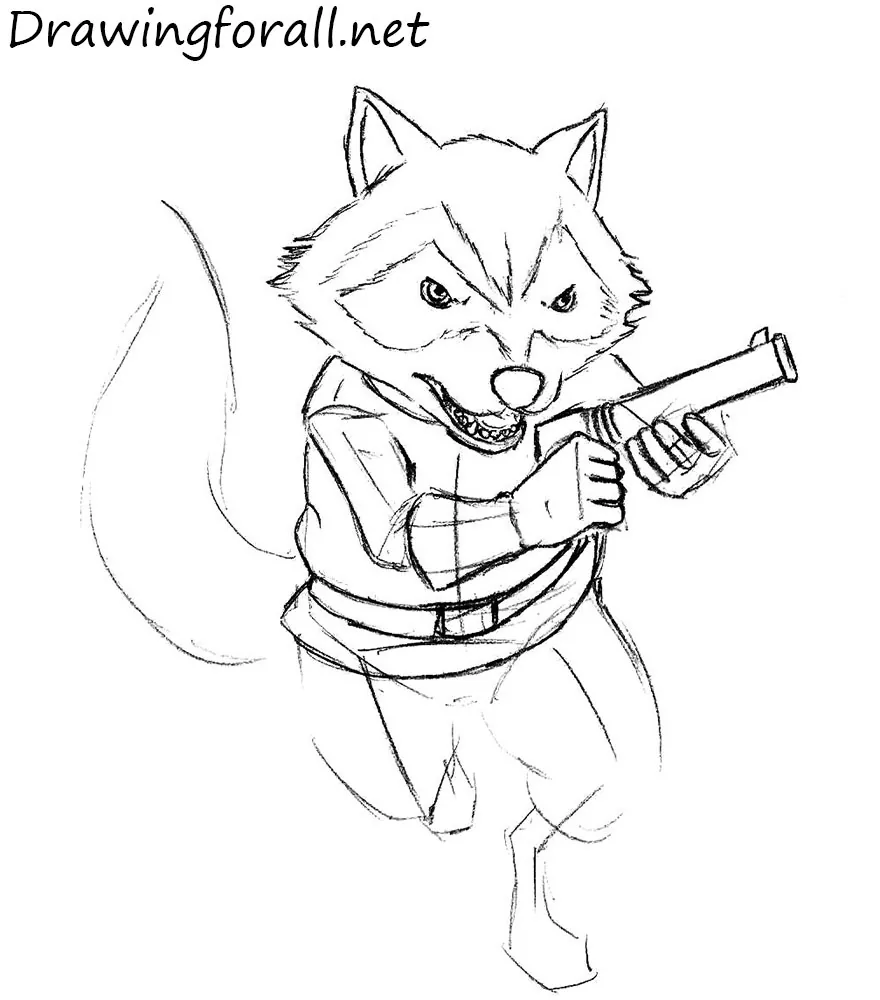
Step 6
Outlinine the contours of the tail, draw the transverse strips and paint over them using hatching. It is best done it in two stages – first outline the contours of the strip, and then paint over the contours. Here circle the leg lines and draw small, sharp nails on feet.
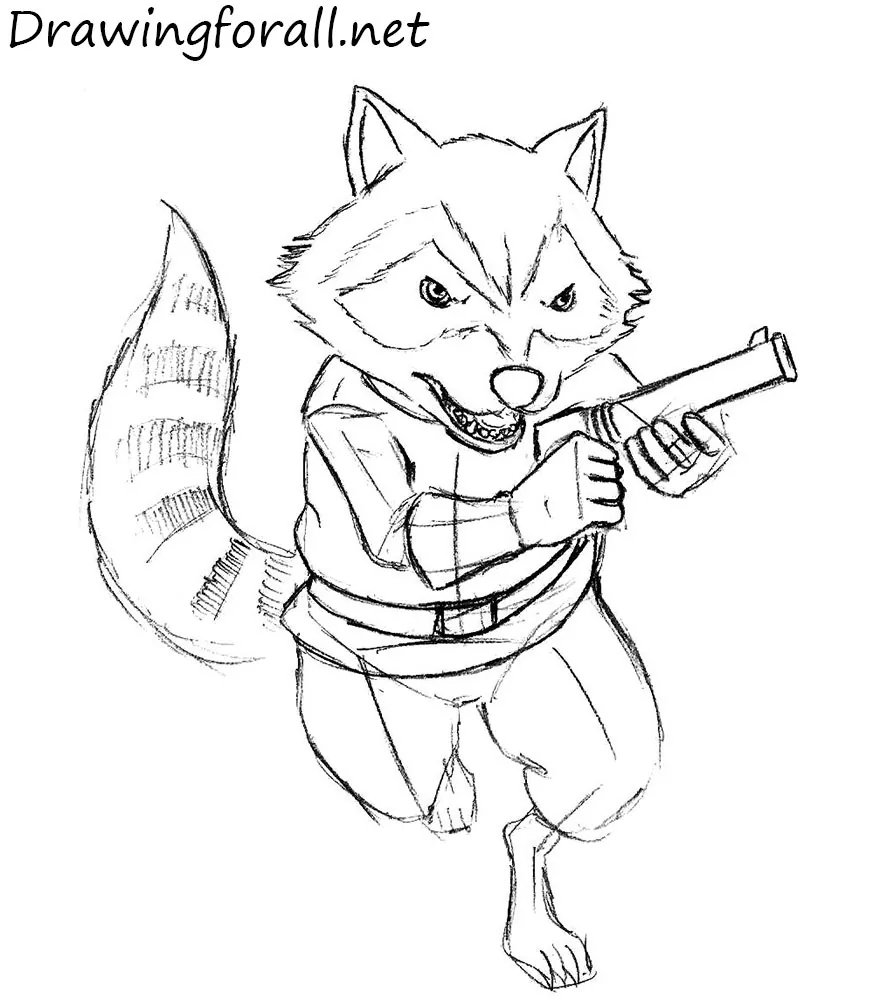
Step 7
So we on the last step of the tutorial on how to draw Rocket Raccoon. Erase extra guidelines from the figure of our hero. Add some details to the clothing of Raccoon, sketch out the ankle on his left leg.
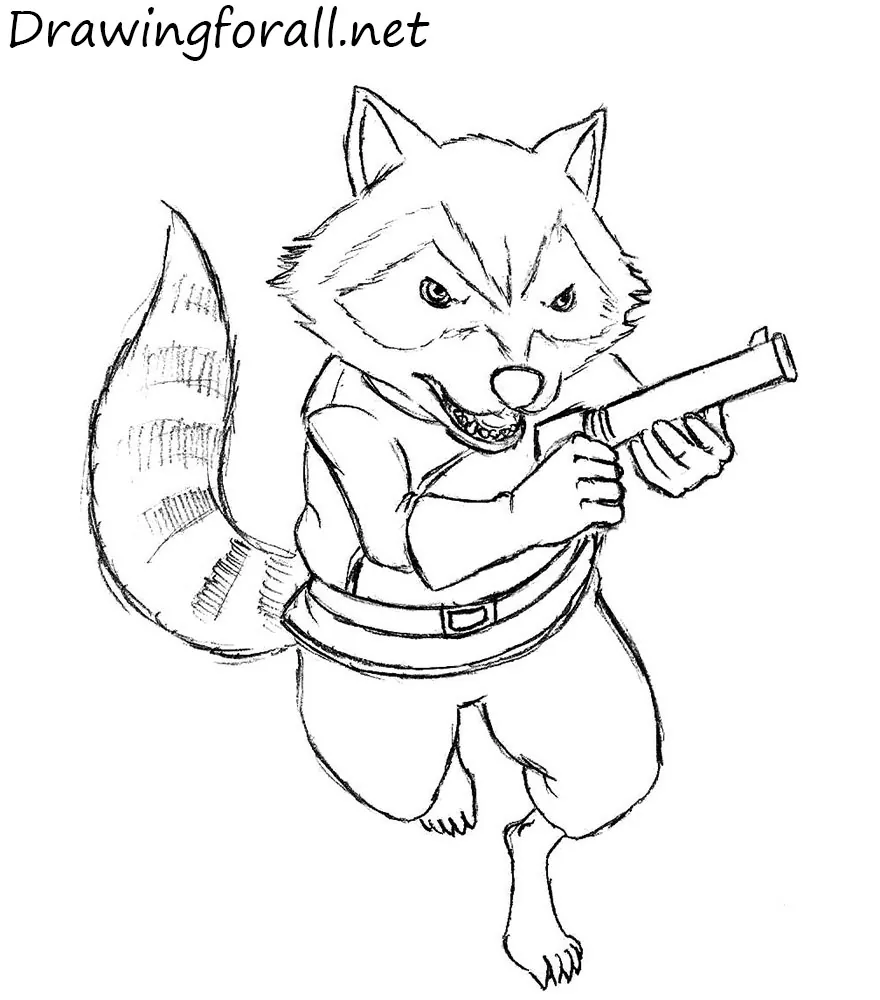
It was a drawing lesson by artists of Drawingforall.net. Follow our updates on social networks, if you liked this lesson.


this is cool