How to Draw Doctor Octopus
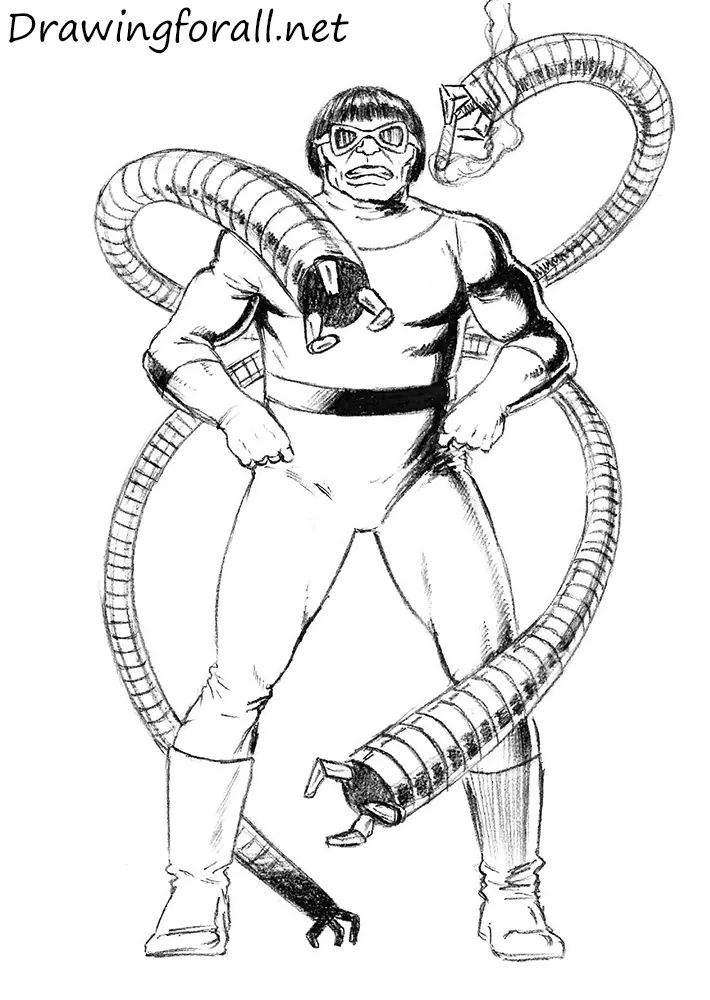
This step-by-step tutorial will appeal to fans of the Marvel universe because here we will show how to draw Doctor Octopus – one of the most famous comic book villains.
In this tutorial, Doctor Octopus will have his classic appearance.
Doctor Octopus’s real name is Otto Octavius. At the beginning of Spider-Man’s story, Otto was a teacher of the young Peter Parker.
After a terrible metamorphosis, the evil doctor became one of Spider-Man’s main enemies and caused him a great deal of trouble.
How to draw Doctor Octopus step by step
Step 1: Sketch Doctor Octopus’s framework and pose
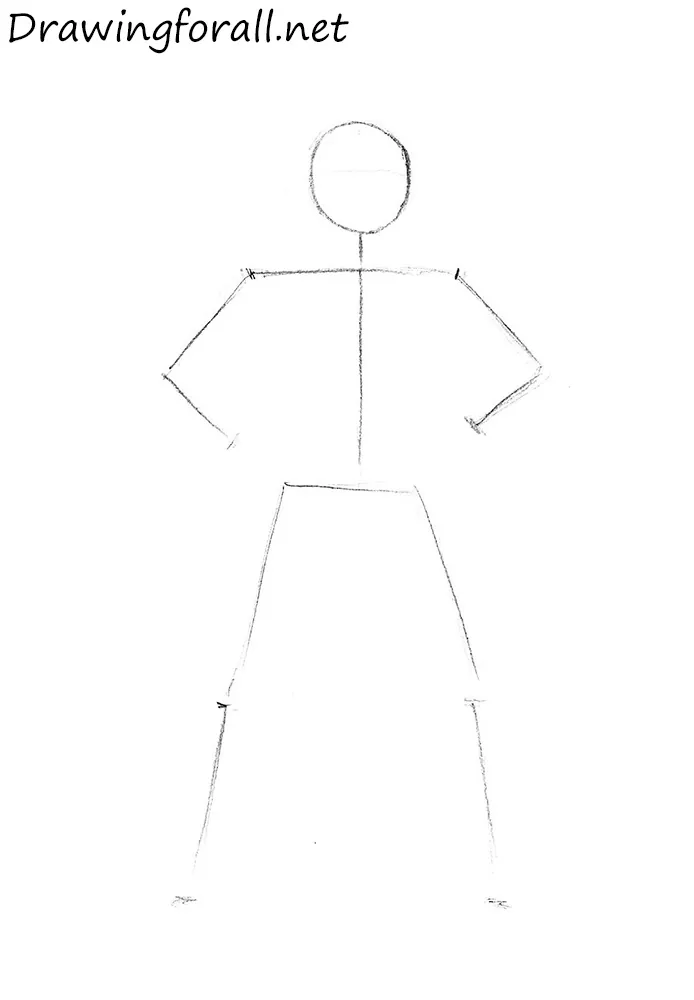
Begin with a stick figure made of lines and circles. It will help you establish the basic proportions of Doctor Octopus, his pose, and his position on the paper. First, consider the proportions: the average human figure is about seven to seven and a half head lengths tall, with the legs accounting for four of them.
Doctor Octopus is not very tall, but his shoulders are broad. Outline the arms resting at his sides and forming nearly right angles at the elbows. Draw Doc Ock’s head as a circle. It appears round because of the head tilt and his slightly overweight build.
Step 2: Add volume to the villain’s body
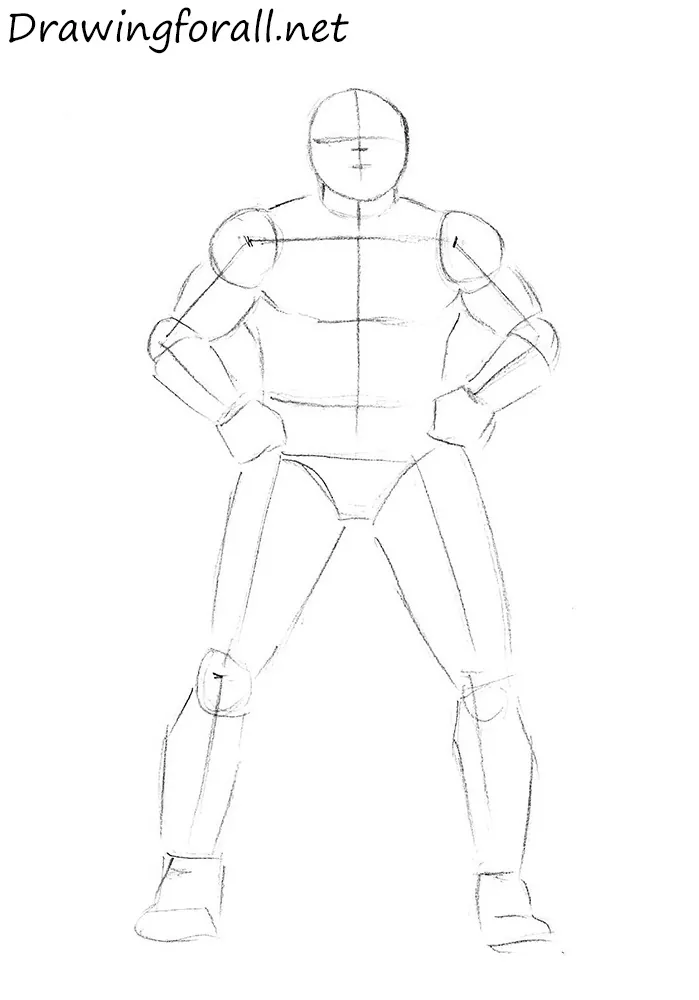
The stick figure is ready, so add volume to the body of Doctor Octopus. First, mark the head with a vertical facial symmetry line that divides the face into two equal parts. Then draw a horizontal line to place the eyes. The eye line is usually located near the middle of the face, but here it sits higher because of the position of the head. Add short marks for the nose and mouth just below it.
Draw the neck as a short, tapered cylinder supporting the head. Sketch the torso so that it narrows toward the waist because of the pronounced chest and back muscles. Use large circles to mark the shoulders and modified cylinders for the arms. Then draw the hands, indicating the clenched fists as pentagons at this stage. As you add volume, follow the lines of the stick figure. Next, draw the legs. Sketch the thighs as cylinder-like shapes that taper toward the knees. Mark the knees and elbows with circles, then draw the shins tapering toward the feet and add the feet themselves.
Step 3: Outline the mechanical tentacles
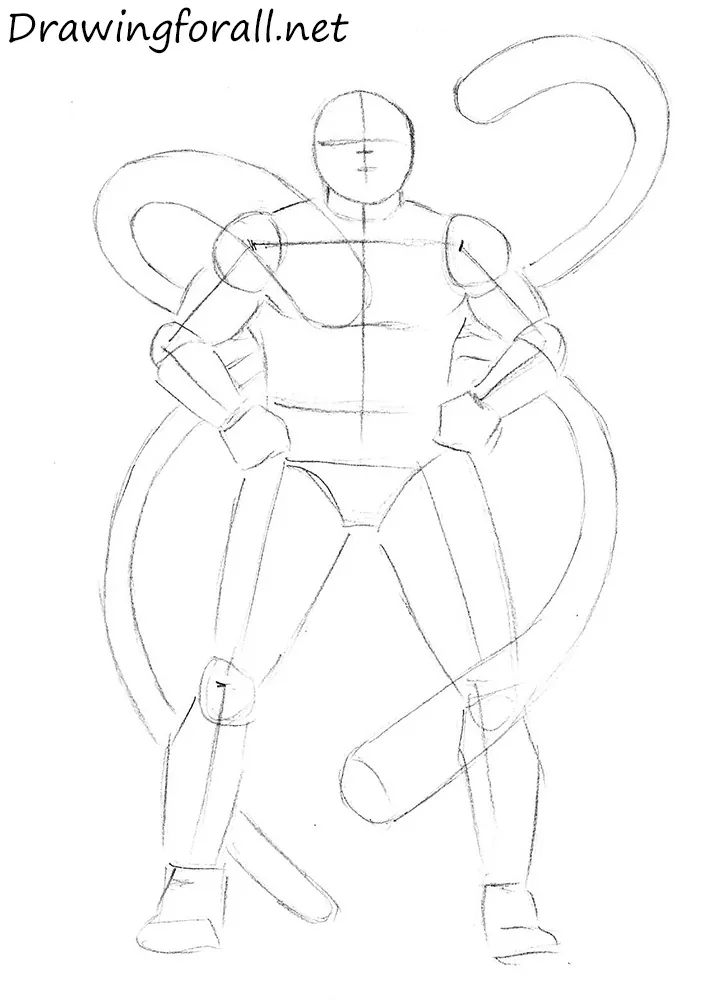
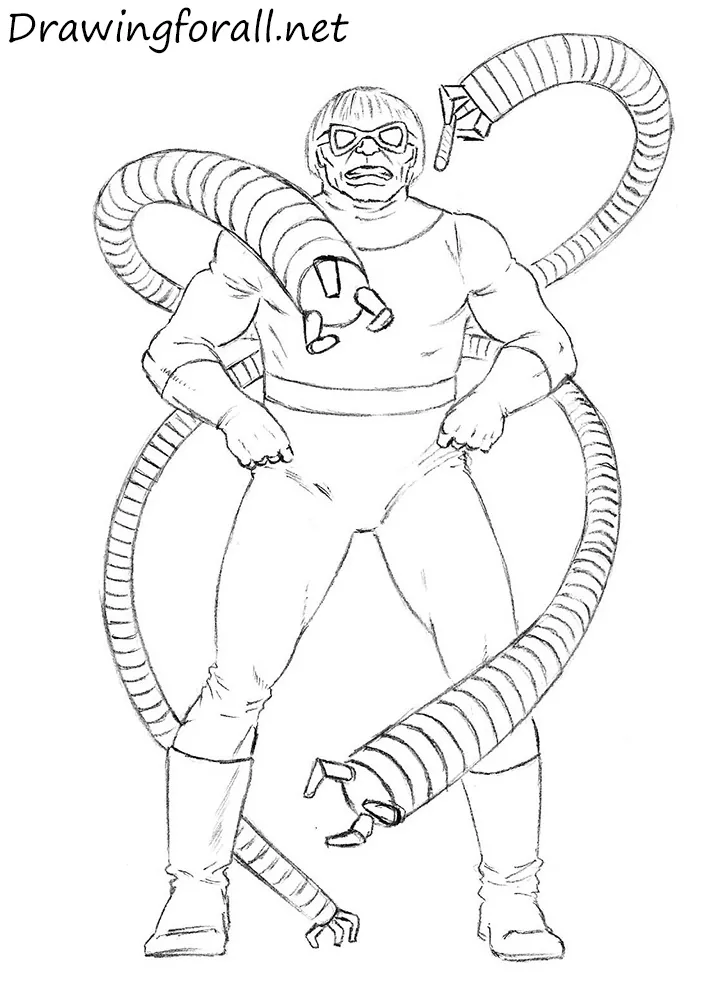
Draw the defining feature of Doctor Octopus: his metal tentacles. More precisely, outline their silhouettes at this stage. Make them smooth and rounded, with the tips increasing sharply in size. This increase helps convey their distance and position in space. The tentacles attach to the back near the connection between the thoracic and lumbar spine, with two on each side. Keep this placement in mind as you draw them.
Step 4: Refine the face and hair
The silhouette of Doctor Octopus is ready, so begin adding details. We usually detail human figures from the head down to the feet, and this tutorial follows the same sequence.
Use the guidelines from the previous steps to draw the wide glasses, short nose, mouth, clenched teeth, and long nasolabial folds. Add the cheeks, cheekbones, and ears, then draw the bowl haircut. Draw the hairlines from the roots toward the ends, which in this case means working from the top down.
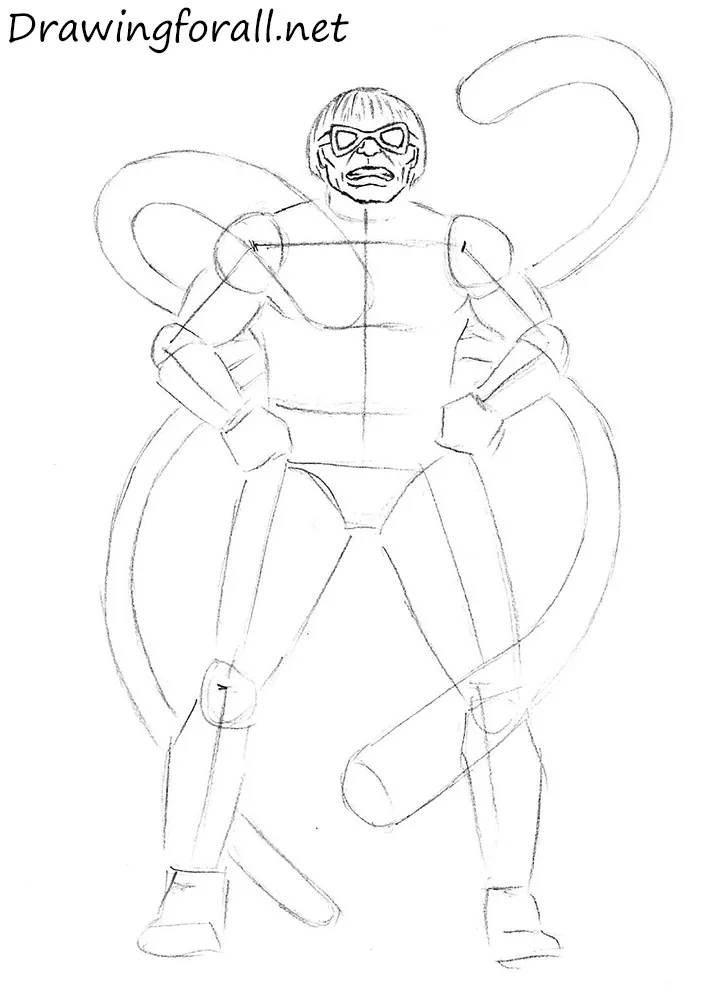
Step 5: Detail Doctor Octopus’s torso
Move lower and detail the torso of Doctor Octopus. Erase the extra guidelines from the neck and use several short horizontal strokes to draw the fabric folds. Draw the collar with a smooth line extending from the trapezius area toward the tentacle line. Then erase the guidelines from the torso, leaving a short line for the pectoral muscles. Add a few strokes to the body and refine the belt line.
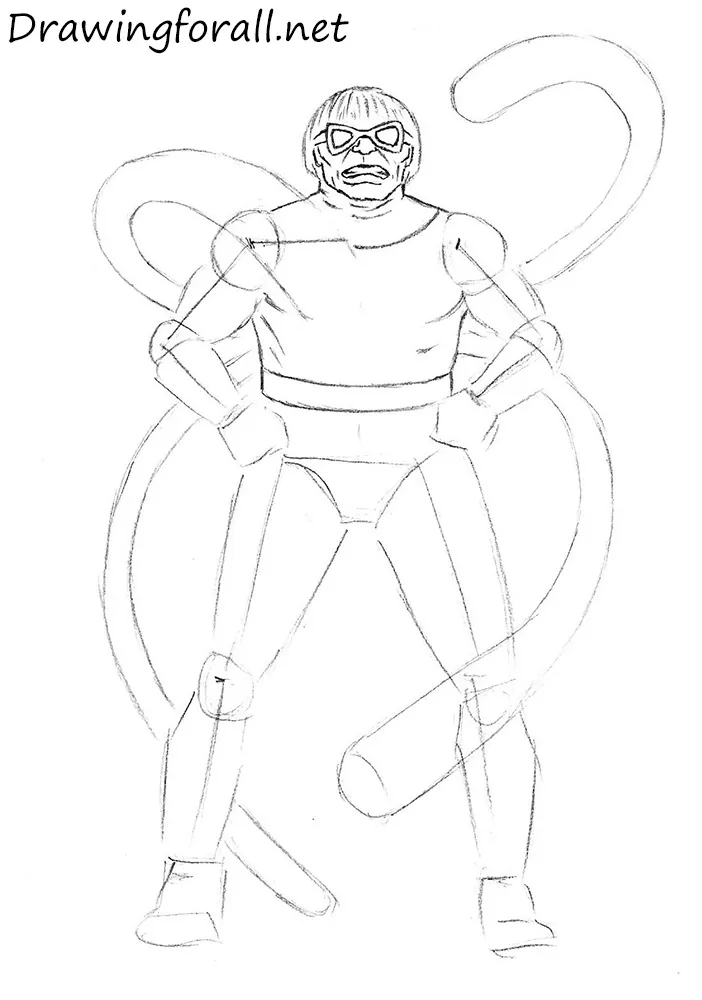
Step 6: Segment the metal tentacles
Refine the tentacles of Doctor Octopus. These four mechanical limbs have the same general origin in most versions of the story. The talented scientist Otto Octavius designed metal tentacles operated by remote control. After an explosion in the laboratory, the tentacles attached to his back fused with his spinal cord under the effects of chemicals and heat, transforming him into Doctor Octopus.
In many comic books and animated series, Norman Osborn appears in this story as Otto Octavius’s employer and the head of his research. Returning to the drawing, add curved horizontal bands across the tentacles.
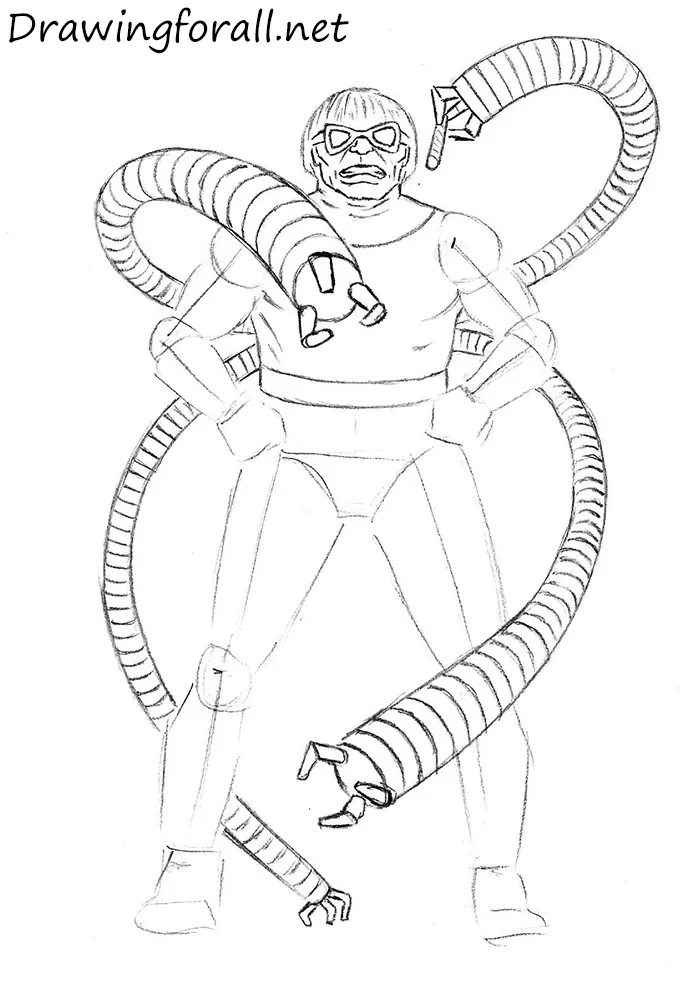
Step 7: Refine the arms and fists
Draw the arms of Doctor Octopus using the guidelines from the previous steps, and refine their outer contours. Add several folds around the armpits. Use short strokes to indicate the muscles showing through the clothing. Then draw the hands. When outlining each fist, pay attention to the knuckles, tendons, and finger shapes. Use two short curved strokes to mark the edges of the gloves.
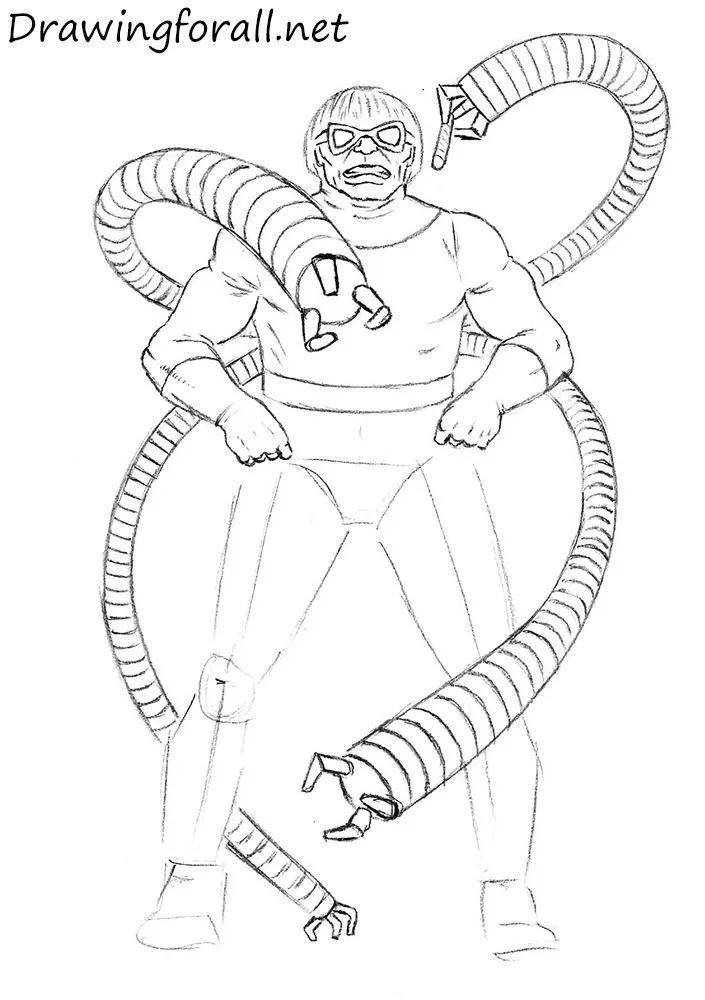
Step 8: Finish Doctor Octopus’s legs
Draw the legs of Doctor Octopus. Erase the construction lines and add fabric folds around the knees. Mark the muscles of the thighs and shins, then use a few curved strokes to draw the shoes. Do not forget the folds around the ankles and add several short lines across the toe areas.
Step 9: Add bold comic shadows
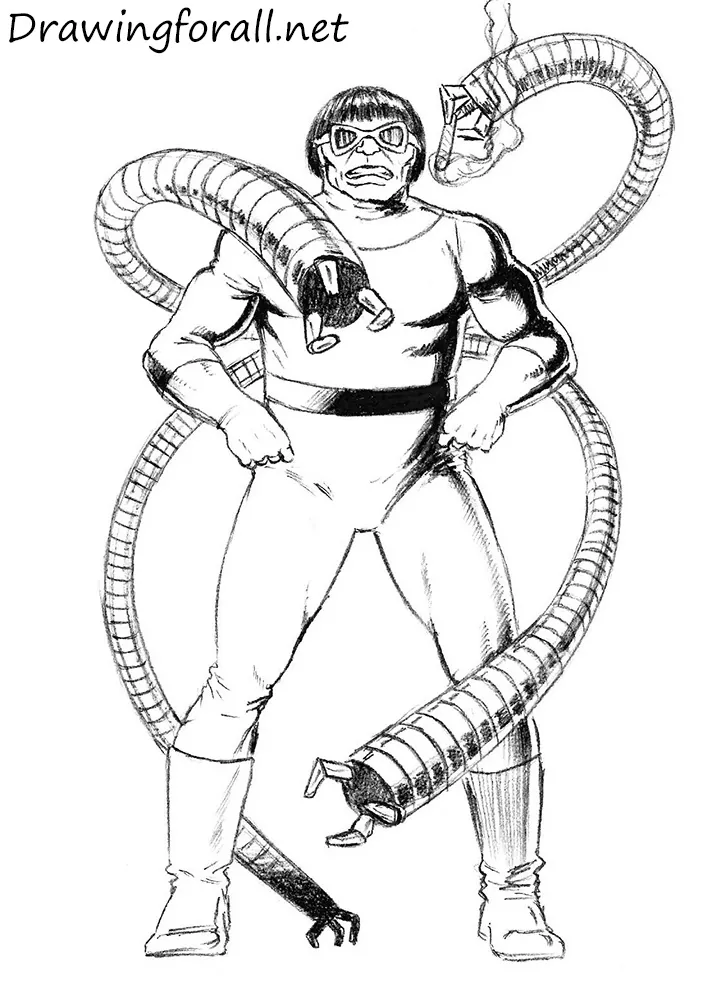
Draw the shadows in a coarse, contrasting comic-book style. Create them in two stages: first outline the shadow shapes, then fill them with a soft pencil. Pay special attention to the shadows on the metal tentacles of Doctor Octopus. They appear as long, dark bands extending along the tentacles. Use unidirectional hatching to create the halftones.
This was a tutorial on how to draw Doctor Octopus, prepared by Drawingforall.net. Visit our site for new drawing tutorials.