

How to Draw Classic Batman
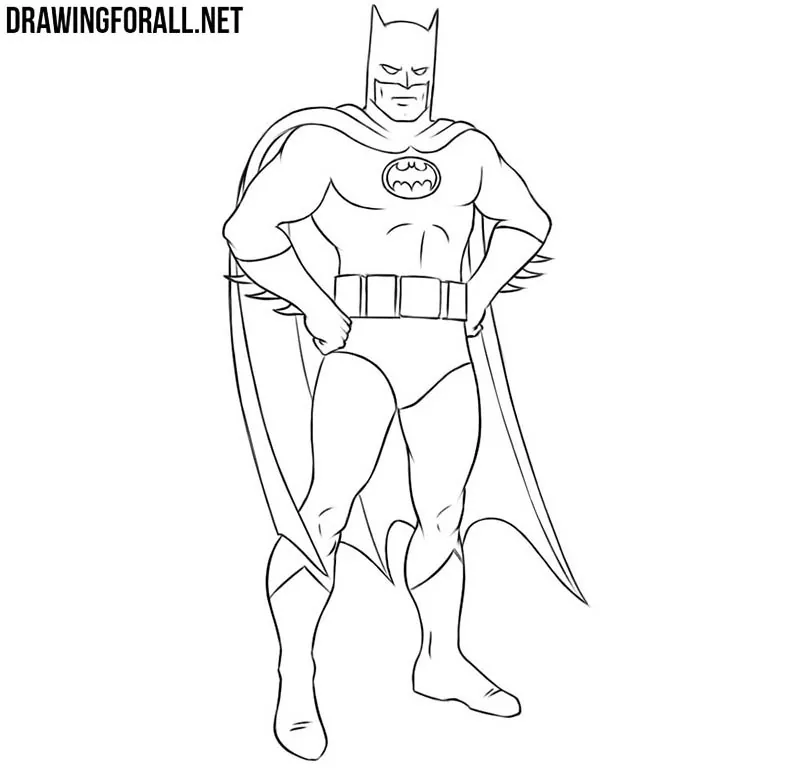
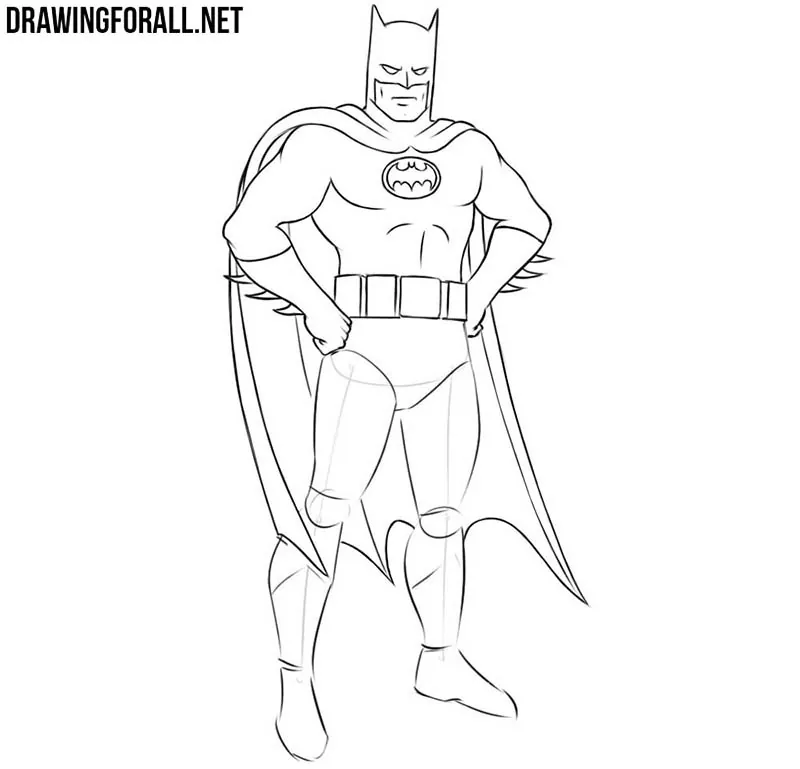
Using this step-by-step tutorial, we will show you how to draw classic Batman in his traditional comic book appearance.
We love the Dark Knight, who, without exaggeration, is one of the most famous comic book superheroes. There are already several different Batman drawing tutorials on Drawingforall.net showing different versions of this character.
Here we will try to recreate the classic appearance of Batman from the DC comics of the mid-20th century.
How to draw classic Batman step by step
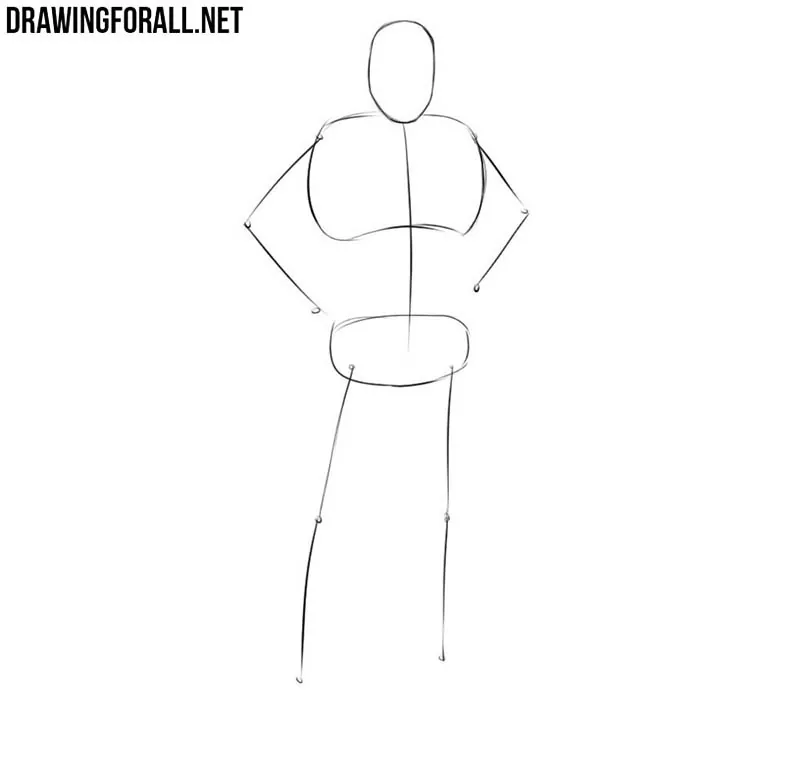
Step 1: Sketch Batman’s basic guidelines
To properly draw classic Batman, first outline the basic figure. Start with the head, which looks like an oval, and then mark the spine. Sketch the wide chest and comparatively narrow pelvis to convey Batman’s powerful superhero build. Finish the basic figure by drawing the arms and legs with very simple lines.
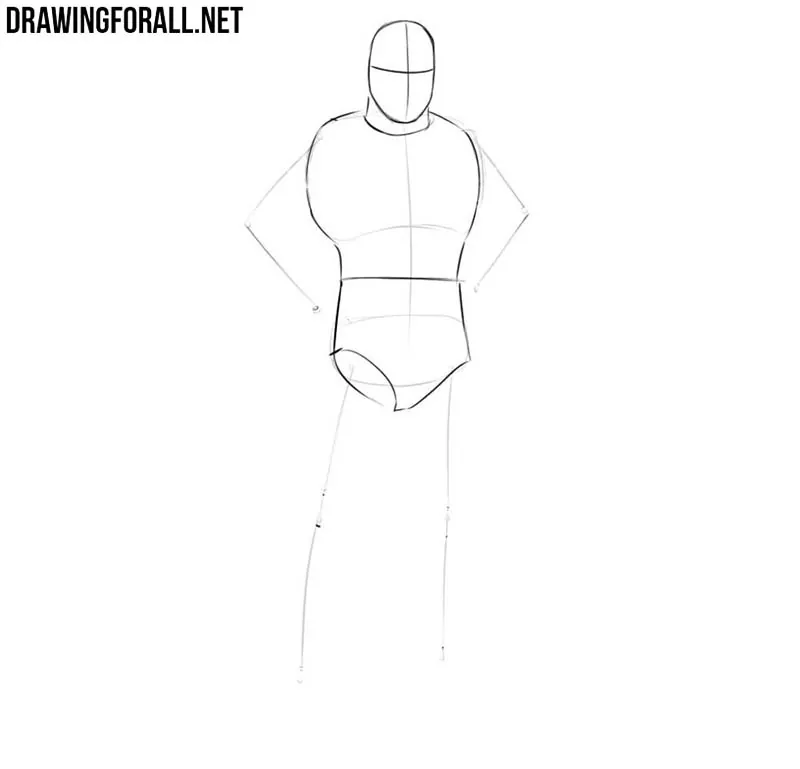
Step 2: Shape the superhero torso
To correctly position Bruce Wayne’s facial features, draw two simple guidelines intersecting in the center of the head. Now mark Batman’s wide and powerful neck as a short cylinder and sketch the muscular torso, which should taper noticeably toward the waist.
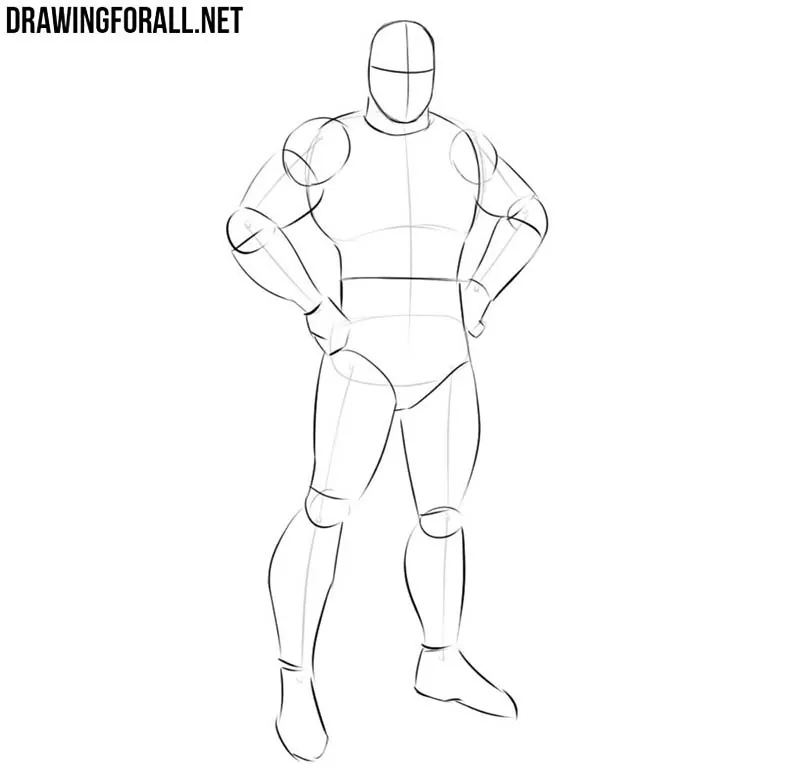
Step 3: Build Batman’s muscular limbs
Now add volume to the limbs of the classic superhero. Mark Batman’s deltoids, elbows, and knees with simple rounded forms, and sketch the arms and legs as slightly modified cylinders. With rough lines, outline the hands clenched into fists and the basic shapes of the feet.
Step 4: Add classic Batman details
The basic mannequin for the Batman drawing is complete, so now add the most recognizable details of the character. Sketch the eyes along the horizontal guideline, then mark the opening of the cowl and the mouth. Add the pointed ears of Batman’s mask and outline the bat emblem on the chest.
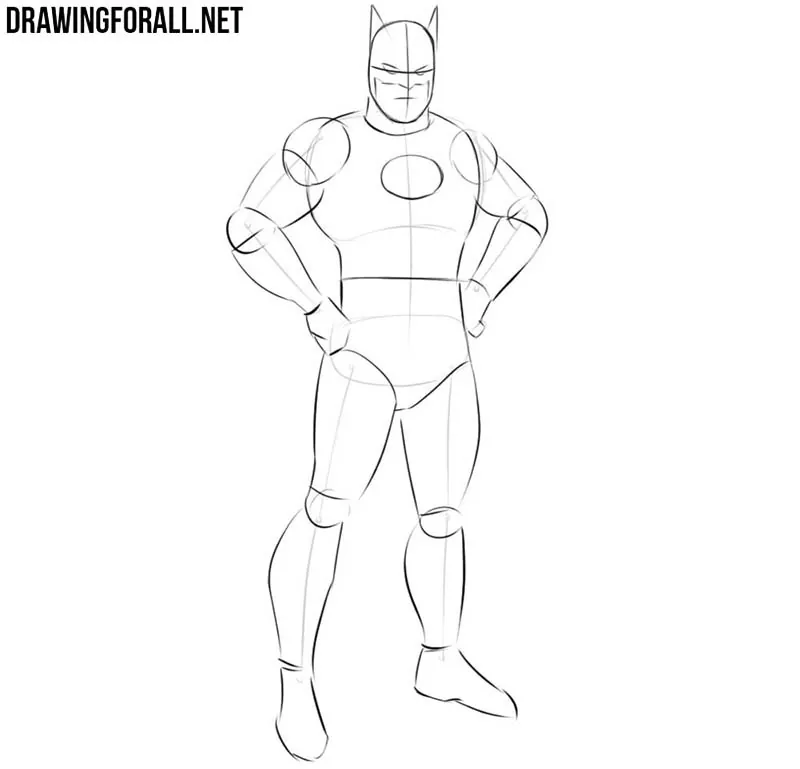
Step 5: Sketch the classic costume
First, outline one of the most characteristic parts of classic Batman’s costume, the long cape with its scalloped lower edge. Next, sketch the outlines of the boots, utility belt, and gloves with their characteristic fins. Sketch all these costume details using very light lines at this stage so they can be refined later.
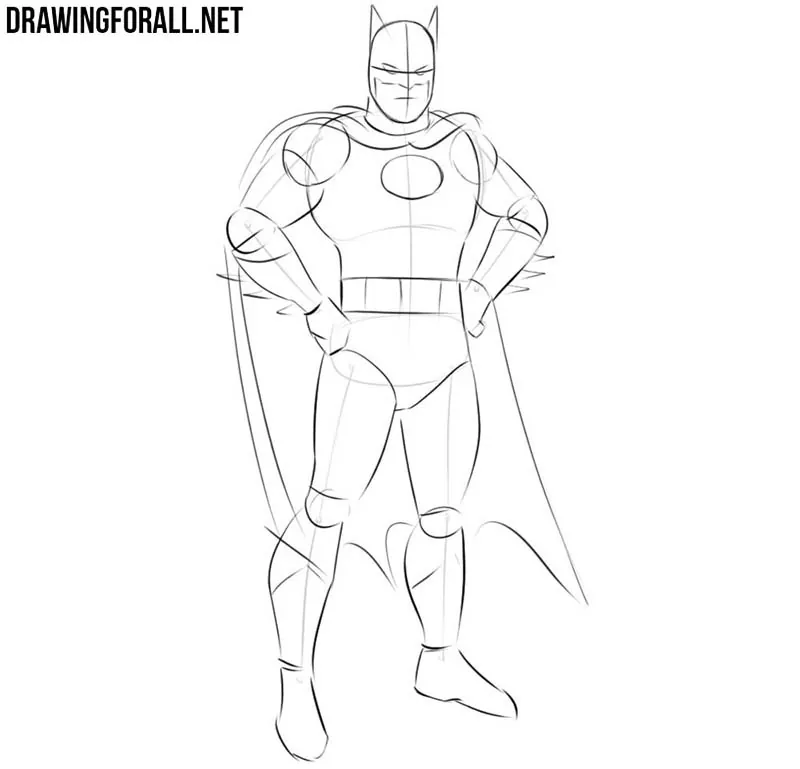
Step 6: Refine Batman’s masked head
Now move on to the final details, and draw Batman’s head in detail. Draw the frowning eyes, sharp nose, and contours of the famous cowl. Outline the mouth and add a few facial wrinkles. Remove the unnecessary guidelines to make the classic Batman head clean and finished.
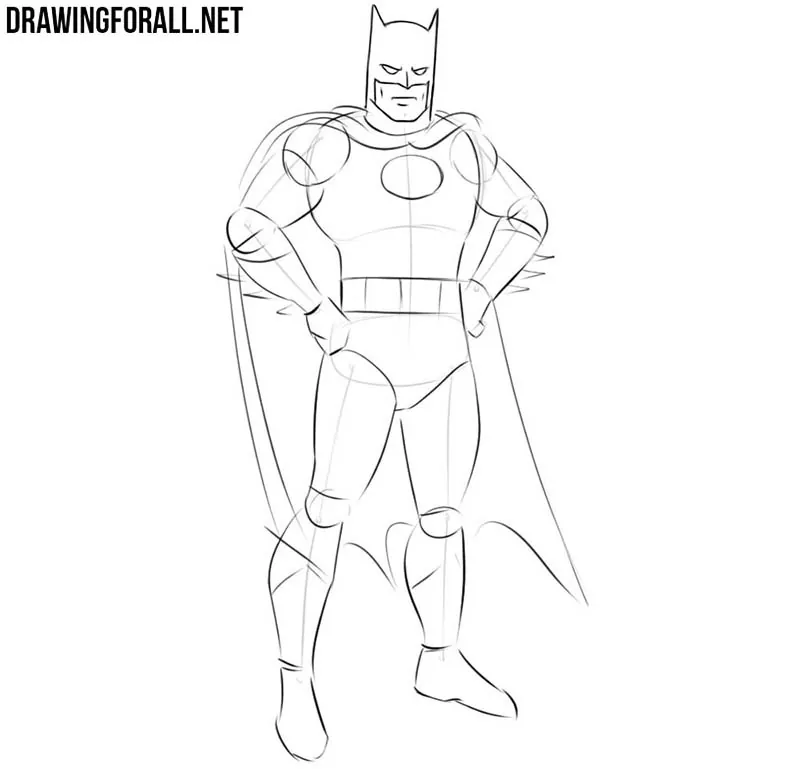
Step 7: Detail Batman’s torso
Now draw Batman’s torso with clear finishing lines. Detail the powerful pectoral muscles and abs beneath the tight classic costume. In the center of the chest, carefully draw Batman’s logo. Then add the details of the belt and remove the remaining guidelines from the superhero’s torso.
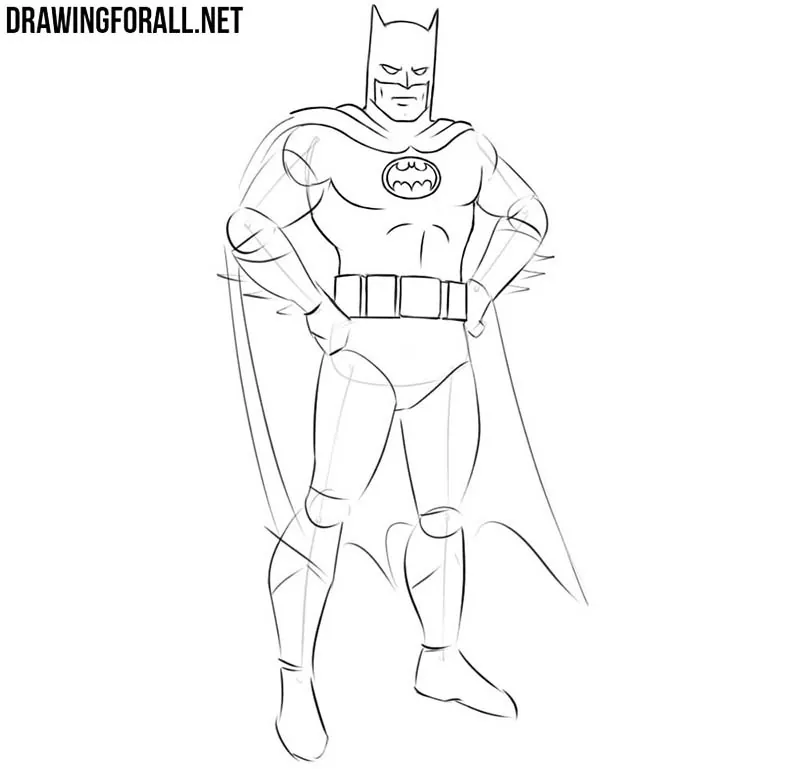
Step 8: Draw the arms and cape
Now finish Batman’s powerful arms. Using clear and dark lines, trace their contours and indicate the main bends of the muscles beneath the tight costume. Carefully draw Batman’s clenched fists and trace the gloves with their characteristic fins. Then darken the long edges of the classic cape with clean lines.
Step 9: Finish Batman’s legs
Finish the classic Batman drawing by refining the legs. Trace the muscular contours with clean lines and indicate the knees and the main muscle shapes beneath the costume. Draw the tall Batman boots and add the necessary folds around the joints. Finally, erase any unwanted guidelines that remain.
So, this was a tutorial on how to draw classic Batman. We depicted the Dark Knight in a traditional comic book style. You can make your classic Batman drawing more detailed by adding shadows.

Wonderful Drawing
You are right this is a wonderful sketch drawing
i love drawing
Great keep it up
shut up not face long neck
Drawing is the best
Can’t draw
See as both of them just dey wear pant and their like broom stick
I LOVE DRAWING
I LOVE DRAWING SO MUSH
it wasn’t useful
hahahhhahahahaah
I love your art work
It look good
Nice drawing
I love drawing batman
And By The Way I Love Drawing Drawing Is My Every day Hobby i Have Drawn big Chill, Ultimate big Chill ,black Widow,bat Girl,ultimate Heat Blast and 29 more i Wish I Can Show U 2 prove But i Can’t if Any One Knows How To Video And post In This Place Pleas Pleas and Pleas !!! Show Me in This Place And Send Your Account No and get Ready To Receiv 1 thousand