

How to Draw an Anime Boy
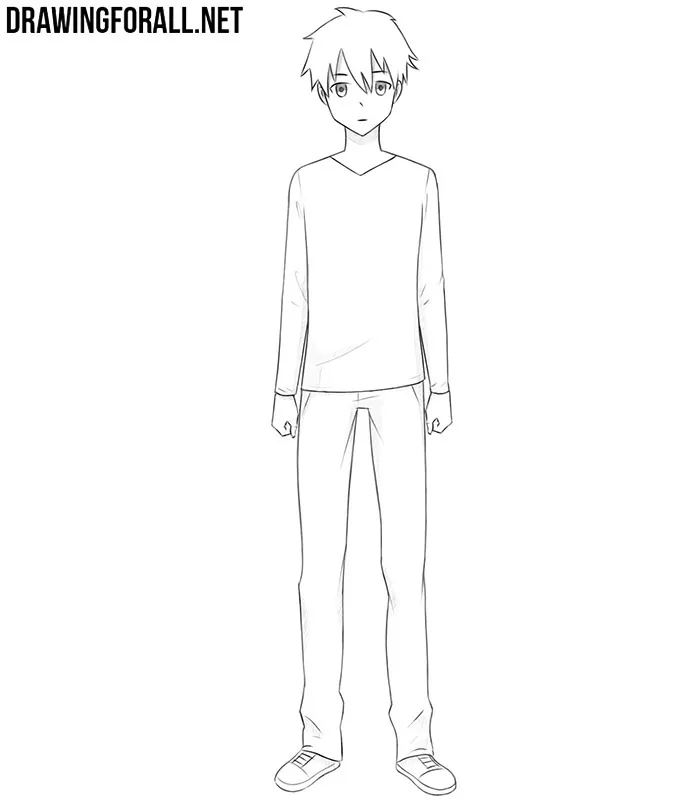
In this drawing guide, we will show you how to draw an anime boy. We specifically chose a simple character design that is easy to follow.
How to draw an anime boy step by step
Step 1: Sketch the anime boy
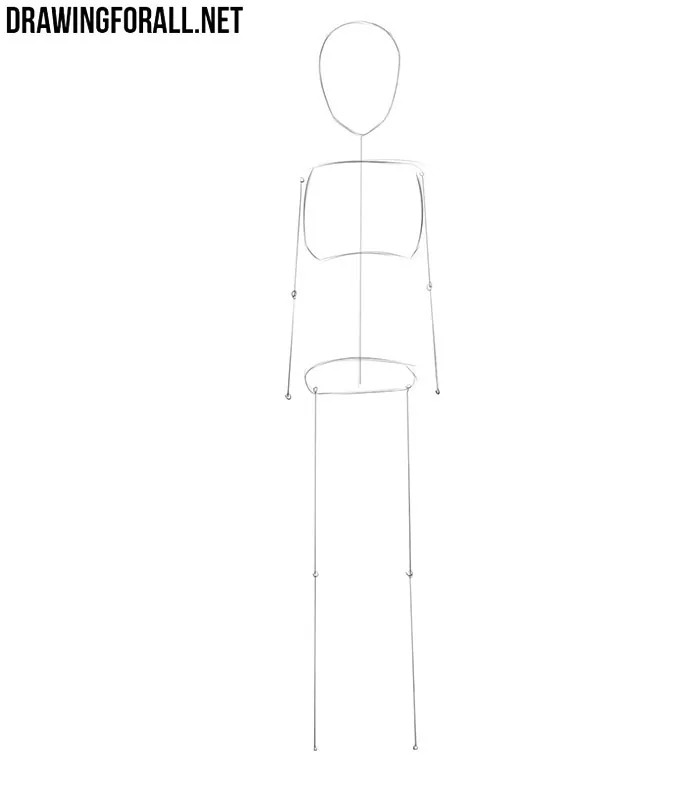
First, create a basic design of sticks and circles to outline the proportions of the anime boy, his pose, and his position on the paper. Here we see the physique of a thin boy in a static pose. The shoulders are slightly wider than the pelvis, while the head is relatively large compared to the body.
Step 2: Build the boy’s torso
Now, with the help of smooth lines, connect the contours of the individual parts of the body. Join the head and chest with a thin neck. Connect the chest and pelvis using two concave lines that form the sides of the abdomen. Based on the oval from the previous step, draw the contours of the pelvis. Also, draw two intersecting lines on the face. The horizontal line should separate the lower third of the face. A vertical line divides the anime boy’s face into two equal parts.
Step 3: Add the boy’s limbs
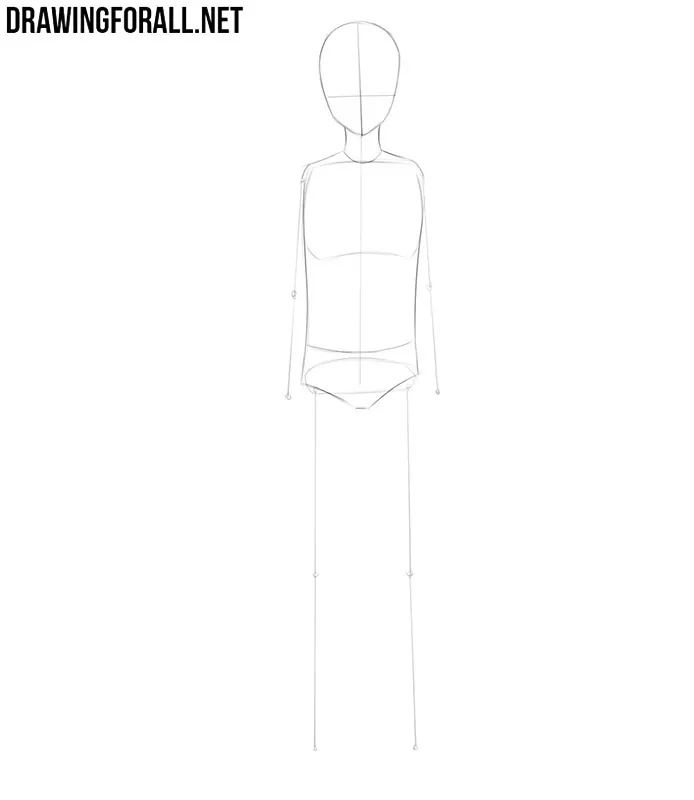
Now outline the limbs of the anime boy. Use elongated, thin cylinders to indicate the position and shape of the arms and legs. Draw the large joints as ball-like shapes. Pay particular attention to the size of the feet and hands and the angle of the feet relative to the lower legs.
Step 4: Add hair and eyes
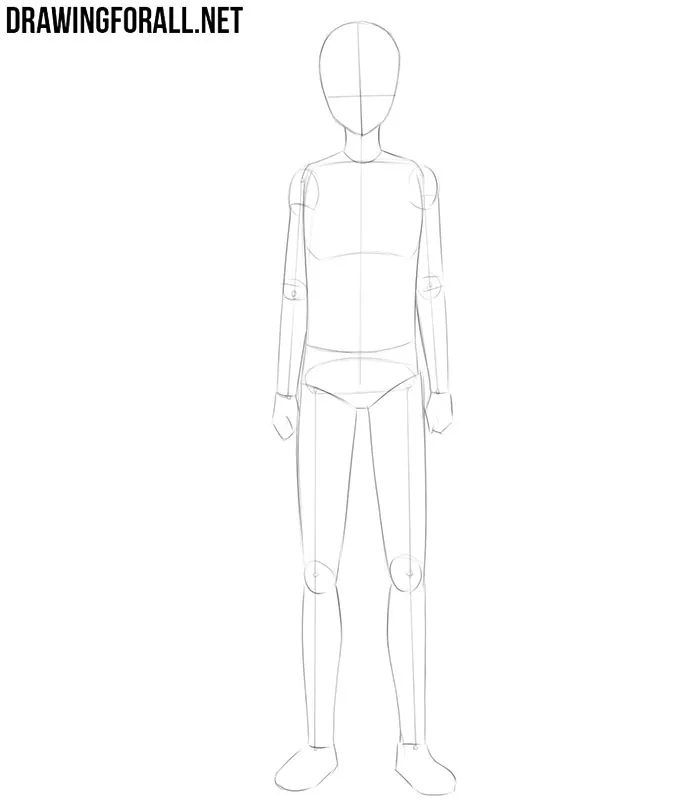
Now make the character look more like an anime boy. To draw an anime face correctly, start with the basic forms. Sketch the eyes, nose, and mouth using the guidelines from the previous steps. Then indicate the general shapes of the ears on the sides and sketch the anime hair without adding details yet.
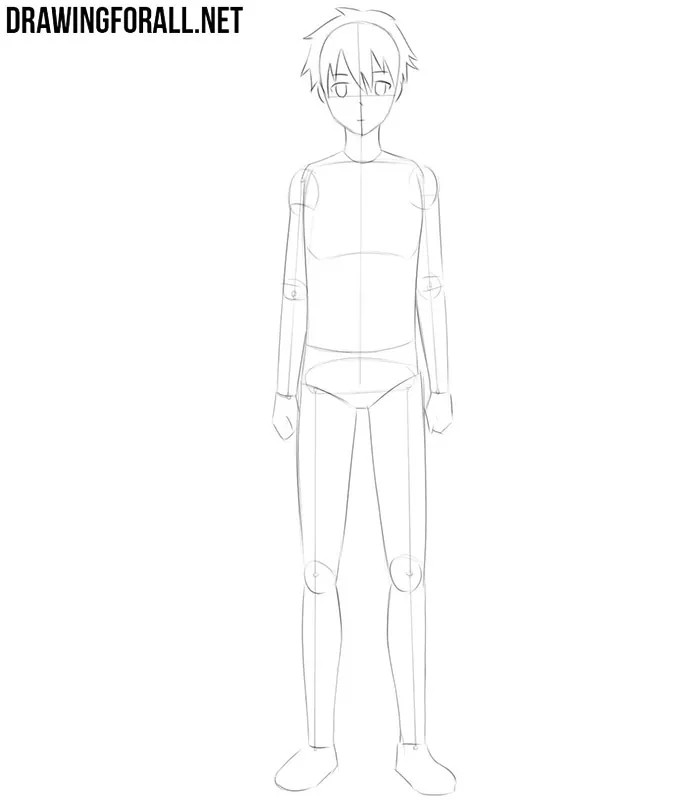
Step 5: Sketch the boy’s clothes
To draw anime clothing, first outline its general shapes with light lines so you can add the details later. Sketch the approximate contours of the sleeves, pants, and sweater. You can come up with your own look and outfit for the anime boy to give the character a different appearance.
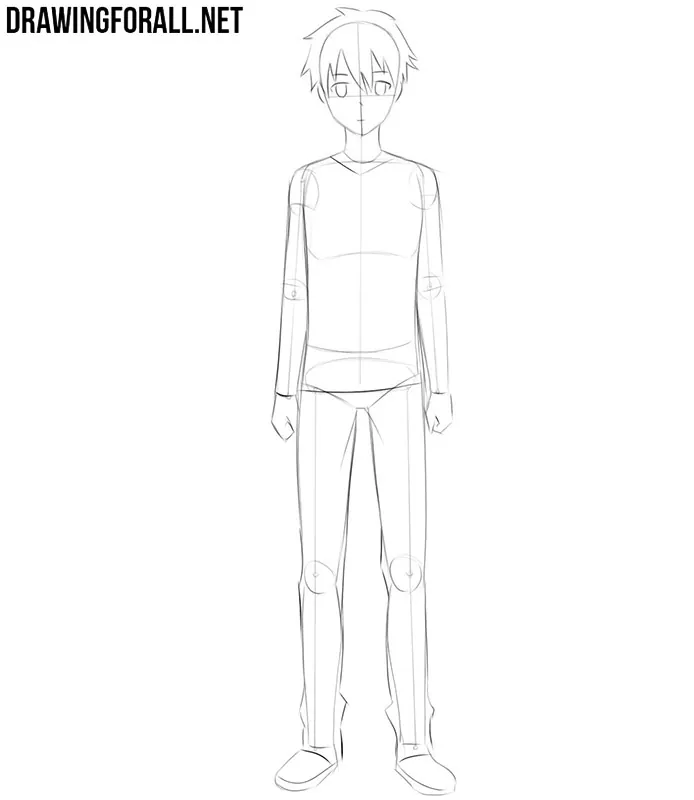
Step 6: Refine the anime face
The eyes are one of the most important features of an anime character and can help convey the character’s mood. Start detailing the face by drawing the anime boy’s eyes. Trace the shapes you outlined earlier and give them a finished look. Then darken the contours of the jaw, nose, mouth, and ears. Finally, darken the outlines of the hair.
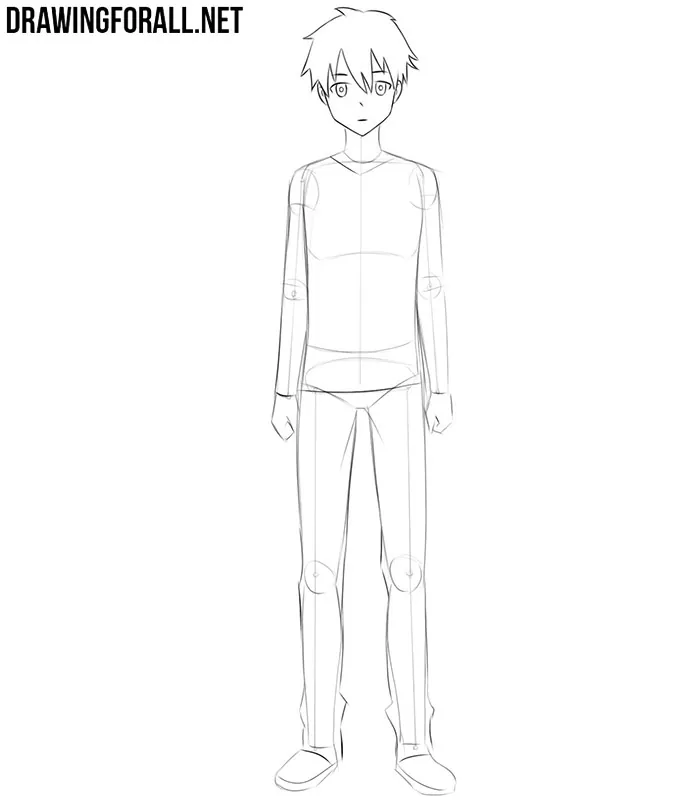
Step 7: Refine the upper body
Move on to the anime character’s torso and start refining it with cleaner lines. Outline the clothing, gradually erasing the construction lines and correcting the contours. Here, you can make this part of the character more individual by adding details that are not shown in our example.
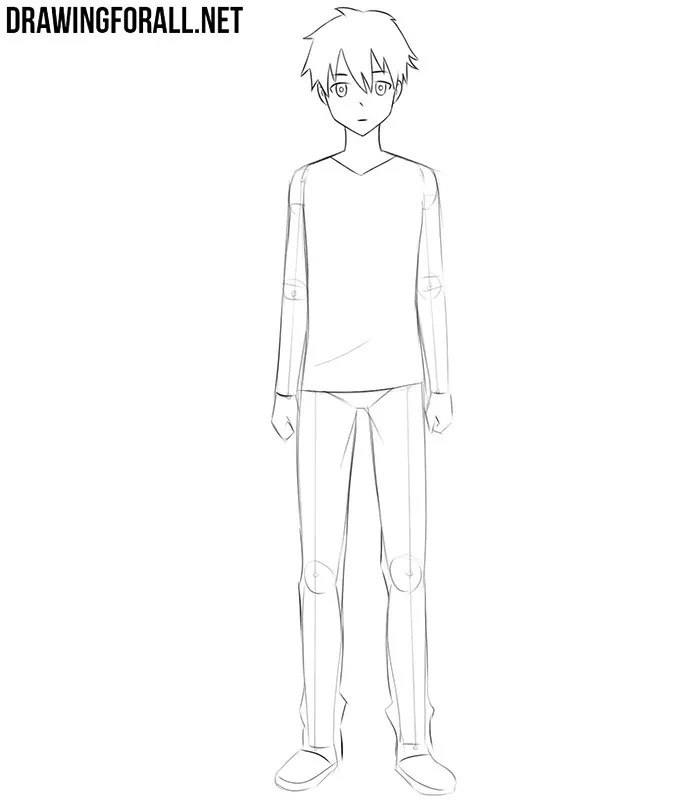
Step 8: Finish the arms
Now refine the anime boy’s arms. First, remove the extra lines from the sleeves, draw their final contours, and add the necessary fabric folds. After that, draw the anime hands. Each fist resembles an asymmetrical hexagon with a line separating the thumb from the other fingers.
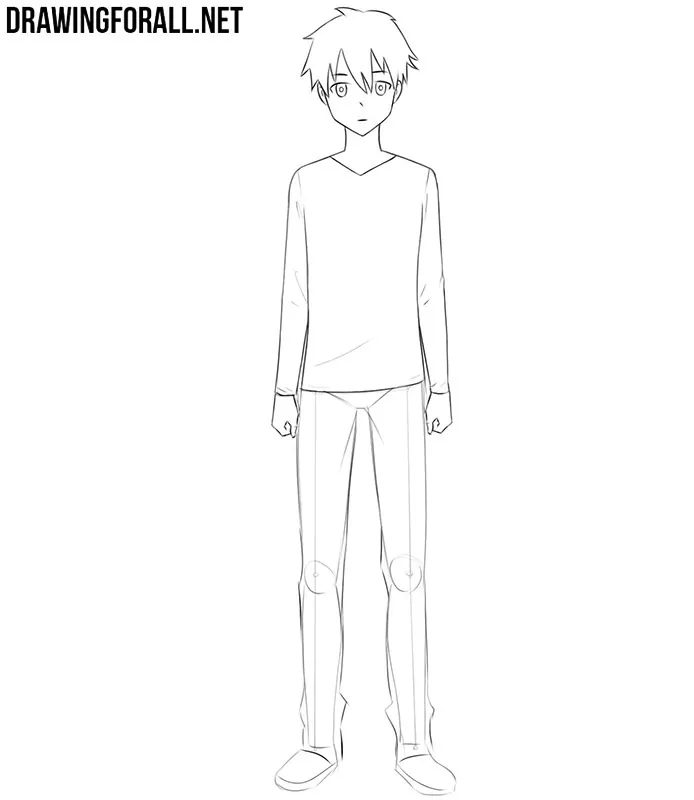
Step 9: Finish the legs
Repeat the same process with the pants and shoes of the anime boy. Pay particular attention to the fabric folds near the lower ends of the pant legs. Do not forget the edges of the soles and the shoelaces.
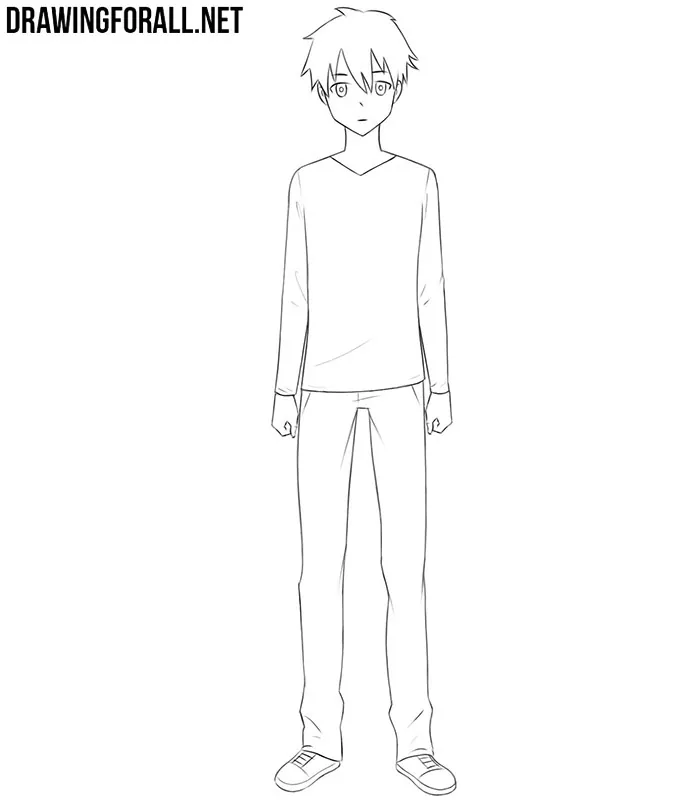
Step 10: Add light shadows
Light shadows will give the anime boy drawing a more finished look. Add small areas of hatching under the character’s neck and hair, as well as near the folds in his clothes.
So, this was our guide on how to draw an anime boy. We hope the steps were easy to follow. If you succeeded, do not forget to write about it in the comments here or on our social networks. We are waiting for your feedback!


Ehh I give up
keep trying
Really helpful
Great
i don’t really know how to do it it’s kinda hard since it’s my first time doing anime.
lol its ok i’m a begginer too
you will get beter
Helpful
Same
Same
Am I the only one who thinks this looks like Kazuto Kirigaya from Sword Art Online?
i did it too
Really fun and easy! 🙂
Really helpful! Thanks Stephan! Now I can impress my brother!
Got it on a first try …. 10q steve😊😊😊😊
DRAW A ANIME LEPRECHAUN
Wow, this is actually really helpful, turned out pretty well.