How to Draw Princess Celestia
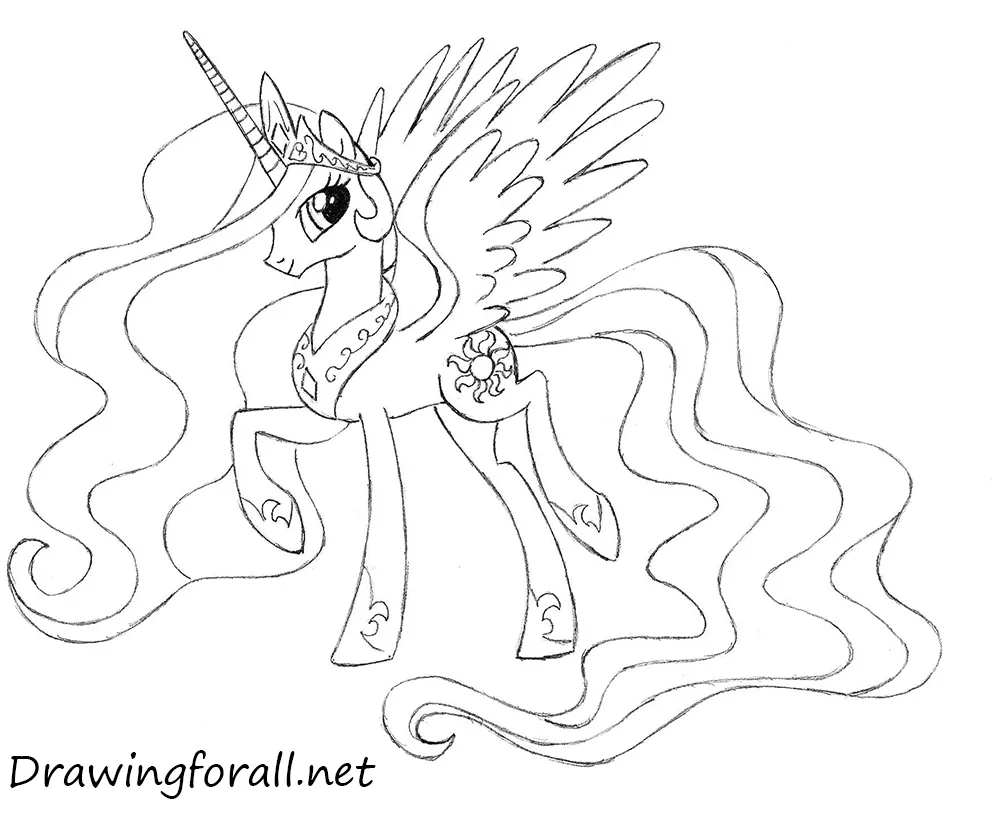
In this tutorial, we’ll show you how to draw Princess Celestia, a character from the animated series “My Little Pony”. Celestia is one of the most beloved heroines of the series around the world.
She is a good and wise ruler, as well as a loyal friend and mentor to the pony Twilight Sparkle. Let’s begin this Princess Celestia drawing tutorial!
How to draw Princess Celestia step by step
Step 1: Sketch the basic shapes
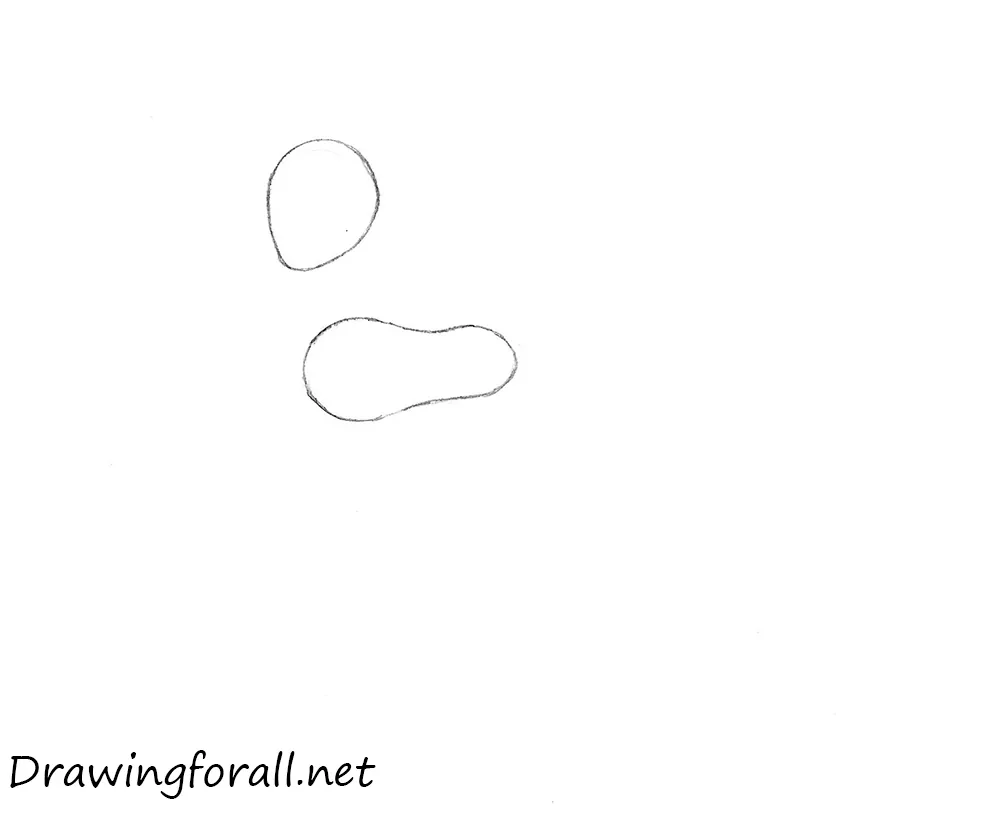
Even the most intricate pencil drawing tutorials on our site begin with simple steps. This tutorial is no exception, so begin drawing Princess Celestia with two very simple shapes that will eventually become the head and torso.
The upper shape is rounded and slightly resembles an inverted drop, while the lower shape looks like a bean or a minion drawn from the cartoon “Despicable Me” in a horizontal position.
Step 2: Connect the body shapes
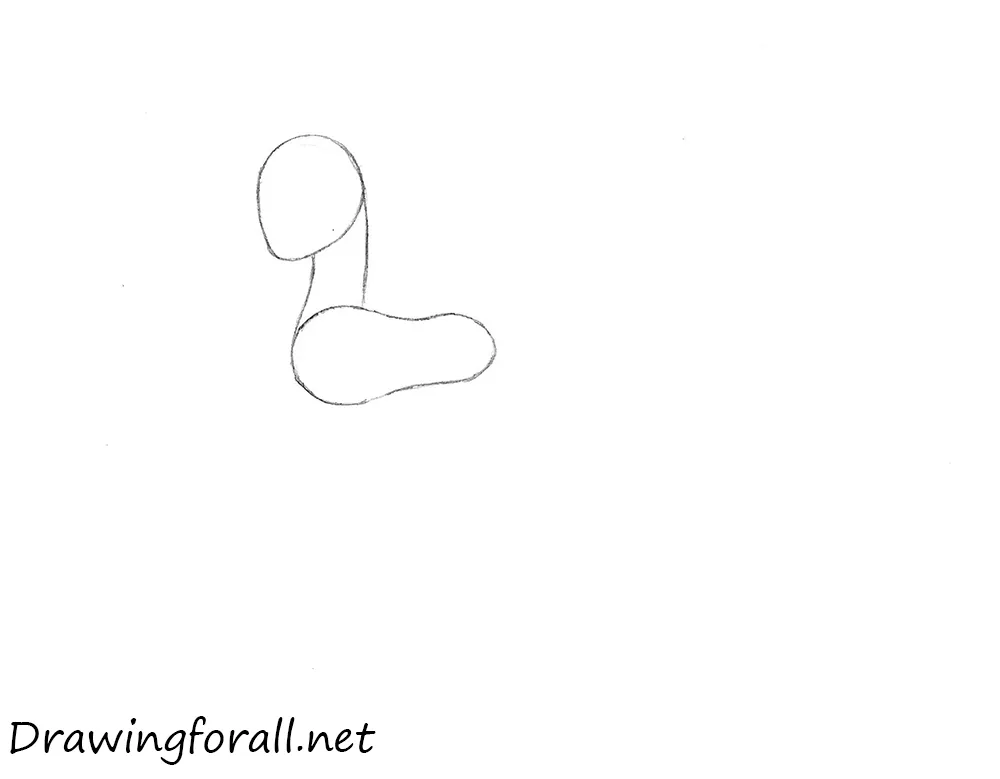
Connect the two shapes from the previous step with two almost parallel lines. The line closer to the tail is nearly straight, while the line closer to the face has a smooth curve.
Step 3: Block in the pony’s legs
Draw Princess Celestia’s legs. They look like elongated, slightly curved cylinders. Each straight leg consists of one simple shape, while each bent leg consists of two simple shapes.
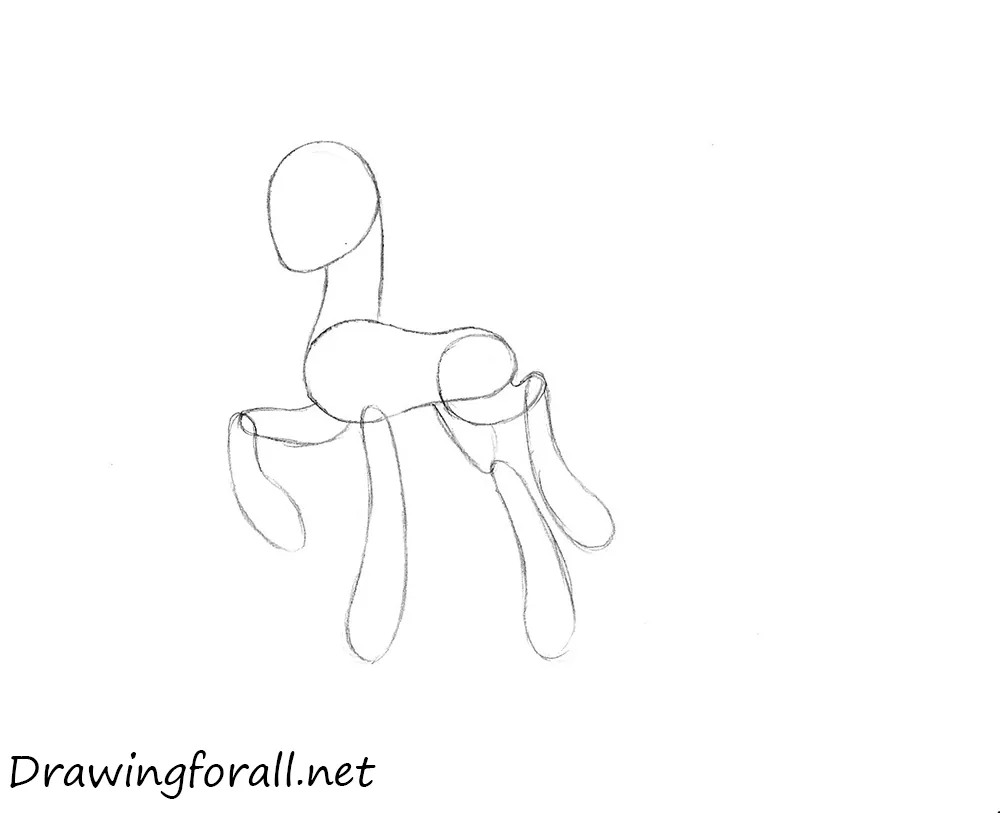
Step 4: Mark the facial guides
Mark Princess Celestia’s face with three curved lines spaced evenly apart. These guidelines will help you place the facial features.
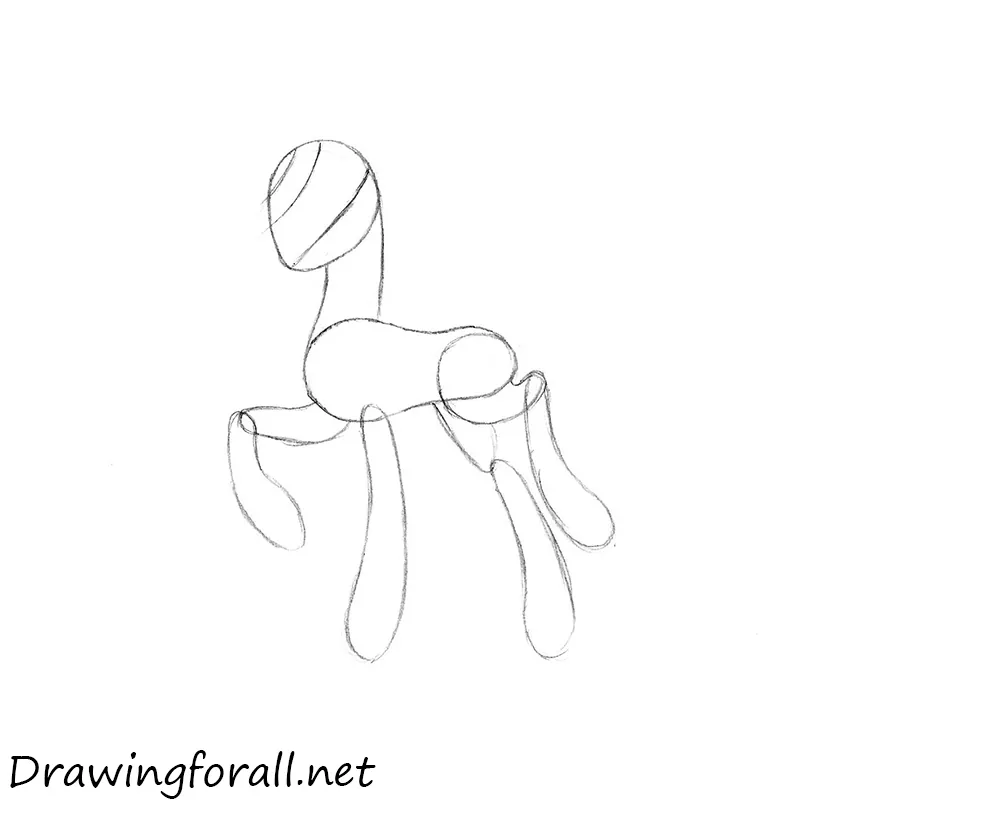
Step 5: Outline the cartoon eyes and muzzle
Using the guidelines from the previous step, draw the outlines of Princess Celestia’s eyes and protruding muzzle.
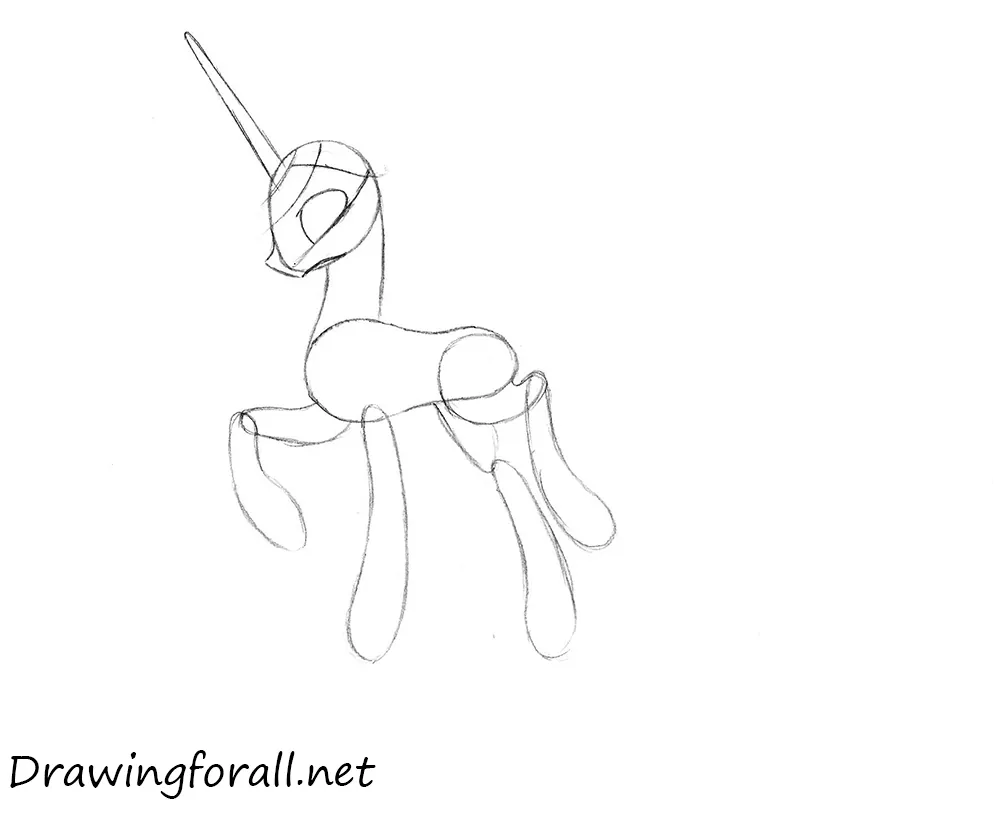
Step 6: Add the crown and hair
Draw the diadem and ear of the princess. Then outline Celestia’s hair. The lower section curls behind her ear near the nape, while the upper section rises around the diadem and horn. Also draw the eye and the pupil inside it.
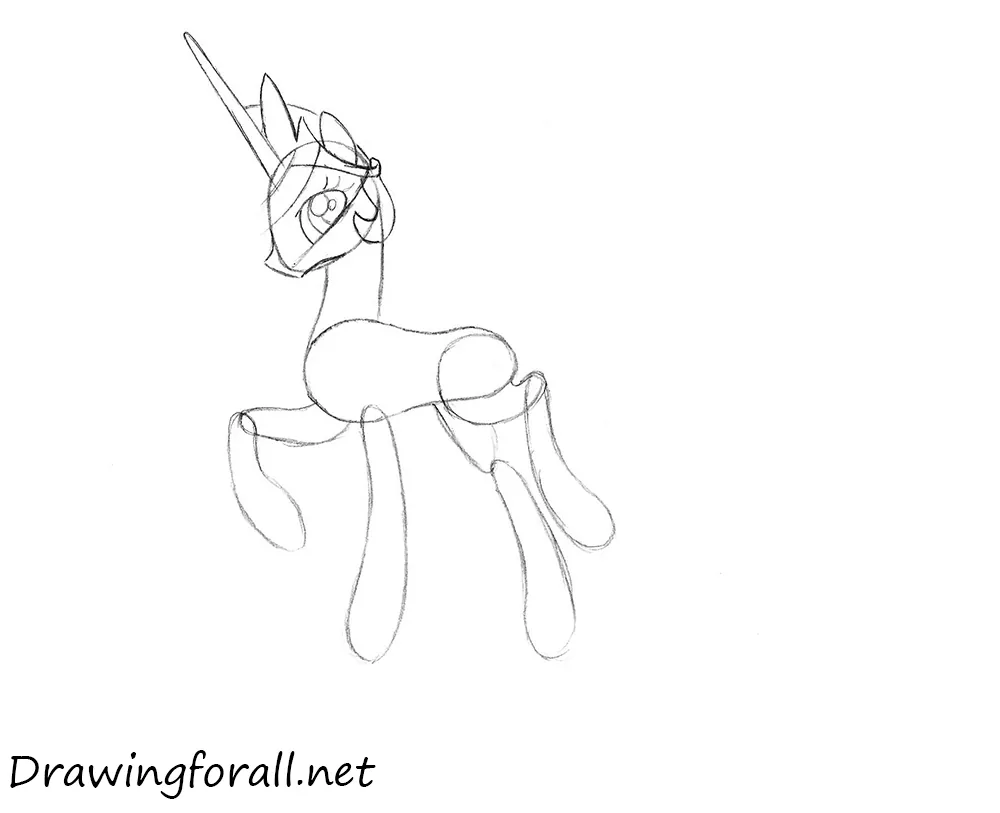
Step 7: Sketch the flowing mane
Outline the silhouette of the pony’s mane, which is almost larger than the rest of the body drawn so far. The mane should continue the hairline from the previous step as it curves around the diadem and horn.
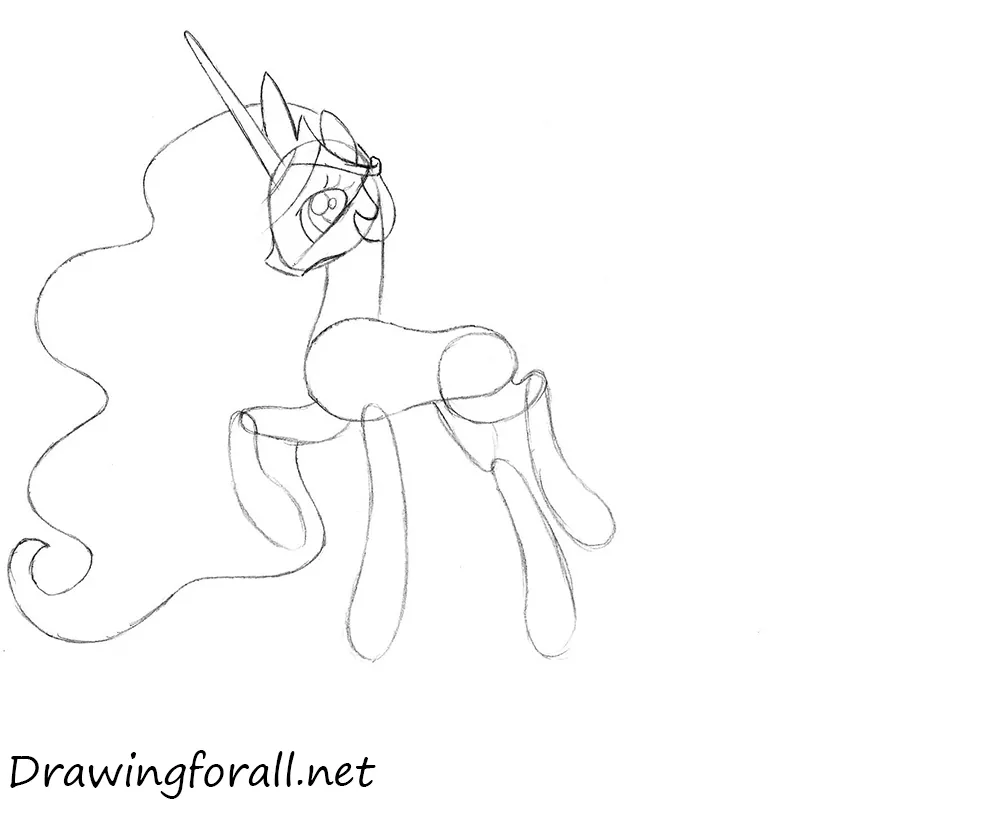
Step 8: Refine Celestia’s facial details
Erase the extra guidelines from Princess Celestia’s face and refine the facial features, horn, and diadem. Outline the nose and mouth with just two short strokes.
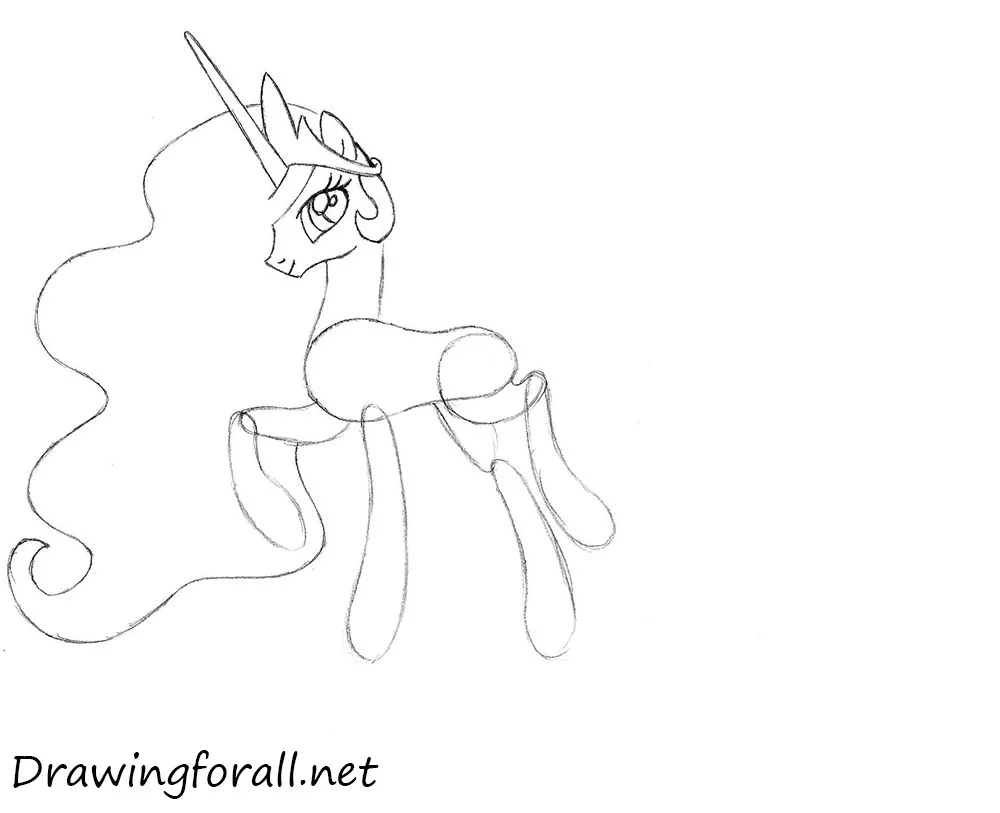
Step 9: Detail the long mane
Use long, curved lines to draw the details of the mane. Remember that Celestia’s mane, like any hairstyle, should be drawn from the roots toward the ends.
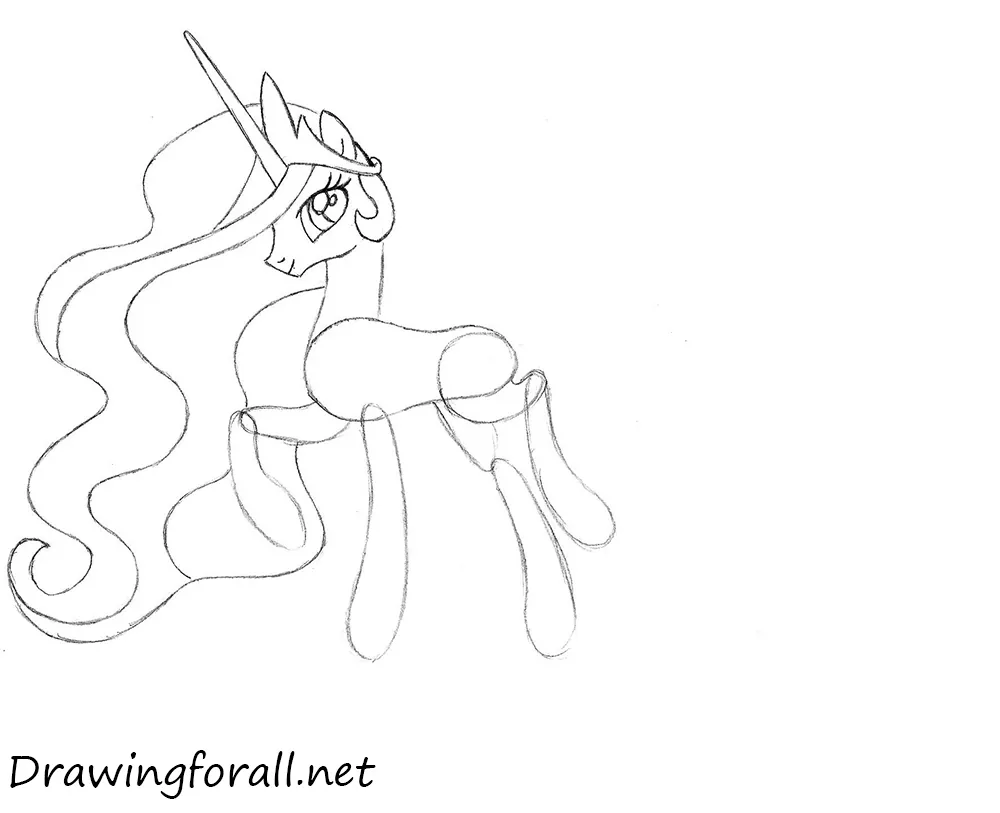
Step 10: Shape the chest and legs
Outline the smooth contours of Princess Celestia’s chest ornament. Refine the leg contours to make them more rounded. Also draw the outline of the mane behind the neck.
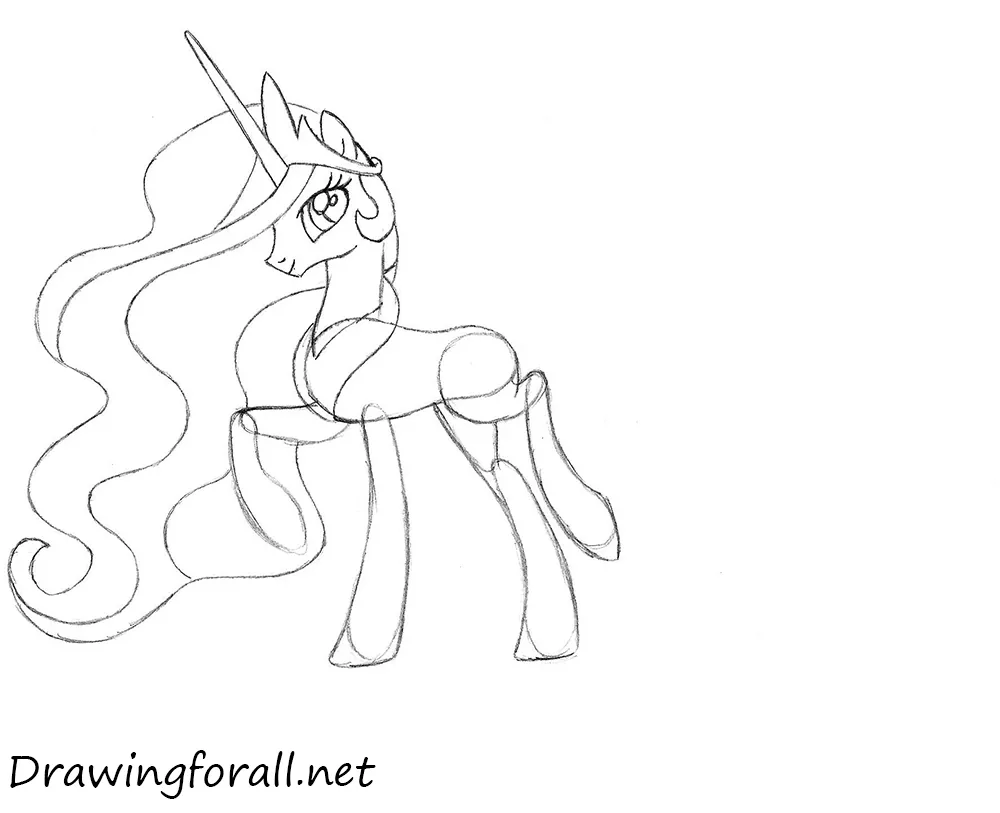
Step 11: Clean up the body
Erase the extra guidelines from the torso and legs, then refine the remaining contours.
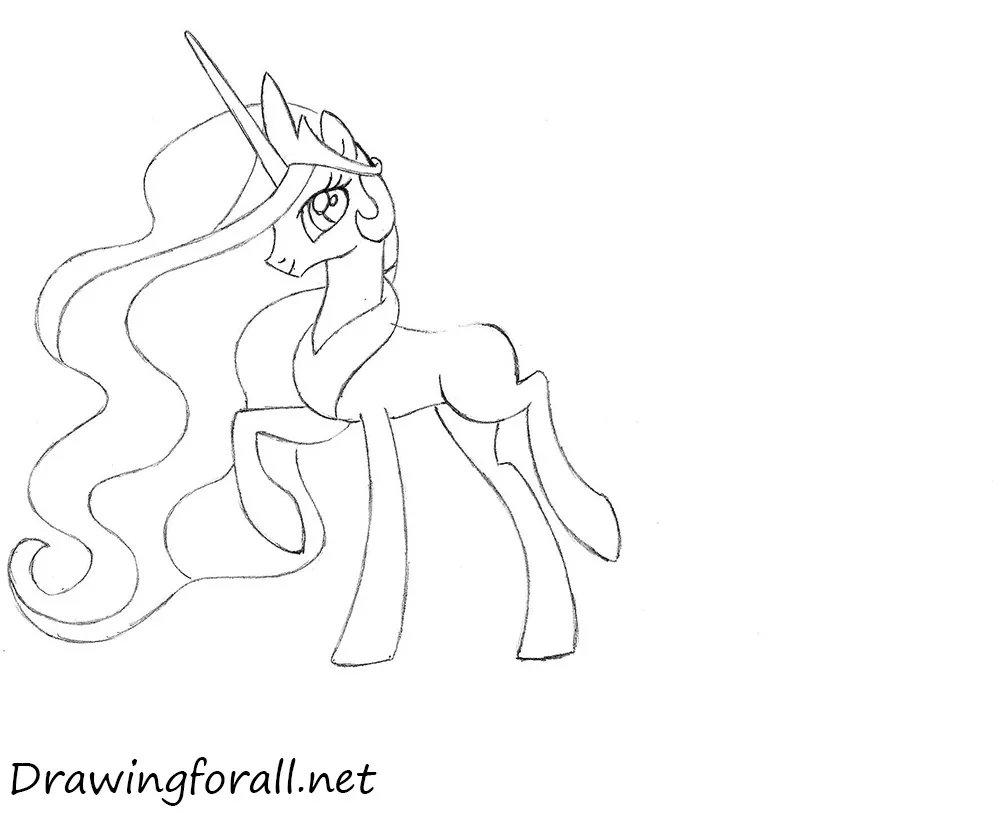
Step 12: Outline the curved wings
Outline the curved wings and the large feathers. Note that the feathers decrease in size as they approach the body. Draw the feather contours from the lower sections toward the upper tips, just as you drew the hair.
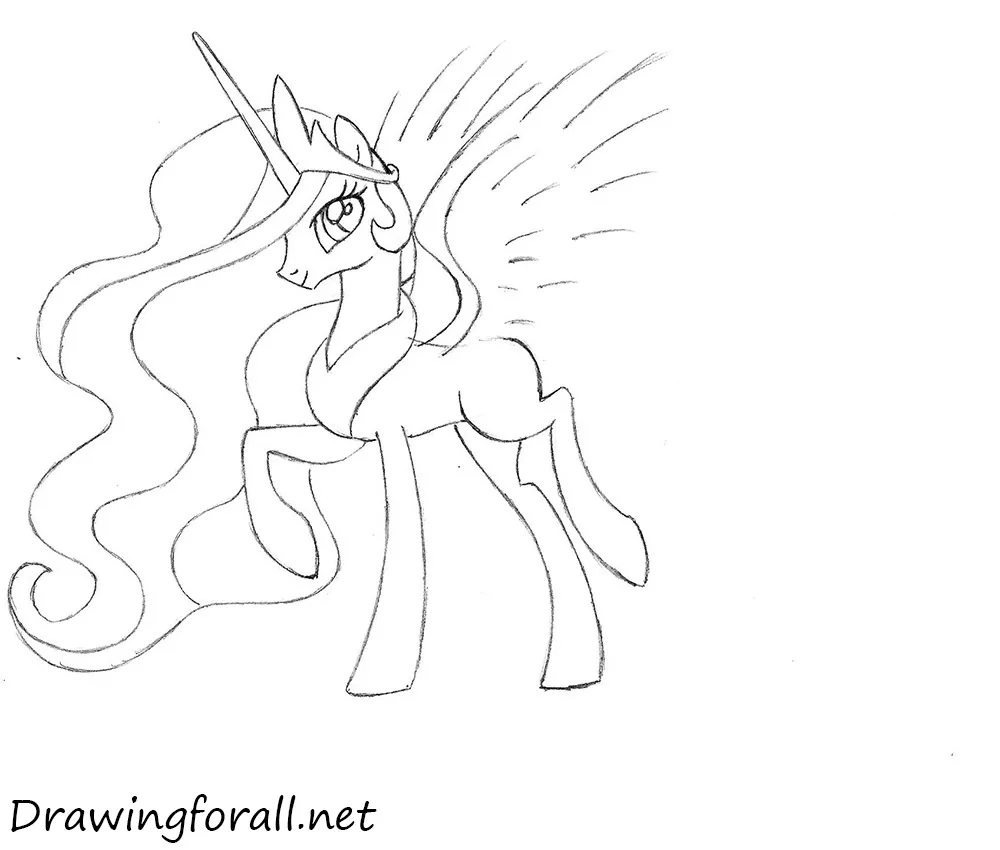
Step 13: Finish the wings and eyes
Refine the feather outlines to give Princess Celestia’s wings a finished appearance. Shade the pupils while leaving small highlights.
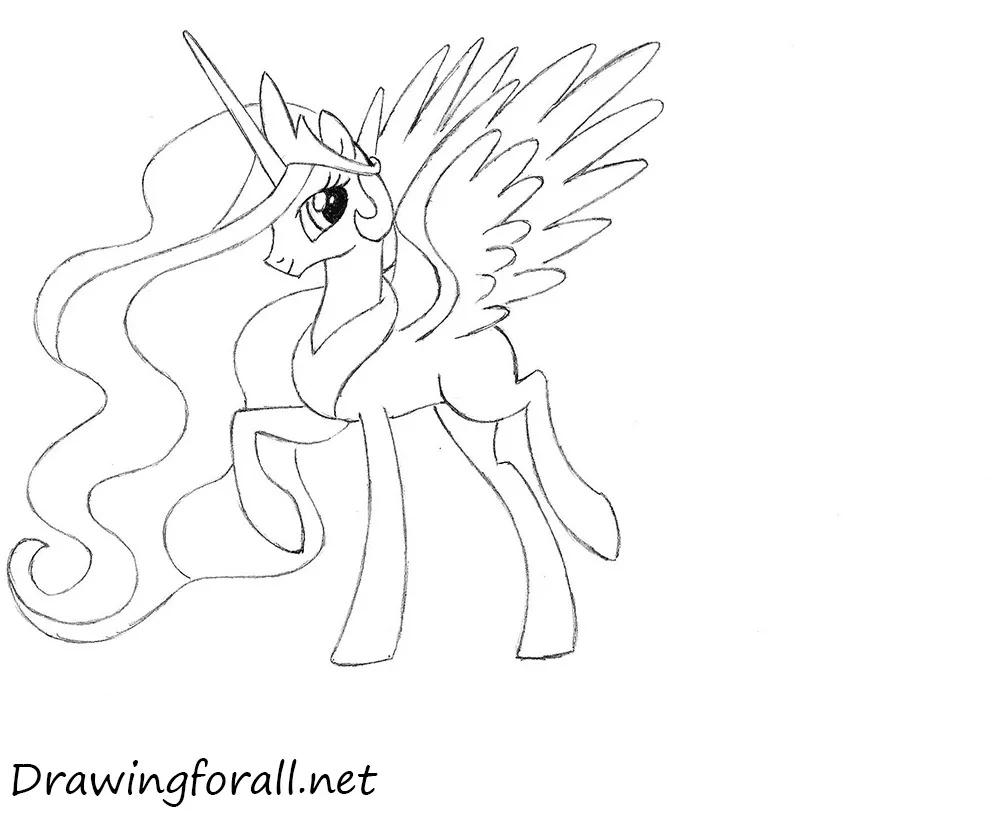
Step 14: Draw Celestia’s flowing tail
Use smooth, wavy lines to draw the silhouette of Princess Celestia’s magnificent tail.
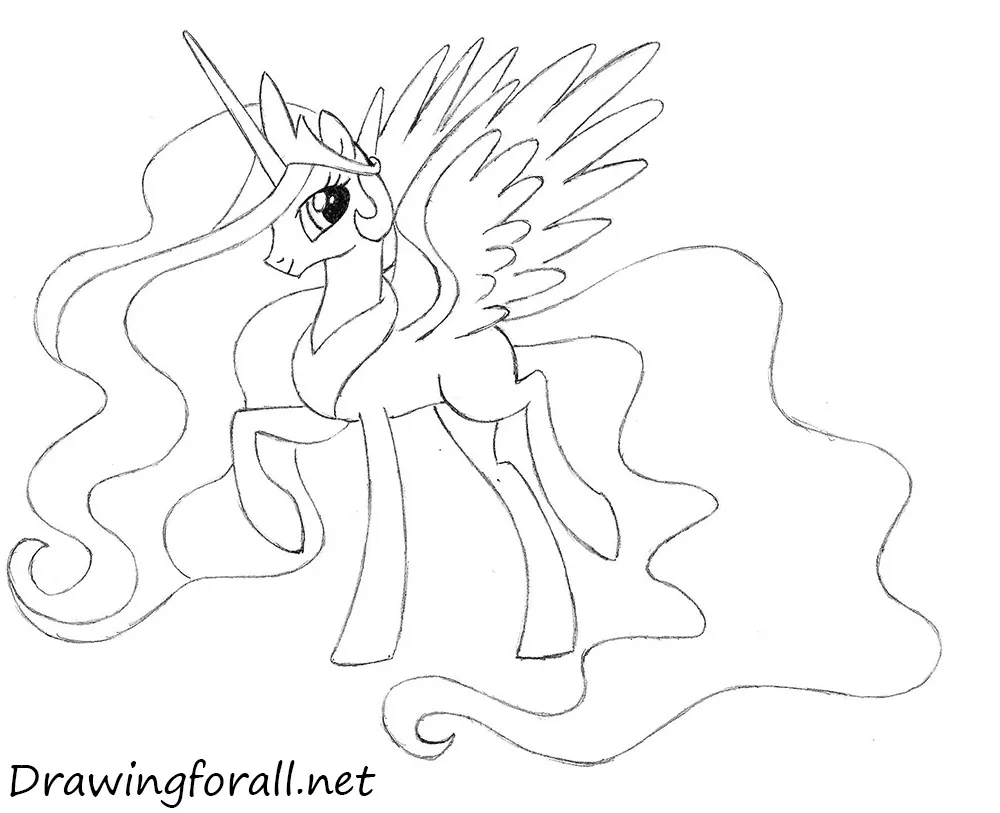
Step 15: Add decorative pony details
Draw patterns on the diadem and chest ornament, as well as on the lower parts of the legs and the thigh. Outline the interior lines of the tail, keeping them smooth and curved.
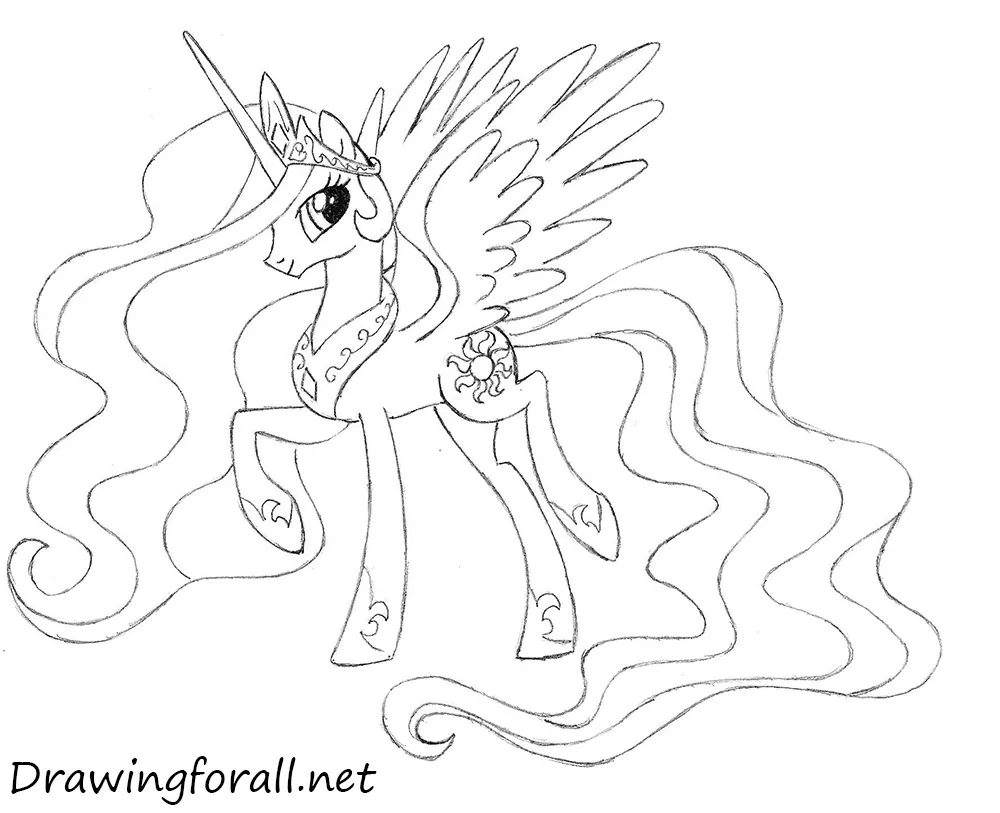
Step 16: Detail the spiral horn
Draw horizontal curved lines across Princess Celestia’s horn. Note that the spacing between them becomes narrower toward the tip.
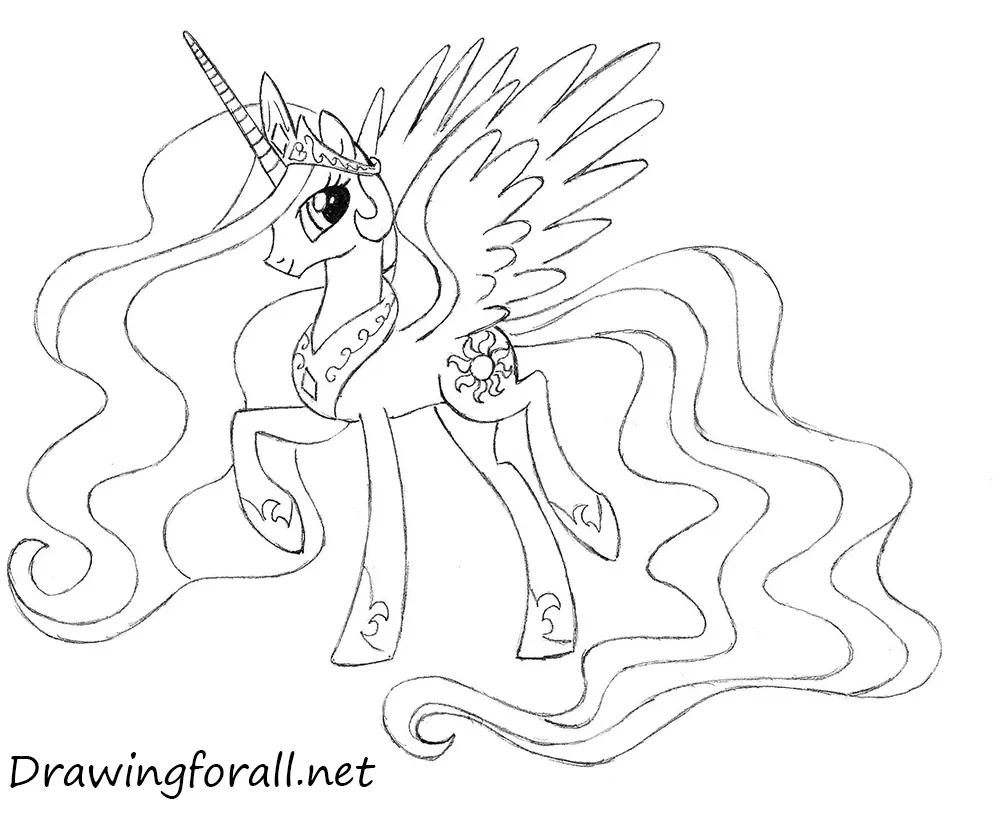
This was a drawing tutorial based on the cartoon My Little Pony, in which we showed you how to draw Princess Celestia. The tutorial was prepared by Drawingforall.net.
If you’d like to draw more My Little Pony characters, continue with drawing Twilight Sparkle to practice sketching another iconic pony. You can also try drawing Rarity or drawing Rainbow Dash, each with their own distinctive hairstyle and personality.