

How to Draw Deadpool
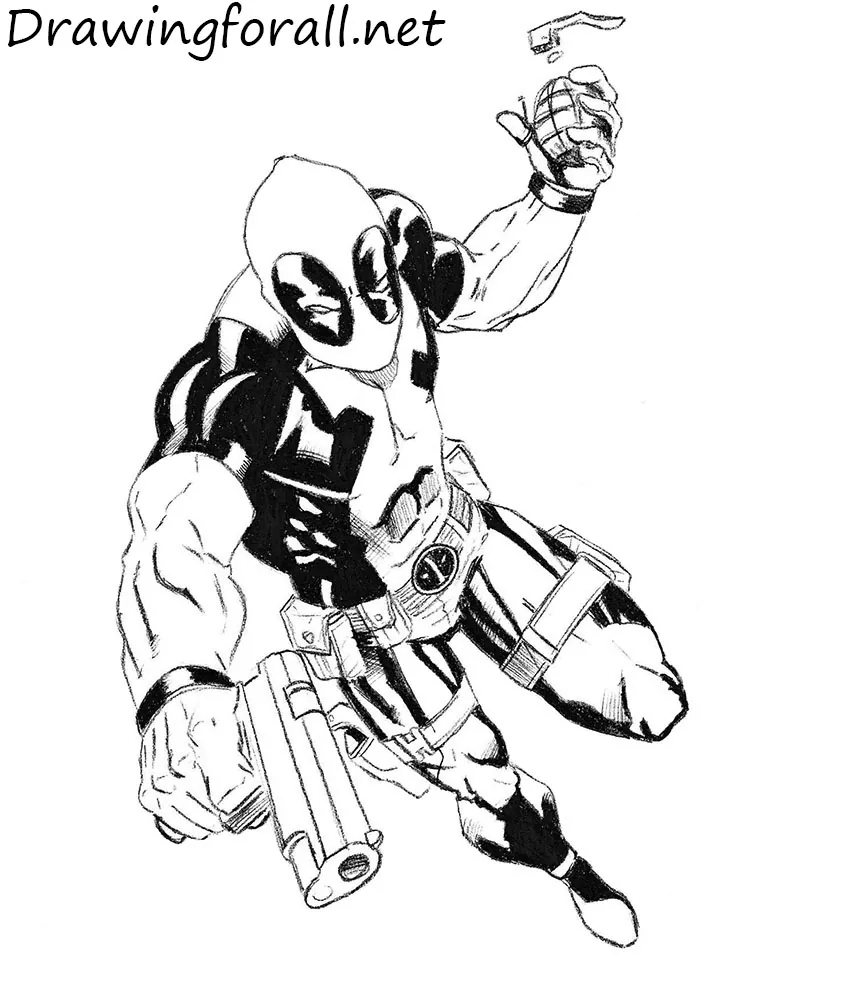
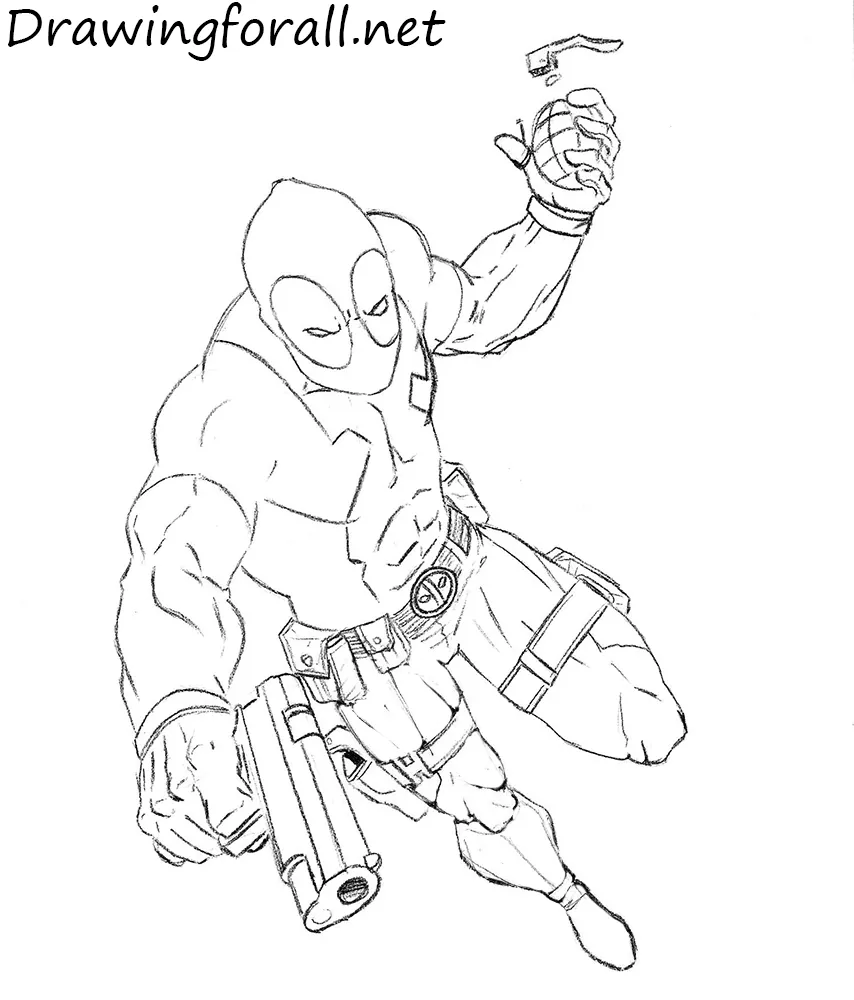
In this step-by-step comic book tutorial, we will show you how to draw Deadpool, one of Marvel’s most recognizable antiheroes.
Note that Deadpool’s costume is very similar to the one from our Spider-Man drawing tutorial.
However, the similarities between Spider-Man and Deadpool end there. He is not a classic hero, but rather a mercenary who often performs various jobs for crime bosses.
Deadpool also has pronounced mental instability and a tendency to do extremely reckless things. In addition, he is a technologically equipped fighter widely known among fans for his jokes, confidence, and dark humor.
How to draw Deadpool step by step
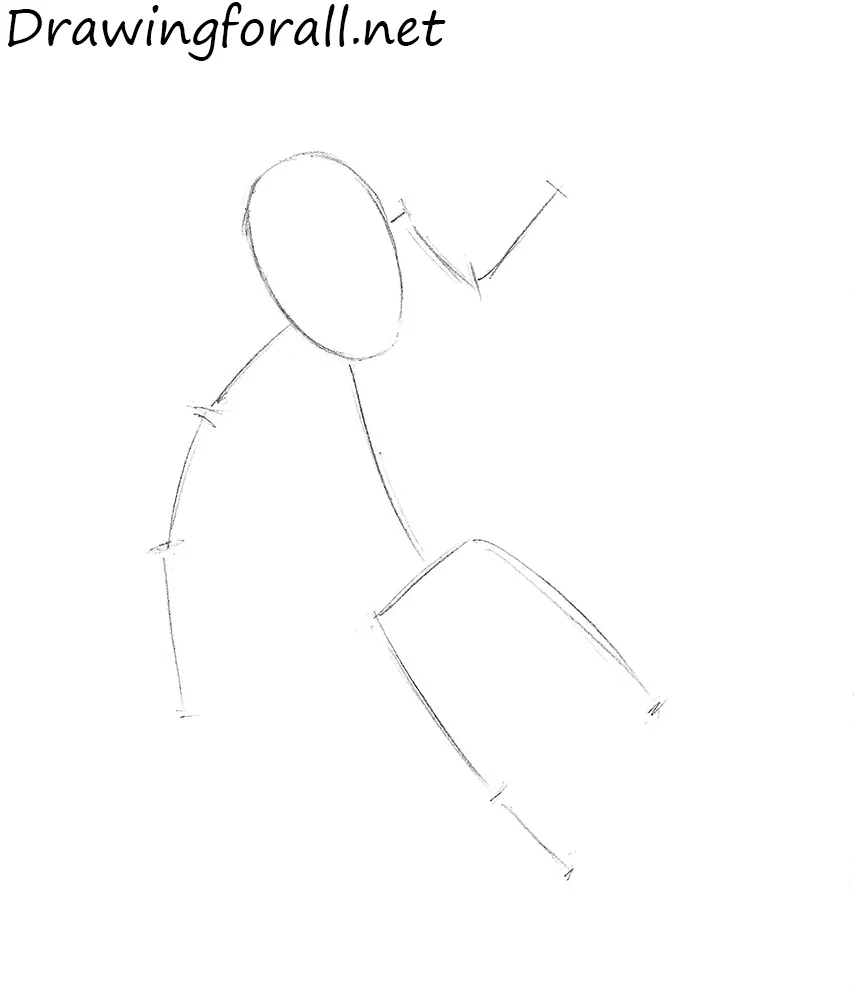
Step 1: Sketch Deadpool’s basic figure position
Begin with a stick figure made of lines and circles. This construction will establish the character’s pose, body proportions, and position on the paper. Because Deadpool is viewed from above, the proportions will appear strongly distorted, especially at this early stage.
First, sketch the head as an oval. Add the back and shoulder lines, then mark the arms and legs with simple strokes. Keep these initial lines clear but very light.
Step 2: Build the upper body
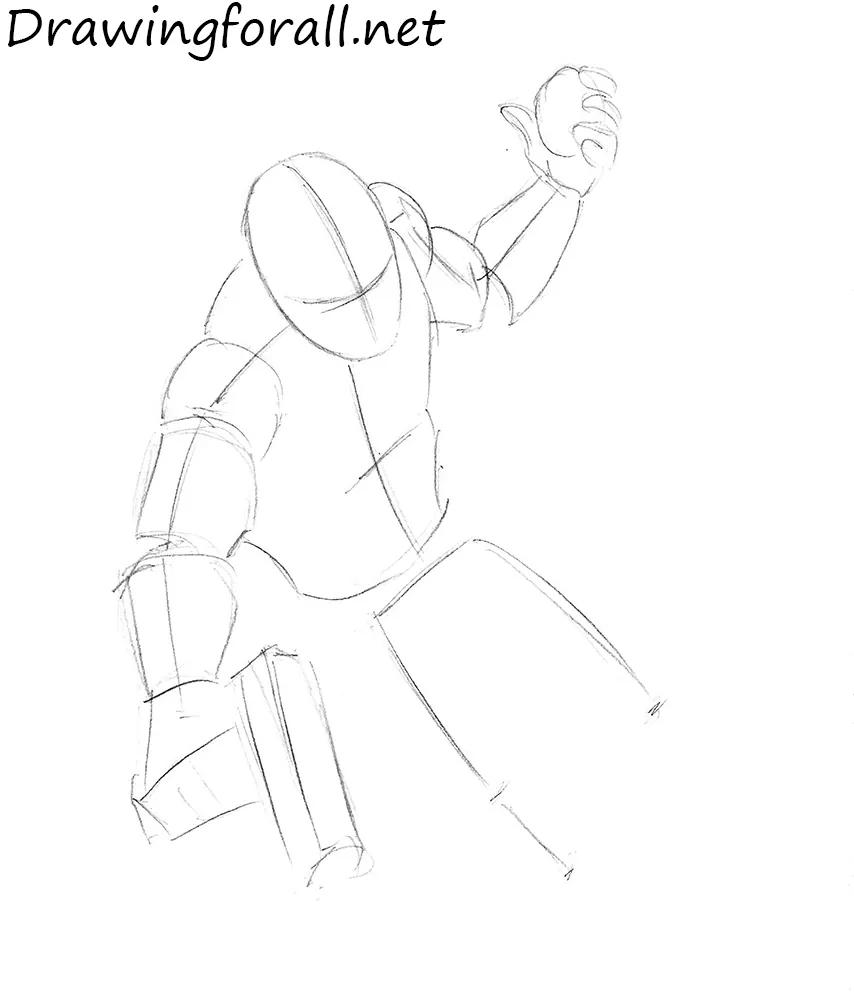
The stick figure is ready, so begin adding volume. Mark the face with a vertical symmetry line and a horizontal eye guideline. These lines cross near the center of the face and indicate the direction of Deadpool’s gaze.
Because of the viewing angle and Deadpool’s pose, the neck is not visible. Mark the deltoids with circles, then construct each arm in three main parts:
- Deltoids;
- Upper arms;
- Forearms.
The hands form a fourth section. Outline the torso so that it tapers toward the waist. Continue by drawing the gun in the right hand and sketching the grenade in the left hand.
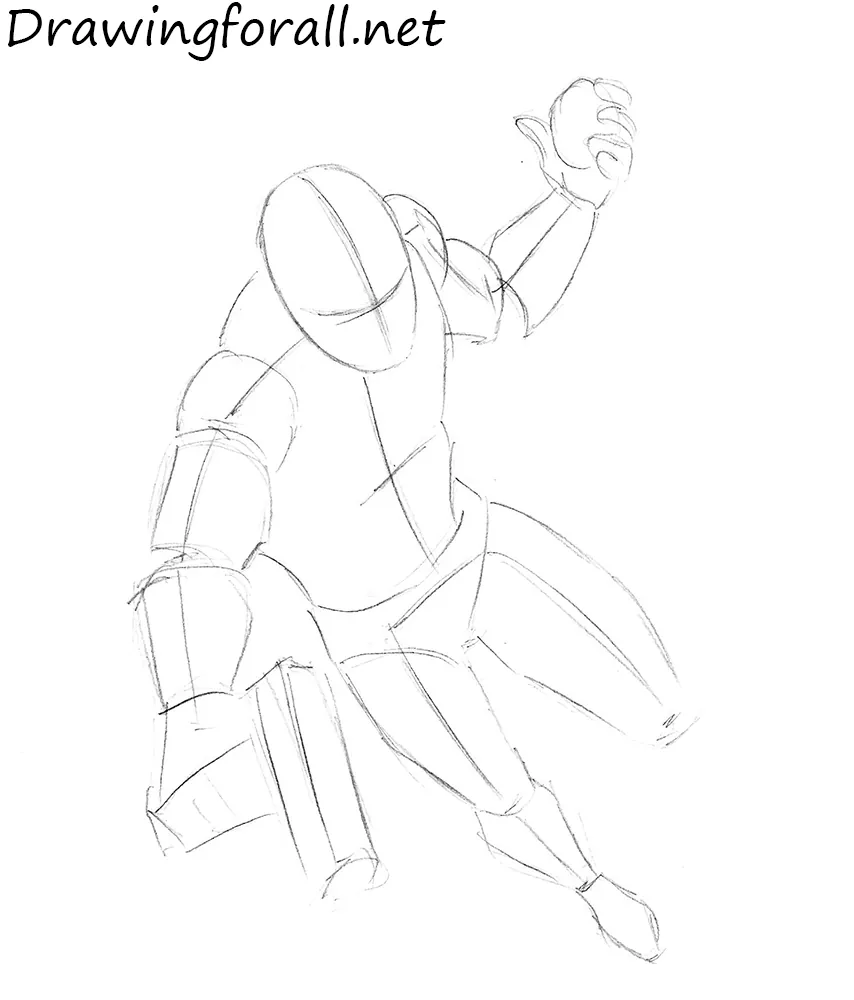
Step 3: Construct the character’s lower body
The upper body is ready, so add volume to Deadpool’s lower body. Outline the pelvis with a triangular shape and construct the legs as cylinders. The leg on our right is closer to the viewer, so it appears larger even though it is sharply bent and only the thigh is visible.
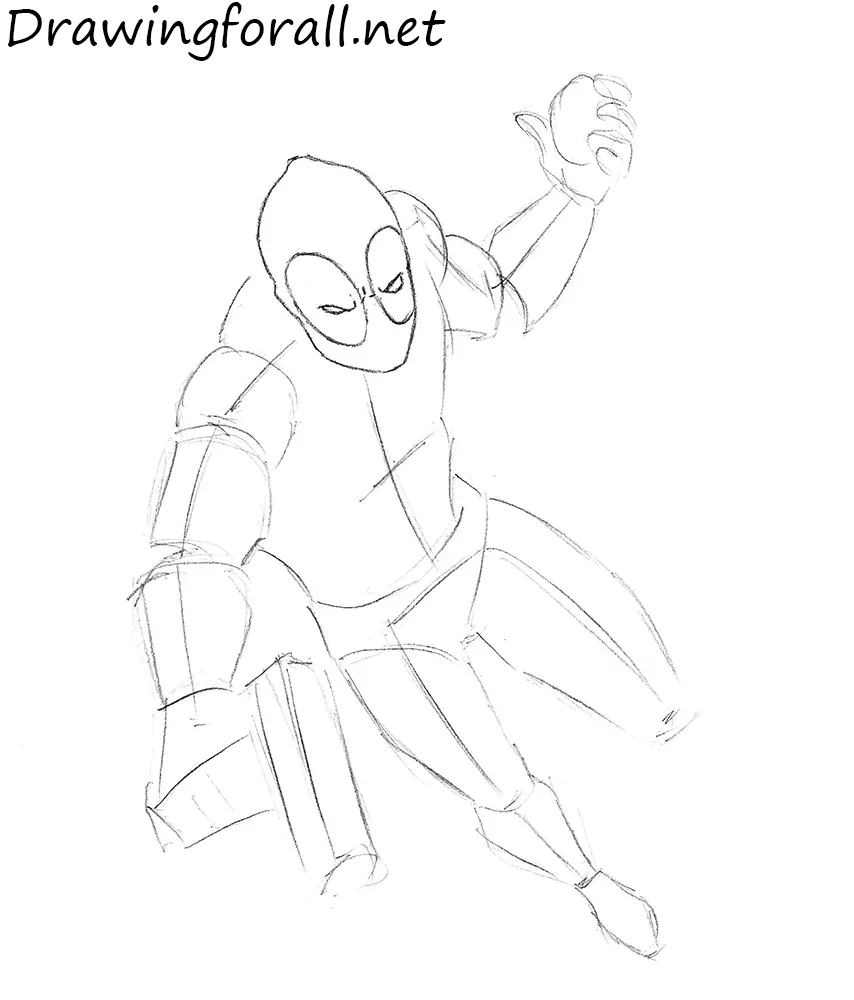
Step 4: Refine Deadpool’s masked head
The silhouette is ready, so begin adding details to Deadpool’s head. Erase the construction lines and place the eyes using the previous guidelines. Add elongated oval shapes around them. Define the chin, cheekbones, and ears beneath the mask, then include several wrinkles around the bridge of the nose.
Step 5: Detail the muscular torso
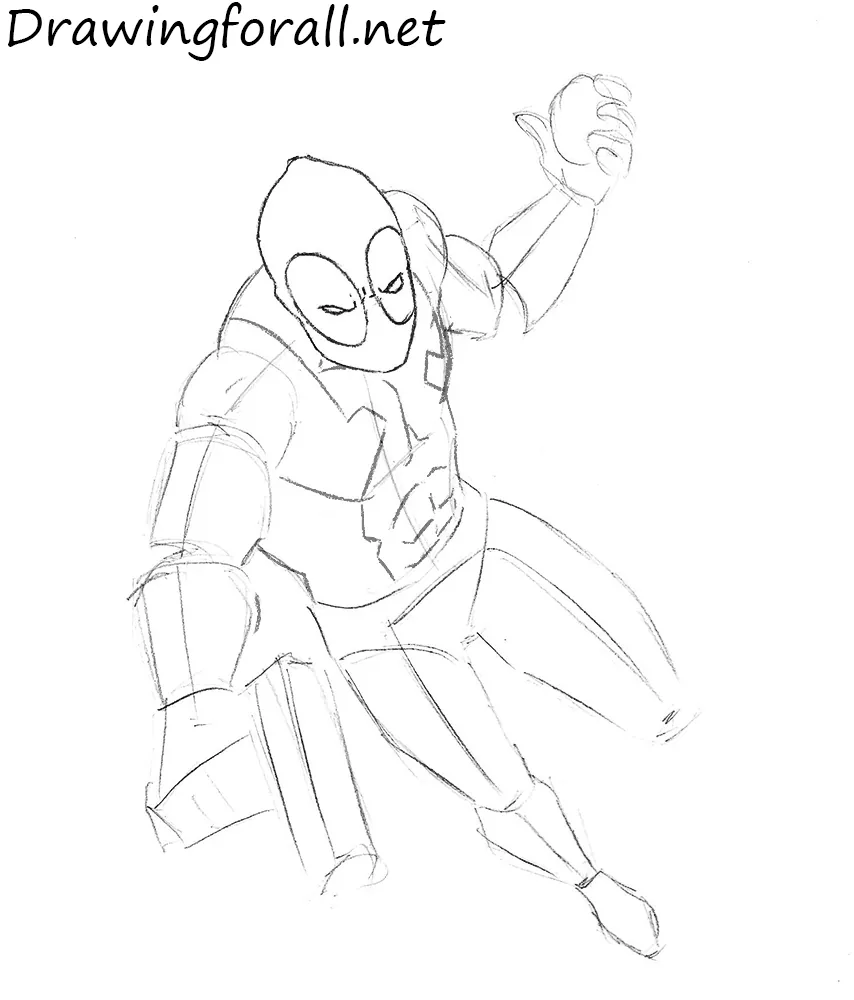
Deadpool is an unusual and interesting character. One notable trait is that he is one of the few Marvel characters who realizes that he is part of a comic book. Now refine his torso. First, outline the visible muscles, including the pectorals and abdominals, then add the patterns of the costume.
Step 6: Define the arms and weapons
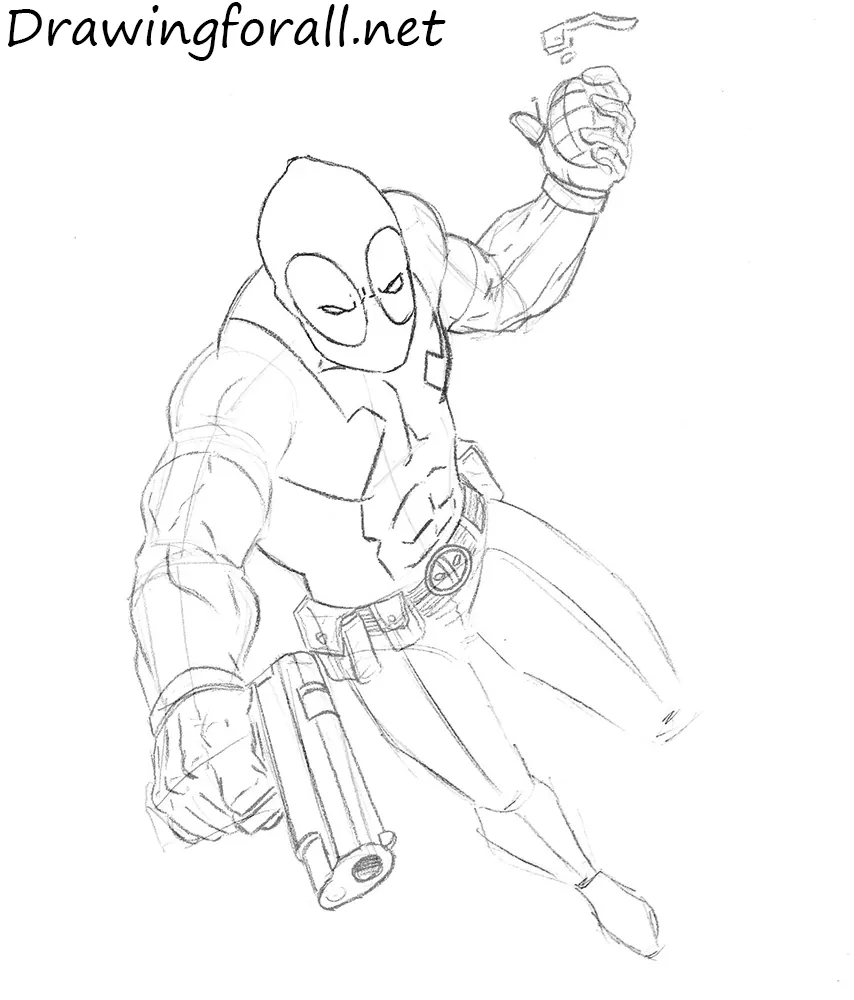
Refine the arms and hands. Deadpool wears a tight suit from head to toe, so the underlying muscles should remain clearly visible. Define the rounded muscle forms from the deltoids through the forearms. Use straight lines to complete the gun in the right hand and refine the grenade in the left. Add the costume seams and bracers.
Step 7: Finish drawing Deadpool’s the upper body
Complete Deadpool’s upper body by erasing the remaining construction lines. Refine the torso and hands with clean, sharp contours. To learn more about this area, visit our tutorial on drawing hands. Add the belt with its numerous pouches and place Deadpool’s logo in the center.
Step 8: Refine the legs and straps
Note that Deadpool appears here without his most important attribute, the sword associated with a samurai.
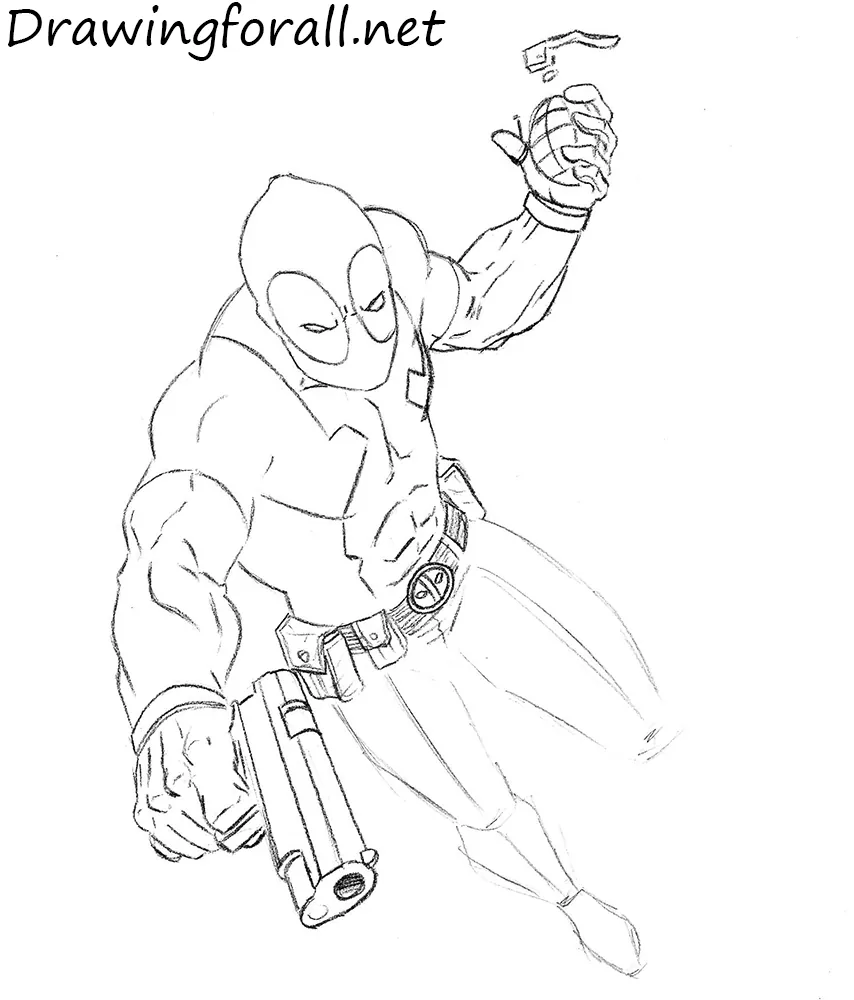
Now refine Deadpool’s legs. Erase the unnecessary construction lines and add vertical contours indicating the strong thigh muscles. These lines extend mainly from the waist toward the knees. Define the knees and sketch the strap around the leg.
Step 9: Add comic-style shadows
Use a comic-book shading style with dark, contrasting shadows covering large areas and formed with dense hatching. First, outline the shadow shapes, then fill them in. Add halftones with lighter hatching.
This was a tutorial on how to draw Deadpool. Share your suggestions for future tutorials in the comments, and we will try to use them. Good luck, and visit Drawingforall.net for more drawing tutorials!


it is very very beautifull
This is awsome!!!!
It looks awsome but I prefer the movie deadpool but still it looks mad
So cool!
this is cool.
It’s good but it would be better if it had Deadpool’s key weapons – the katanas
it is perfect! 🙂