

How to Draw Yoda
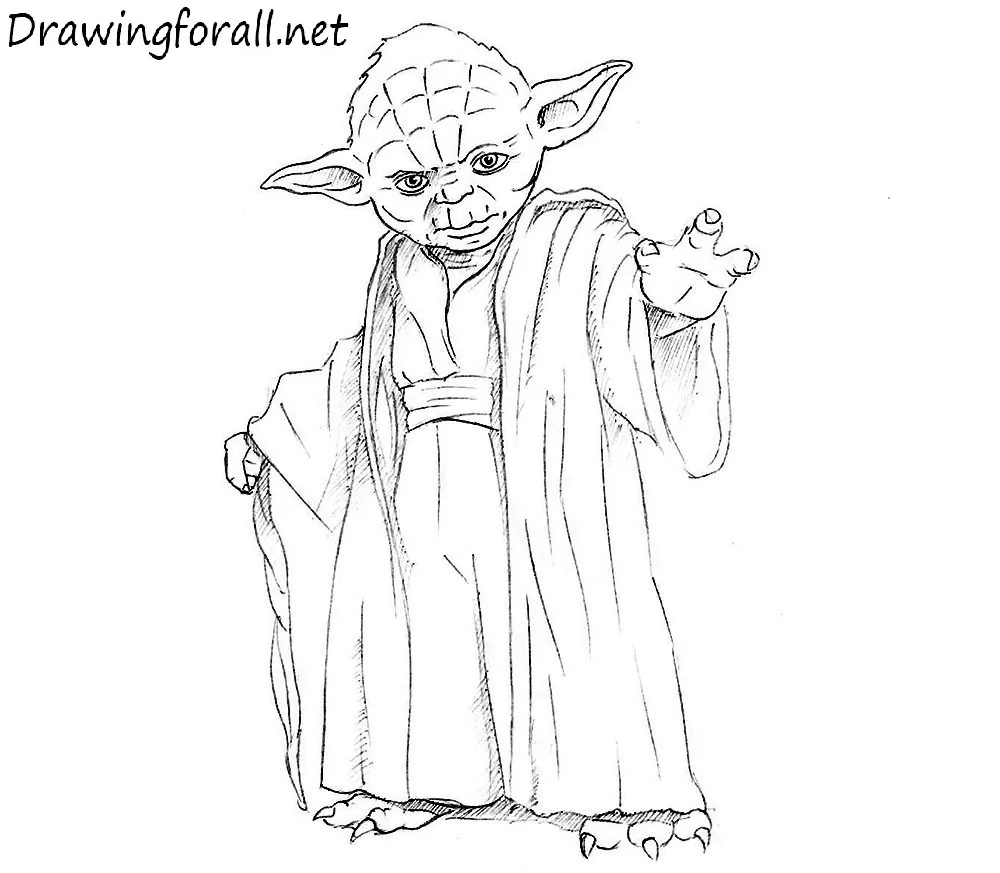
In this drawing tutorial for Star Wars fans, we will show you how to draw Master Yoda step by step.
It is difficult to say much about Master Yoda’s past. George Lucas, the creator of the Star Wars universe, did not allow subsequent films to reveal details about Yoda’s youth, parents, or other events from his early life.
How to draw Master Yoda step by step
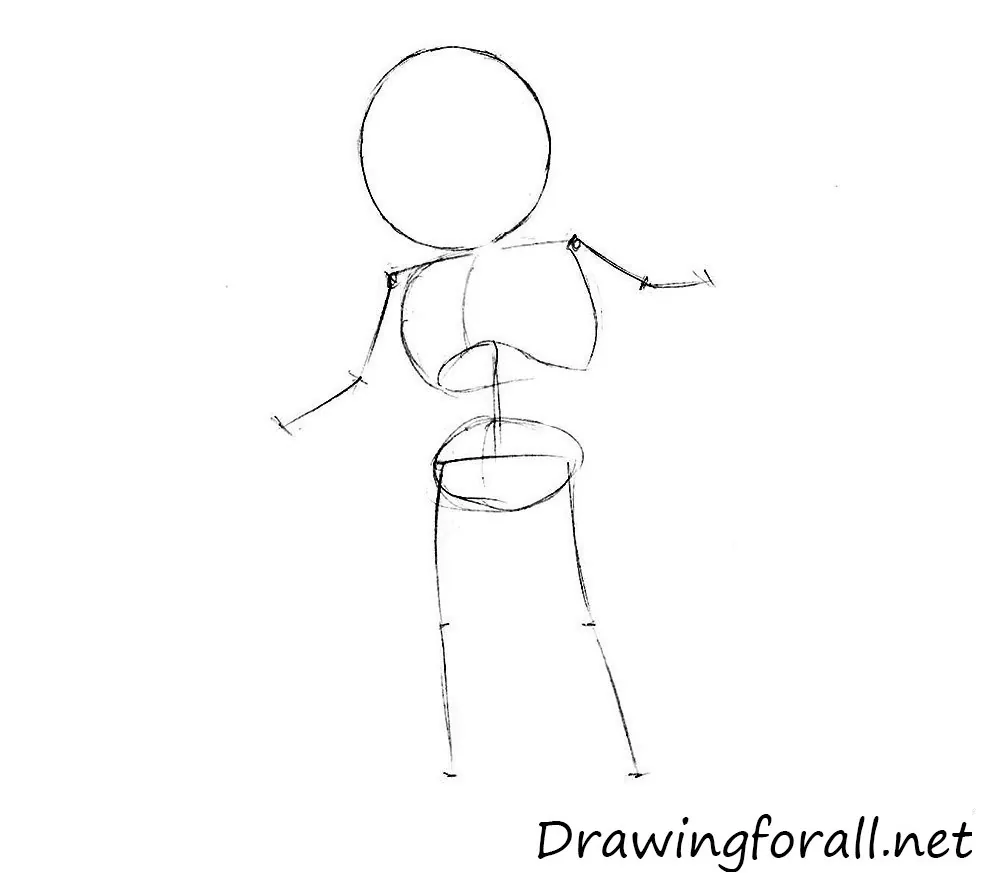
Step 1: Sketch Yoda’s basic figure
Using circles and lines, sketch the stick figure. The head is very large, especially in comparison with the body. The chest and pelvis are nearly the same width. As you can see, the figure has almost no visible neck.
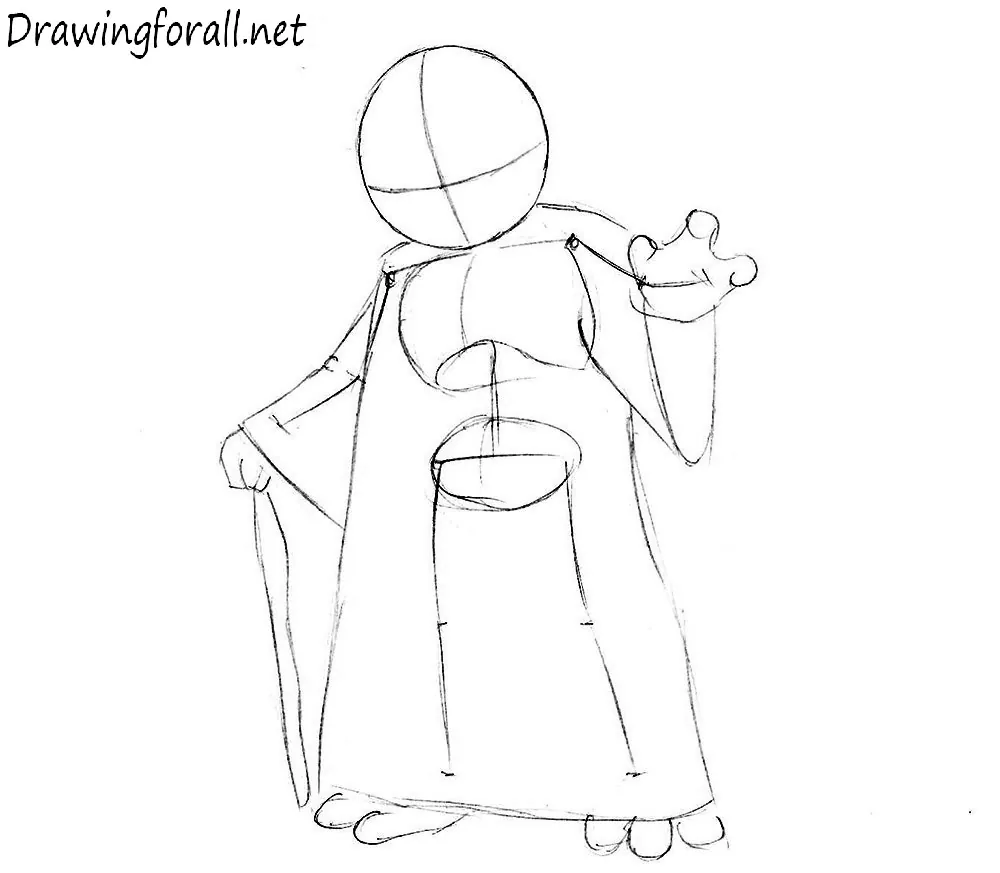
Step 2: Add the robe and limbs
Once the stick figure is ready, outline the robe. The garment narrows slightly around the waist on the right side. Use smooth, curved lines to form the arms and legs. Do not forget the wooden staff. Although Master Yoda uses it for walking, he can cast it aside when fighting clones or droids.
Also add the facial guidelines.
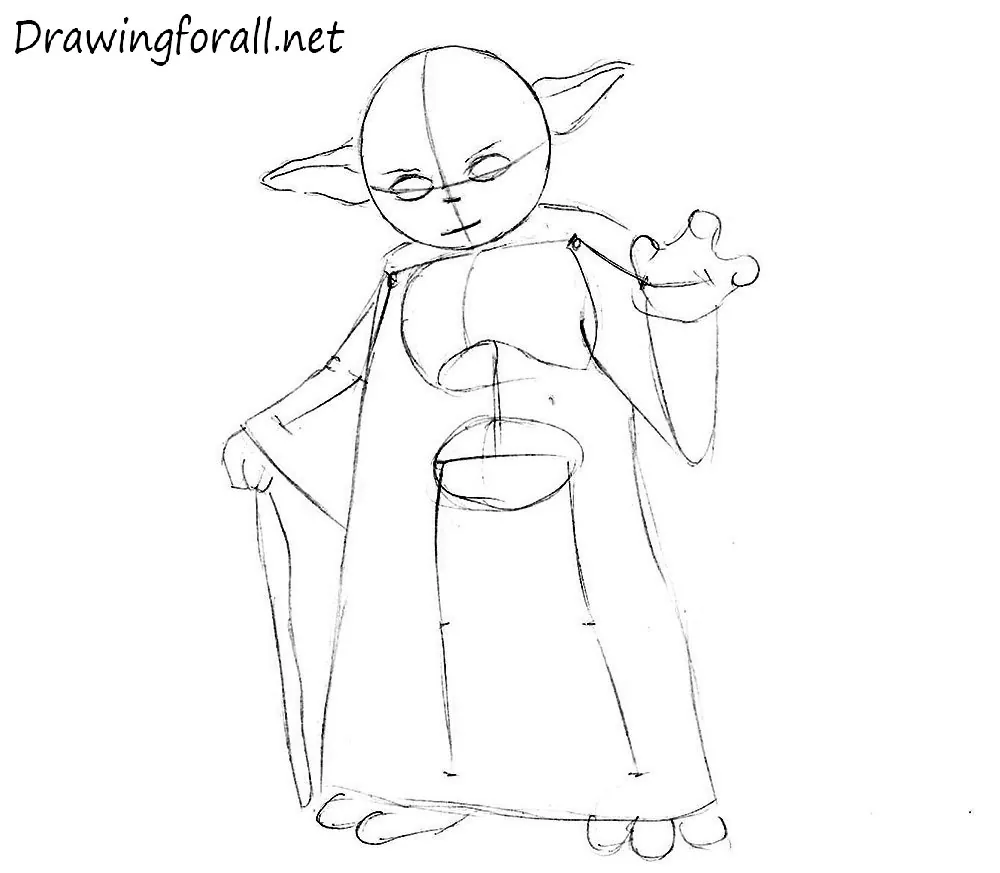
Step 3: Draw Yoda’s facial features
Use the guidelines from the previous step to place the facial features. Continue by drawing the eyes, then add the pointed ears extending horizontally from the head.
Step 4: Refine Yoda’s face
The basic sketch is nearly ready, so refine the face. First, erase the unnecessary guidelines from the previous step. Then define the eyes, nose, and lips. Do not forget the inner details of the ears.
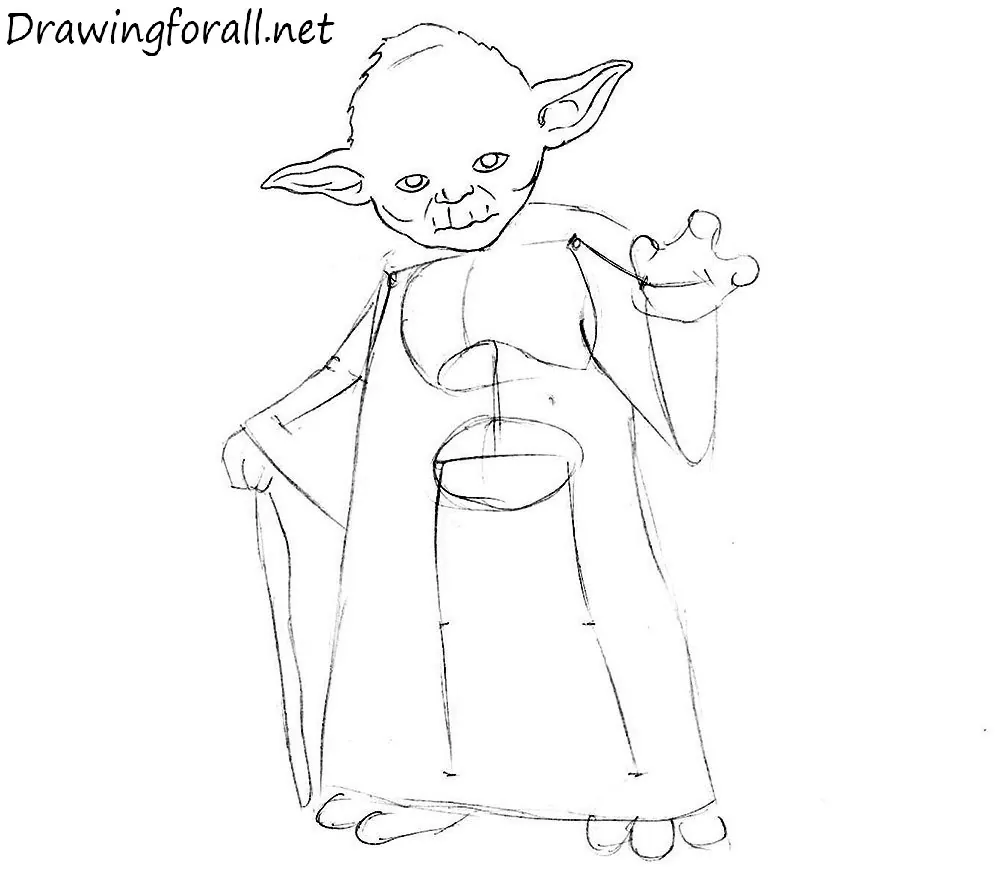
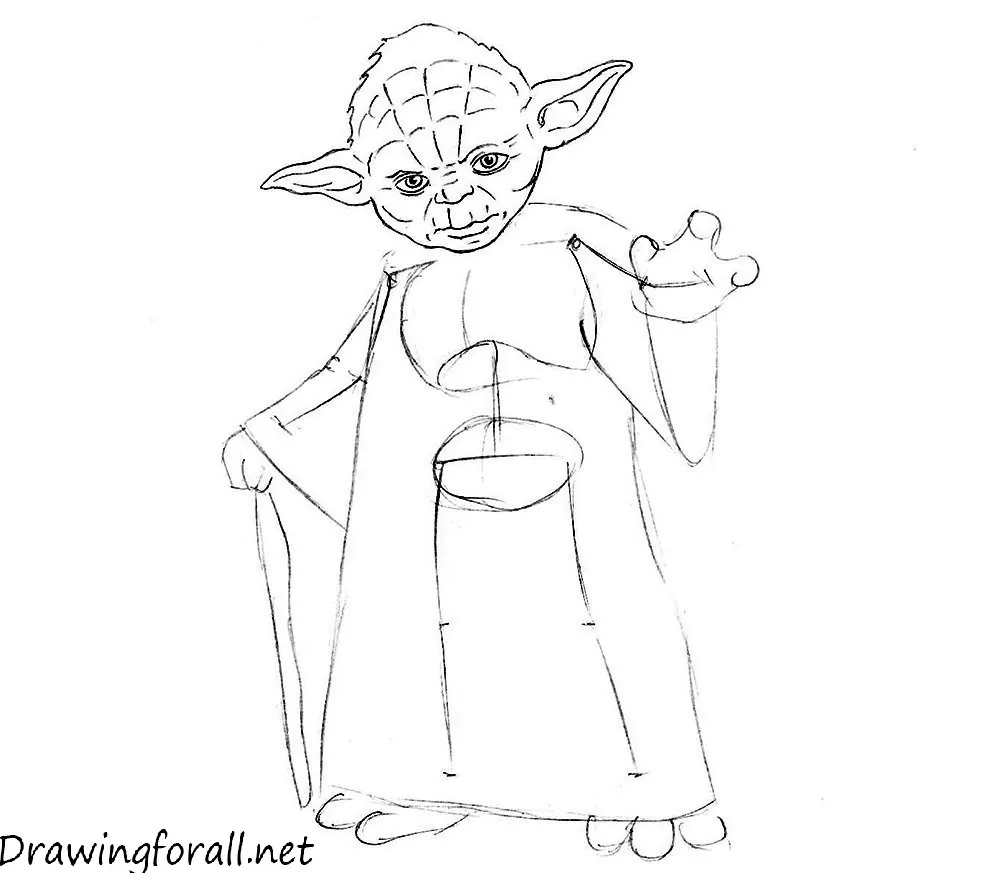
Step 5: Add the facial wrinkles
Draw the character’s wrinkles. The lines on the forehead resemble the web pattern used when drawing Spider-Man’s mask. Do not forget the wrinkles between the eyes.
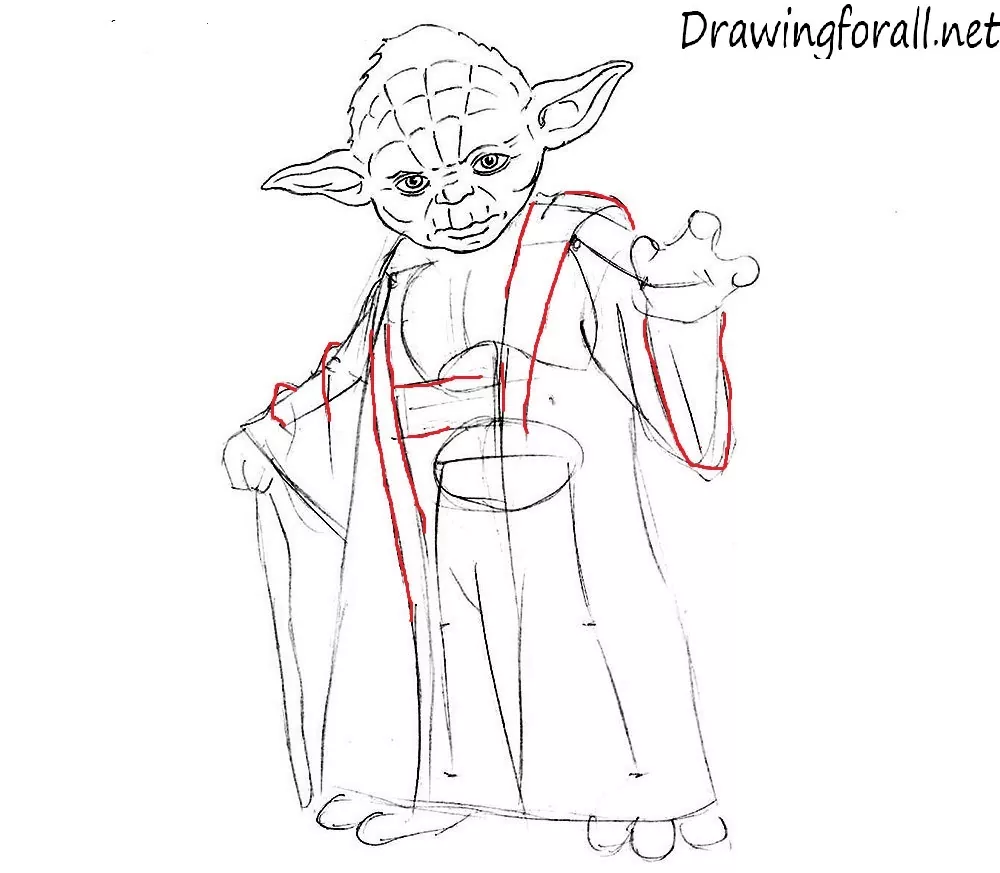
Step 6: Draw the robe folds
Now add the fabric folds. The robes of Jedi Masters contain many folds, so the lines to draw are marked in red.
The drawing without the red guide lines:
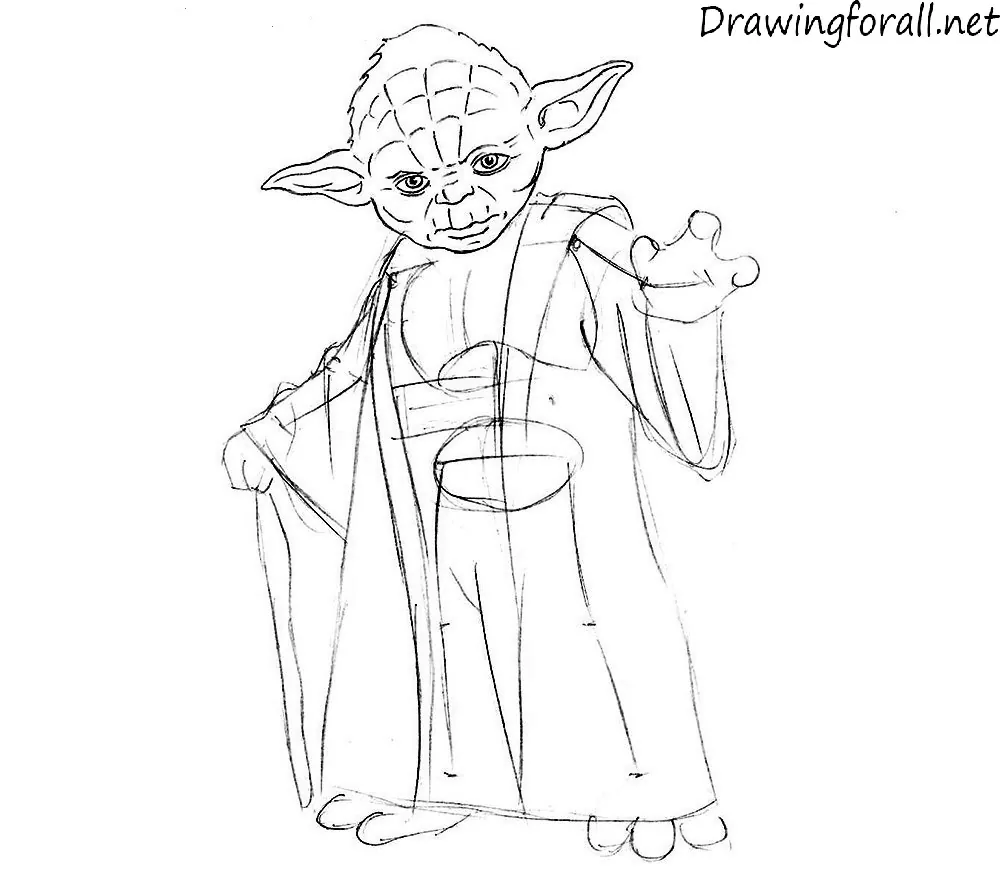
Step 7: Finish the robe details
Continue outlining the robe and its fabric folds. First, erase the remaining stick-figure lines and any unnecessary marks from the previous steps.
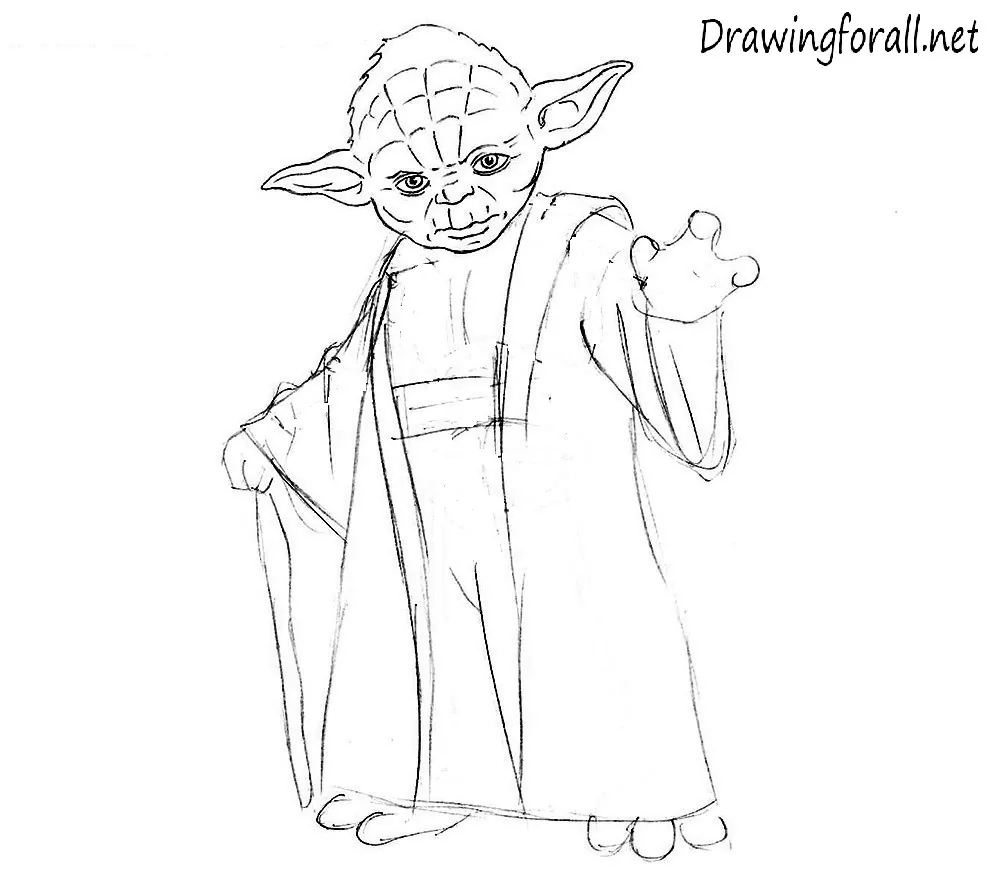
Step 8: Draw the remaining folds
Draw the vertical folds hanging down Yoda’s robe. Add details to the cane, then erase any remaining construction lines from the drawing of Master Yoda.
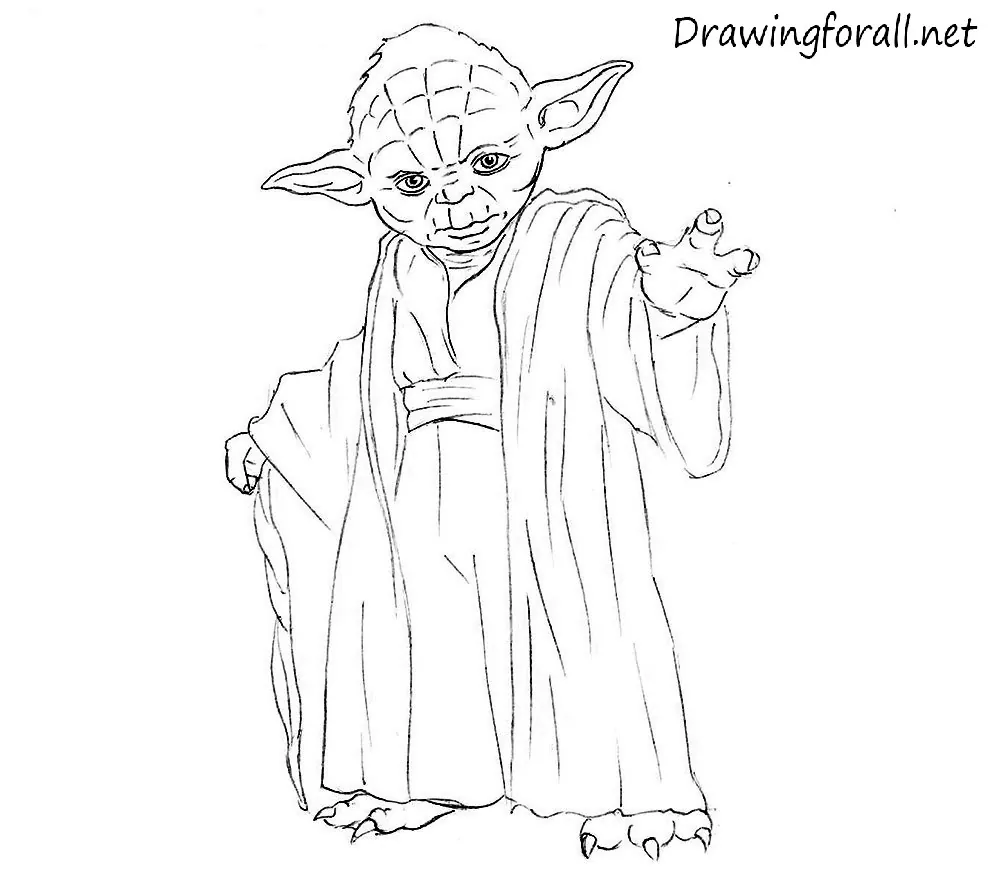
Step 9: Draw final shadows on Yoda
The drawing is nearly complete. Finish it by adding shadows.





nice love the wibsites
hiiiiiiiiiiiiiiiiiiiii love the vids
May the force be with you!
should have obi wan