

How to Draw a Cute Cat
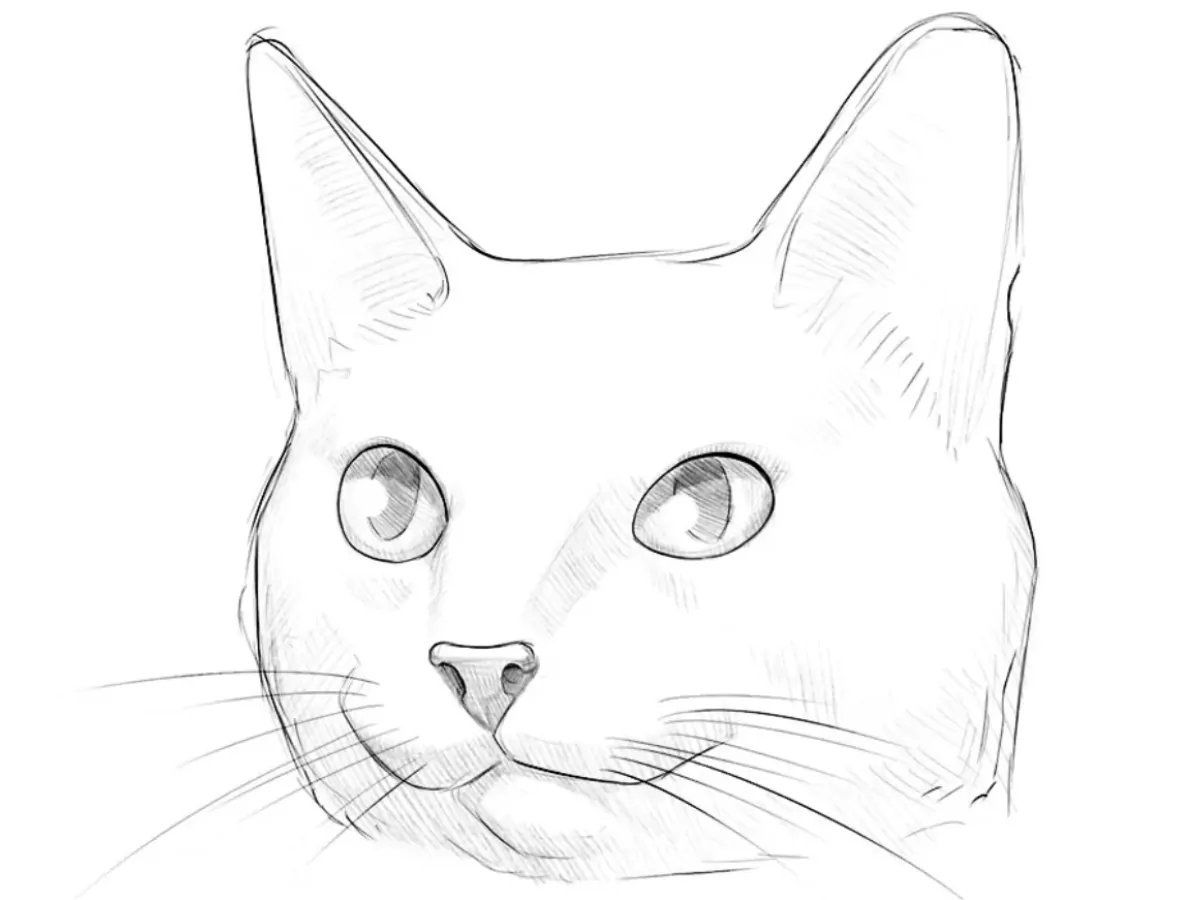
We carefully read your comments and learned that you enjoy drawing cats. That’s why we created this guide on how to draw a cute cat.
There are countless ways to make a cat drawing look cute. The idea of “cuteness” itself is broad, since most cartoon cats are inherently cute, and drawing in kawaii or chibi styles naturally enhances that effect.
However, in this lesson we want to create a cute cat in a realistic style consistent with our approach.
Because much of a cat’s charm is concentrated in its face, we will focus specifically on how to draw the cat head in a gentle and appealing way, carefully rendering the shadows and highlights on the face and in the eyes.
How to draw a cute cat step by step
Step 1: Prepare the facial structure
First, draw the shape of the cat’s head. To do this, sketch a large oval in the center of the page. It is also important to establish the facial guidelines. Draw a straight horizontal line across the center of the oval, then place a vertical line slightly shifted to the left.

Step 2: Mark the cat’s main facial features
We have now created the basic sketch of the cat’s head, so we can begin adding details. First, draw the triangular ears on the head of the cute cat. Keep in mind that the right ear will appear slightly larger than the left. Then sketch the eyes as small circles. At the end of this step, add two short lines along the vertical guideline.

Step 3: Draw the cute eyes of the cat
Now draw the most expressive part of the cat’s face that gives it a cute appearance – the eyes. To begin drawing the cat’s eyes, outline them as almond-shaped forms. Then add the narrow pupils inside. If you want to enhance the sense of cuteness, make the pupils slightly larger and more rounded. Be especially careful because the position and shape of the pupils will shape the direction and expression of the gaze.

Step 4: Draw the nose of the cute cat
Now it’s time to draw the cute cat’s nose. Use the guidelines from the previous steps to help with placement. The nose should sit between the two short marks along the vertical guideline. Instead of placing it exactly at the center of the vertical line, shift it slightly to the left to match the head’s angle.

Step 5: Illustrate the mouth and whiskers
Directly below the lower point of the nose, draw a short line dividing the upper lip into two parts. From this line, sketch two smooth, symmetrical curves extending to the left and right. On both sides, add the cat’s whiskers using long, gentle lines spreading outward.

Step 6: Draw the cute cat ears in detail
Now we need to draw the complete shape of the cute cat’s ears. Connect the auxiliary lines with the oval of the cat’s head. Using a few smooth lines, define the inner contours of the ears. This step may seem minor, but it plays an important role in making the cat look more natural and convincing.

Step 7: Remove all construction lines
We have done a great job and are getting close to completing this tutorial on drawing a cute cat. Now remove all construction lines from the cute cat drawing. Use long, confident strokes to refine and complete the shape of the head. With similar strokes, add a subtle texture to represent soft fur.

Step 8: Add shading and highlights
Now add shadows to give the cute cat drawing more volume. First lightly mark the areas that require shading, then apply hatching. The darkest shading should be placed inside the pupils. Also remember to leave small white highlights, as shown in our example.

Step 9: Complete the cute cat drawing
Review your entire cute cat drawing and check for any issues in symmetry, proportions, or details. Correct them if necessary. At this stage, you can also deepen the shadows, increase the contrast of the highlights, and add more texture and subtle details.

To make your cute cat drawing even more lively, you can try coloring it. You may also add small decorative patterns to the cat’s face.
In addition, you can continue developing the drawing by including extra details that are not present in our example.
A useful exercise would be to draw a cute cat in full body, applying the principles from this lesson along with those from our full-body cat drawing tutorial.
You could also draw a sitting cat using the facial features from this example.
If you are interested in other stylistic approaches, you can review our chibi cat drawing lesson or the even more simplified kawaii cat drawing tutorial.
Exploring these variations will help you build a strong foundation and broaden your overall drawing skills.



cool and sharp