

How to Draw Obelix
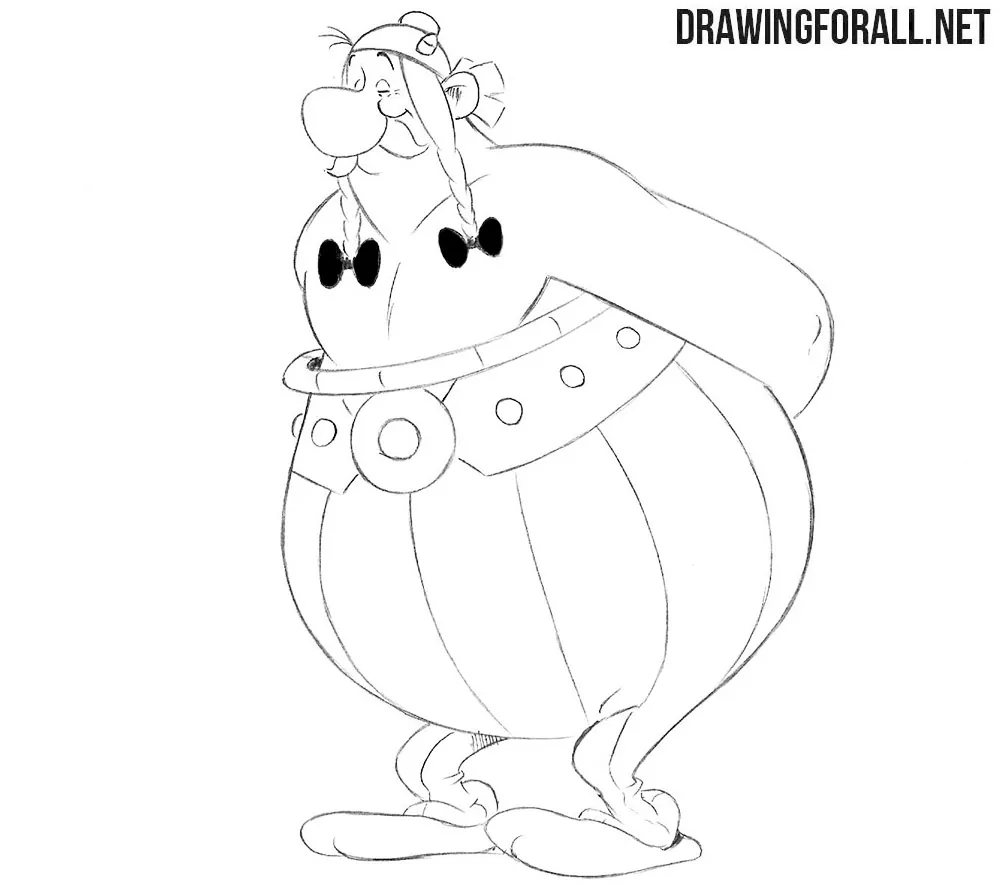
We are all familiar with Asterix and Obelix, two Gallic warriors and colorful characters from comics, cartoons, and films. In one of our previous tutorials, we showed you how to draw Asterix, and here we will show you how to draw Obelix.
How to draw Obelix step by step
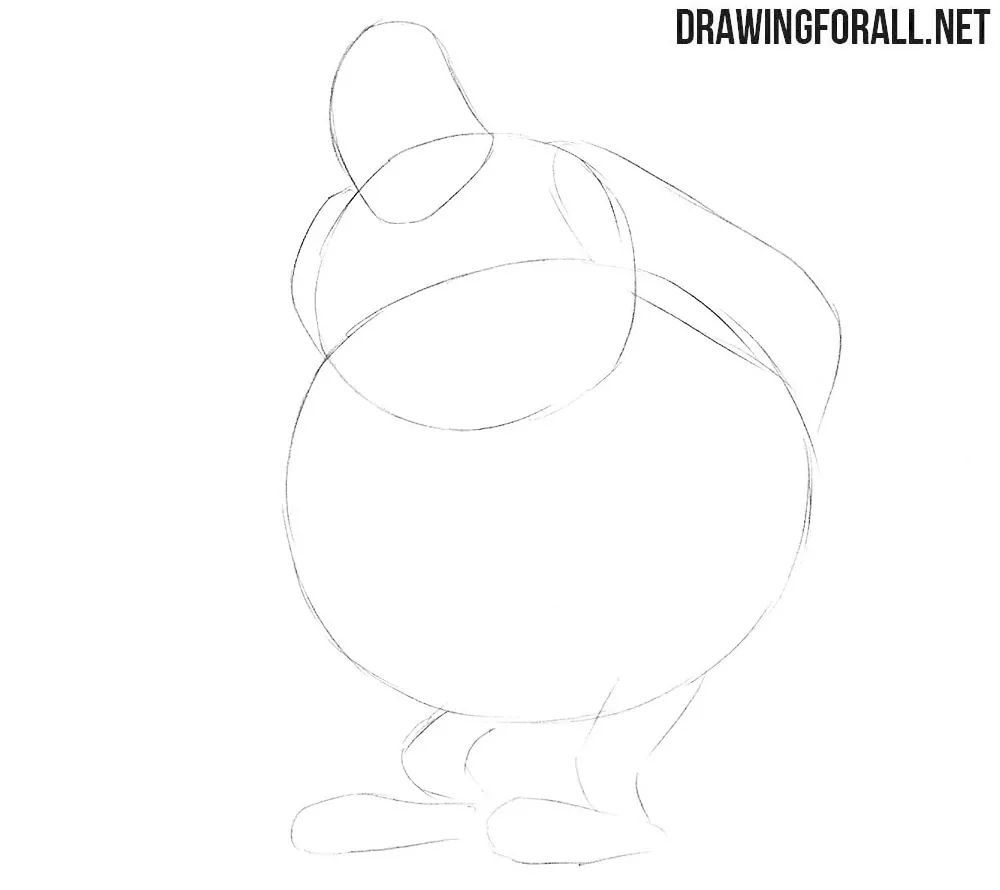
Step 1: Sketch Obelix’s basic shapes
As in the tutorial about Asterix, we start with the most basic contours. First of all, outline the head as an elongated half-oval. Next, outline the upper torso and large belly with two overlapping rounded forms. Make the belly much larger than the upper torso and head. Think of this huge lower form as the main volume of the whole character. Finish this step by sketching the arms and legs.
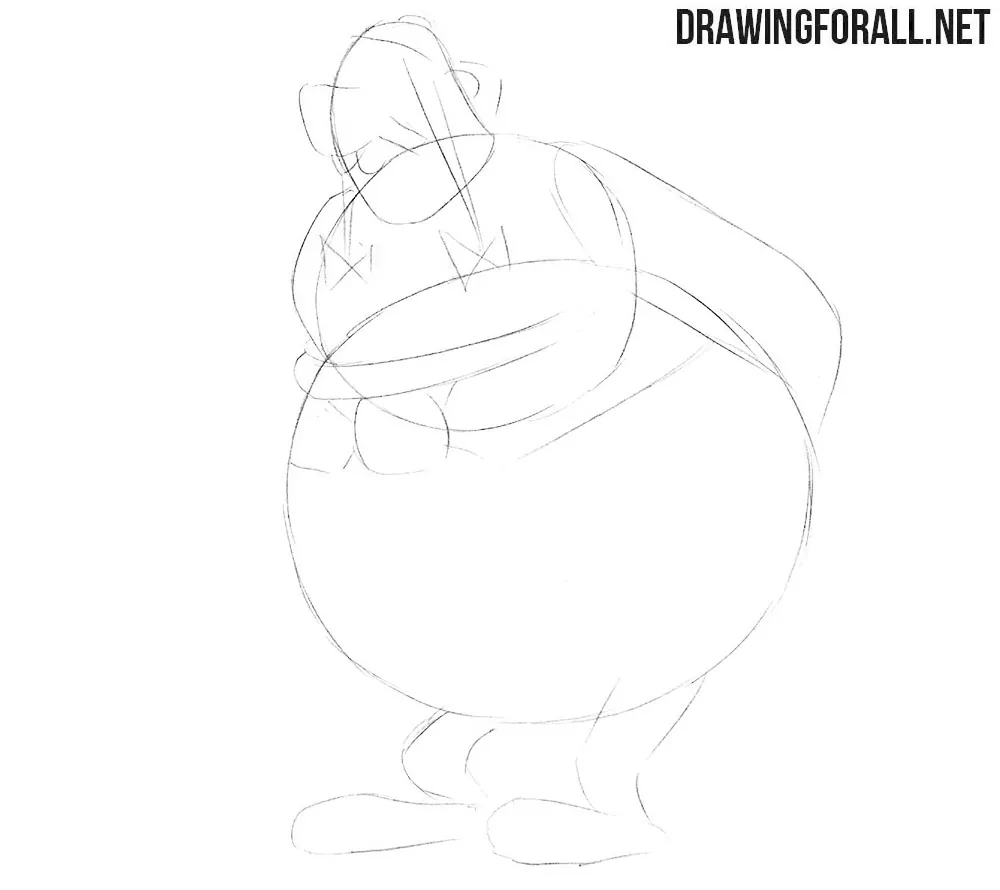
Step 2: Sketch the face, helmet, and belt
Now outline the main details of the Obelix drawing. Start with the head, sketching the eyes and nose, then draw the cartoon mustache. Make the nose very large and place the small eyes close together above it. Next, outline the helmet, ears, and long braided hair. After that, move lower and carefully sketch the wide belt as a broad curved band that follows the large rounded belly.
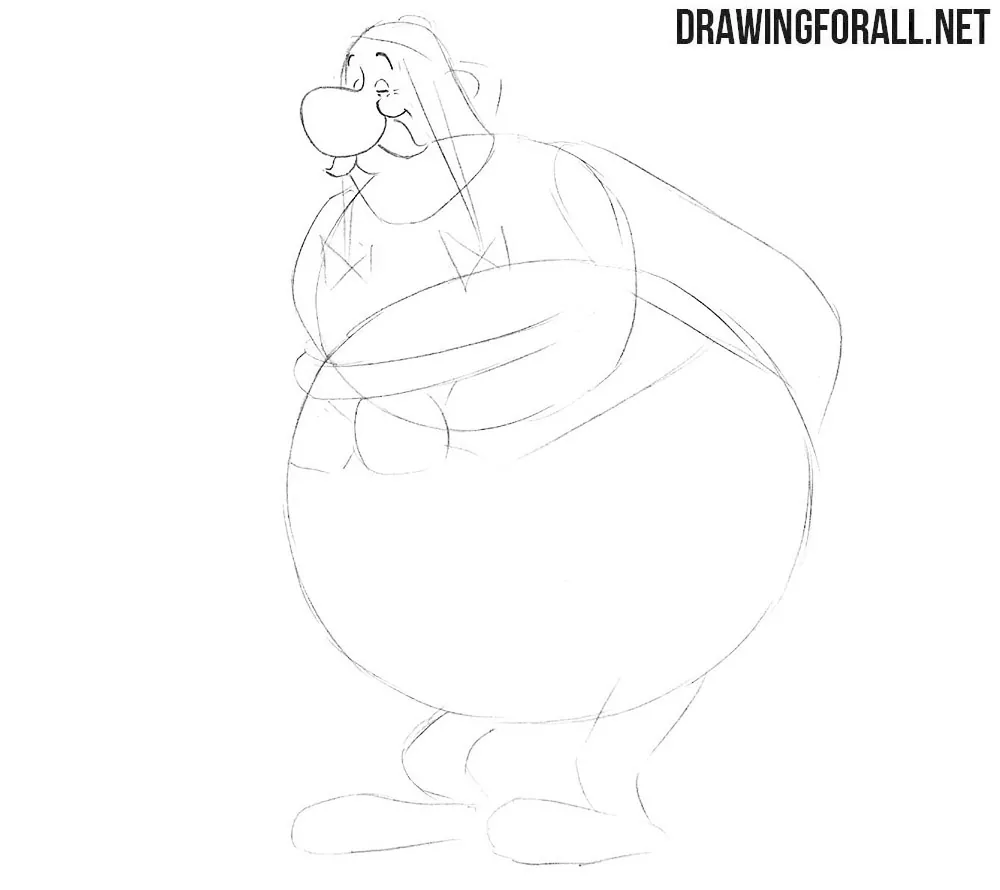
Step 3: Refine Obelix’s facial features
With clear lines, carefully draw the cartoon eyes. Next, trace and darken the large bulbous nose, cheeks, and mustache. The nose projects far beyond the rest of the face, so make it the dominant form in this area. Draw the mustache as two large curved sections extending to the sides from under the nose.
Step 4: Draw the helmet and braided hair
Carefully draw the outlines of the helmet. Add the small curved horns at the top of the helmet. In the same step, trace the large ears and long braided hair with bows at the ends. Draw each braid from a series of curved sections that become smaller toward the bow. Remove all unnecessary guidelines from the head.
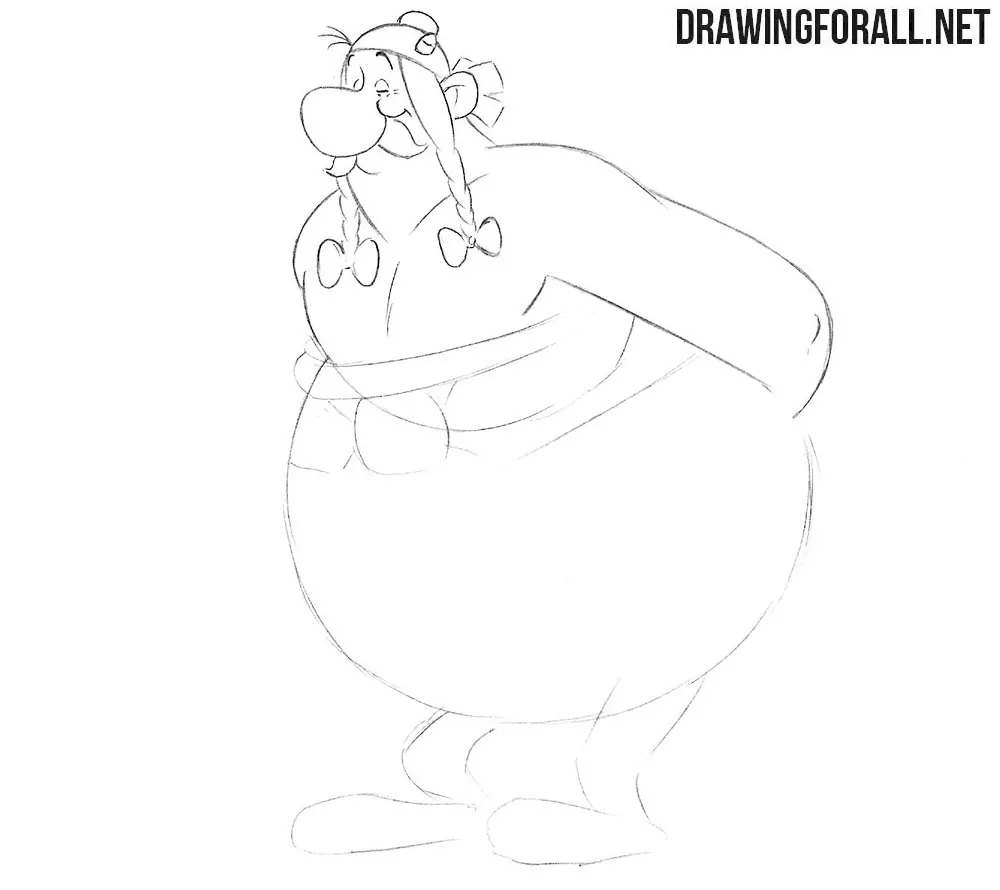
Step 5: Refine Obelix’s upper body
Let’s now work on the upper body of Obelix. Continuing the lines of the neck, carefully draw the shoulders, which flow into the arms behind his back. The hands are hidden behind the body, so only the large curved contours of the arms are visible. Next, refine the outlines of the chest and remove the unnecessary guidelines from the upper body.
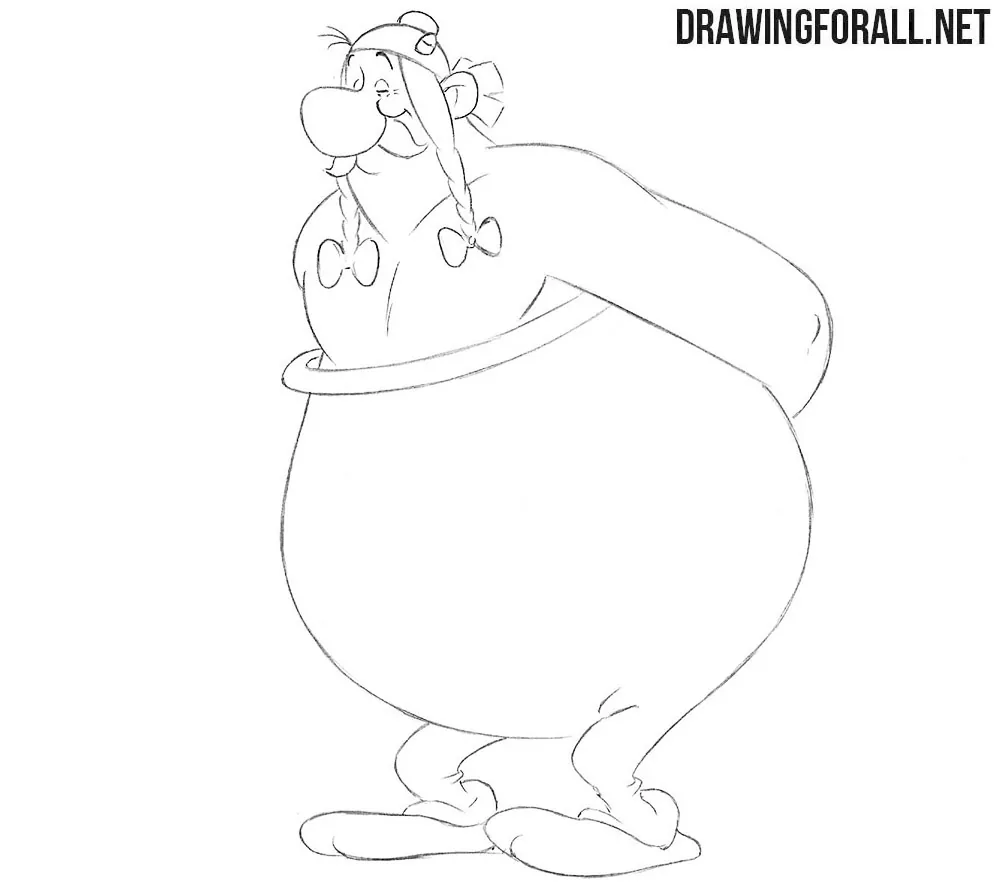
Step 6: Draw the belt and striped pants
Now draw the large characteristic belt with its round buckle and studs. Next, refine the outline of the large belly and thin legs. Finish the legs with large, low shoes. Add the vertical stripes to the pants and remove the guidelines. Draw the stripes with long curved lines that follow the rounded form of the pants. Make the central stripes broader and let the lines near the sides turn more strongly around the large volume.
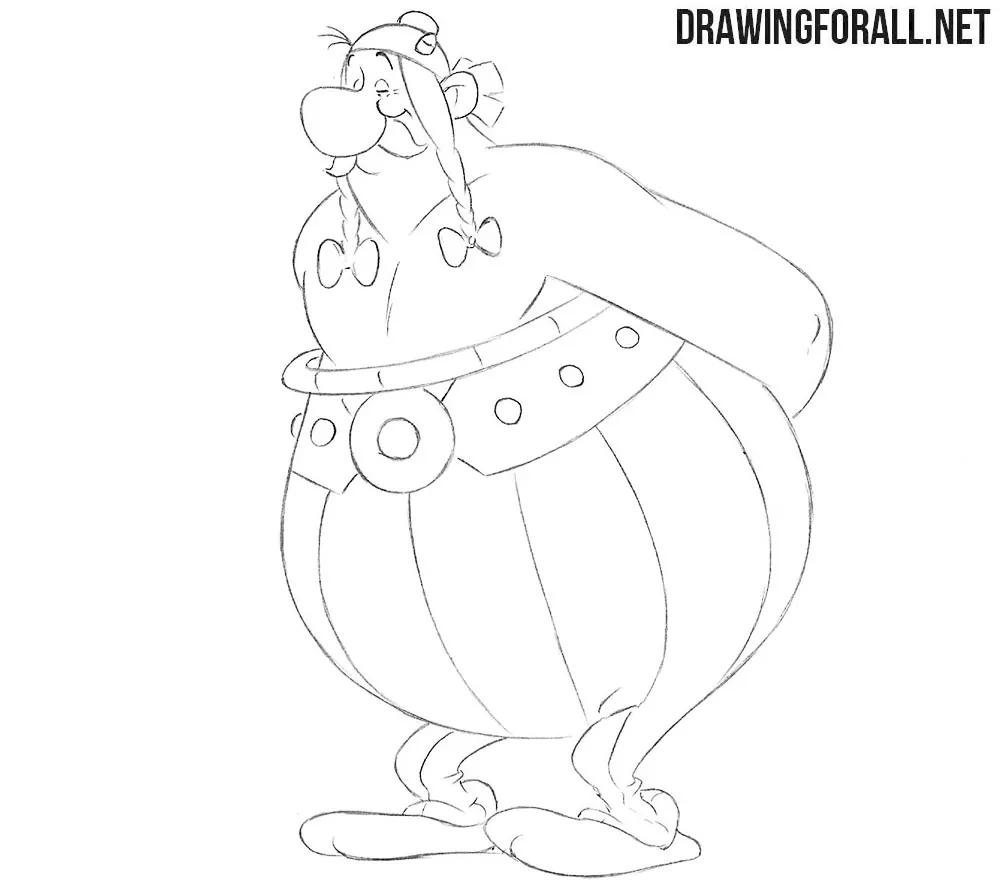
Step 7: Darken the bows and add shadows
The final step of this rather simple tutorial will be extremely easy. Darken the bows at the ends of the braids and add small areas of shadow with dense hatching. Add a few short strokes inside the ear and beneath the belly, where the large body overlaps the legs.
Obelix has a rather interesting build that can basically be represented as a pear or an upside-down light bulb. The main elements and details are constructed around this form.
All the lines that lie on the surface, such as those on his pants, should also follow this spherical form. Keep this in mind as you draw.
Conveying the spherical form by drawing all the lines and elements with its curvature in mind gives volume even to a simple line drawing.


I love Asterix and Obelix!!!!
My drawing looks cool!