

How to Draw a Sandwich
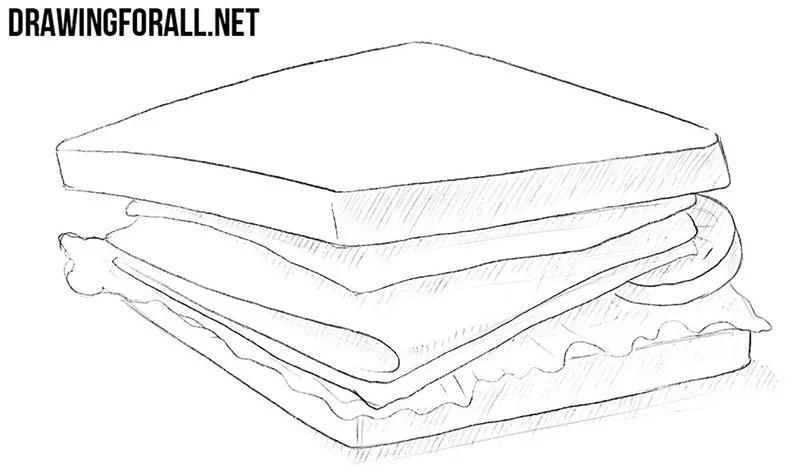
A sandwich is made up of several layers placed on top of each other. In this tutorial, we will show you how to draw a sandwich and demonstrate how to convey its simple shape on paper.
Sandwiches can have different shapes and can be based on different simple geometric forms. Here, we chose a box-like form, so let’s start with it.
How to draw a sandwich step by step
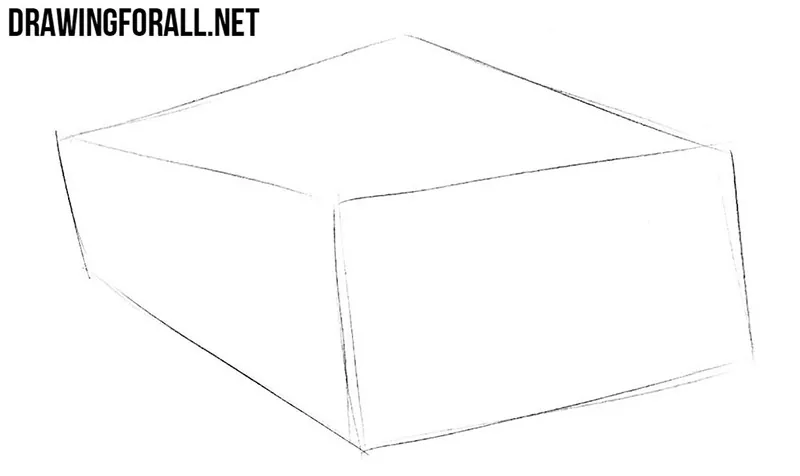
Step 1: Sketch the sandwich shape
Start with the overall shape of the sandwich using straight, light lines. The sides do not need to be perfectly symmetrical. Try to draw these lines without using a ruler so that the shape looks more natural.
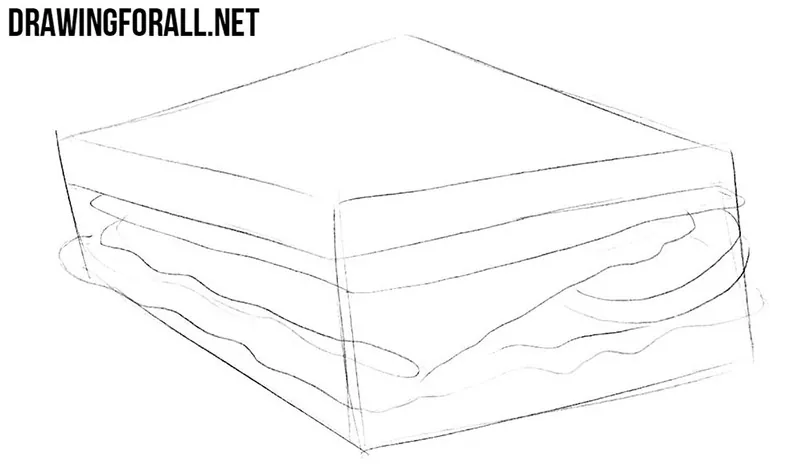
Step 2: Mark the sandwich layers
Divide the shape from the previous step into several layers. Make the lower part slightly wider, then indicate the edges of the cheese, tomato, and lettuce between the slices of bread. Use uneven lines for the lettuce to distinguish it from the other ingredients. Each ingredient must have its own distinctive form.
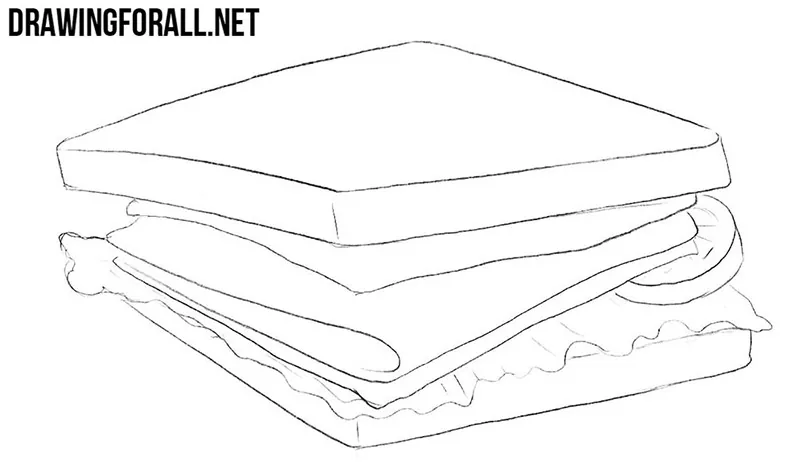
Step 3: Refine the sandwich ingredients
Erase the unnecessary construction lines and refine the contours of the bread, lettuce, cheese, and tomato. Give each ingredient a slightly different edge. You can also add other ingredients if you want to change the appearance of the sandwich.
Step 4: Add shadows to the sandwich
Add light shadows to the front and side areas of the sandwich using simple hatching. Place darker strokes between some of the layers to separate them from each other. Do not press too hard on the pencil; the shading should look relatively light.
This tutorial showed a simple sandwich with several familiar ingredients, but you can easily change its appearance by adding or removing individual layers and ingredients.
Try changing the shape of the bread or adding different fillings to create another version.
Since bread and lettuce are two of the main forms used in this drawing, you can practice them separately in our tutorials on how to draw bread and draw lettuce.





was good