How to Draw a Comic Book Viking
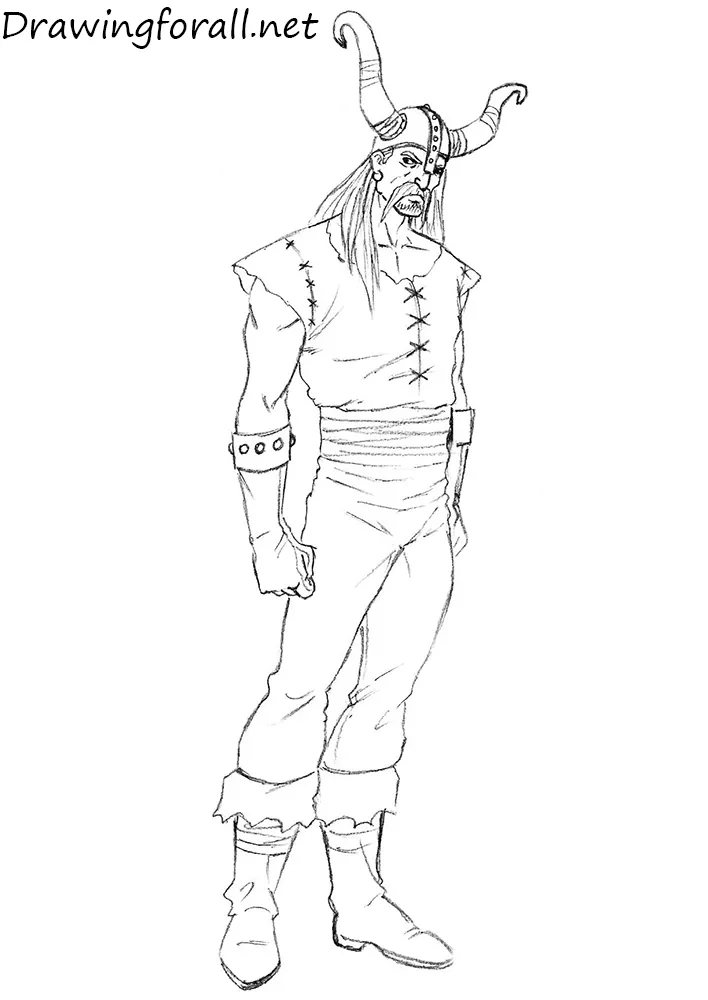
This tutorial is dedicated to a fierce Scandinavian warrior and will show you how to draw a comic book Viking step by step.
The Vikings were seafaring warriors of the early Middle Ages who raided rich merchant ships and coastal towns.
In fact, they were a Northern European counterpart to pirates, but they also made important geographical discoveries and established new trade routes.
The Vikings left behind many legends and myths featuring fictional creatures that remain popular today, such as sea dragons.
Nordic gods such as Thor, Odin, and Loki also gained new popularity through Marvel comics.
How to draw a comic Viking step by step
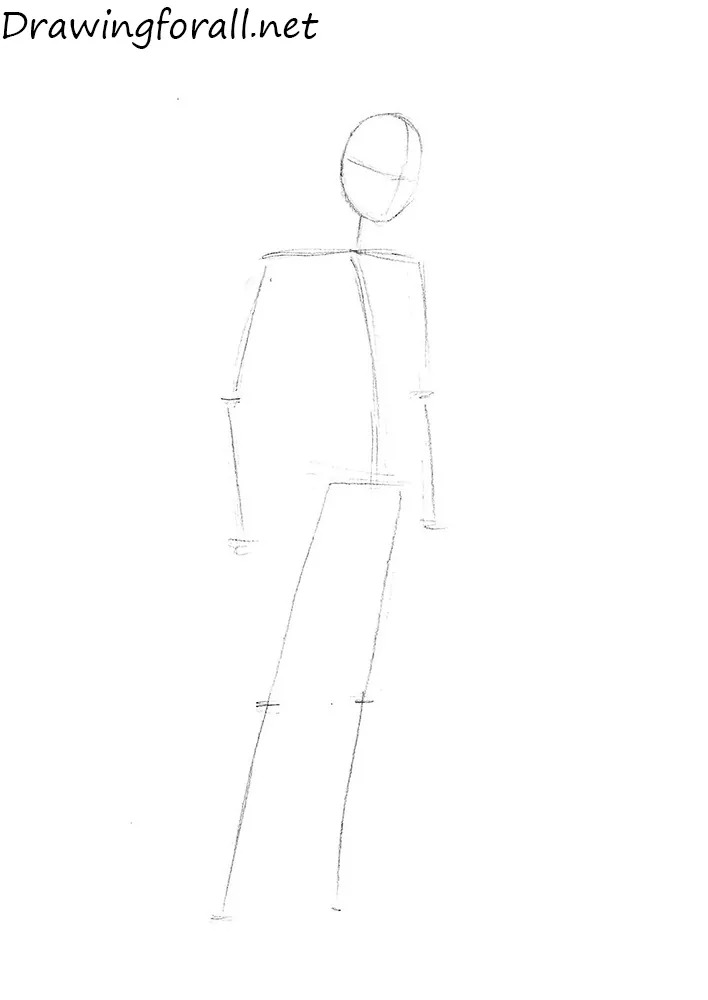
Step 1: Sketch the Viking’s pose
As with all full-body human figure tutorials on our site, begin with a stick figure. This framework of circles and lines establishes the Viking’s basic body structure, pose, and position on the paper. His static pose and tall, imposing figure allow us to apply the basic rules for drawing a male figure:
- The height of an average person is equal to approximately seven or seven and a half head lengths;
- The legs are approximately four head lengths long;
- The arms hanging at the sides reach approximately to the middle of the thighs. Because we are not yet drawing the hands, the arms appear shorter than they actually are;
- The shoulder width is approximately equal to three head widths. Because the Viking is turned slightly, his shoulders appear somewhat narrower.
Also draw the facial guidelines. The vertical line marks the center of the Viking’s face, while the horizontal line indicates the position of the eyes.
Step 2: Build the warrior’s body
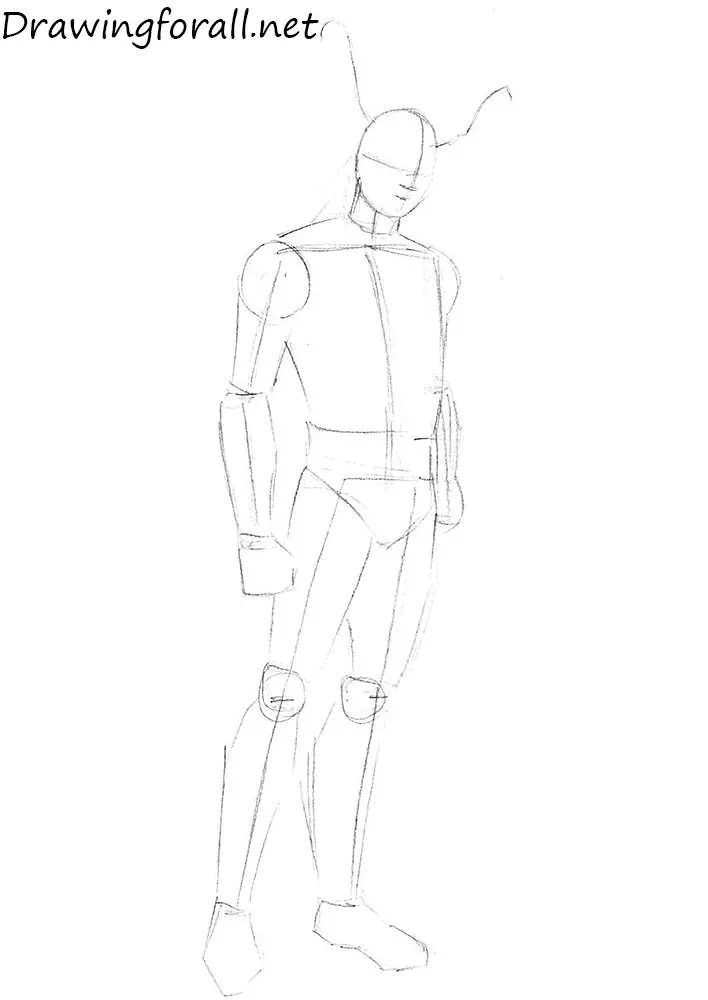
The human body is an extremely complex structure, but here we will represent it schematically with simple geometric shapes. First, add lines to the Viking’s face to mark the positions of the helmet horns, nose, and mouth.
Draw the neck as a short cylinder supporting the head. At the tops of the arms, add large circles for the deltoid muscles of the shoulders. Then use cylinders to draw the arms and a pentagonal shape to outline the fist. Draw the torso as a large cylinder that tapers toward the waist. Mark the belt and groin with a rectangle and triangle. When drawing the Viking’s legs, remember that the thighs taper from the hips toward the knees. The lower legs have characteristic angular bulges formed by the powerful calf muscles. Finish by sketching the feet.
Step 3: Mark the clothing and helmet
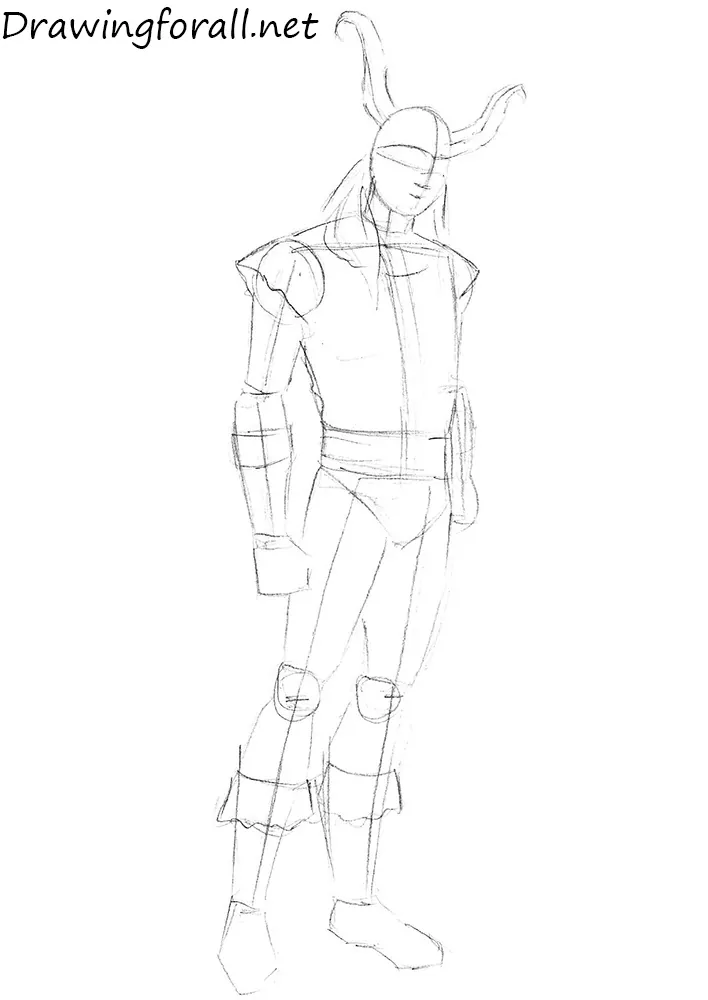
Add several details that will help with the final drawing of the Viking. Using the previously marked lines, outline the horns and sketch the helmet slightly above the eye line. Then mark the long hair falling over the shoulders and extending below them.
Sketch the short sleeves and use small rectangles to mark the upper parts of the gloves. Also draw the belt line and outline the boot cuffs approximately halfway down the lower legs.
Step 4: Detail the Viking’s face
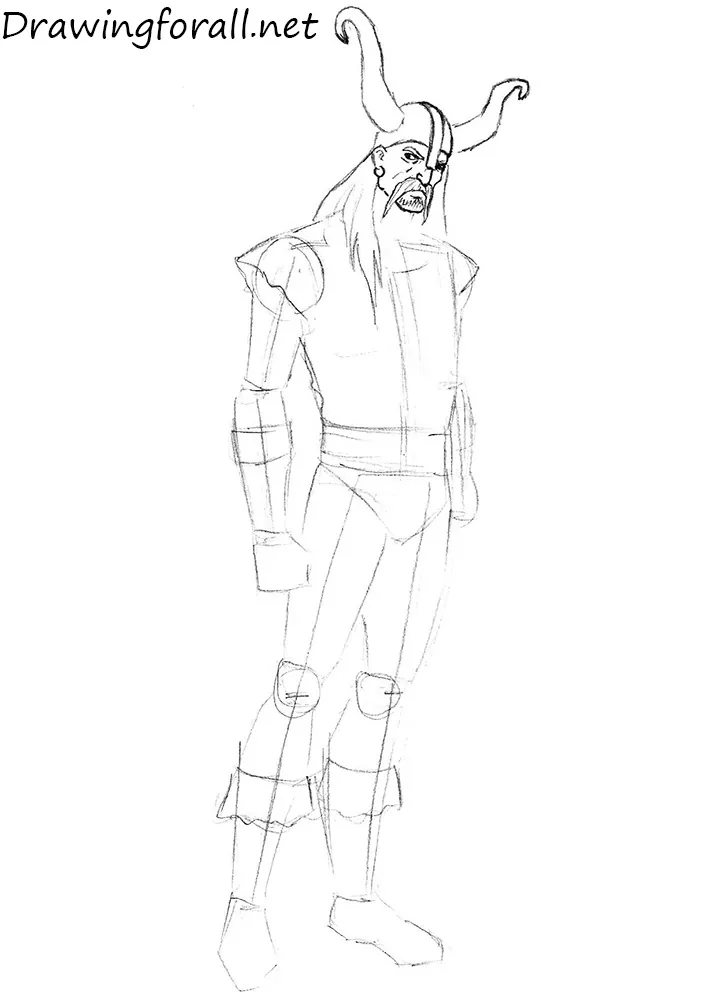
Begin detailing the Viking’s helmet and horns. Draw a long strip extending from the top of the helmet and covering the nose. Add curved, frowning eyebrows and place the eyes along the facial guidelines. Draw the pupils to indicate the direction of his gaze, then add wrinkles around the eyes with a few curved lines. The upper edge of the ear should align with the eyebrows, while the lower edge should align with the tip of the nose. Add the earring and draw a long mustache extending below the chin.
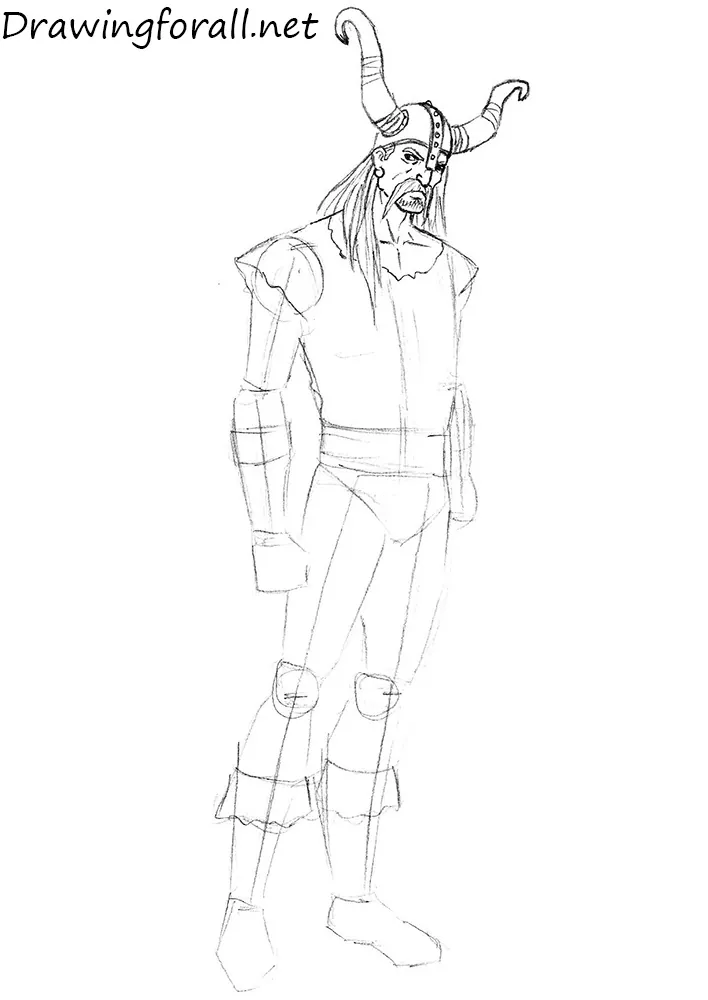
Step 5: Refine the helmet and chest
Complete the helmet by drawing transverse decorative bands near the bases and centers of the horns. Add rivets to the helmet strip covering the nose.
Then refine the Viking’s hair and mustache, drawing the strands from the roots toward the ends.
Outline the neck muscles, throat, and visible upper part of the chest muscles, which resembles the letter “T.” Use an uneven line to draw the torn upper edge of the Viking’s shirt.
Step 6: Define the Viking’s right arm
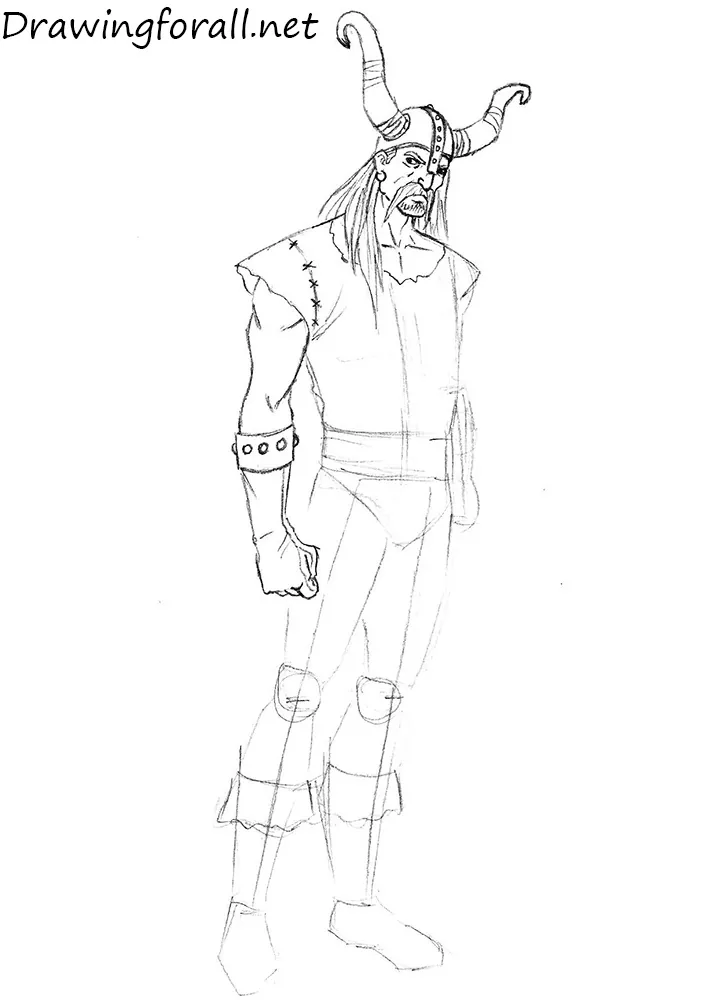
Now work on the Viking’s right arm. Using the construction lines from the earlier steps, draw the torn sleeve and outline the biceps and triceps. Add the visible muscle lines and refine the entire outer contour of the arm. Draw decorative patterns on the glove and shoulder, then add several folds around the wrist and armpit.
Step 7: Finish the warrior’s torso and arms
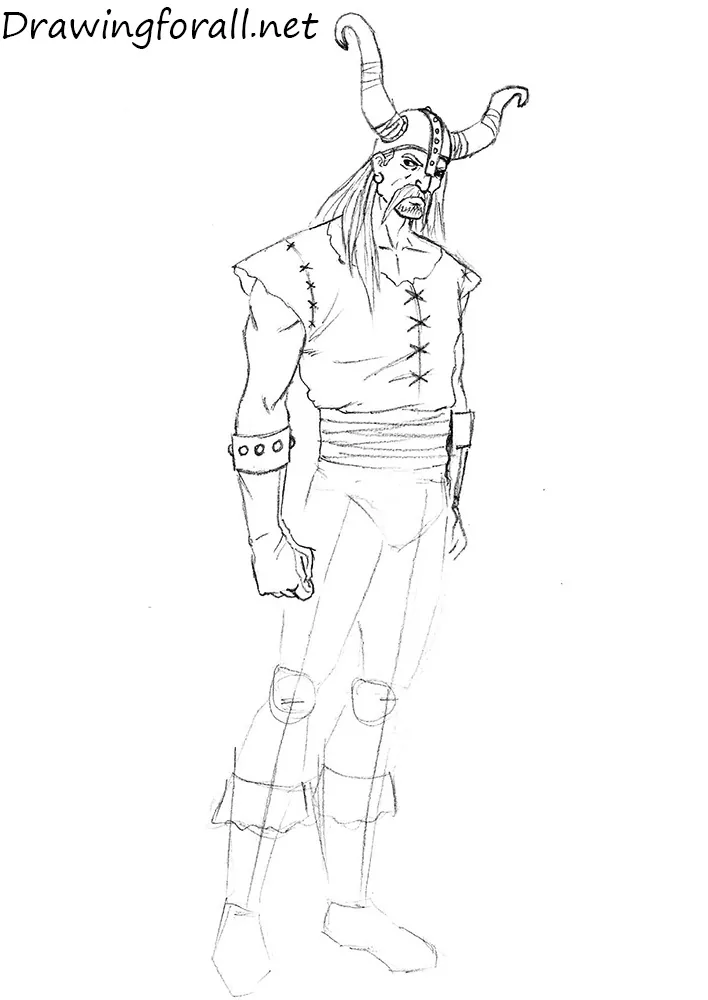
Refine the contours of the Viking’s torso and erase the unnecessary guidelines. Note that the outer edges of the shirt are wavy, while the edges of the belt are almost straight. Draw a vertical seam in the center of the torso and add five horizontal lines to indicate fabric folds. Then outline the left arm, including the raised edge of the glove and the clenched fist.
Step 8: Draw the comic book character’s right leg
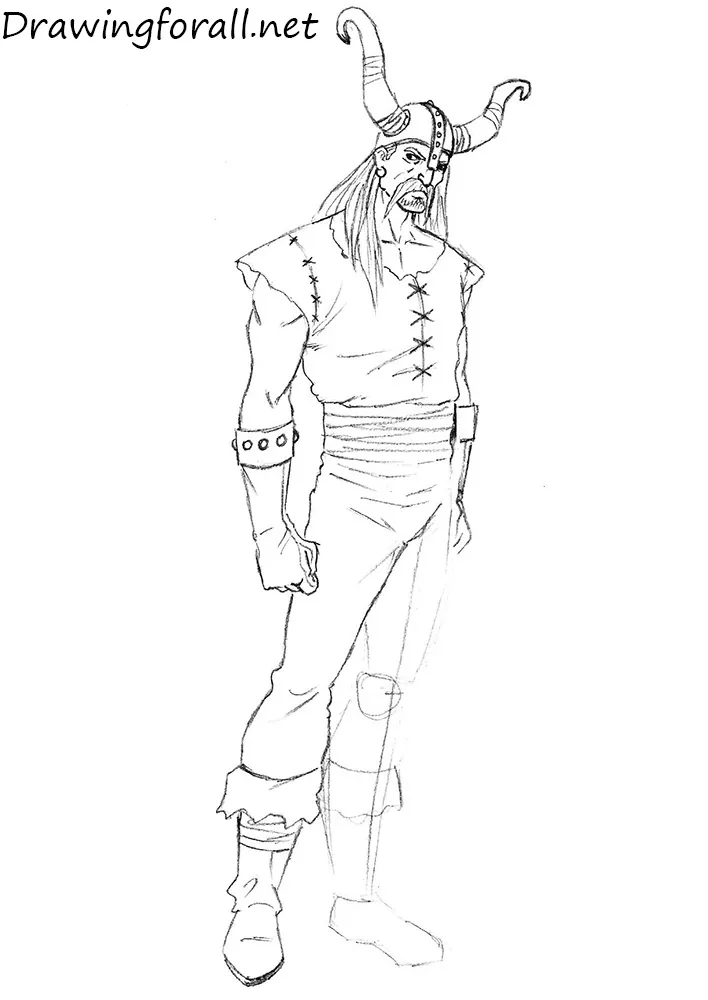
Draw the Viking’s right leg. Add several nearly horizontal fabric folds around the groin. Refine the leg contour, erase the unnecessary guidelines, and draw folds around the knee. Then outline the boot. Its upper edge should be uneven and torn. Add strips of fabric below the boot cuff and several folds around the ankle. Finish by drawing the sole.
Step 9: Complete the Viking’s second leg
Draw the Viking’s second leg in the same way, noting that it turns slightly to the side. Erase the construction lines and refine the leg contours. Add folds around the knee and draw the seam extending downward from the groin. Finish the Viking drawing by outlining the sole of the second boot.
This drawing tutorial was prepared by Drawingforall.net. If you’d like to try something simpler, start with drawing a cartoon goblin. If you’re ready for another fantasy creature, continue with drawing an ogre.