How to Draw a Bloodhound
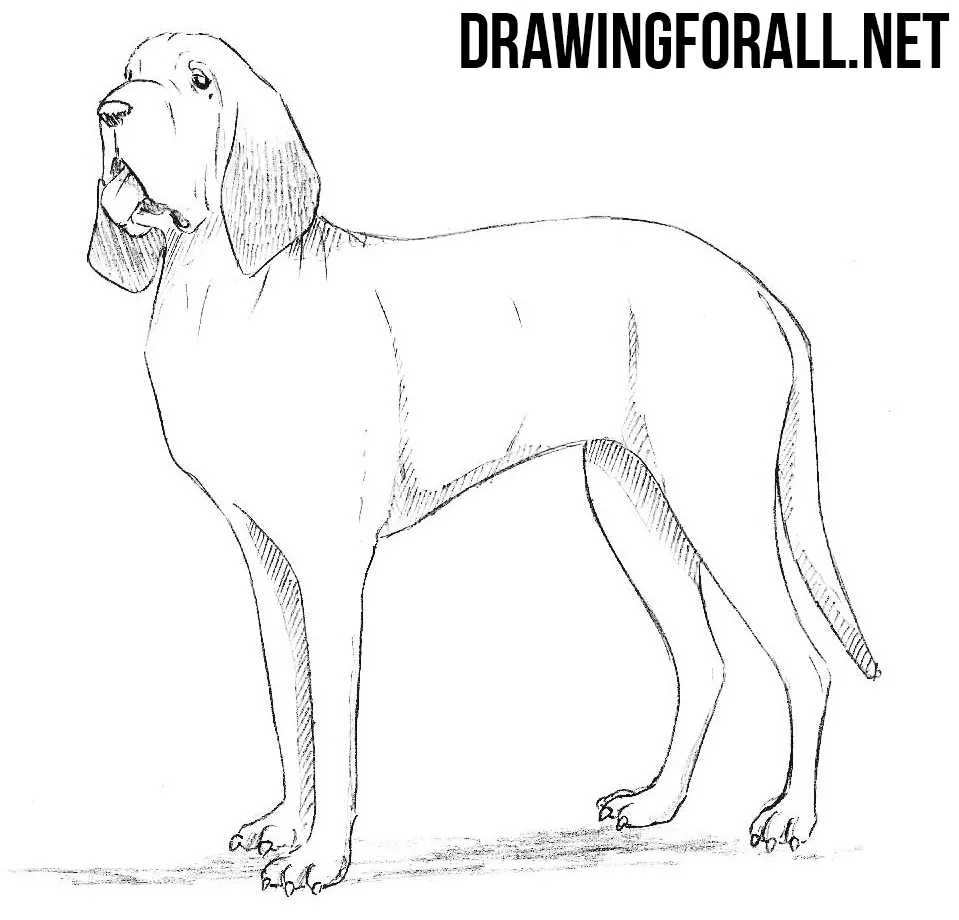
Welcome to the DdrawingForAll and a new drawing lesson on how to draw a bloodhound step by step. This is a very beautiful beagle dog that was bred in Belgium. In this lesson we will use a step-by-step method of drawing, similar to the one we used in the lesson about an Afghan hound.
Step 1
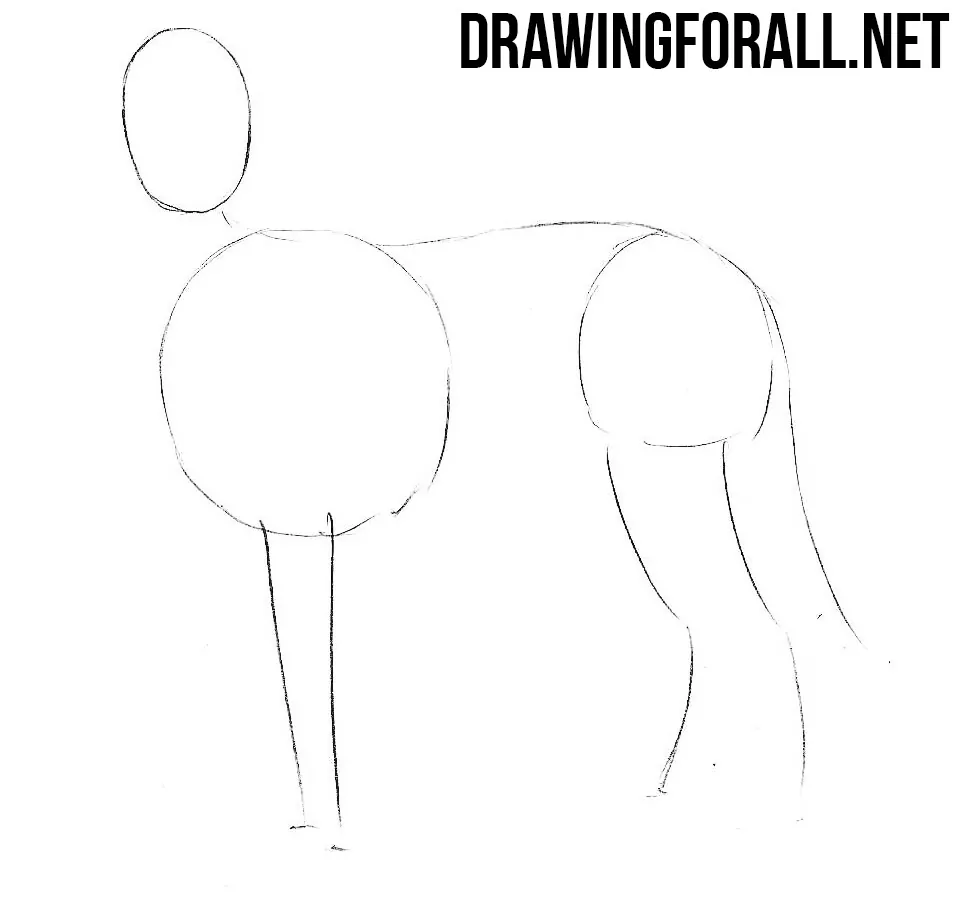
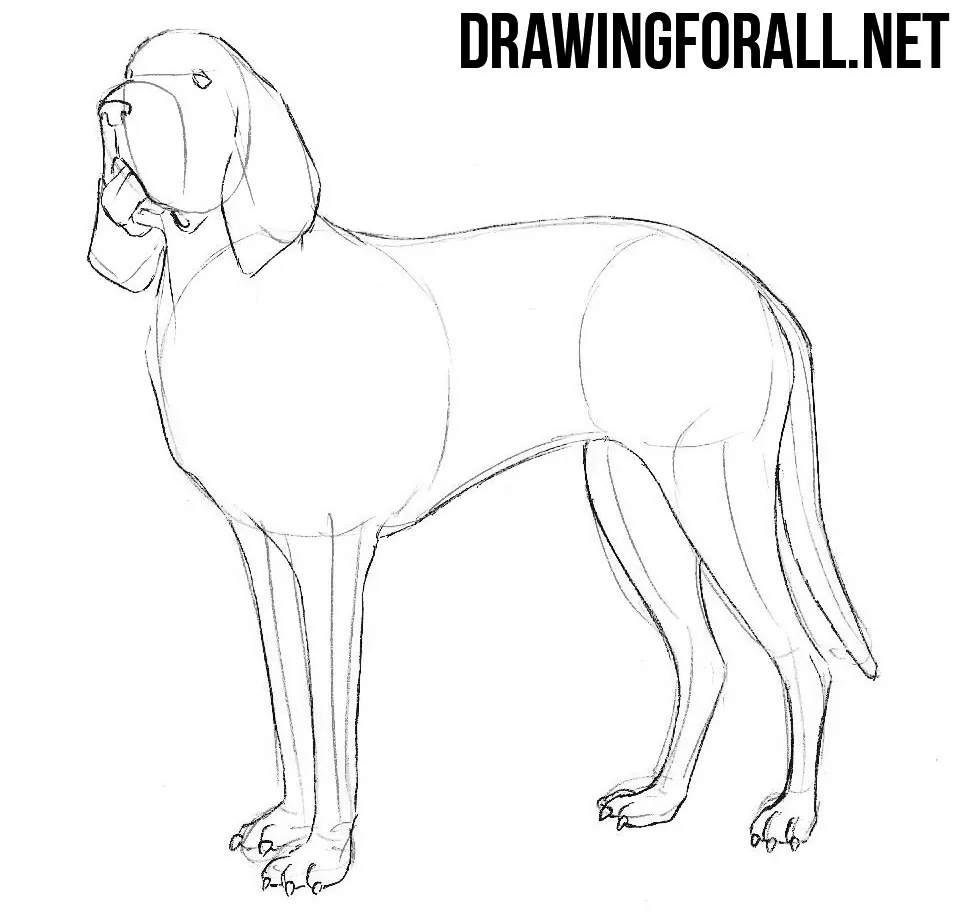
To get a dog draw three parts – the head, chest and pelvis, using simple ovals. The head should be the smallest of ovals. Using simple lines sketch out the spine, tail and limbs.
Step 2
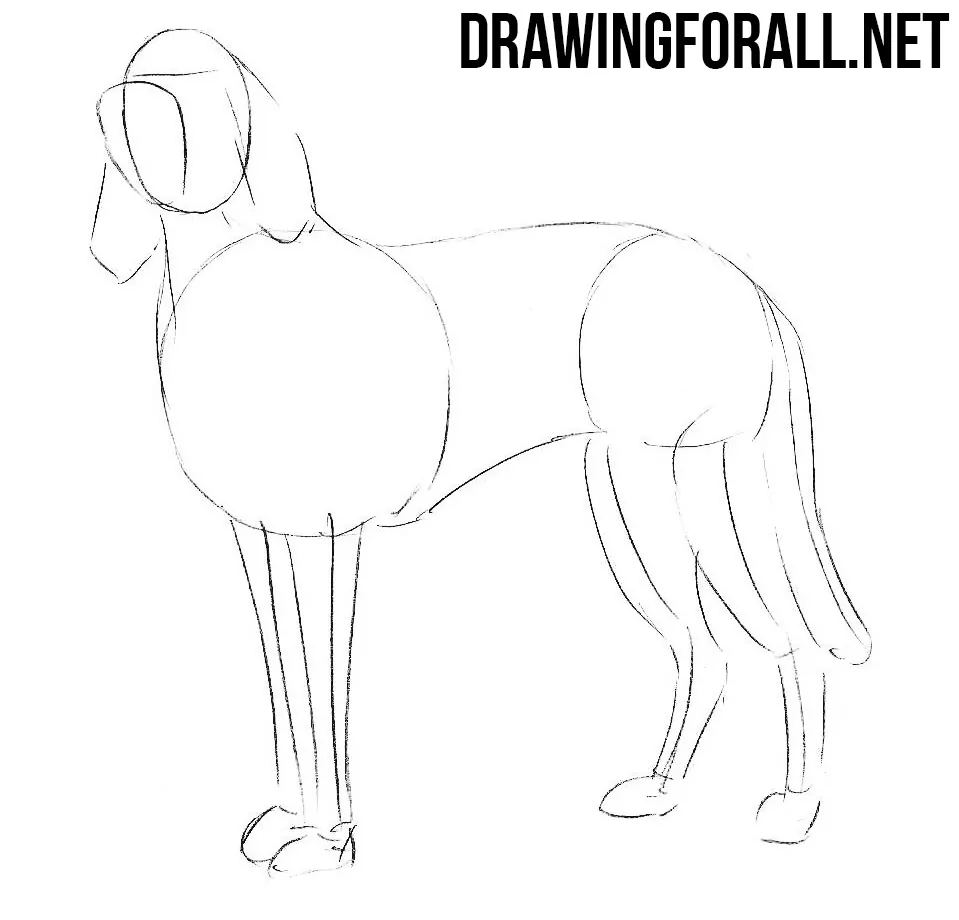
Using light lines connect ovals from the previous step. Add the hanging ears with the help of curved lines and legs with the help of simple geometric figures.
Step 3
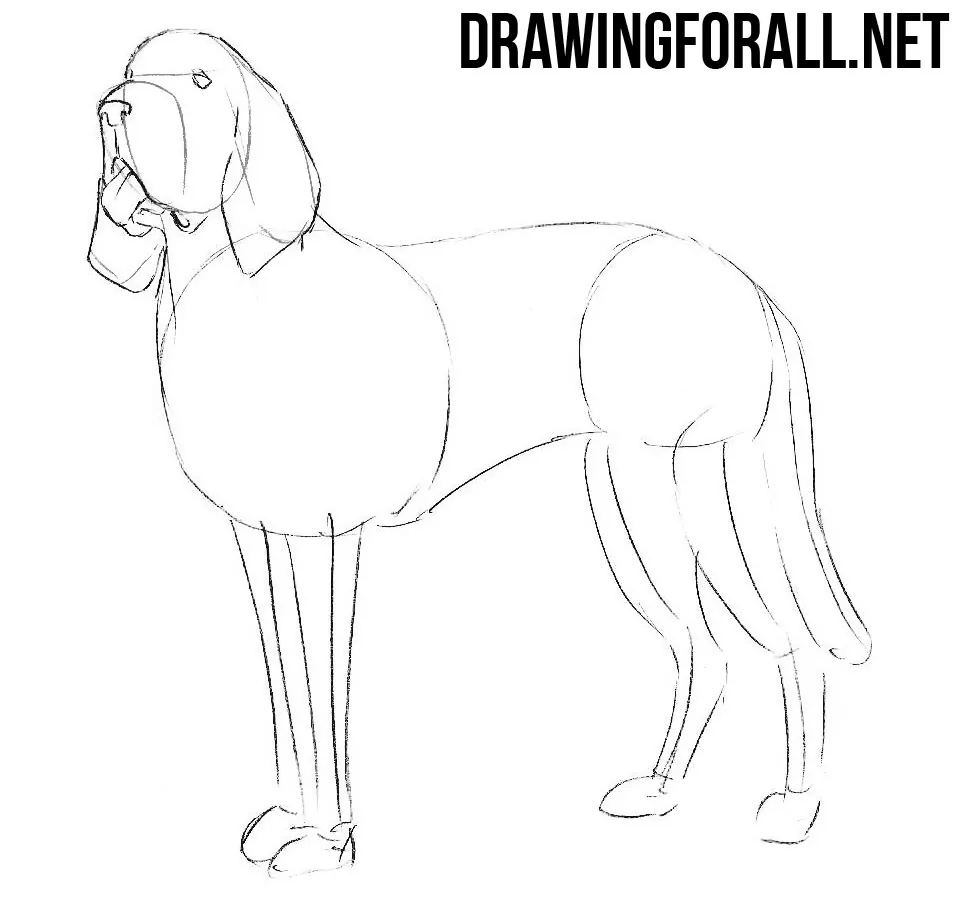
Continue the drawing lesson about how to draw a bloodhound. Using clear and dark lines draw a sad expression on the face of our dog.
Step 4
Using clear lines draw out the body of our bloodhound as it shown in our example below.
Step 5
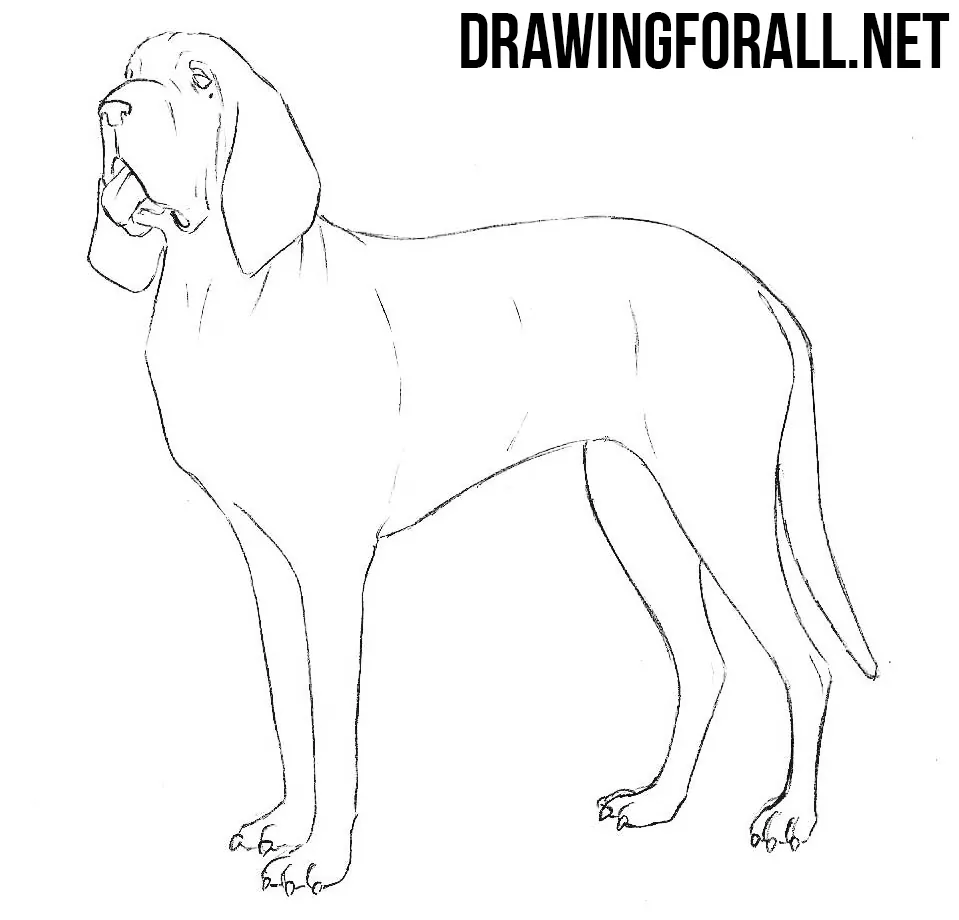
Erase all additional guidelines from the drawing. Add wrinkles on the face and body of our bloodhound and the drawing our dog is almost ready.
Step 6
Now add some shadows to the drawing of bloodhound neatly hatching the parts on which the shadow does not fall.

It turned out to be a realistic drawing of a bloodhound, is not it? If you liked this drawing tutorial, try to draw something else from “animals” category from our site, for example a wolf or a horse. We will be glad to see the results of your work. Leave comments, come to us more often, and you will learn a lot of new things. Thank you for attention!


Hi