

How to Draw Avatar Aang
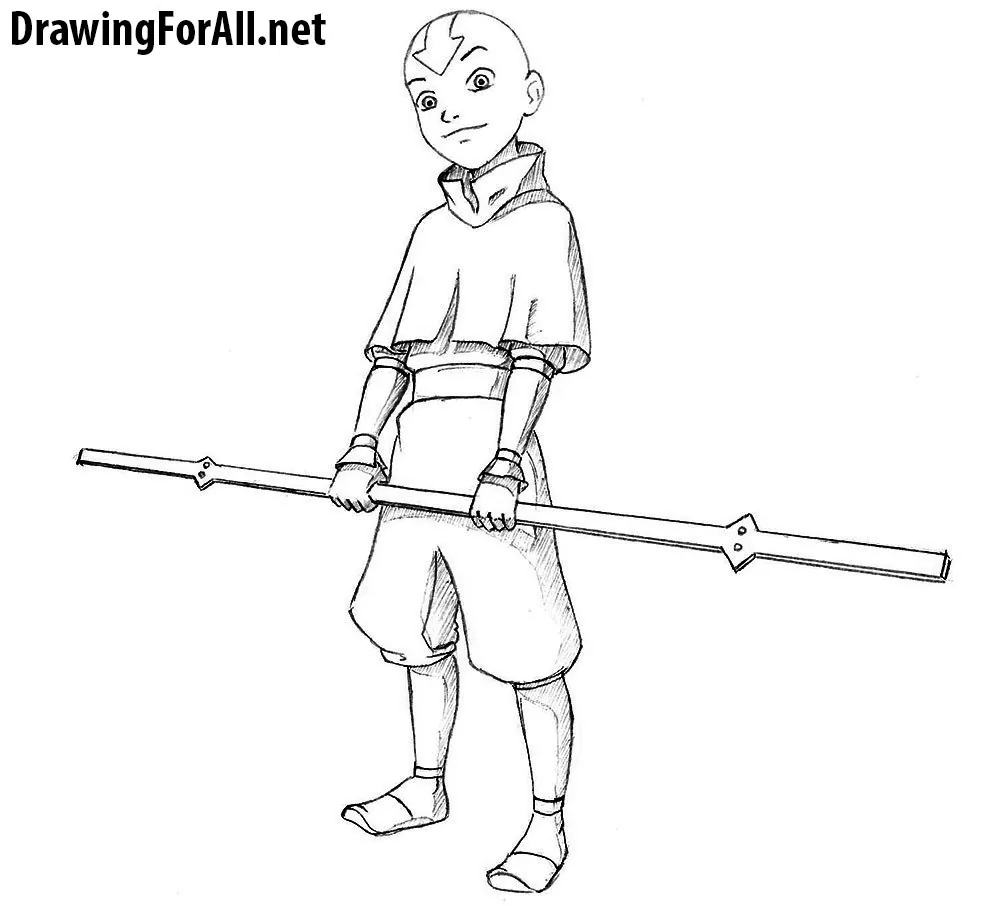
In this step-by-step tutorial, you will learn how to draw Avatar Aang from the well-known cartoon series.
This entertaining, high-quality cartoon series, dedicated to the adventures of Aang, a boy who can control air with magical powers, was released in 2005.
This Avatar Aang drawing tutorial will not be very difficult, or rather, no more difficult than other anime-style drawing tutorials on our website. Let’s begin and learn how to draw the young Airbender with this step-by-step tutorial.
How to draw Avatar Aang step by step
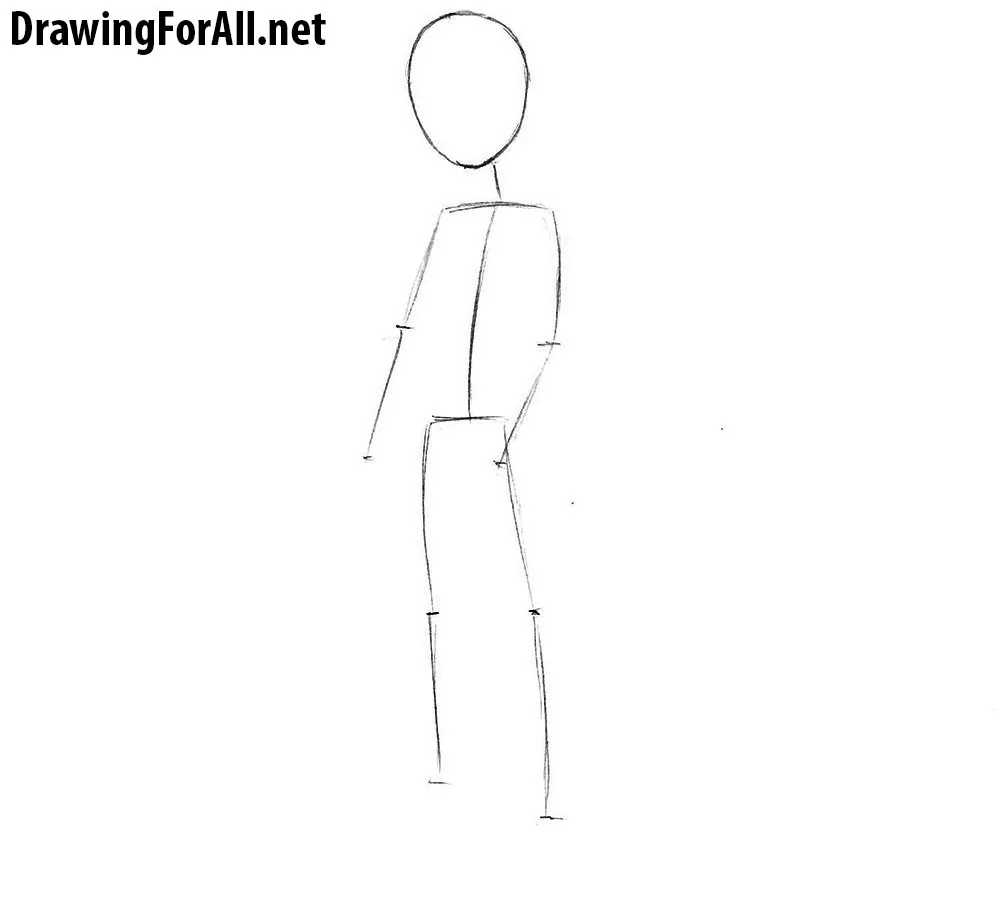
Step 1: Sketch Aang’s basic frame
The first stage is not particularly different from the beginning of other figure-drawing tutorials. As you may know, we first draw a stick figure. Since we are drawing an anime character, his head is slightly larger than that of an average person. Otherwise, draw a standard stick figure: first outline the head with an oval, then sketch the body’s framework with simple lines.
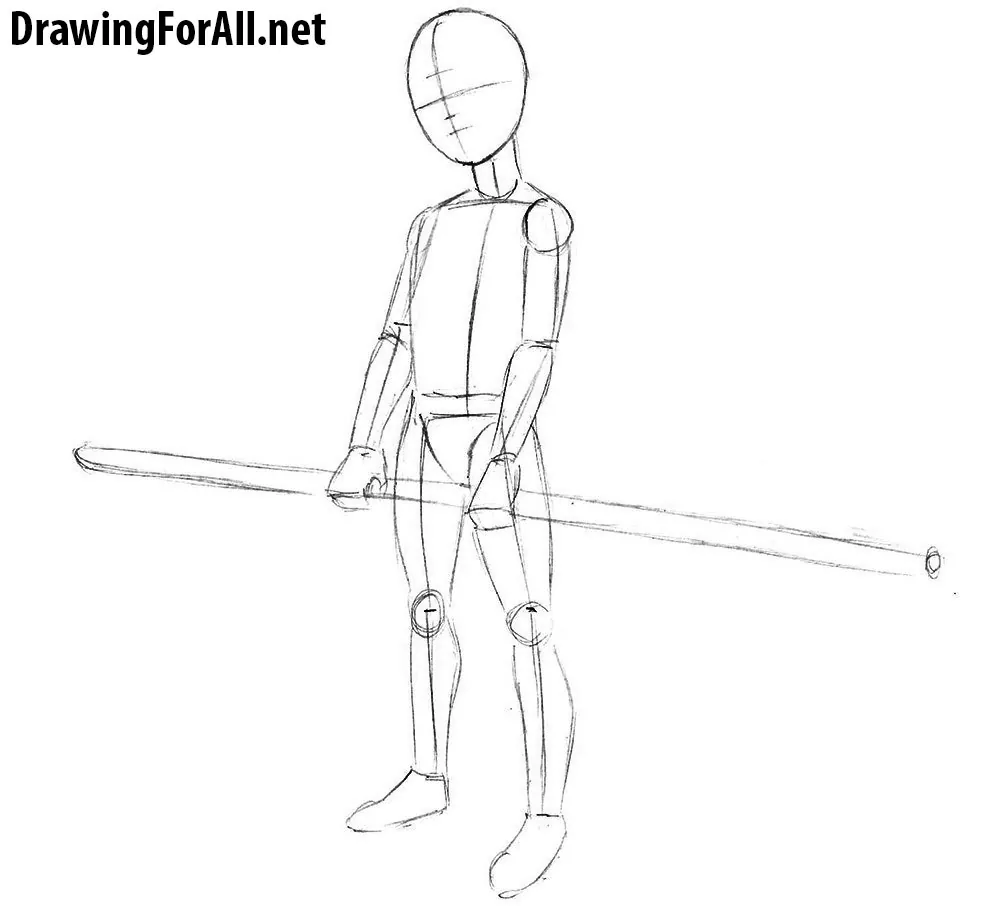
Step 2: Build Aang’s body shapes
First, mark the vertical and horizontal facial guidelines. The horizontal lines indicate, from top to bottom:
- The eye line, located approximately in the center of the face;
- The nose line;
- The mouth line.
Below the head, draw the neck as a long cylinder. Under the neck, sketch the torso, using the line from the first step as a guide. Draw two circles for the shoulders. Shape the arms as elongated cylinders and sketch the hands. Draw the lower part of the body as an inverted triangle. Form the legs in the same way as the arms, using elongated cylinders. Finally, draw the feet and sketch the staff in Aang’s hands.
Step 3: Add Aang’s facial features
This is a short stage. Once you have completed the preparatory work, begin adding details to Avatar Aang. Work from top to bottom. Using the facial guidelines from the previous step, draw the main features and do not forget the arrow on his forehead.
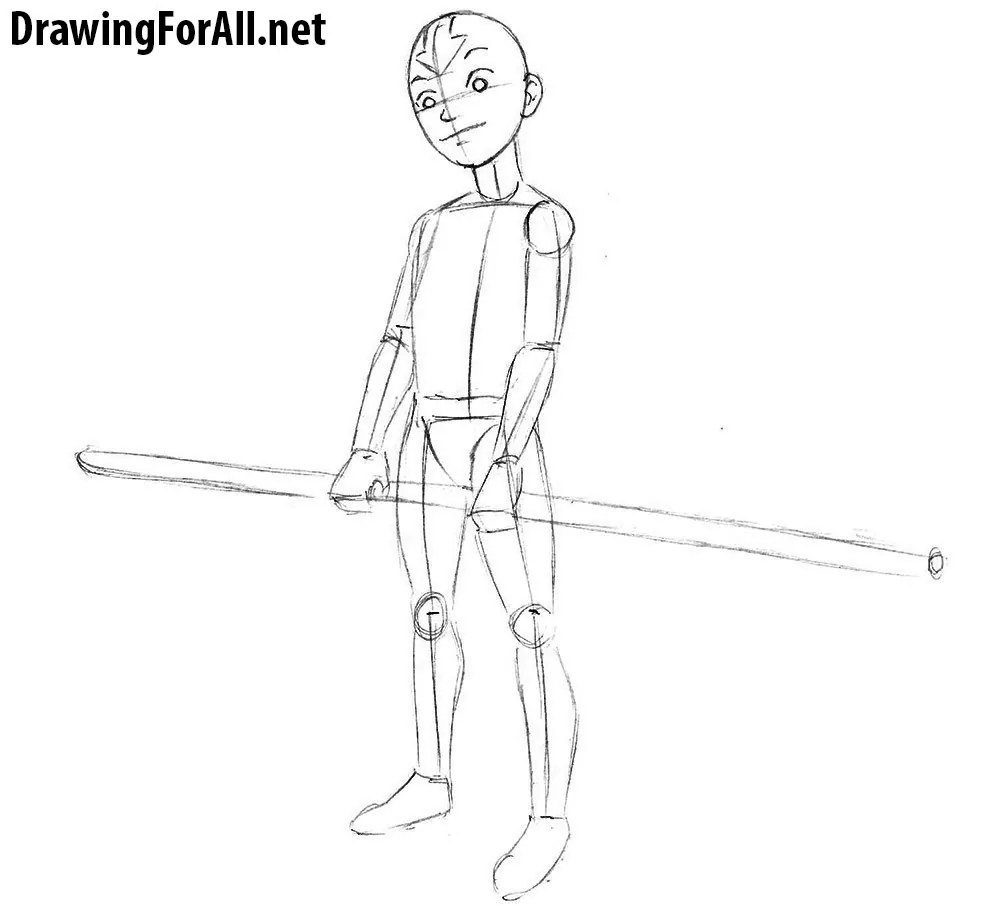
Step 4: Refine the young Airbender’s face
Finish adding details to the face. Erase the facial guidelines and draw Aang’s eyes.
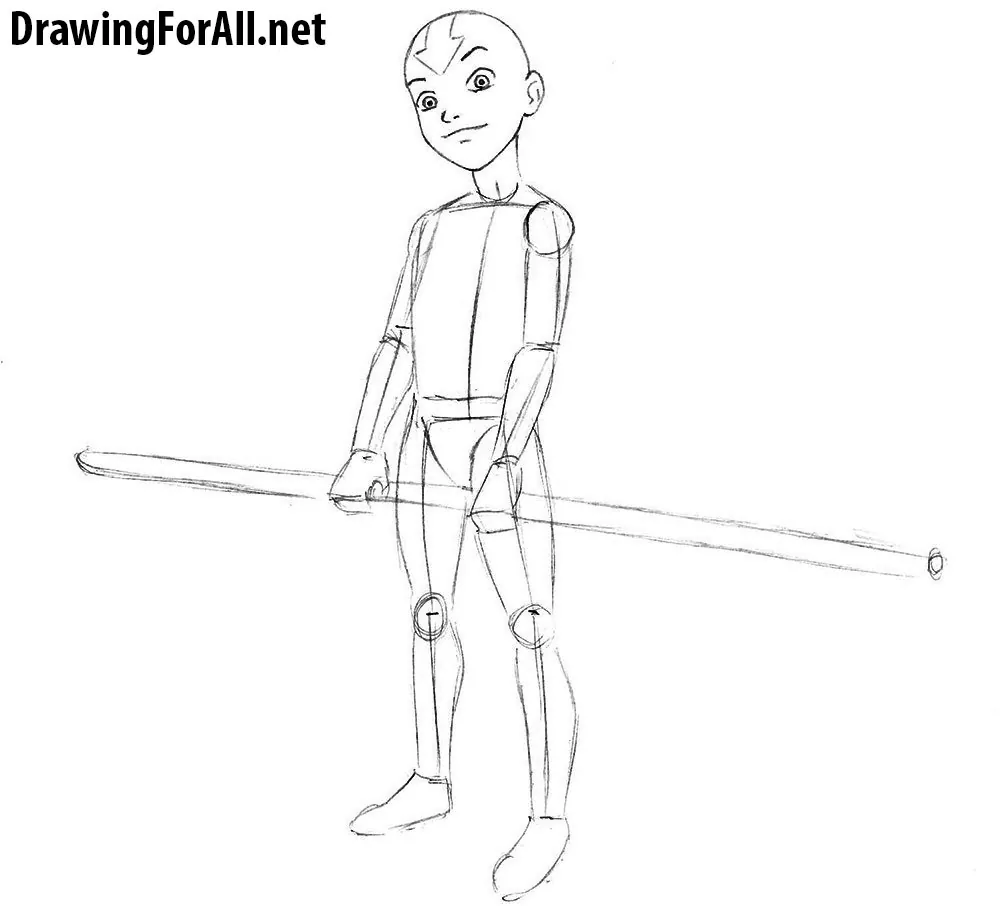
Step 5: Outline Aang’s loose clothing
Now outline the cape of Avatar Aang. The collar should not fit tightly around the neck. As you can see, there is considerable space between this part of the cape and the neck. The cape itself should hang loosely. Use light, wavy lines to draw it.
Also draw Avatar Aang’s pants. They should be loose, like the upper part of Aang’s clothing.
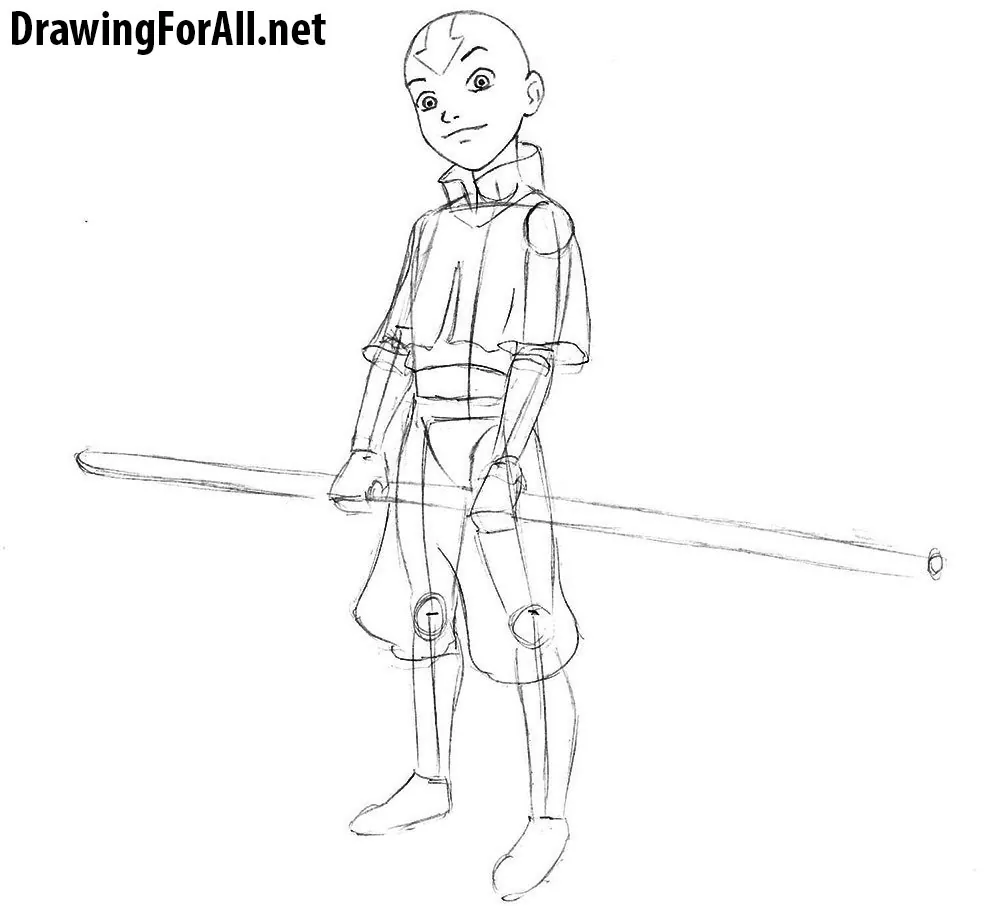
Step 6: Detail the hands and torso
Draw Avatar Aang’s hands tightly gripping the staff. To learn more about drawing hands, use our separate tutorial. Then outline the entire upper torso with confident, precise lines and erase all unnecessary guidelines. Also, remember to add a few folds to the fabric.
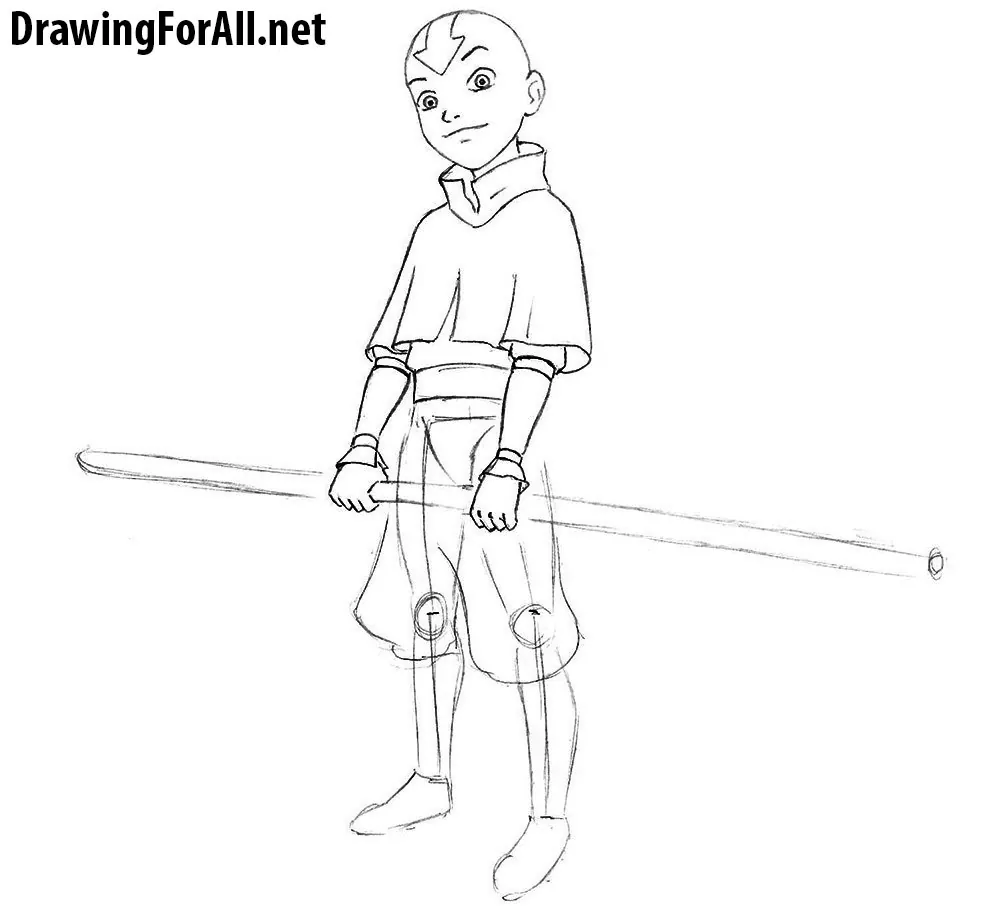
Step 7: Refine Aang’s lower body
Repeat the same process on Avatar Aang’s lower torso and legs. Outline these areas, erase the guidelines from the previous steps, and clean up the drawing.
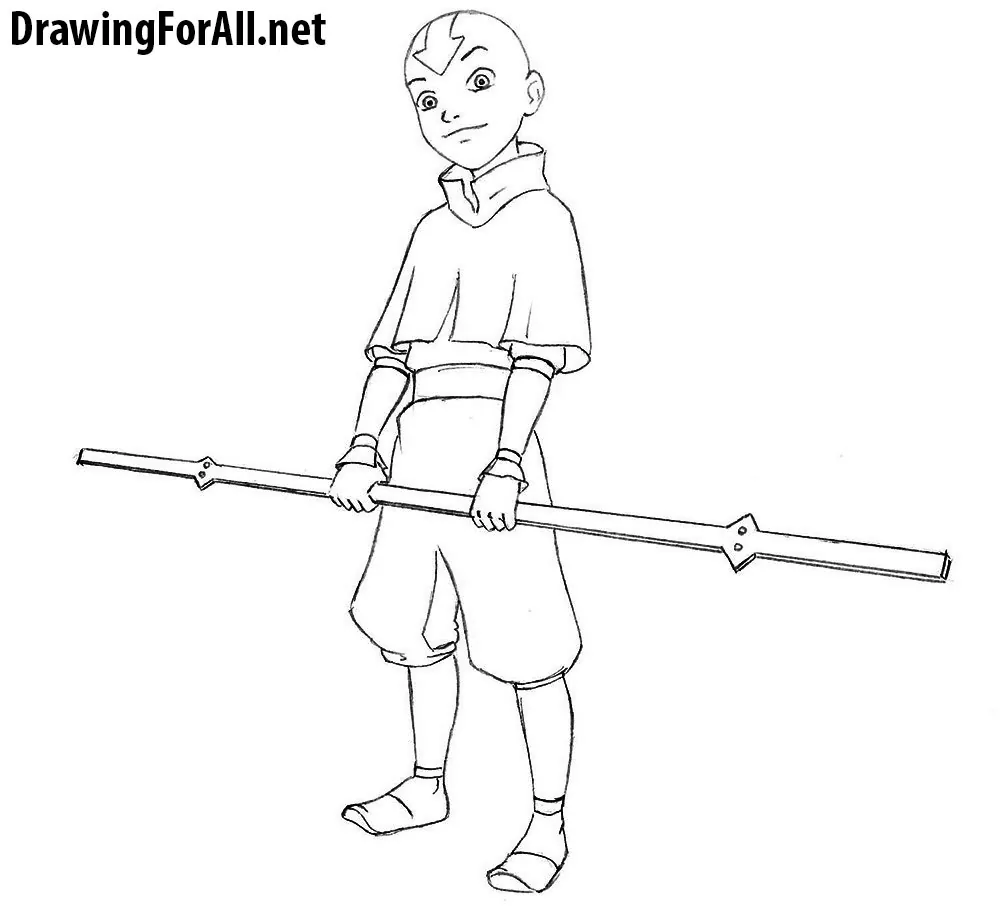
Step 8: Shade the Aang drawing
Now add shadows to Avatar Aang. The shadows are very simple and consist of single-layer hatching with medium intensity. Place them on the neck, beneath the collar, on the sleeve to the right, and in other shaded areas. It is best to outline the shadowed areas first and then fill them with a single layer of hatching.
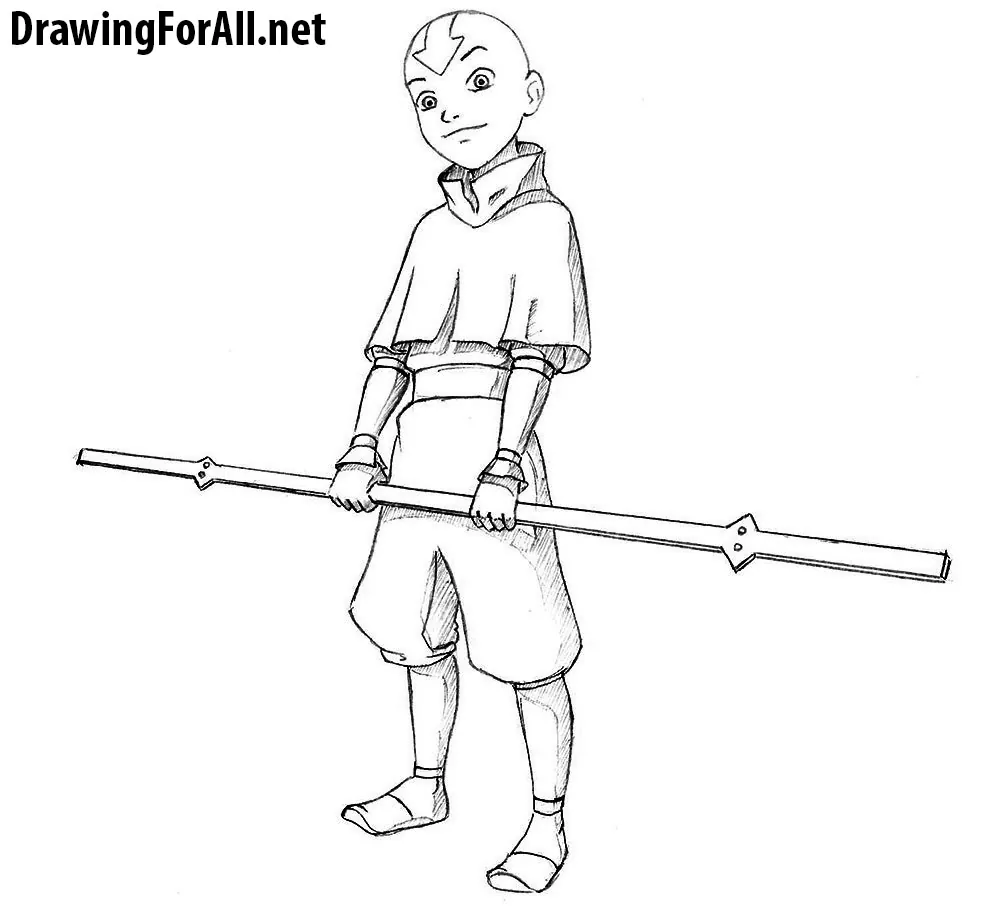
This tutorial showed you how to draw Avatar Aang, the main character from Avatar: The Last Airbender. If you’d like to continue sketching characters from the same series, try drawing Korra, the Avatar from the sequel series The Legend of Korra.
Our site includes many other anime and cartoon characters as well. Continue by illustrating Naruto, another hero who relies on martial arts and special abilities, or draw Monkey D. Luffy, one of the most recognizable anime protagonists.


I want to learn