How to Draw Goro
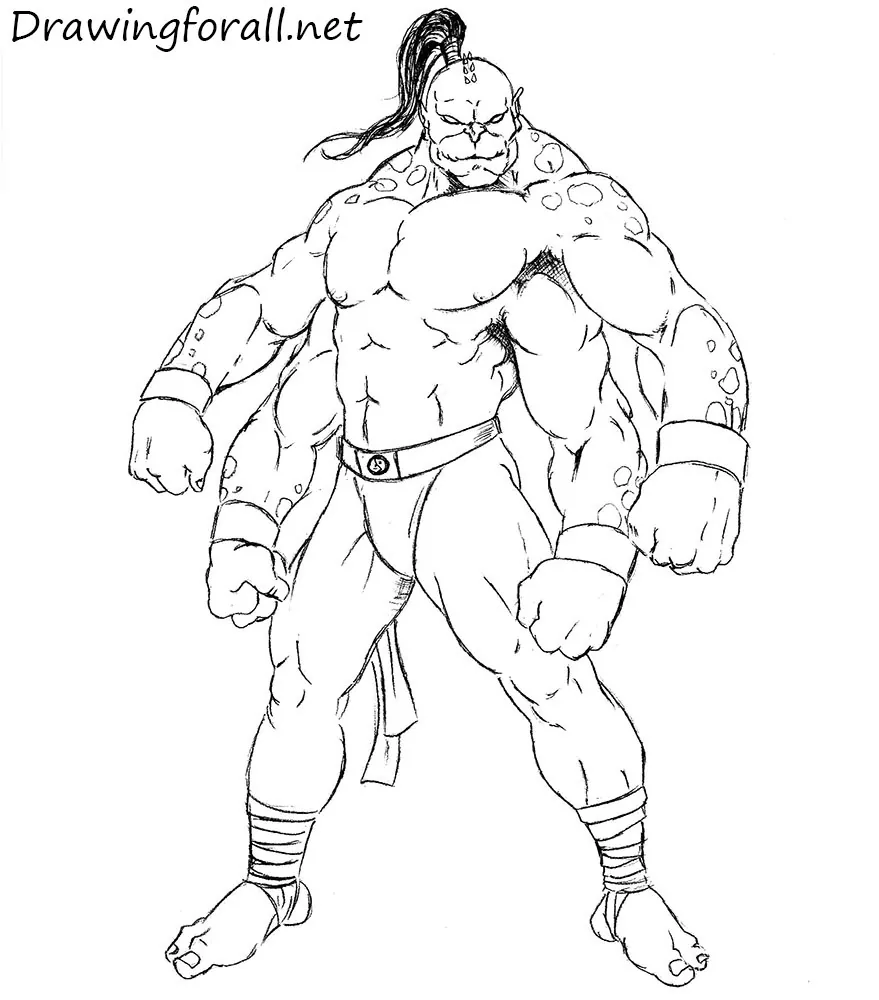
In this tutorial, you will learn how to draw Goro step by step and capture the appearance of the half-dragon warrior from Mortal Kombat.
Goro is a representative of the half-dragon race called the Shokan. The Shokan are an ancient race from Outworld.
They are aggressive creatures with formidable combat skills. An average Shokan is about 250 centimeters tall and can weigh more than 1,000 kilograms.
Goro appeared in the first Mortal Kombat game and was remembered by players as one of its most brutal and frightening bosses. Let’s learn how to draw Goro!
How to draw Goro step by step
Step 1: Sketch Goro’s basic guidelines
First, consider Goro’s unusual body structure. He has four arms, a disproportionately small head, enormous trapezius muscles, and massive limbs.
His hands and feet also have distinctive features. Goro has enormous fists, three fingers on each hand, and only two toes on each foot, similar to the features seen in our Leonardo drawing tutorial. However, the second pair of arms is what makes this monster especially unusual. Without this feature, his figure could resemble the powerful body of an athlete.
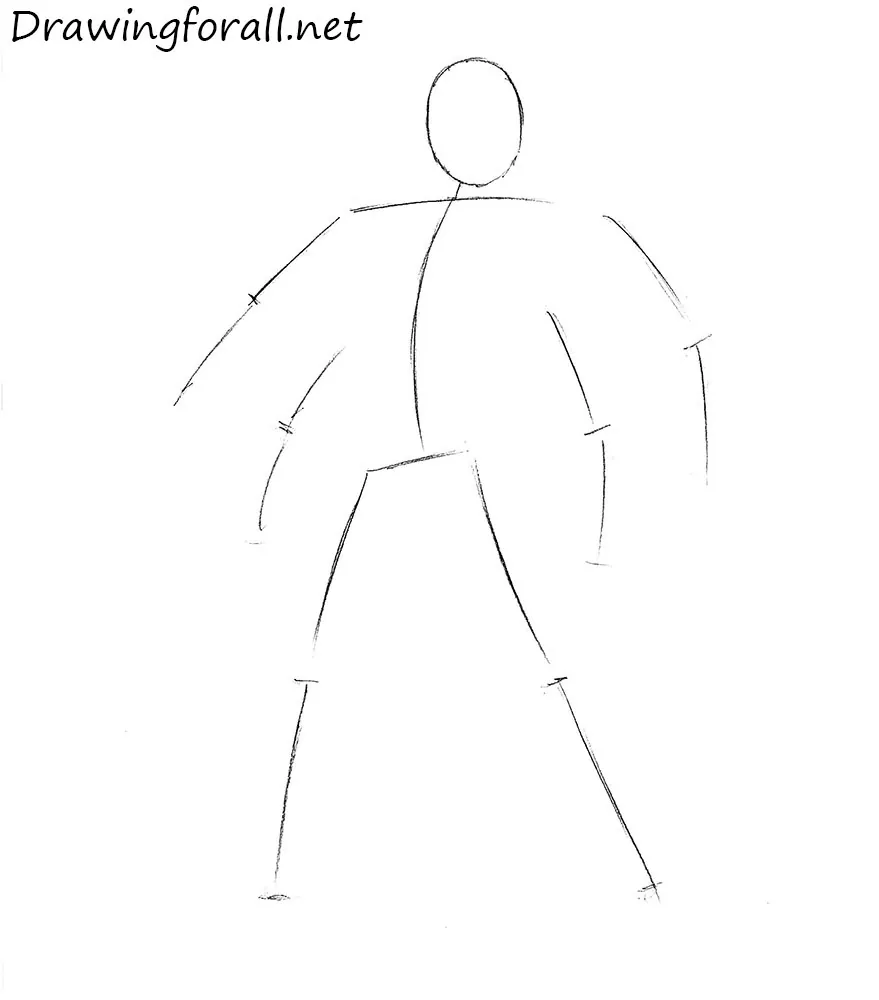
Begin by drawing the head as a circle, then sketch Goro’s body framework with simple lines.
Step 2: Build Goro’s massive body
Add substantial volume to Goro’s figure, creating a clear silhouette over the stick figure. Before that, mark the head with a vertical facial symmetry line that divides the face into two equal parts. Then draw three horizontal lines to indicate the eyes, nose, and mouth. Note the very short distance between the eye and nose lines. Also outline the tuft of hair on Goro’s head.
Outline Goro’s four arms. Each arm consists of several main parts:
- The shoulder;
- The upper arm;
- The forearm;
- The drawn hand.
Next, draw Goro’s torso by following the stick figure. Preserve its distinctive shape: the torso narrows sharply toward the waist and widens near the neck because of the broad chest and narrow waist. Draw the groin as a triangular shape, then sketch the legs with cylinders.
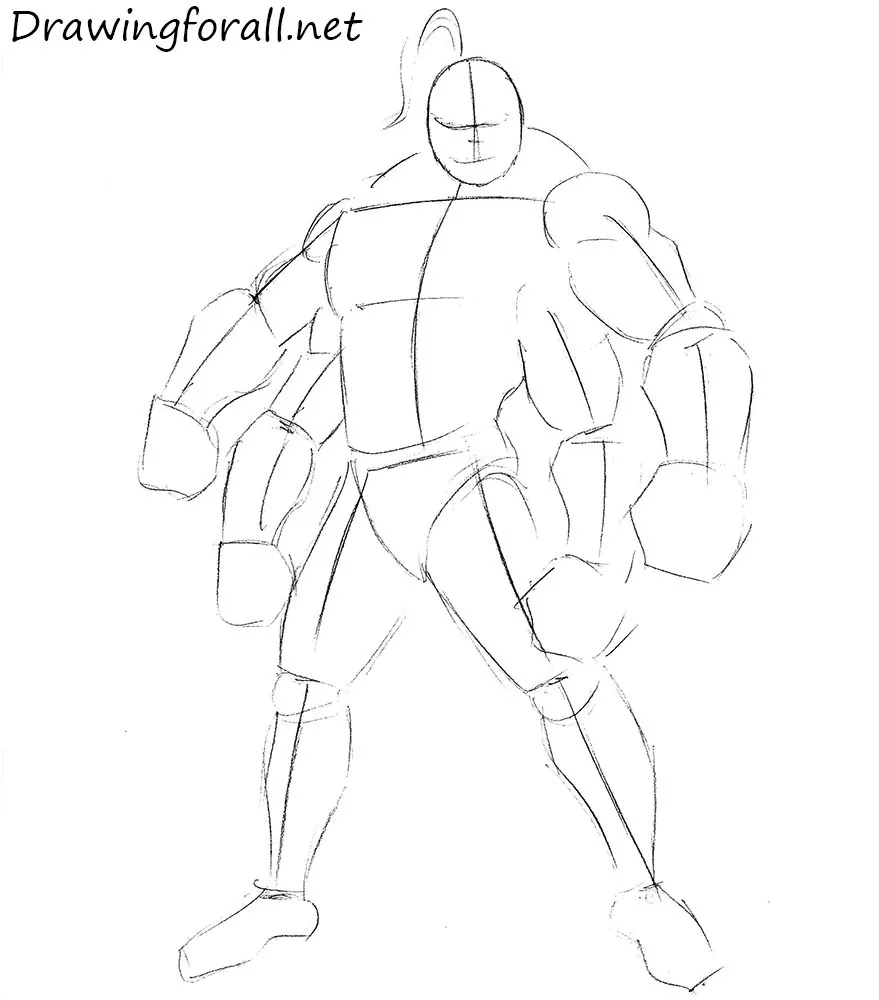
Step 3: Outline the facial features
With Goro’s silhouette ready, begin adding details from the head down toward the feet. Use the guidelines from the previous step to draw the low, overhanging eyebrows, very short nose, and large, fleshy lower lip.
Add the nasolabial folds extending downward from the nose. Sketch the ears slightly longer than human ears. They should also have pointed tips, like those of many fantasy characters.
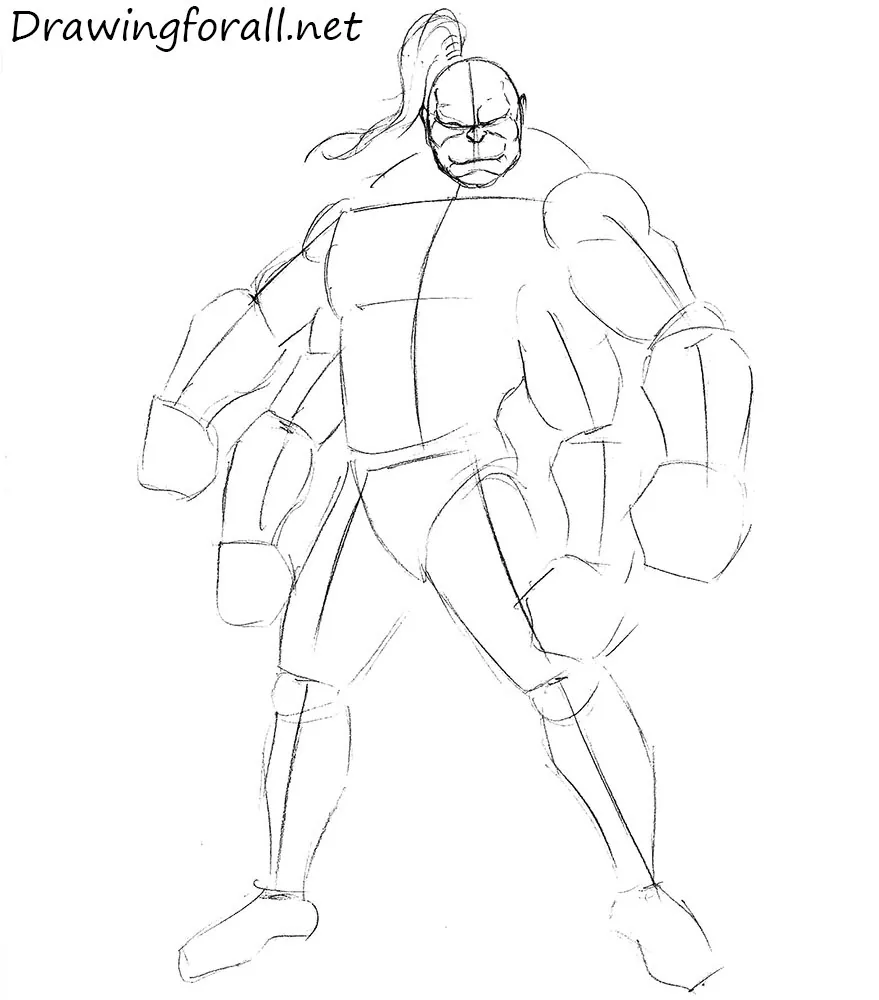
Step 4: Draw Goro’s face and hair in detail
Complete the details of Goro’s face. Erase the unnecessary guidelines, then draw the wide, protruding cheekbones and cheeks. Add the tuft of hair on Goro’s head. When drawing long hair on a powerful monster, guide the strands from the roots toward the ends. Do not forget the small spikes along the center of Goro’s skull.
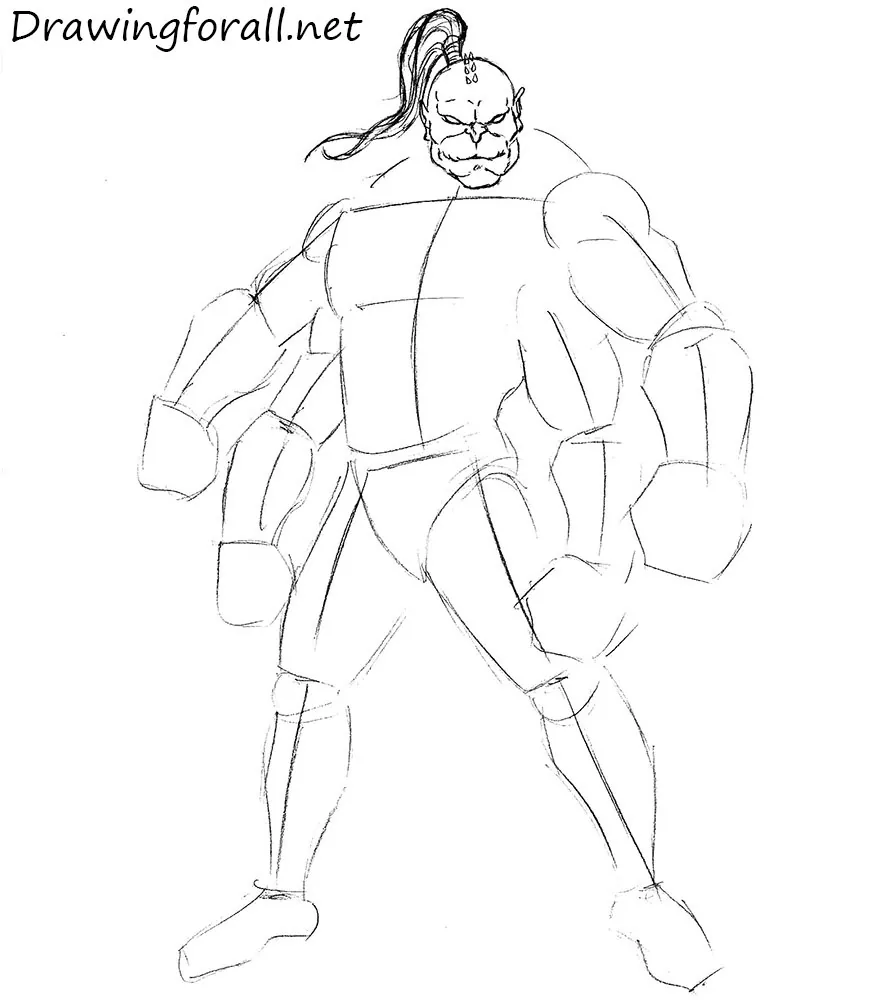
Step 5: Mark the torso muscles
Outline the muscles of Goro’s torso. This stage is difficult, so begin with light lines and minimal pencil pressure.
The largest and most prominent muscles are the pectorals. Below them, outline the abdominal muscles and the oblique muscles along the sides of the torso.
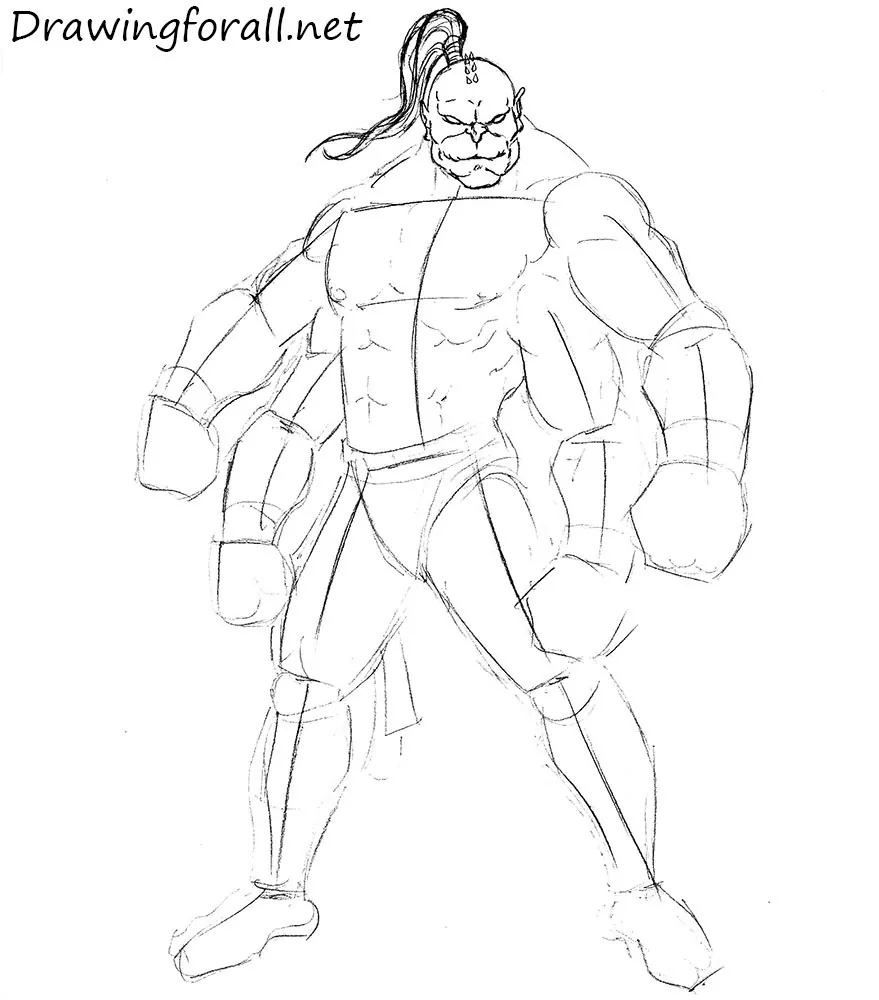
Step 6: Refine Goro’s muscular torso
Refine the lines of Goro’s torso and erase the unnecessary guidelines. Check the placement of the chest, abdominal, and side muscles before darkening the final contours.
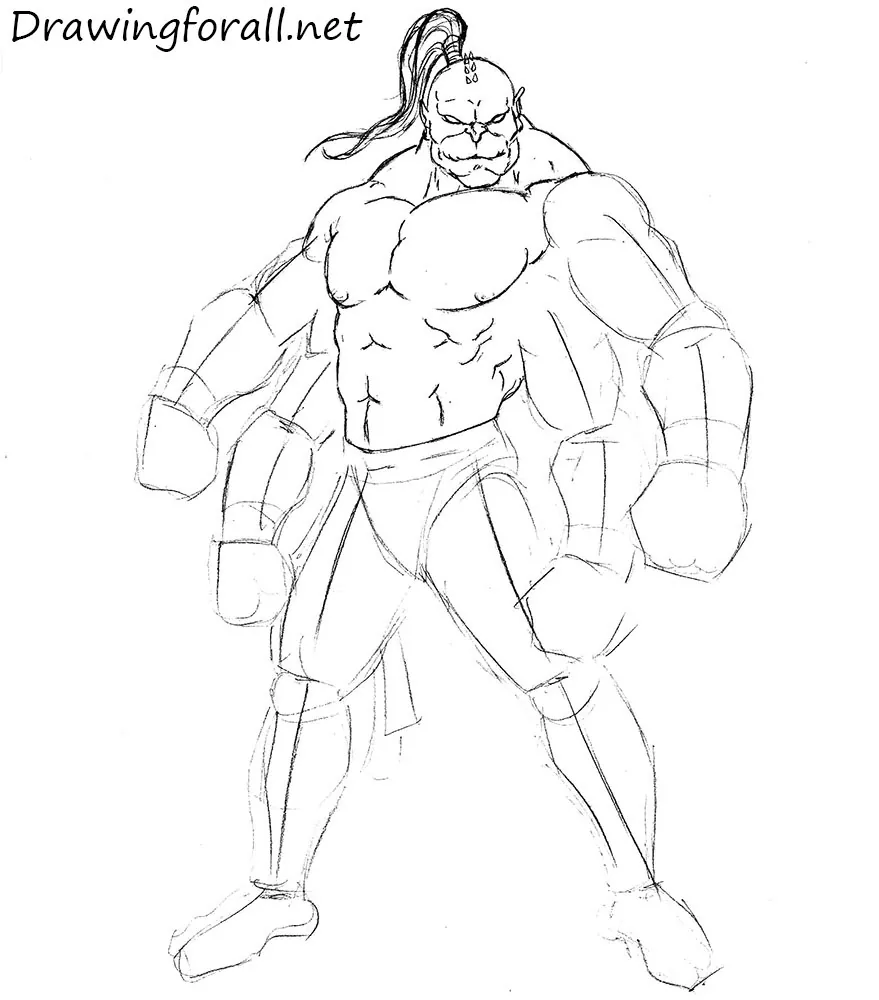
Step 7: Draw Goro’s upper arms in detail
Draw Goro’s upper pair of arms. Use the main arm muscles described earlier: the biceps, triceps, and deltoids. Notice the rounded biceps on the arm to our right. The triceps is less visible because of the arm’s position, although it is the largest muscle of the upper arm.
Goro’s forearms appear wider than his upper arms, especially on the arm to our right. Do not forget to draw the wide bracelets around the wrists.
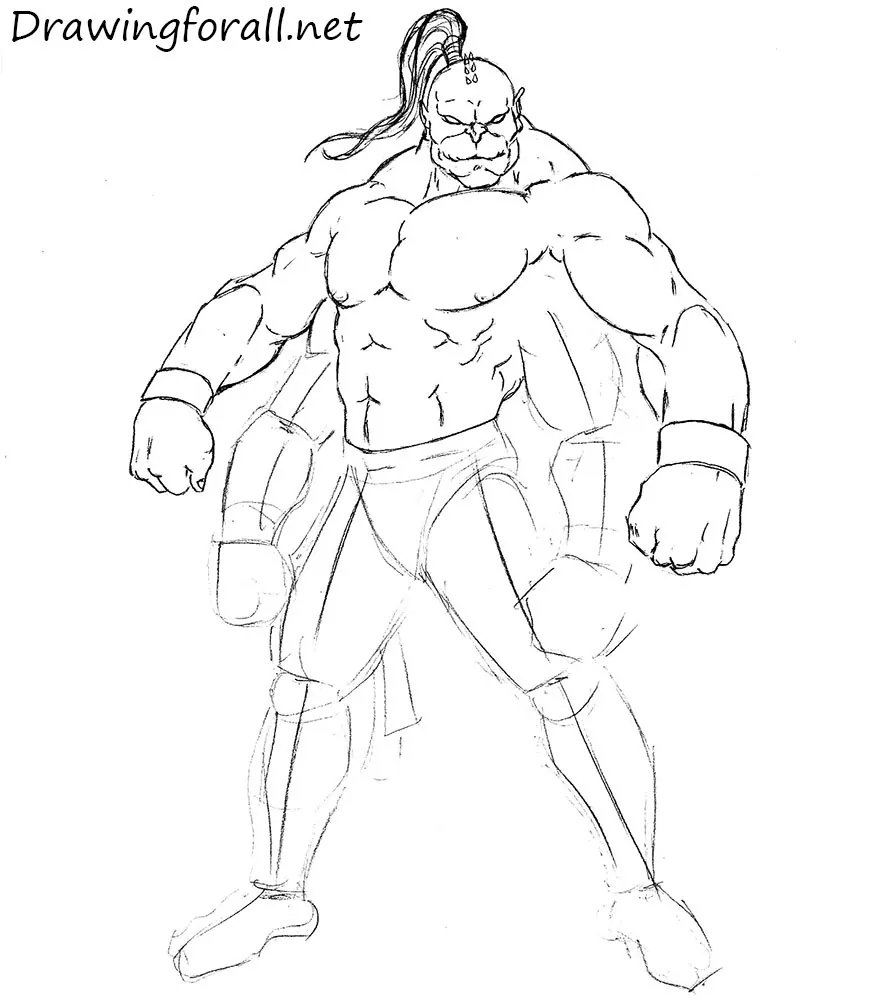
Step 8: Complete the fighter’s lower arms
Refine Goro’s lower pair of arms in the same way. The biceps, triceps, deltoids, and forearms have forms similar to those of the upper arms, although the lower arms are bent slightly less.
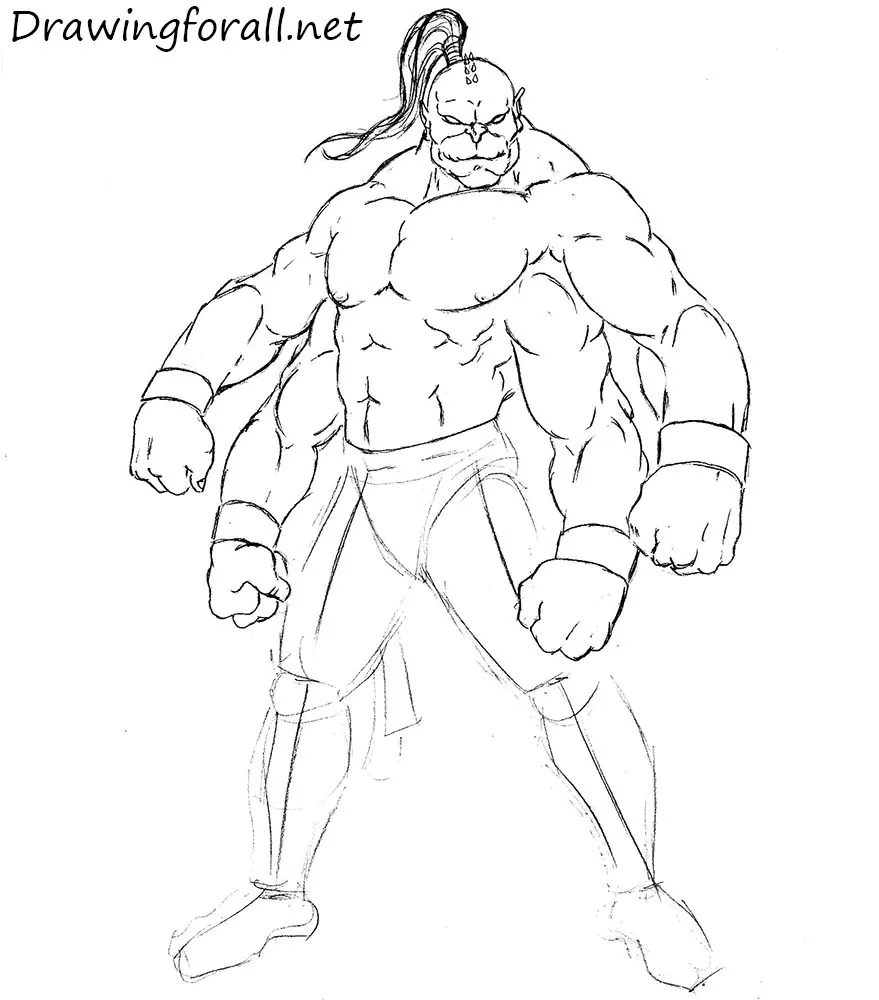
Step 9: Draw Goro’a right leg
Draw Goro’s groin area and the leg on our right. Add the yin-yang symbol to the belt. Define the thigh muscles, paying particular attention to the long muscle line extending across the thigh.
Draw the knee and calf muscles. Use several horizontal lines to add strips of fabric around the lower leg. Then draw Goro’s foot, noting that one toe is slightly larger than the other.
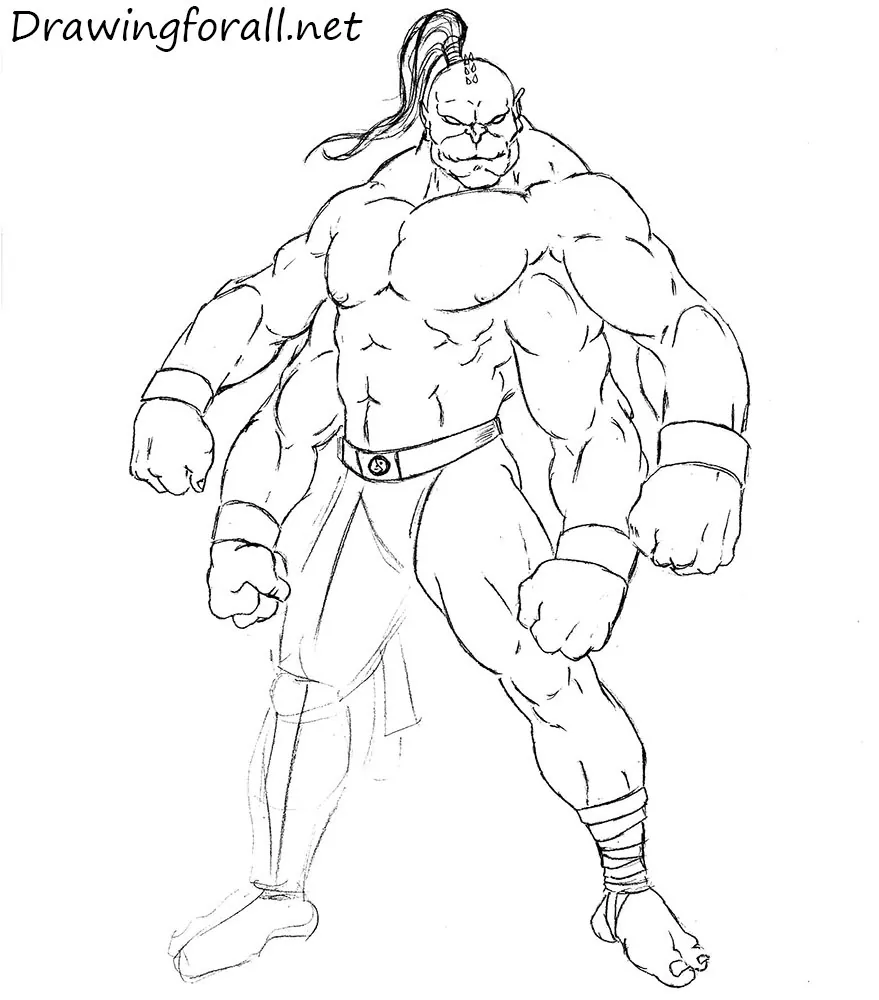
Step 10: Add final details to the Goro drawing
Draw Goro’s groin area and the leg on our left in the same way as the previous leg. Make the hair on his head thicker and darker. Add shadows beneath the right arms and around the neck. Finish by drawing the spots across Goro’s shoulders and forearms.
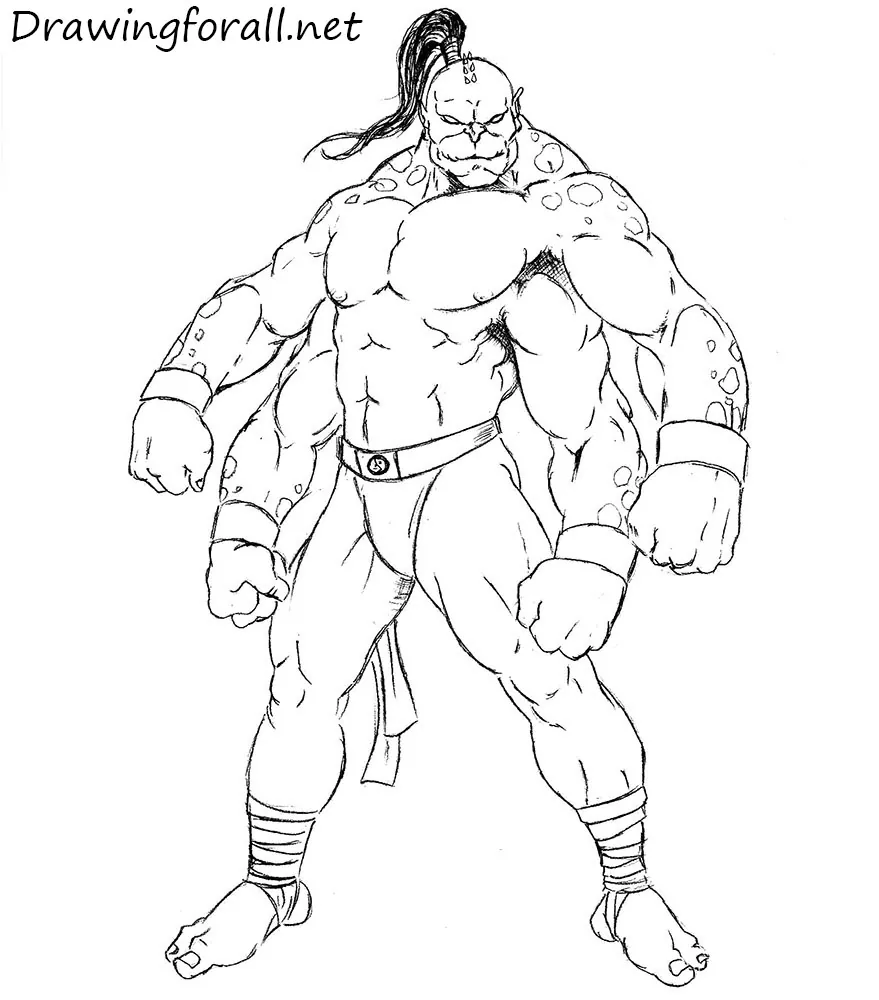
This step-by-step tutorial showed you how to draw Goro from the Mortal Kombat series. If you want to draw more fighters from the games, continue with drawing Johnny Cage, the main enemy of Goro from the first MK movie.
You can also try drawing Raiden to practice another classic Mortal Kombat character with a completely different costume and silhouette.
Our collection also includes many other Mortal Kombat characters. You can continue with drawing Scorpion and many other fighters from the legendary game.