

How to Draw an Anime Character
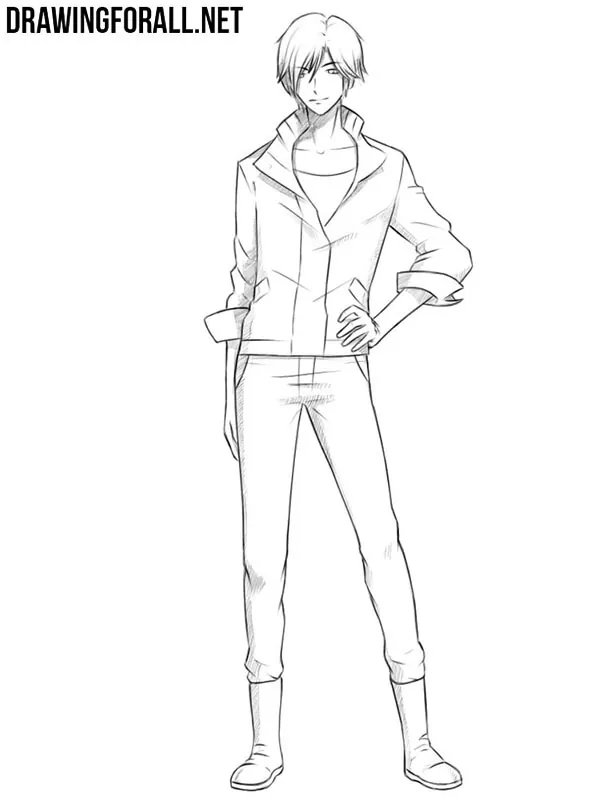
Learning how to draw an anime character is quite simple if you understand the basic sequence of constructing the figure and adding the details.
In this tutorial we will show you how to do it step by step.
In one of our previous guides, we already showed how to draw anime, and in this tutorial we want to show how to draw a design a anime character from a slightly different angle. Here we will focus on how the principles of anime character design work using a specific example in a simple form.
This guide can also serve as a basic guide for drawing a wide variety of anime people. Using these steps, you can also draw an anime version of yourself or your friends.
To begin, you will need the usual drawing tools: paper, a pencil, preferably a mechanical one since it is easier to work with, and an eraser.
How to draw an anime character step by step
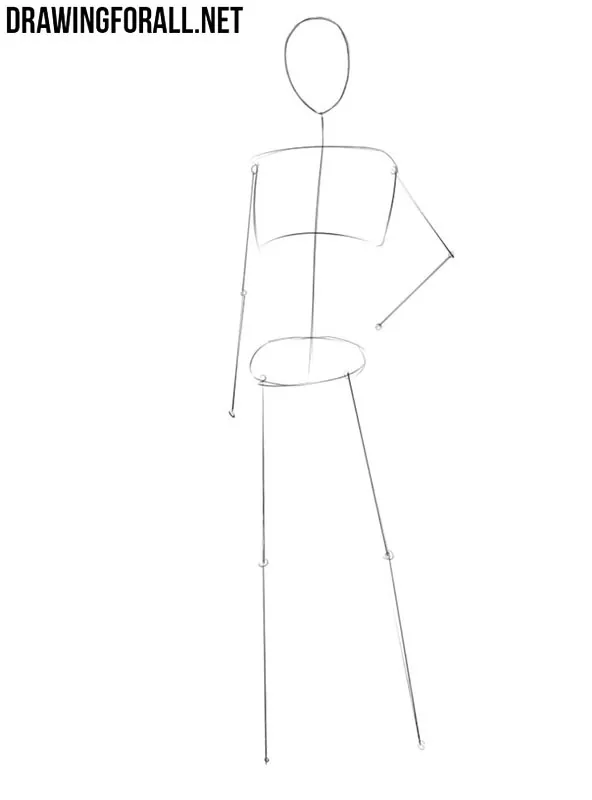
Step 1: Sketch the anime character’s framework
To draw an anime person correctly, first sketch the basic framework, starting with the head. Next, use a very simple, light, almost transparent line to draw the spine. On the spine, sketch the rib cage and pelvis. Draw the arms and legs with the same light lines. These construction lines will help you place the body parts correctly and avoid mistakes later.
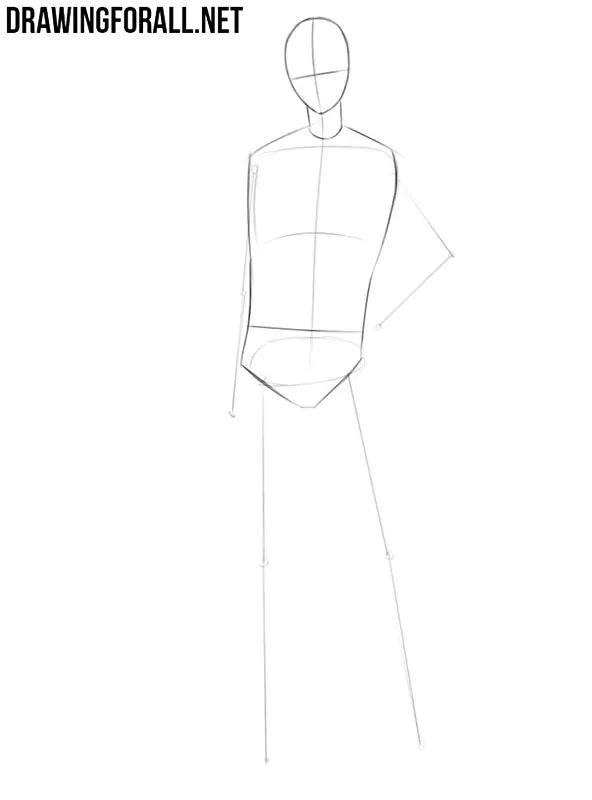
Step 2: Add volume to the torso
Now make the anime character more three-dimensional using simple geometric forms. The face should be symmetrical, so draw two lines intersecting near the bridge of the nose. Use a simple cylinder for the neck and a larger modified cylindrical shape for the torso.
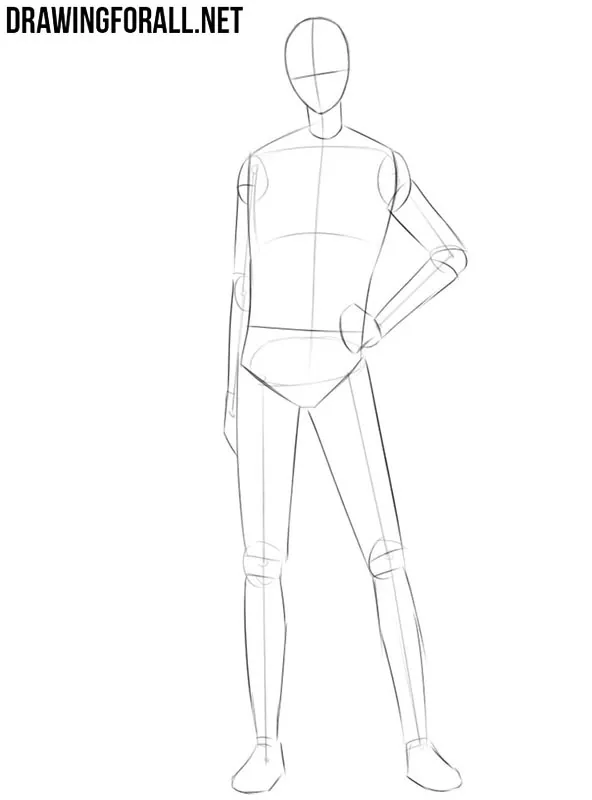
Step 3: Add volume to the limbs
Now add volume to the arms and legs of the anime character. Use elongated cylindrical shapes for the limbs and circles or ovals for the shoulders, elbows, and knees. To check the overall construction, you can look at the sketch in a mirror. This often makes errors in the size and placement of individual parts easier to notice.
Step 4: Sketch the anime face and hair
The head is one of the more difficult parts of an anime character. To draw it correctly, first add the main details using the intersecting guidelines from the second step. Lightly mark the position of the anime eyes, indicate the nose with a short line, and draw another line for the mouth. In the same step, outline the jaw and the general shape of the hair.
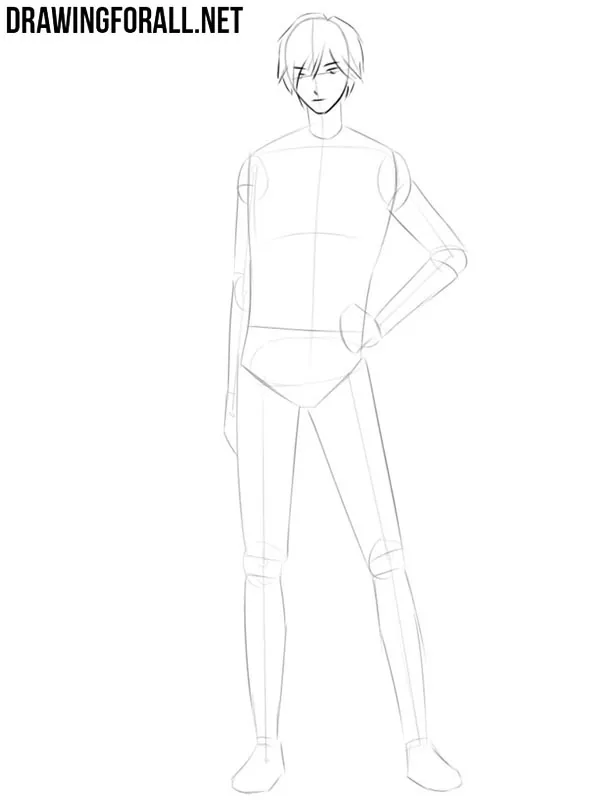
Step 5: Sketch the anime character’s clothes
Now start indicating the lines of the clothing. If you are drawing clothes from a photo or from imagination, transfer the main shapes and folds to the figure as shown in our example. Some artists place a new sheet over the construction sketch before drawing the final details so they do not have to erase the earlier lines. Anime characters often wear slim-fitting pants, so most of the folds in this example appear around the groin, knees, and lower parts of the pants. You can see these principles in more detail in our lesson on drawing anime clothes.
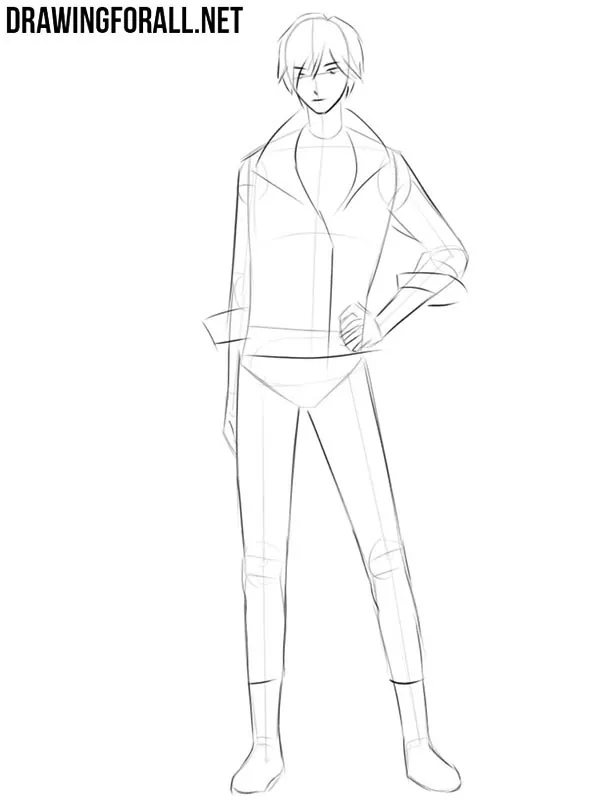
Step 6: Detail the anime face and hair
Now, draw the anime facial features with dark, clear lines and add any details you missed earlier. The jaw of an anime character can be narrow like the one in our example or more angular. Then use the same clean lines to draw the anime hair. Add more individual strands where necessary. People can have very different facial features and hairstyles, but the general drawing principles remain the same.
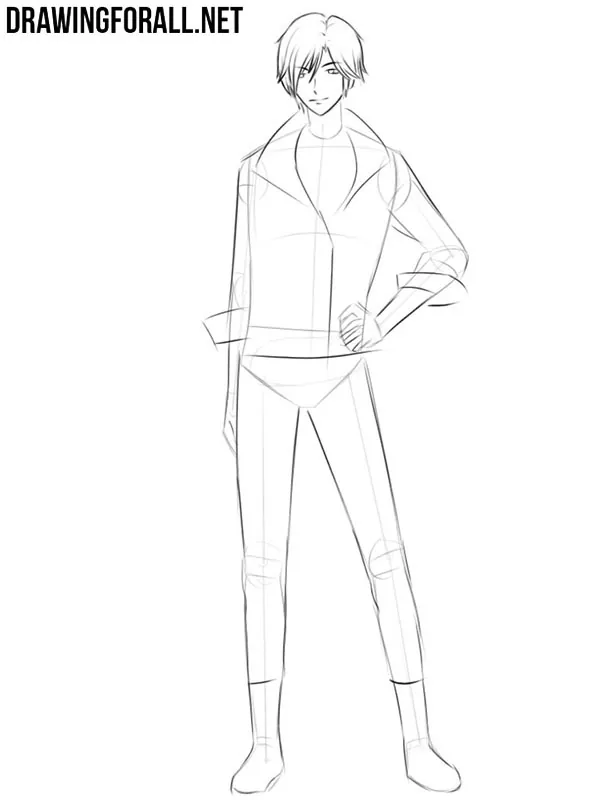
Step 7: Draw the torso and clothing
Now move on to the torso. First, draw the neck muscles with two lines and add the clavicles with two more lines. Then draw the clothing with smooth, clear contours. Anime characters can wear a huge variety of clothes and styles, so you can give your character a simple T-shirt or something more elaborate. Remove the unnecessary construction lines from the torso as you finish this part.
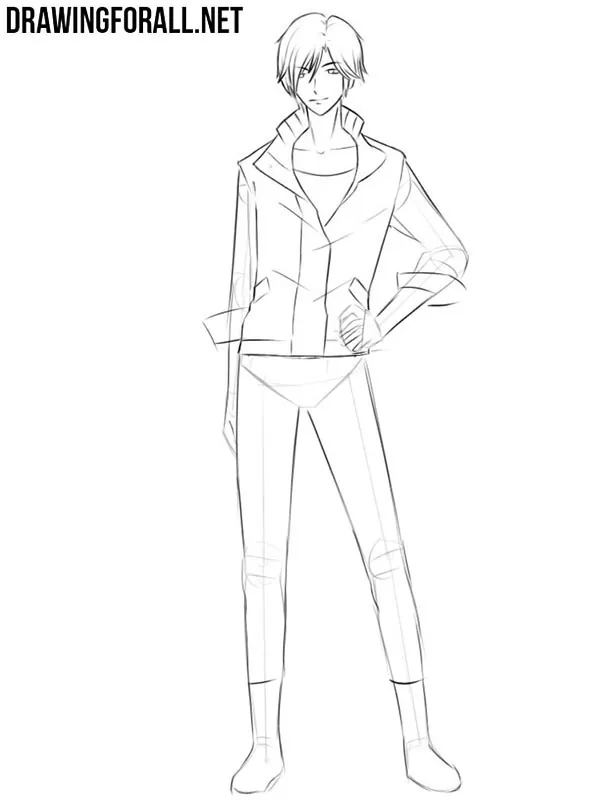
Step 8: Draw the anime character’s arms and hands
Now repeat the same process with the arms of the anime character. Draw them with clear, dark lines, slightly varying the line weight where necessary. Then draw the hands and individual fingers and erase the remaining guidelines. Our separate guide on drawing anime hands explains this part in more detail.
Step 9: Draw the jeans and folds
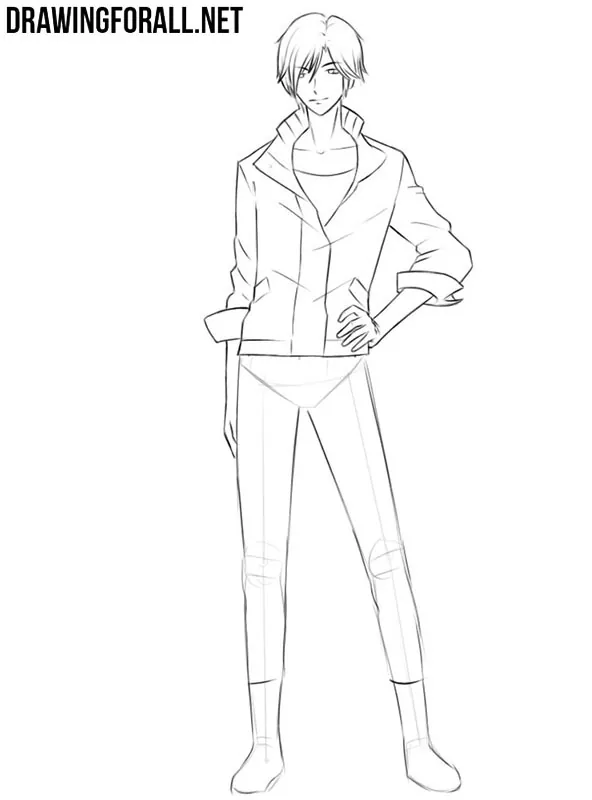
The basic shape of the jeans is already drawn, so now move on to the details. Indicate the folds with short lines and small bends around the pelvis, knees, and the areas where the pants meet the shoes. Then take an eraser and remove the remaining construction lines that are no longer needed.
Step 10: Add shadows to the anime character
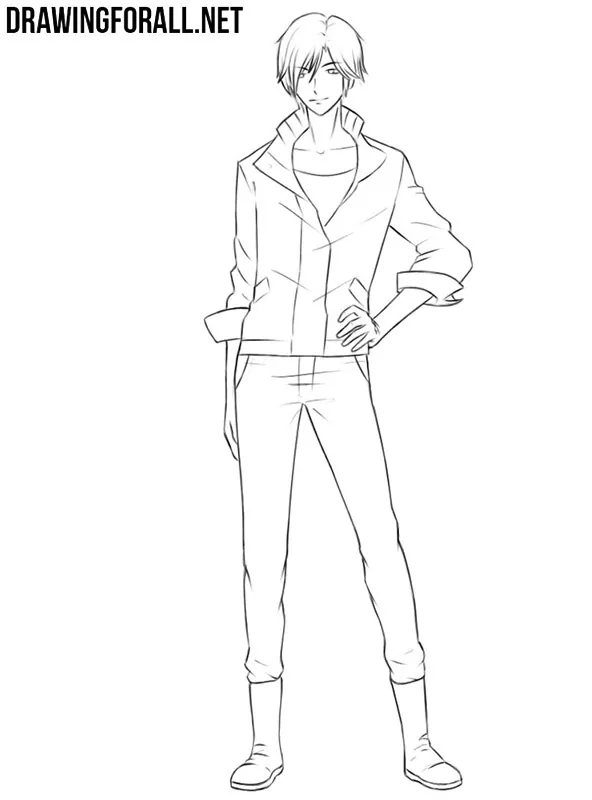
To draw the shadows correctly, first mark their locations. Then fill these areas with hatching, changing the pressure on the pencil and the density of the strokes to adjust the darkness. Try to keep the drawing free of unwanted smudges. You can place a clean sheet of paper under your drawing hand while you work.
Basic principles of anime character design
When designing an anime character, try to give them several distinctive features that make their appearance unique.
These can be a characteristic hairstyle, unusual eyes, a particular piece of clothing, an accessory, a scar, glasses, jewelry, or another detail.
You do not need to make every part unusual. A few well-chosen features are usually enough to create a distinctive anime character design.
The face is especially important because relatively small changes can create very different characters.
The hairstyle can change the entire appearance of an anime character. When designing it, first look at the general shape of the hair around the head rather than individual strands.
A strong overall shape can become one of the character’s most characteristic features. After establishing this shape, divide the hair into larger locks and add smaller strands only where they are needed.
A character’s clothes can show some aspects of their personality without any additional explanation. The way the clothes fit, how they are worn, and even small changes in their design can make the same type of outfit look very different on different characters.
Characteristic details are also an important part of anime character design. For example, when you draw Naruto, his forehead protector and whisker marks are important parts of his appearance.
When you draw Luffy, his straw hat and X-shaped chest scar immediately distinguish him from other characters. When creating your own anime character, think of similar details.
When creating your own anime character, start with a simple idea about who this person is. Then choose several visual features that support this idea and repeat the most characteristic elements where appropriate.
The details of your anime character should look like parts of the same character rather than a collection of unrelated details.
Once you have decided on the character’s design, draw them several more times with different expressions and from different angles.
You can also change the hairstyle or clothes, but leave the main features of the design unchanged. This is a good way to check whether the same character can be drawn in different situations without losing their individual appearance.
You can also use this tutorial to draw yourself, a friend, or another real person as an anime character. Use a photo for reference and first look at the features that are most characteristic of that person. Then adapt these features to the anime style instead of trying to copy every realistic detail exactly.
The same method can be used to create completely different anime characters. Change the main facial features and then choose a hairstyle and clothes that suit the new character. In this way, you can use the sequence from this tutorial as a basis for many different character designs.




This is very helpful.
I agree Audrey
I agree with audrey, it’s really helpful
VERY FROM BAD TO GOOD
My drawing skills have got much better thanks to drawing for all
Thank you too. Our team is very glad that Drawingforall.net is useful for you and helps you to become better at drawing.
Find the hair/head shape hard to do though :I
Just keep drawing and practice as much as possible. Over time, you will notice how your drawing skills grow.
yea… the head and hair detail is hard for me
wow that is sooo cool
Thank you
im sure its so good!
im sure its so good!
i made an exact copy of it
i love you
What kinda jacket is this?? I absolutely love it