How to Draw an Ancient Greek Warrior
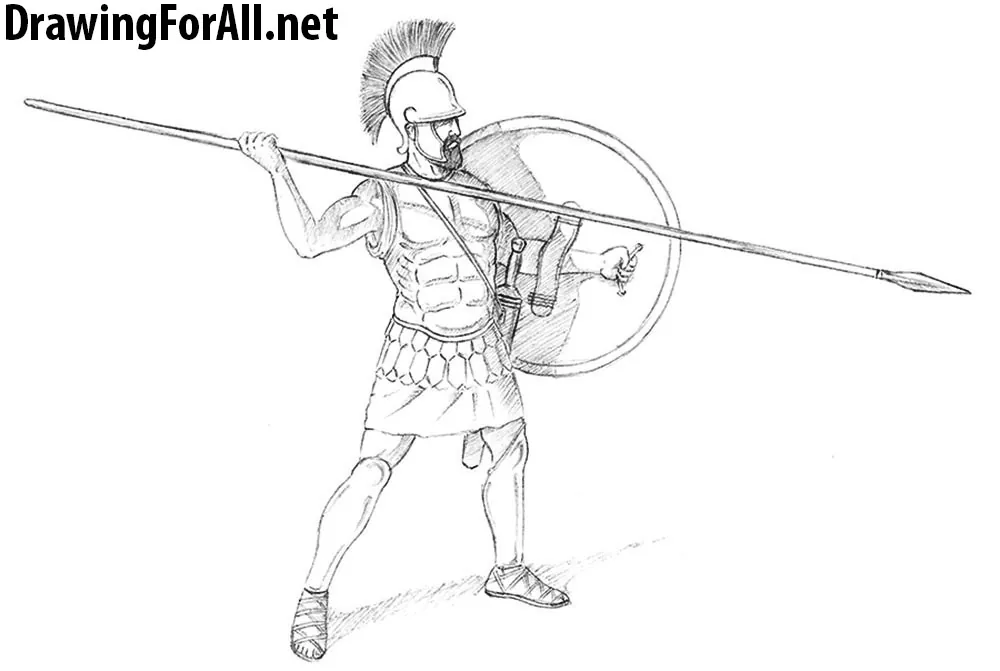
Many of you are familiar with the works of Greek writers and sculptors, praising Greek warriors. And today we will try to give a tribute to ancient masters in our drawing tutorial. Today we will learn you how to draw a greek warrior. Greek civilization in general has been the center of the ancient world for a long time, yet has not given way to his place to even more powerful and developed Roman Empire (by the way, we have a Roman warrior in our site). And for a long time equipment of greek warriors was the most advanced in the world. Let’s draw the warrior with all due care – drawing tutorial is quite complex, but if you will follow all the steps, you will get a very cool and realistic picture of Greek Warrior.
So, how to draw a warrior of ancient Greece? Scroll down, and learn how to do it!
Step 1
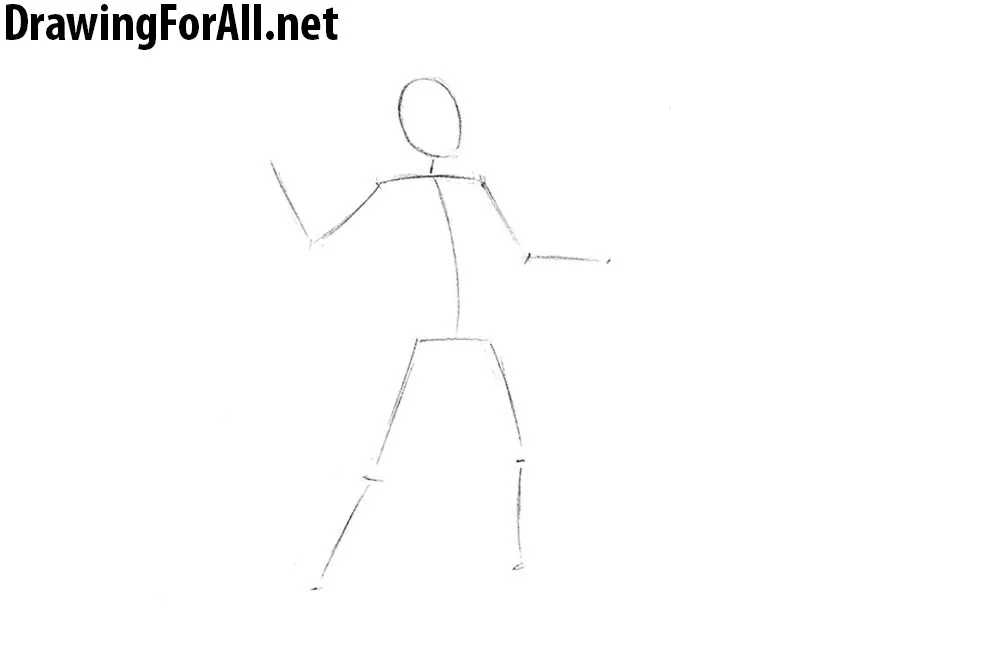
First draw a stickman, which is a schematic of the man, made of sticks, lines and clubs. It is very simple to draw it, the main thing – not to be mistaken in the proportions and position of body parts. Human Growth equals the sum of the lengths of 7.5 heads. So first, we outline the contour of the head, which looks like an inverted egg. After that, we in rotation outline the lines of shoulders, torso, arms and legs. As always, we want to remind you that you need to use very light lines in the first stages.
Step 2
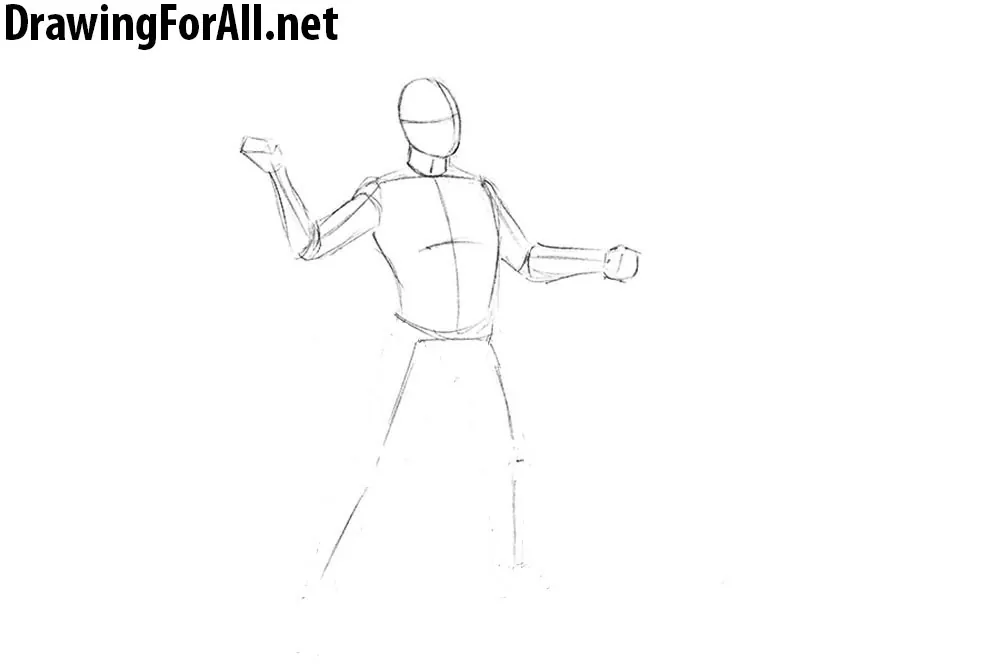
Now we outline the figure of the greek warrior, ie add volume to the skeleton. Note, that we do it in the direction from top down. Do not forget to sketch out a couple of lines on the face – vertical will indicate facial symmetry, and the horizontal, we will be guide for the eyes.
Then we draw the neck in the shape of cylinder. Below the neck we sketch out the torso, that tapers down to the waist. Then sketch out the arms, that also look like elongated cylinders, and elbows, that look like circles. At the end of this step, draw the schematic outlines of the fists.
Step 3
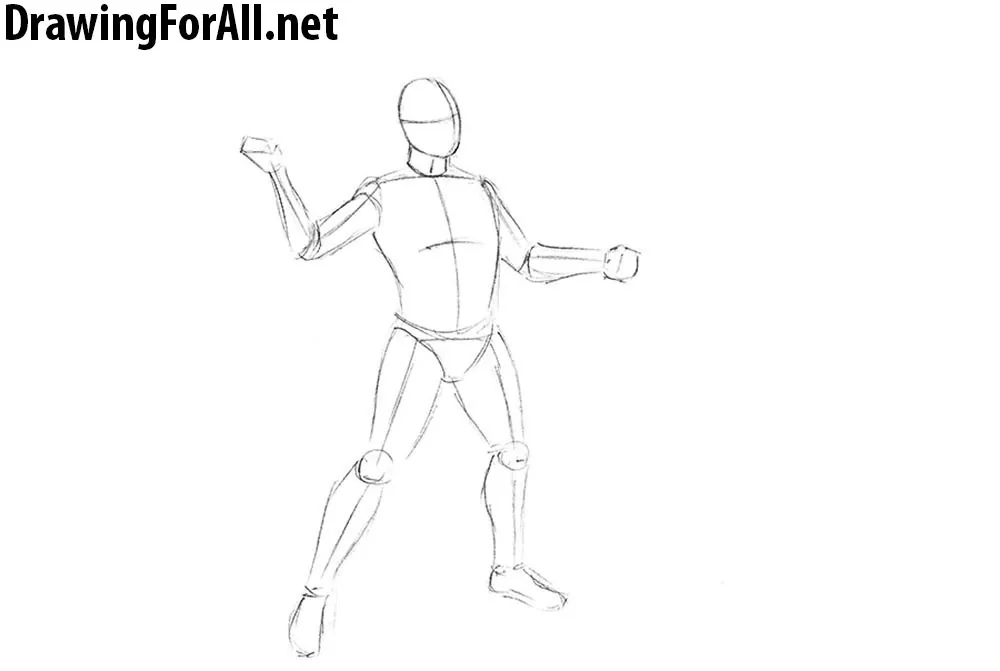
Okay, now outline the contours of the lower torso and legs. Inguinal area looks like a triangle whose sides are slightly curved. Then we outline the contours of the thighs that look like cylinders tapering to the bottom.
Sketch out the circles of the knees. After the knees we outline the contours of the shins, which are expanded in the area of calf muscles and narrowed in the area of the ankles. Mannequin of the Greek warrior is ready, then we proceed to details.
Step 4
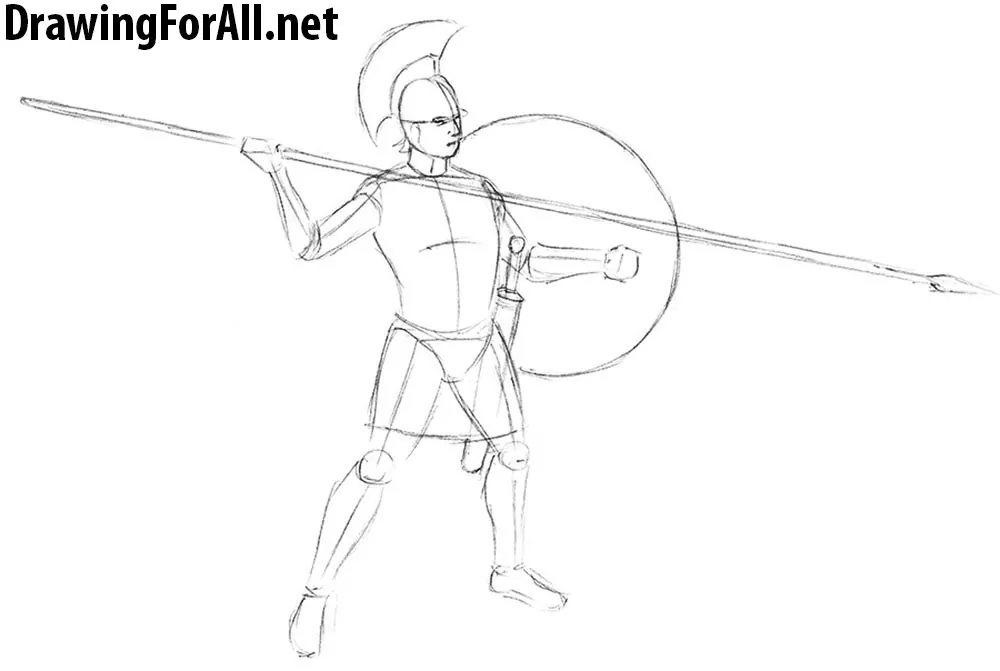
The figure of the Greek warrior as a whole is ready – we can see the basic proportions of our warrior, clearly understand the position, see the diverting movements of the arm, which will subsequently hold a spear, then you can begin to detail. In this step, we draw the contours of the weapons and armor of our warrior.
So, referring to the lines of the face from the second step, draw the outline of the crest on the helmet and the metal part that holds it. Then we outline the earflaps and the curved part of the helmet that covers the back of the head. Here, short lines outline the eyes, nose and mouth. Now outline the spear, sword and round shield.
Step 5
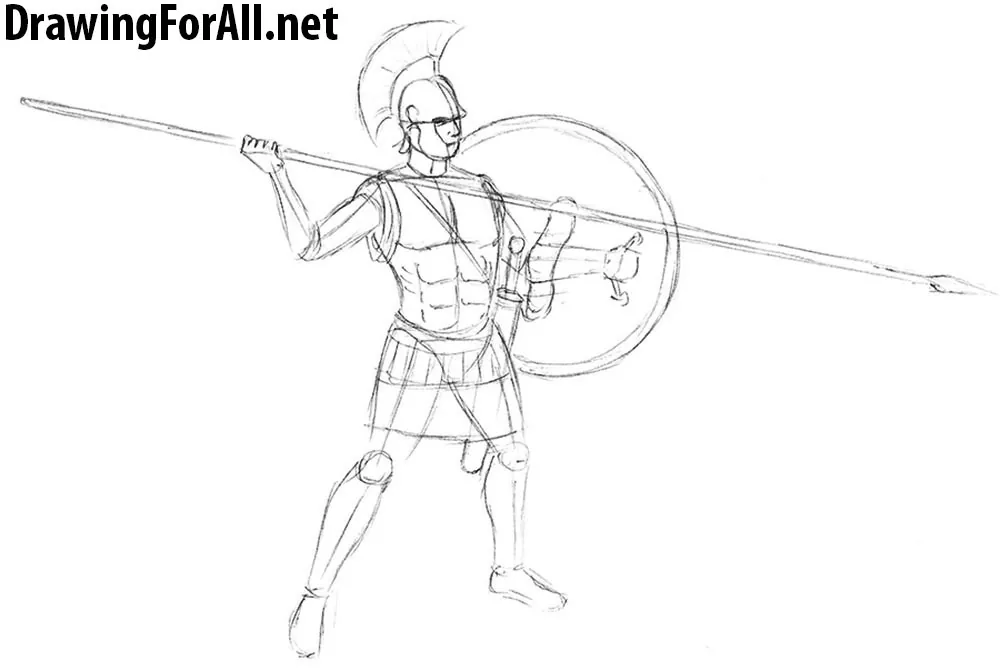
Add some more details. Draw the contours of the earflaps, outline longitudinal lines of the crest. Then draw the lines on the armor, that repeat the anatomically correct human body muscles – there are wide plates of pectoral muscles, abdominals and even lines of the obliques.
Here we draw the contours of rough thick fabric hiding the upper part of the leg. Later we will draw longitudinal plates on this part of clothing. Yes, do not forget about the handles of the shield. Here we sketch out the fingers on a hand.
Step 6
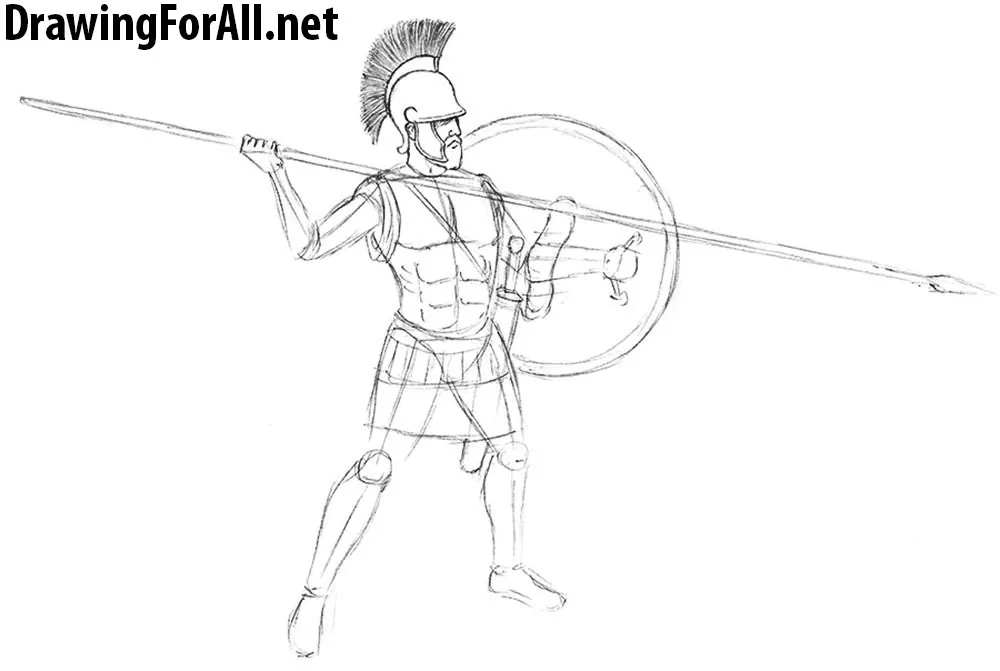
Okay, now add details to the head and helmet. The crest should be drawn from the base to the tips (our regular readers know that human hair are drawn on the same principle). Draw the shadow, that falls from the helmet on the eye area. Finally draw the the helmet itself, do not forget about edges of earlaps. Draw the nose, ear and beard. As you can see, unlike the knight helmet, the helmet of Greek warrior is half open.
Step 7
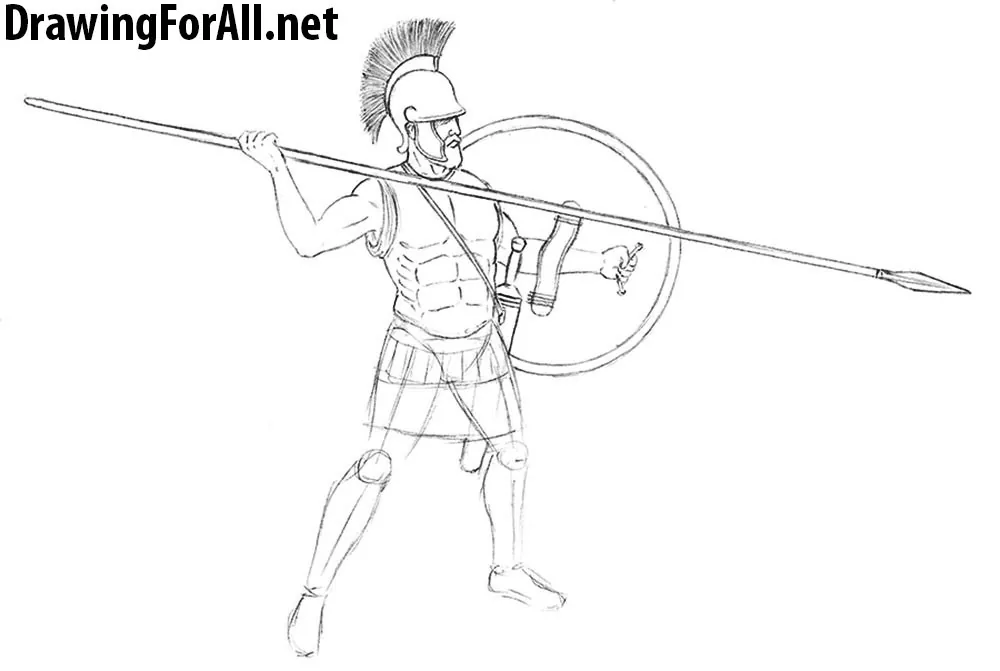
For this step, we need an eraser. Erase extra lines from the body, clean up the entire area of the body and draw, where necessary, the final precise contours making it like in our picture to this stage. Also in this stage draw the final contours of the arms, pre-erasing the guide lines of the first steps. At the end of this drawing tutorial do not forget to outline the muscle lines on the arms of the Greek warrior.
Step 8
So, draw the vertical plates on top of the lets over the fabric, that we drew in previous steps. Using short and slightly curved lines draw the folds of fabric on this part of clothing. Next, using smooth lines draw the shin guard as in our example. At the end of this step, we will draw the sole and straps on the feet of our Greek warrior. Note that the straps are arranged crosswise.
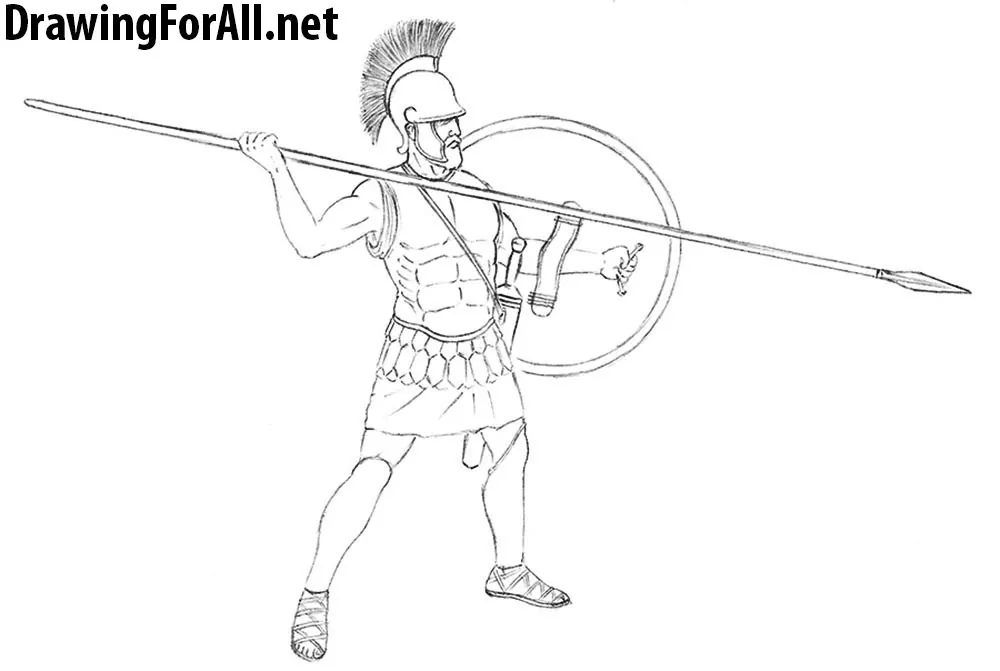
Step 9
The final stage we add shadows to our Greek warrior. The light falls, as you can see, from the top and front, respectively, we add shadows to the area on which the light does not fall.
Also add shadows on the area of the arms and legs, as in our example. Do not forget about metallic glare on the helmet and greaves – they look like lines, that repeat the contours of the legs, not reaching to the edges. So, the shapes of glares and the lines of armor are parallel.
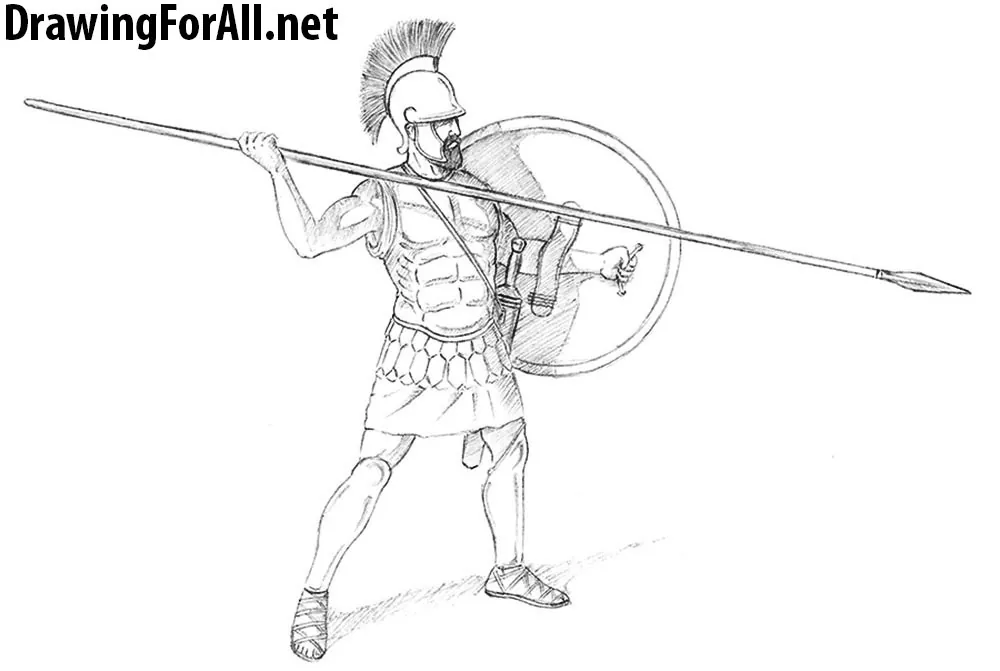
In this tutorial, we talked about how to draw an ancient Greek warrior. Drawing lesson,as you could observe, came out highly complicated. But, hopefully, sooner or later, all our readers will be able to draw such drawings.
What we usually say at the end of our drawing lessons? Of course, we usually like to remind that we will be glad if you will subscribe to us in social networks and share this drawing lesson with your friends.


This caught my eye cuz I read Percy Jackson lol
GO PERCY JACKSON
This is so cool
Go percy
im doing a project on ancient greece so this was perfect
OMG AWESOME!!!!!!!!!!!!!!!!!!!!!!!!!! Sooooooooooooo helpfuuuuuuuuuullllllllllllll !!!!!!!!!!!!!!!!!!!!!!!!!!!!!!
even though this is not for small paper, I loved it! Especially since i’m doing a school project on athens
this is a nice yet easy to draw drawing
So great! This was very helpful, and I only made slight changes on the face. It was not too hard, and supper fun to do.
a m a z i n g
Greate tutorials .I’m really starting to get the hang of human form from them. Thank you.
this is perfect for this project i have for midddle school