How to Draw a Pokémon

We’ll show you how to draw a Pokémon using Pikachu as an example, in a highly detailed style that stays as close to the original as possible.
The creators of the Pokémon series draw in a fairly traditional anime style, using standard anime and manga techniques.
Here, we’ll be using those same methods for this Pokémon drawing lesson. However, we won’t be using color or tones – instead, we’ll show you a detailed pencil drawing finished with shading through hatching.
After you finish, you can either color your Pokémon or leave it in the pencil style, as shown in our example. To get started with the basics of hatching, you can first check out our article on shadows and lights.
How to draw a Pokémon step by step
Step 1: Sketch the Pokémon’s basic body shape
As we always do, draw the basic shapes of the Pokémon’s body. Use very smooth lines but don’t try to make it look perfect. These are just the basic shapes of the character. If you draw Pikachu, repeat the shape as in my example, but if you want to draw a different Pokémon, use a different shape.

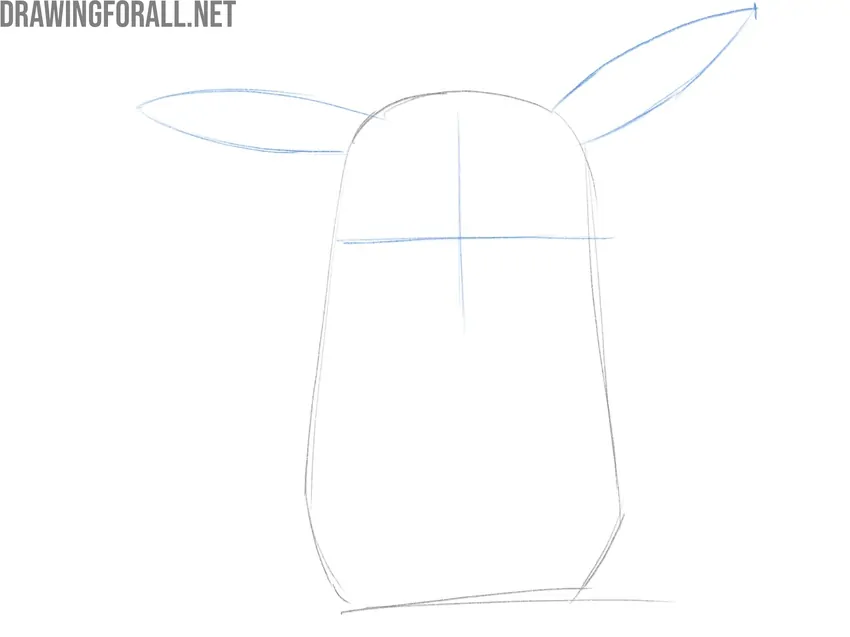
Step 2: Sketch the ears and facial guidelines
Let’s start adding the basic details to give the Pokémon drawing some recognizability. Since we’re drawing Pikachu, sketch the iconic long ears at the top of the head. Pikachu’s ears should point in different directions. After that, sketch the vertical and horizontal guidelines to make it easier to draw the facial features later.
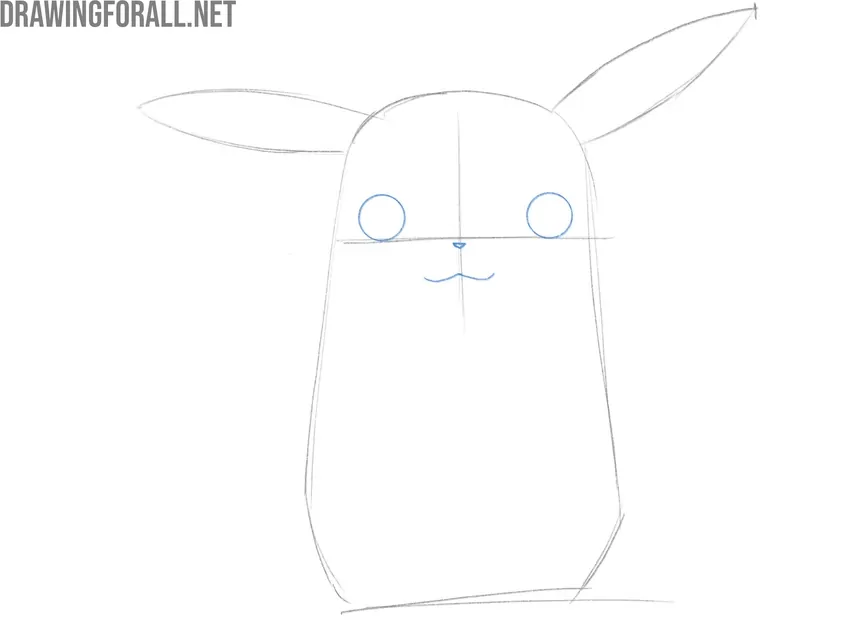
Step 3: Draw the eyes and mouth of the Pokémon
Now, let’s use the guidelines from the previous step to draw the Pokémon’s facial features. First, using the horizontal guideline, draw the eyes. They should be located right at this line. Then, just below the intersection of the guidelines, draw the triangular nose. Finish the facial features by drawing the curved mouth just below the nose.
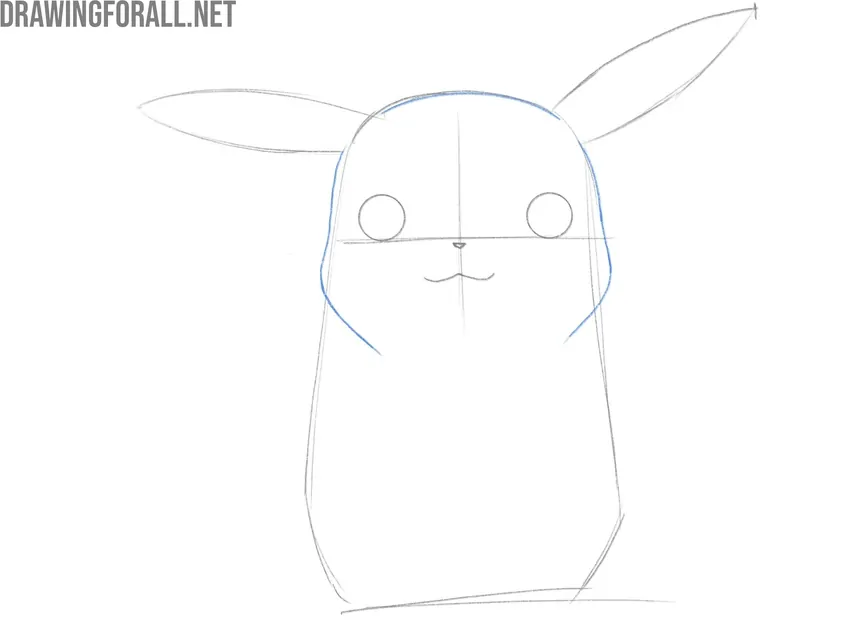
Step 4: Detail the character’s head shape
Let’s shape the face of the Pokémon. First, draw the top of the head with a curved line. Try to give it a very smooth and symmetrical shape. After that, draw the sides of the head and cheeks. The left and right sides of the face should also be very symmetrical and equal in shape, so always check the symmetry.
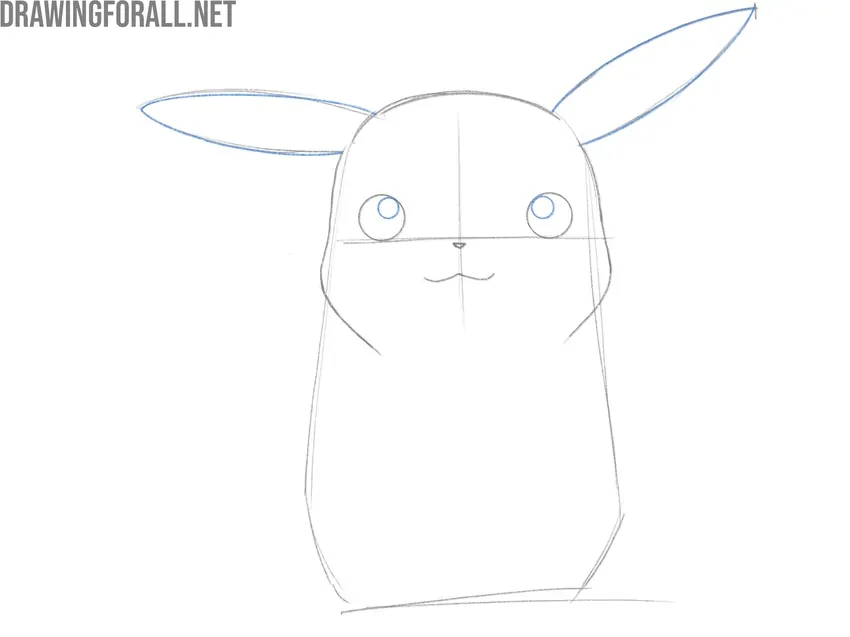
Step 5: Draw the Pokémon’s ears and pupils
We sketched the Pokémon’s ears in one of the previous steps, so let’s give them a finished look. To do it, use very smooth and polished lines. The left and right ears should have the same shape and size, but still point in different directions. After that, draw the pupils inside the eyes with the help of a couple of circles.
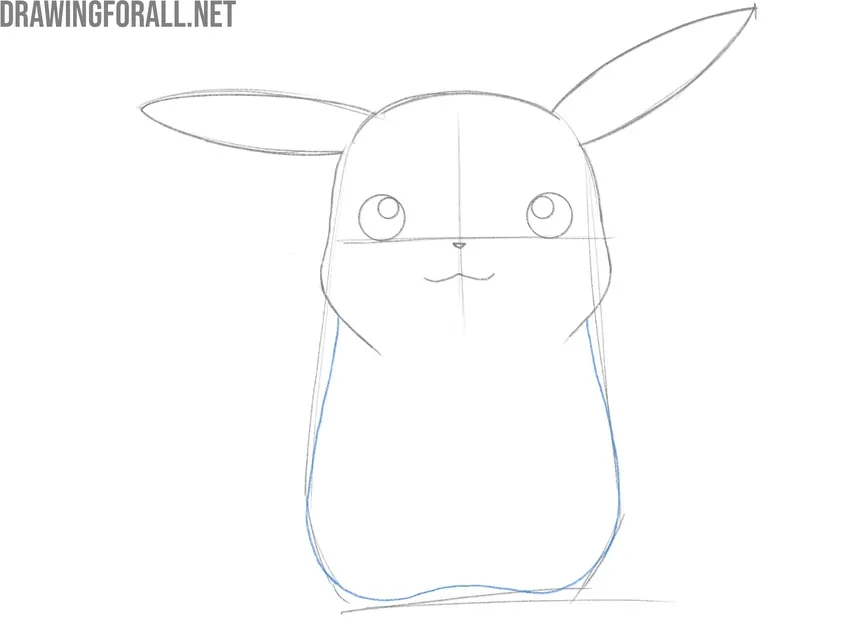
Step 6: Finalize the Pokémon’s body shape
Since we sketched the basic body shape in the first step, now we have to finalize the torso using finished lines. Use very smooth and polished lines to detail the sides and the bottom of the body. The bottom of the body can be slightly asymmetrical to give the legs a more realistic stance in the future steps.
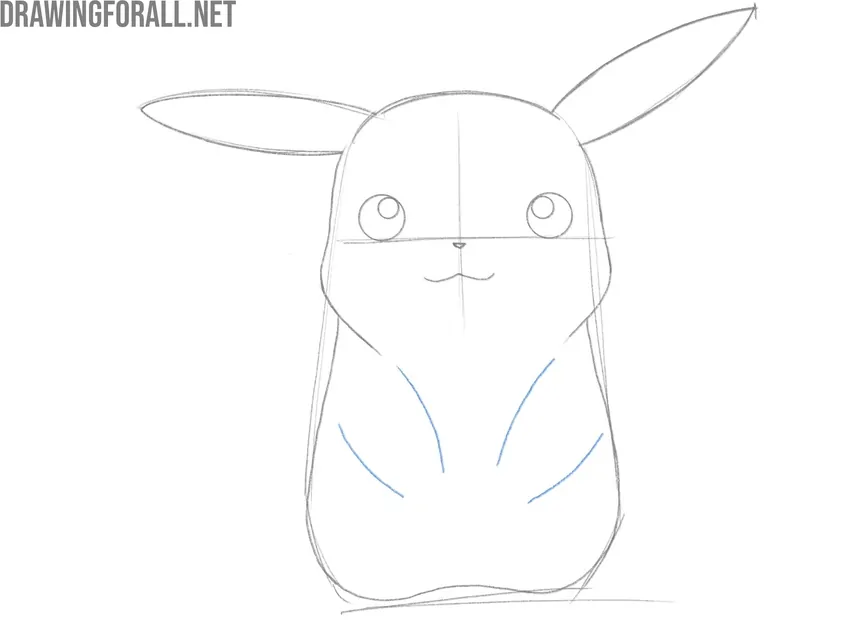
Step 7: Draw the Pokémon’s arms
To draw the arms of the Pokémon, use two simple curved lines for each arm. The arms should be smooth and taper slightly toward the ends. When drawing Pikachu, place the arms at the front of the torso, but you can adjust their position if you’d like.
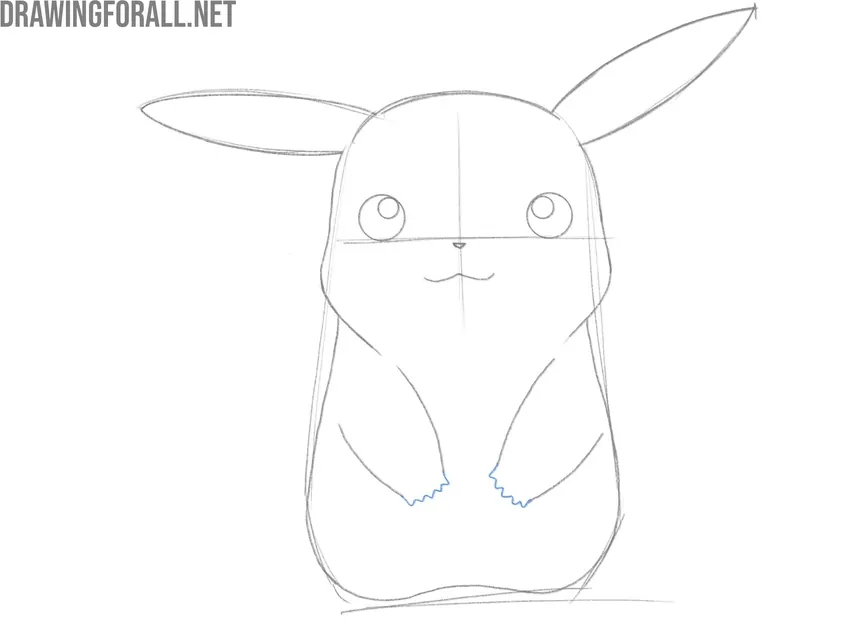
Step 8: Detail the hands of the character
Since the basic shapes of the arms are finished, let’s draw the hands. Pokémon usually have very simple hands, and the fingers should be very simple, as most Pokémon have basic-looking arms and legs. In this example, Pikachu’s hands look like simple wavy shapes consisting of five very small fingers.
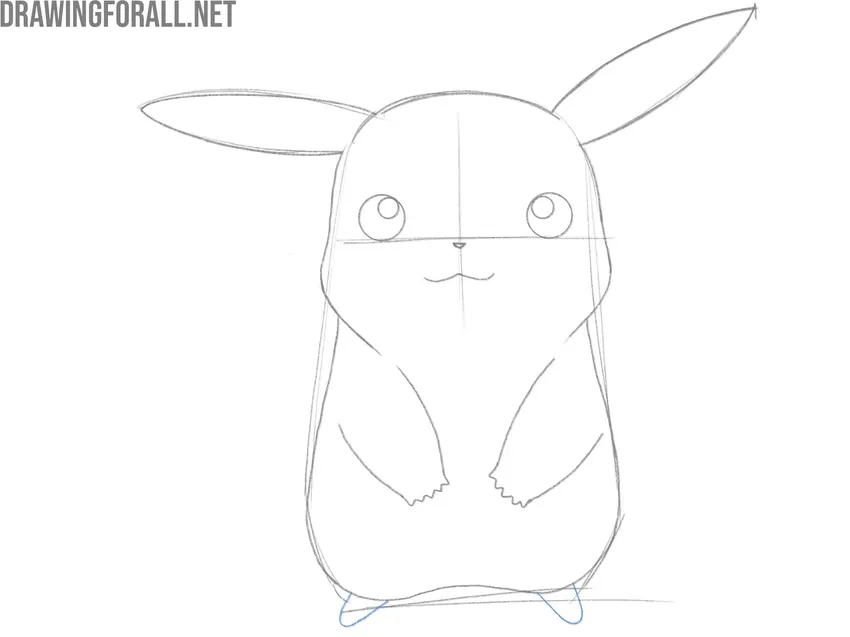
Step 9: Draw the feet of the Pokémon
Now, let’s move to the lower part and sketch the character’s feet. The feet, like the hands, should look very simple. In this example, they resemble a pair of elongated U-shaped figures. Like the ears, they should point in different directions for a more natural look.
Step 10: Add the toes of the anime character
Since the feet are sketched, let’s add some details. Like the hands, the legs have very few details, and in this example, the character’s feet are defined with only small, short lines. These lines indicate the toes. Even in this very simple example, try to draw the toe lines with slight curves to suggest the volume of the feet.
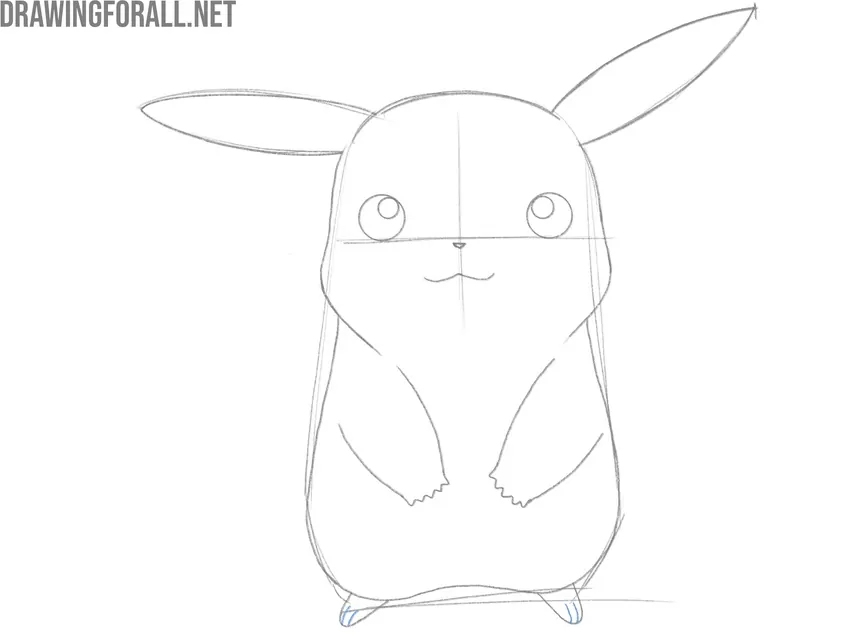
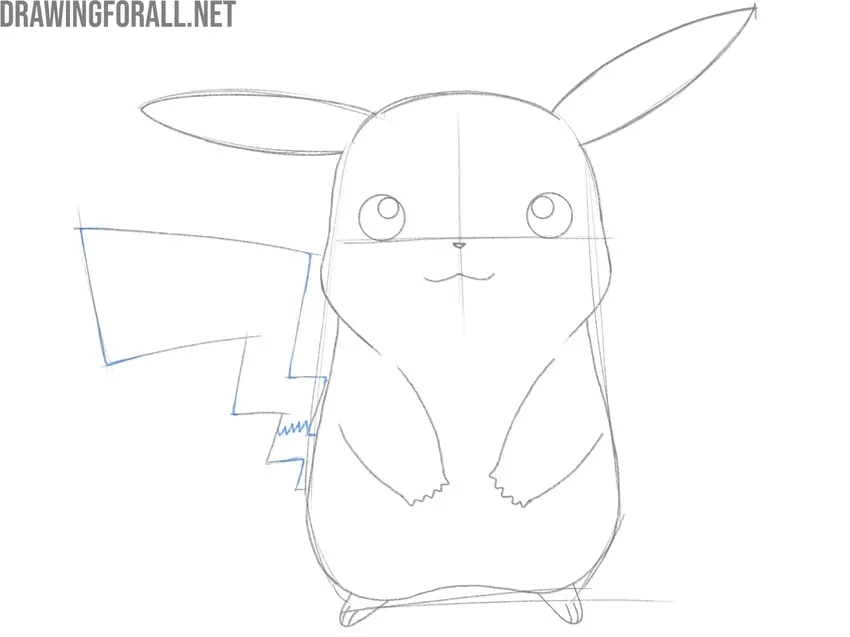
Step 11: Sketch the basic shape of the tail
Every Pokémon has some defining features, and one of the most iconic parts of Pikachu is his zigzag tail. To draw it, use lines with a slight curve along the edges. The tail should be thicker at the end and thinner near the body. In this step, you should only sketch the basic shape of the tail.
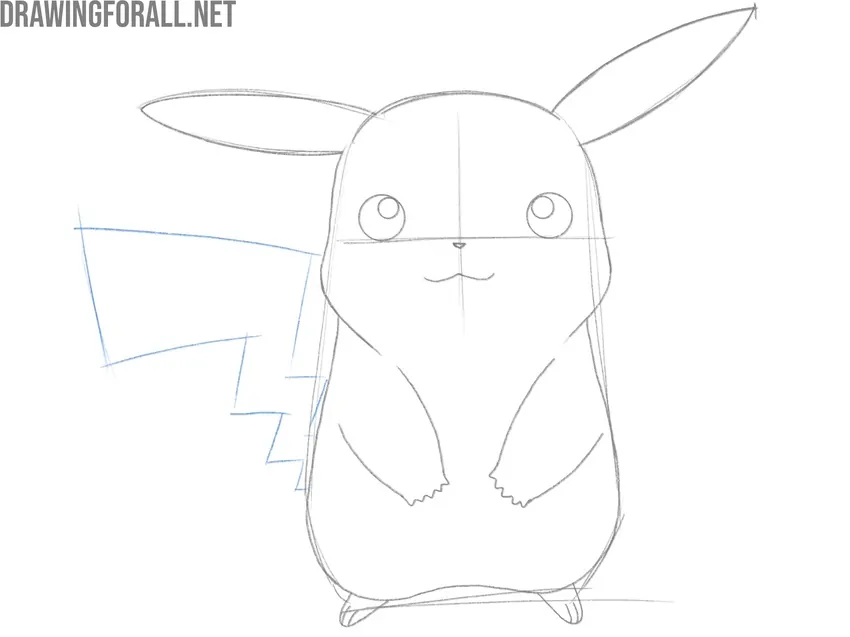
Step 12: Draw the Pokémon tail in detail
To make the Pokémon’s tail look more finished, trace over the shape using darker, more refined lines. Finalize the curves and angles. Then, add texture at the base of the tail using another, smaller zigzag line. As with the hands, you can adjust the shape and direction of the tail if you’d like.
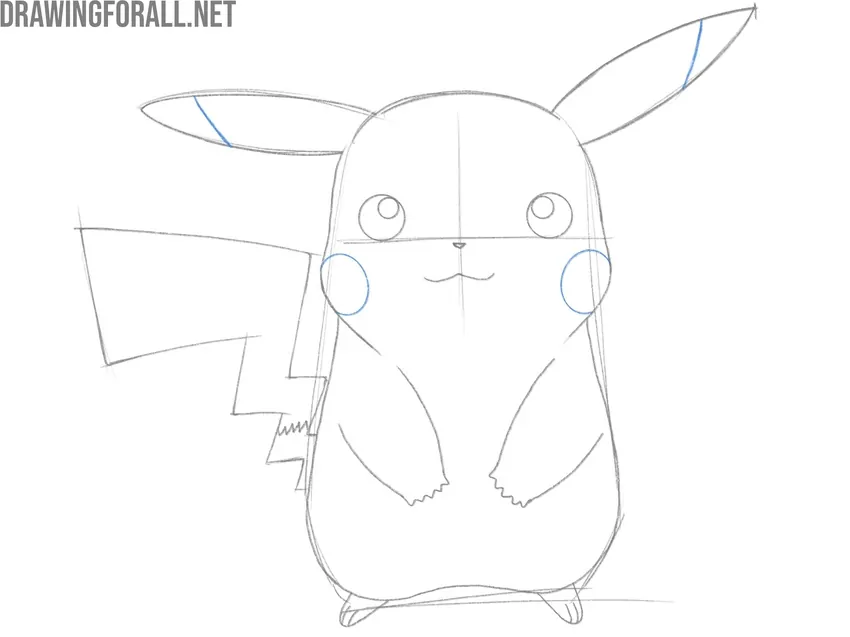
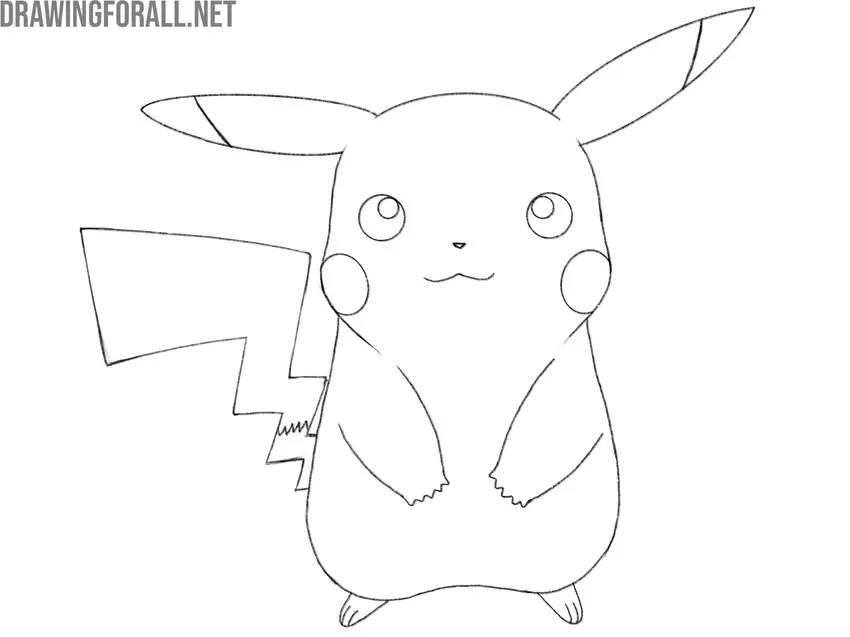
Step 13: Detail the cheeks and ears
In this step, let’s add a few key details to make Pikachu look even more recognizable. Draw two large circular shapes for the cheeks – place them on each side of the face, slightly below the eyes. Then, add curved lines near the tips of the ears to separate the darker sections from the rest of the ear.
Step 14: Erase the guidelines
Now, take an eraser and remove any construction lines and sketches. Try not to touch the necessary lines of the drawing. After that, trace over the entire drawing of Pikachu with darker lines to give it a finished look. Correct any errors and prepare the drawing for the final stages.
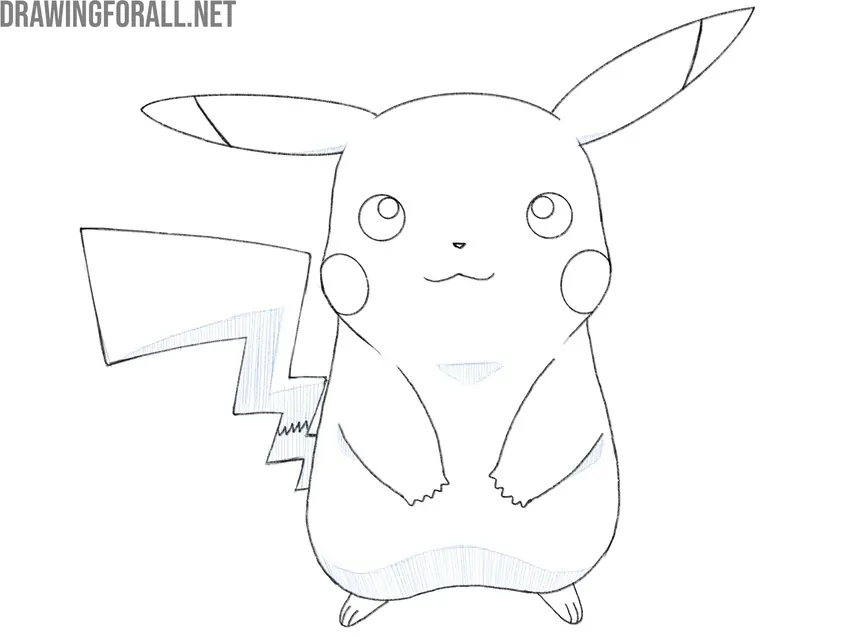
Step 15: Add some hatching to the Pokémon
Now, add subtle hatching to draw shadows and volume. Use light, even strokes to shade areas like the lower part of the body, the underside of the arms, the base of the tail, and the small area under the mouth. These simple touches of shading make the drawing more voluminous. Avoid overdoing it – just enough to draw form without making the image look heavy.
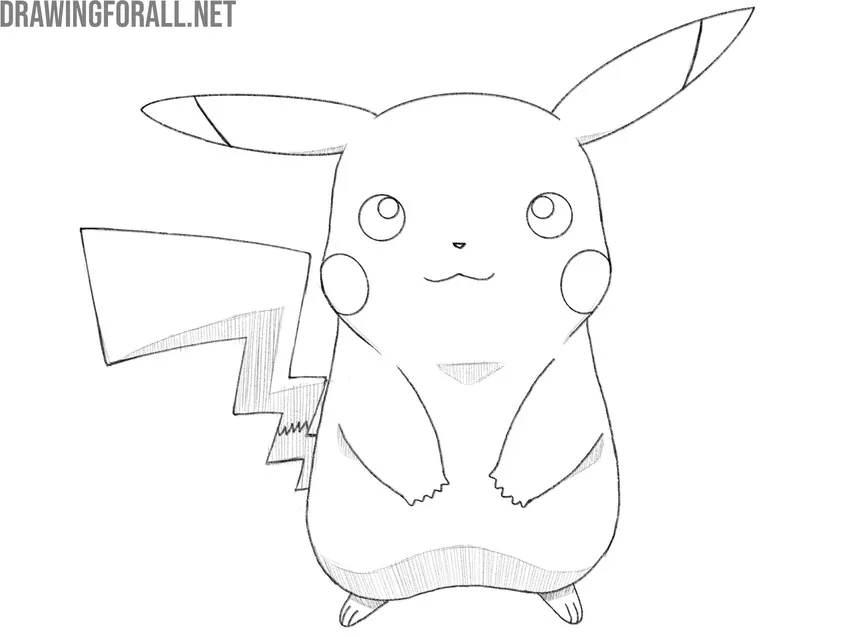
Step 16: Finalize the Pokémon drawing
Now that the shading is complete, take a moment to review your Pokémon drawing and make any necessary final touches. Check the proportions, smooth out any uneven lines, and adjust the hatching if needed to keep the shading consistent and professional. Erase any remaining construction marks or stray lines.
In this lesson, we used Pikachu as an example, since it is a very characteristic Pokémon with a highly recognizable style and appearance.
It is worth noting that we also have a separate Pikachu drawing tutorial where we focus specifically on this character in greater detail.
Here, however, we tried to show the main principles of drawing Pokémon in general, in a way that can be applied to almost any other Pokémon.
For example, by slightly changing the shape of the ears and tail, you can draw Raichu.
If a Pokémon differs much more from the one shown in our example, you will only need to open a reference image and carefully draw it step by step using the same principles from this lesson: first sketch the basic shapes, then add the larger details and main parts of the character, and after that move on to the smaller details.


this rocks!!!!!!!!!!!!!
Good
can you do shaymin pretty plz
i love this can you do a sanrio tut
i love pokemon😀😀😀😀😀
Yeah I love pokemon tooo
pikachu is the best
can you do eminem
one of my best drawings and I’m still learning