

How to Draw a Lying Dog

In this step-by-step tutorial, we will show you how to draw a lying dog. Here, we decided to apply the classic academic drawing method.
The steps in this lying dog drawing tutorial are quite simple, but by following our recommendations, you will create a fairly realistic drawing.
To draw a lying dog like the one shown here, you can use either pencils and paper or a tablet. To better understand how to create specific parts of the dog’s body, you can first review our tutorials on drawing a dog and drawing a dog’s face.
Let’s begin the tutorial on how to draw a lying dog.
How to draw a lying dog step by step
Step 1: Sketch the basic outline
First, sketch the contours of the lying dog using very light, rough lines. These lines should be barely visible, as they help prevent mistakes in the overall structure. Use them to position the lying dog correctly on the paper. To learn more about placement, check out our article on composition.

Step 2: Outline the body parts
Start adding the largest details to your drawing. Sketch the ears first, then outline the neck, tail, and both the front and hind legs. As you work, constantly compare the different parts of the lying dog to keep the drawing consistent.

Step 3: Sketch the facial features
Move on to the smaller details by sketching the dog’s face. Draw the eyes in the upper third of the head, then add the dog’s nose, mouth, and tongue. Keep the facial features symmetrical, and check your drawing in a mirror if necessary.

Step 4: Refine the dog’s face
Continue refining the dog’s face to give your lying dog drawing a more finished appearance. Using cleaner and smoother lines, define the facial features more clearly. Add details such as the nostrils, gums, and teeth.

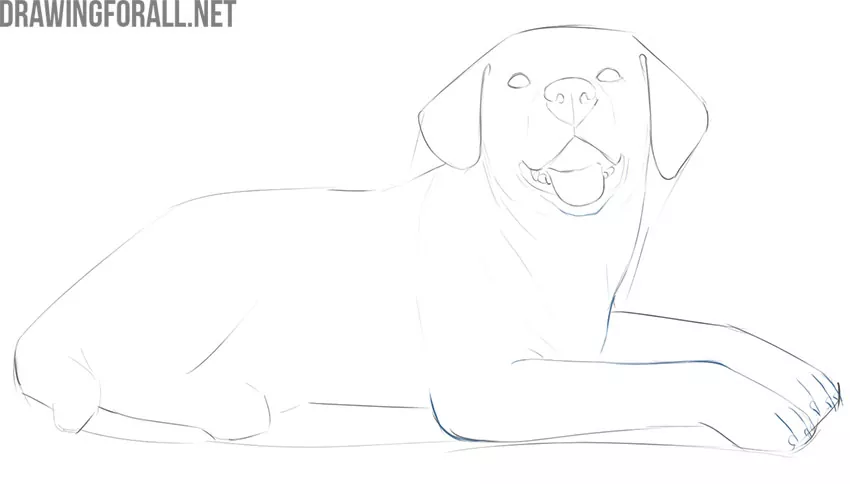
Step 5: Detail the front legs
Draw the chin and neck folds with smooth, dark lines to emphasize the turn of the head. Refine the front legs with cleaner contours, then add the toes and claws. Don’t forget to draw the folds where the front legs connect to the torso.
Step 6: Refine the hind legs
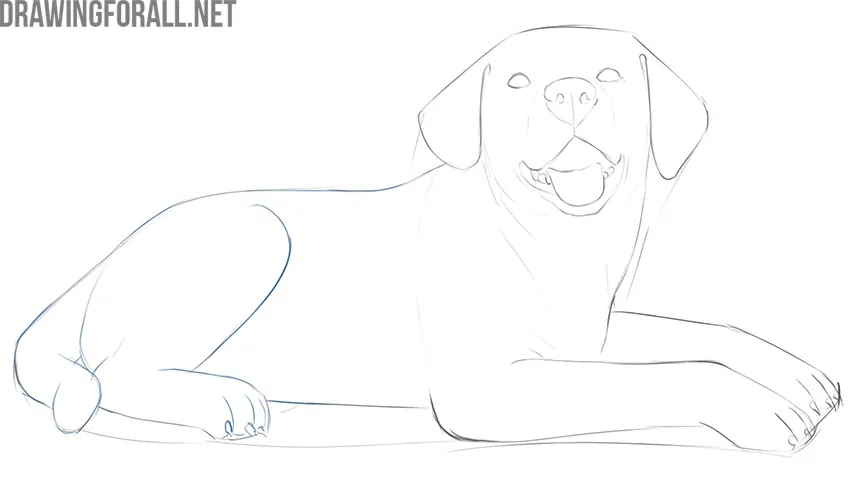
Now refine the hind legs in the same way. Carefully draw the visible hind leg and tail with smoother lines, then add the toes and claws. You can also include details such as folds around the joints or markings on the coat to make the lying dog more realistic.
Step 7: Clean the line art
Carefully erase the construction lines from the beginning of the drawing. Darken the lines that are closer to the viewer to give the lying dog more volume.

Step 8: Add the final shading
The final step is to add shadows. Well-placed shading will give your lying dog drawing a more three-dimensional and realistic appearance. Start with the darkest areas, then gradually build the lighter tones using hatching.
The team at Drawingforall.net hopes this lying dog drawing tutorial was helpful. If you enjoyed it, be sure to share it with your friends and anyone who wants to learn how to draw dogs.
Also, don’t forget to explore our other drawing tutorials. For example, in the Animals category, you’ll find a wide variety of guides for drawing many different creatures from around the world.




i love dogs
This one is noice
i love dogs and ur drawingforall.net company
Cool
i do not like dogs!!!
There’s no reason to announce that.
YEAH!!! SHUT UP, DOGS ARE THE BEST!!!
Why don’t you like dogs? It is so cool
Nice drawing! I luv dogs
great totorial very good and easy
great totorial very good and easy
love dogs. this is amazing. I also tried the dog house.
I LUV DOGS SOOOO MUCH!!!