How to Draw a Baby Zebra
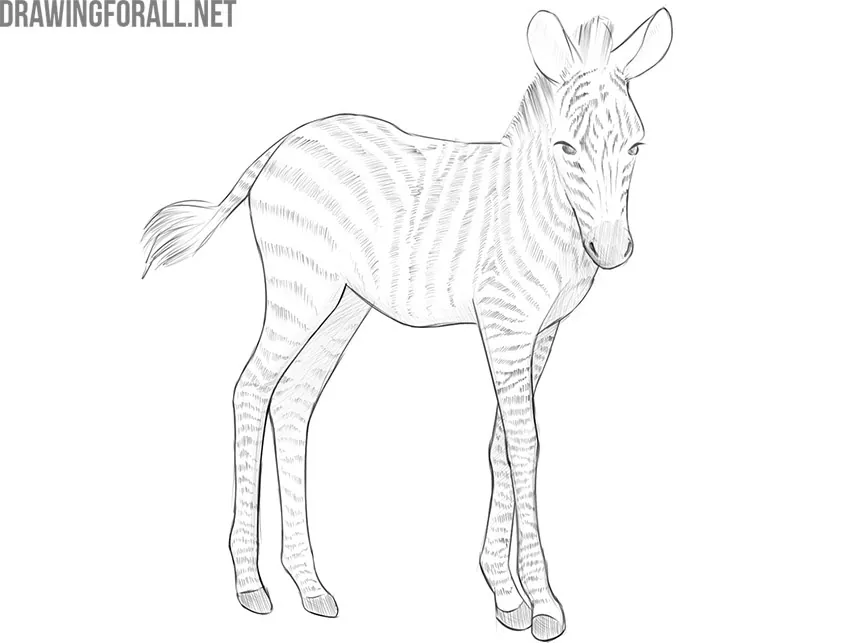
Baby animals are some of the cutest creatures ever. That is why we have created a guide on how to draw a baby zebra.
This tutorial on how to draw a baby zebra is not going to be very difficult, no matter what it looks like. All the apparent complexity here lies in the numerous stripes that are not as difficult to draw as they seem.
In fact, the process of drawing a baby zebra, as well as an adult zebra, is very similar to drawing a donkey. The main differences are that, unlike other similar animals, the zebra has the famous striped pattern.
Step 1
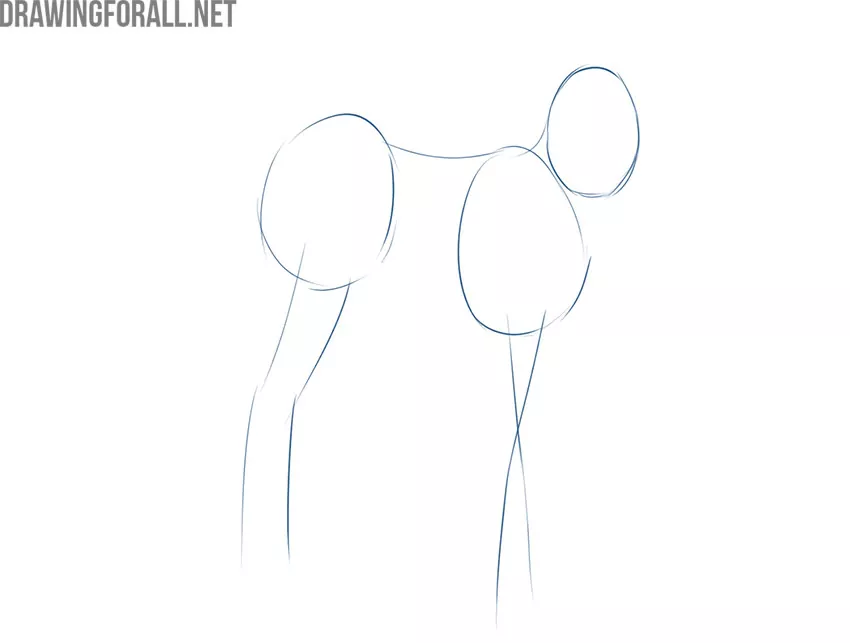
First, we outline the localization of the baby zebra on a piece of paper. We will also outline the pose of the zebra. To do all this, we need three ovals of different sizes and four elongated lines. Try to arrange these shapes as in our sample.
Step 2
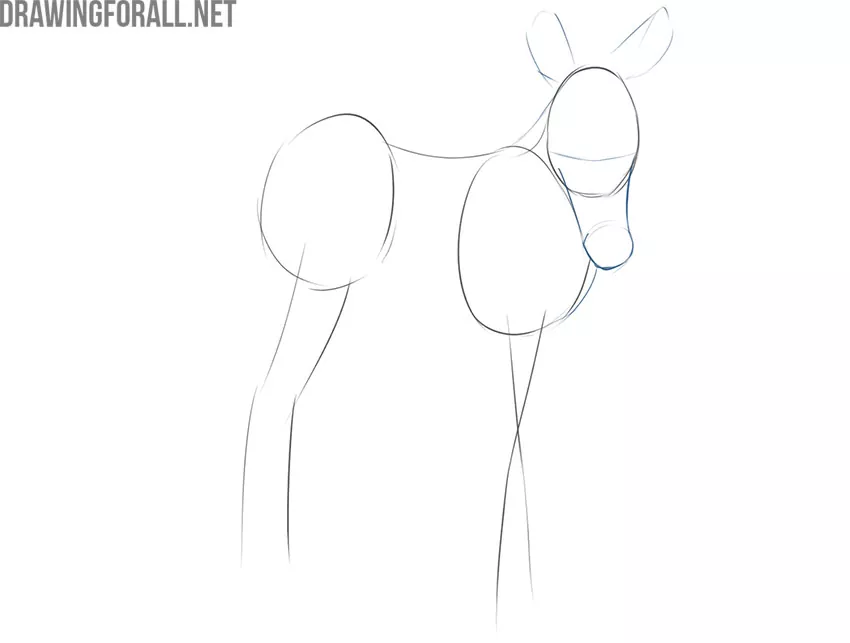
In this step, we can start creating the first details to the baby zebra drawing. We suggest starting with the head. So let’s depict long, elongated ears and a long nose with a rounded shape at the tip. Another important action in this step is to create a smooth curved line with which we will outline the location of the eyes.
Step 3
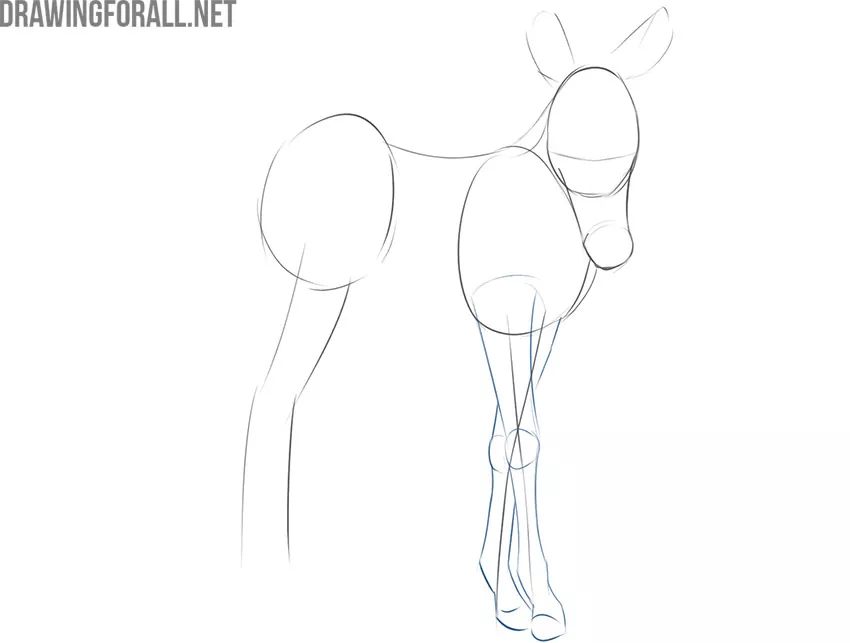
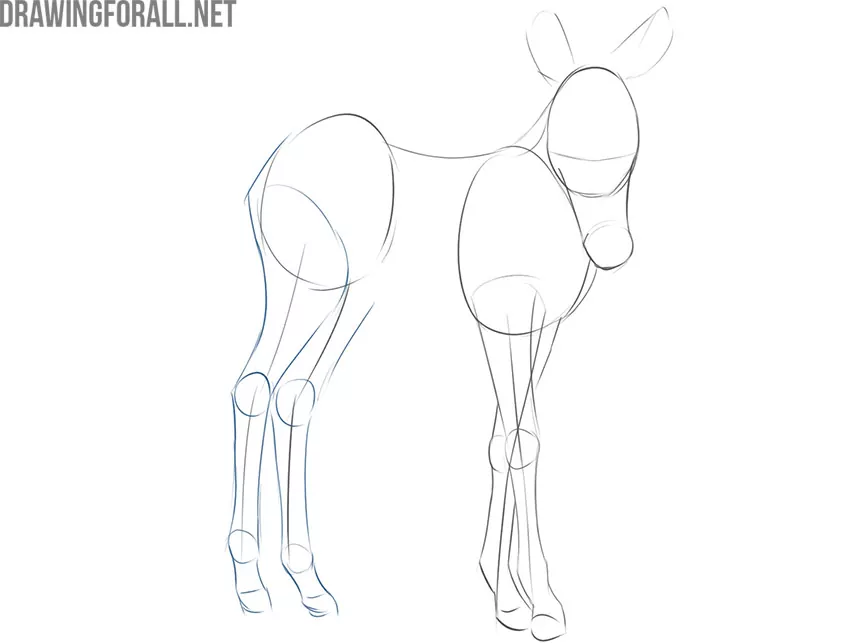
So we continue with the guide on how to draw a baby zebra. And now we will depict the outlines of the front pair of legs of our zebra. Use rounded shapes to mark the joints. Draw the rest of the legs in the form of long, elongated, graceful figures. Note the irregular curves in the distal hooves.
Step 4
We continue what we started in the last step. Now we will draw the back pair of legs. Take a good look at this characteristic curve and correlate the size of the legs with the size of the torso. By the way, to check the proportions of your baby zebra drawing, look at it in the mirror.
Step 5
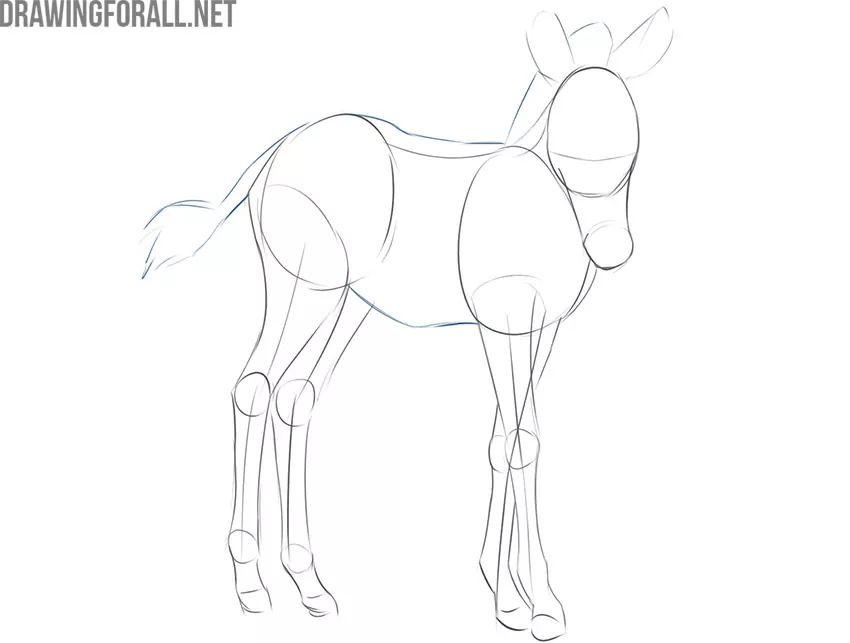
A few small lines from this step will become very important. Let’s draw smooth lines that connect the front and back of the torso at the top and bottom. Using a vertical line, we will connect the head and torso of the baby zebra. Also in this step, we will draw the rough outlines of the short but fluffy baby zebra tail.
Step 6
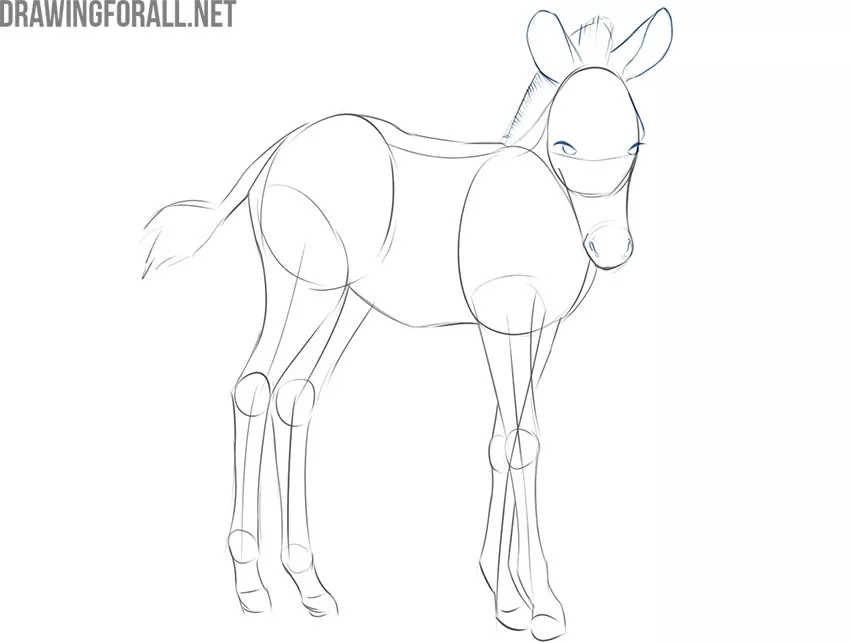
Add some final details that will shape the look of our zebra. First, let’s draw small almond-shaped eyes, focusing on the line from the second step. After that, we can draw a short but thick enough mane. Don’t forget about the inner parts of the zebra’s ears, this is another action from this step.
Step 7
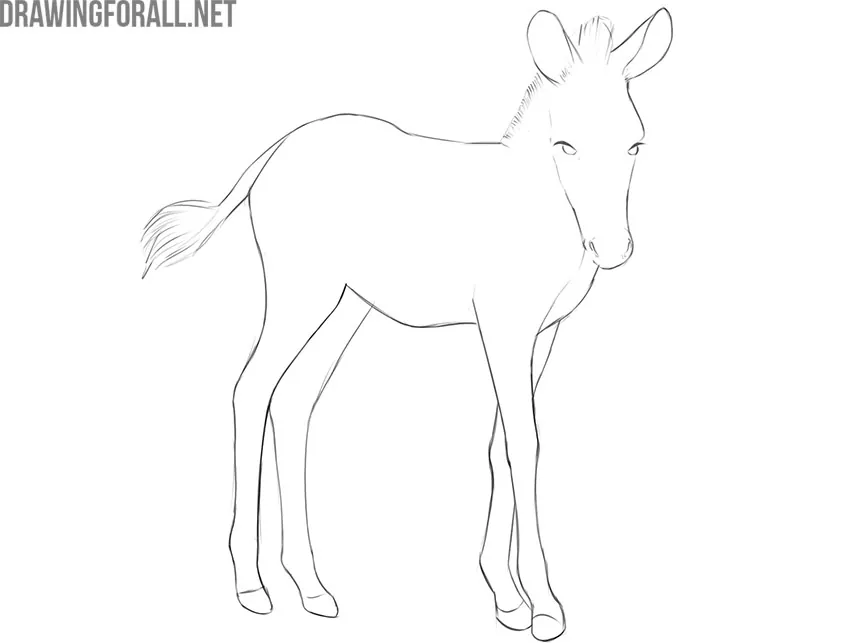
This will be the step in which we will not draw anything. Here we will only erase the extra lines and evaluate the whole baby zebra drawing. In fact, this is a very crucial step, because mistakes that you can skip now will be very difficult to correct after coloring.
Step 8
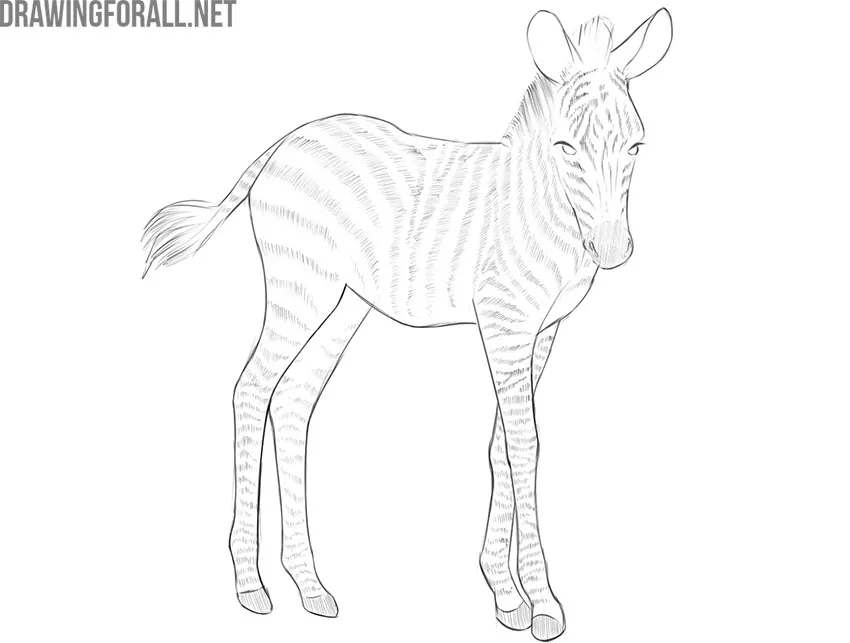
Probably, there is no person who does not know what a zebra looks like. Everyone knows about these famous stripes. Let’s sketch out some dark stripes that look like sections of short but rather intense shading. Particularly dense shading areas are located in the hoof area.
Step 9
So we have completed this tutorial about drawing a baby zebra. If you followed the correct sequence of steps and did not make gross mistakes, you should get a baby zebra drawing similar to the example created by the artists of Drawingforall.net.
If this drawing guide on how to draw a baby zebra was helpful, please let us know about it. Your opinions and criticism are very important to us. Your comments really help us to understand in which direction our drawing lessons should be moved.