How to Draw Thor
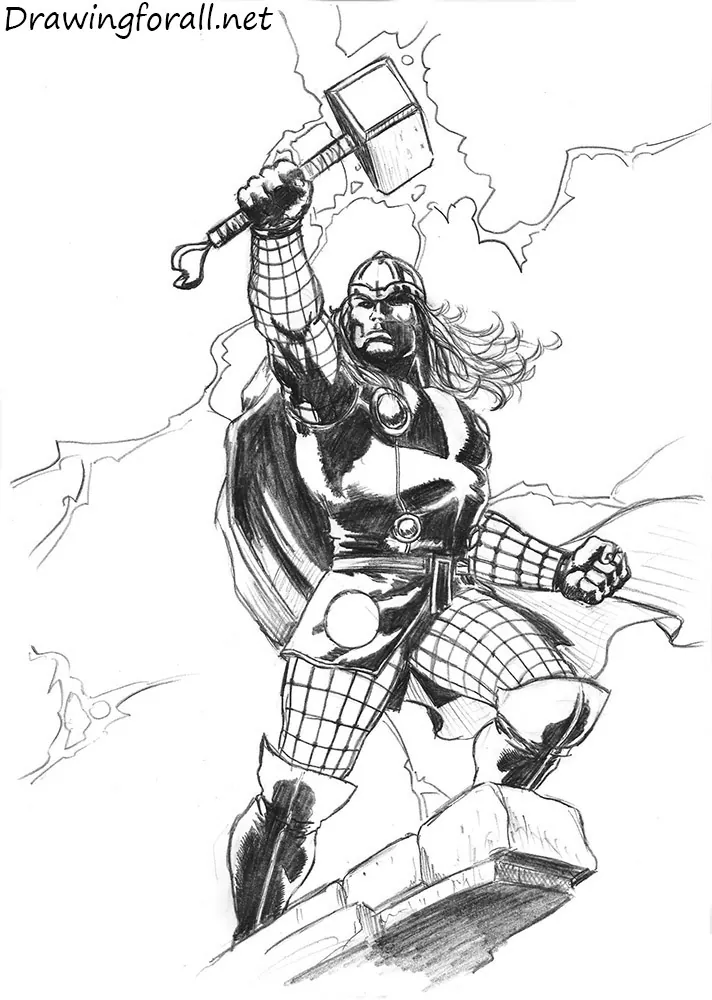
We continue to pump the technique of drawing with the team of Drawingforall.net. Today we draw another Marvel Universe character – a mighty superhero Thor. Marvel Universe Thor is based on the image of the eponymous god of Norse mythology. Thor was created by Stan Lee, Larry Lieber and Jack Kirby, and first appeared in the comics Journey into Mystery # 83 (1962). So, let’s start the tutorial, and learn how to draw Thor.
Step 1
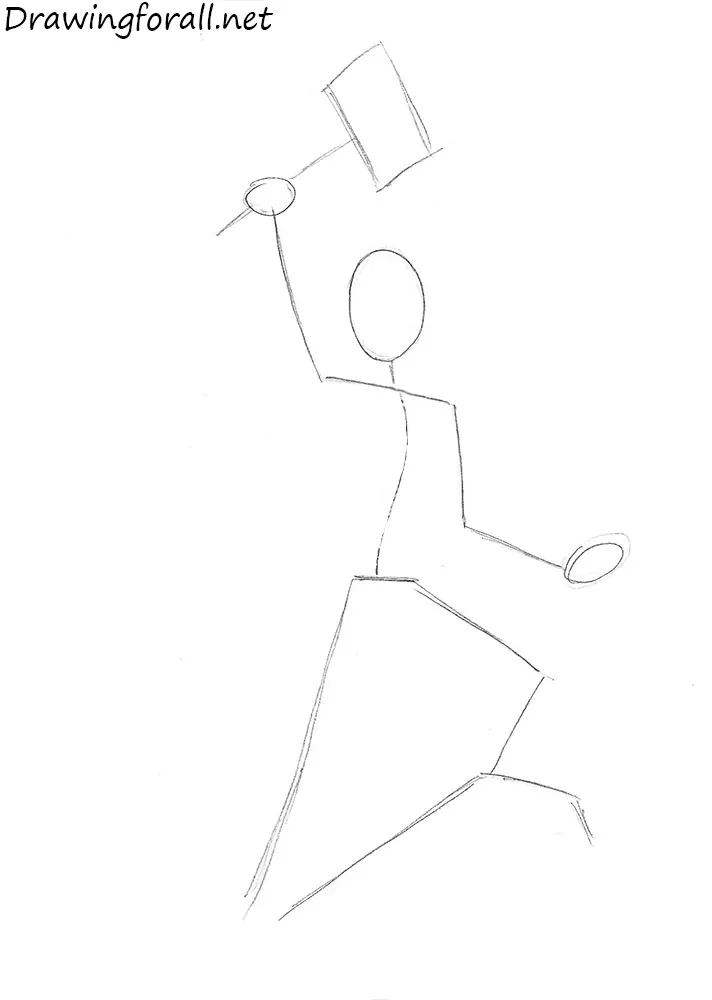
At first we need to sketch out the skeleton of Thor. Using an oval draw the head. Sketch out the body of the character using smooth lines. Sketch out the Mjolnir. If you want to learn more about the hammer of Thor, visit our drawing lesson about how to draw Mjolnir. Look closely at the hand holding a hammer – it really should look shorter than another due to the perspective (aimed in our direction). Sketch out the outlines of the rock, on which stands Thor.
Step 2
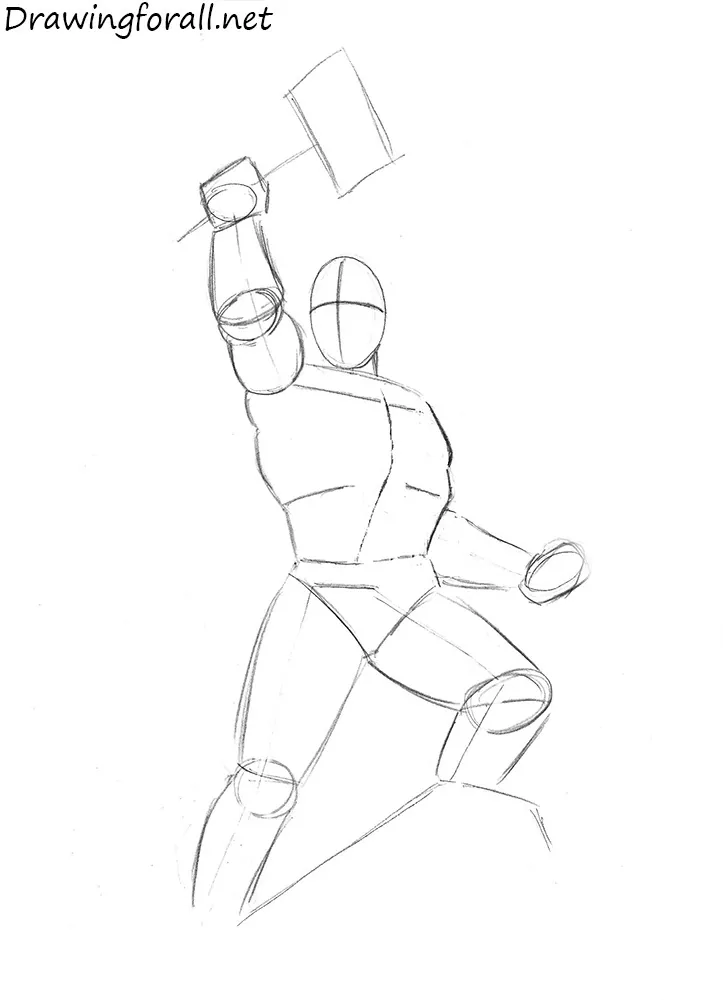
At this step let’s add volume to the body of Thor. At first draw the lines of facial symmetry. Note, that these lines show us the position of the face. Using circles and ovals draw the elbows and knees. Draw the arms and legs using cylinders.
Step 3
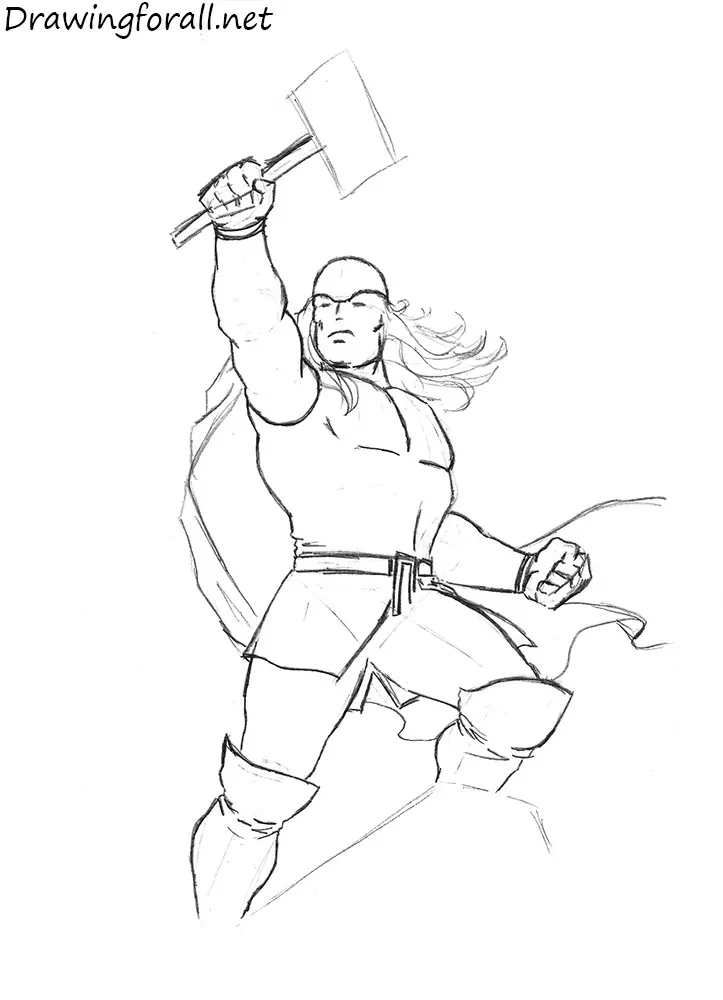
Now draw the massive pecs, outline the longitudinal lines of the abdominals, draw out his fists. In the same stage add details to the clothes – wide “superhero” boots with small folds, the upper part of the garment, which is the likeness of a long plastic plate armor. Using curved lines draw the contours of the cape. Sketch out long hair and helmet, outline the facial features using the lines of the facial symmetry.
Step 4
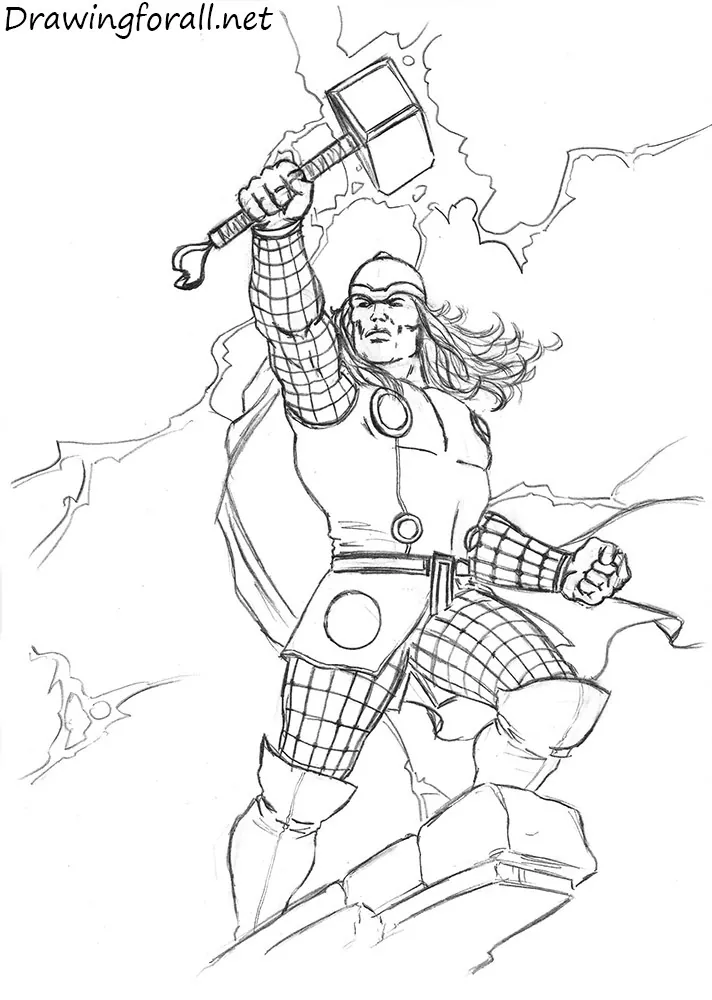
Continue the drawing lesson about how to draw Thor. Draw the facial lines as in the example below. Draw the lines on the helmet. Detail draw long hair. Draw the circles on the chest and draw the details of the hammer. Using ragged and sharp lines draw the lightning. Using long crossing lines draw the details of the armor on the arms and legs. Draw the details of the rock and move to the next step.
Step 5
So, we got to the last step in the tutorial about how to draw Thor. Now impose the thick shades. They should be dark and dense. At first we draw the outlines of the shadows, and then paint the areas of shadows. In order to get semi-shadows use dark and fast strokes.

It was the drawing lesson about how to draw Thor. We hope this drawing lesson helped you to improve your drawing skills. And remember, that the practice – is the father of the manship. Goodbye!


it wasn’t easy and it failed
Thank you it worked great
very helpful
it was hard but I managed
It was really hard but I tried
Awsome Realy Hard