

How to Draw the Joker
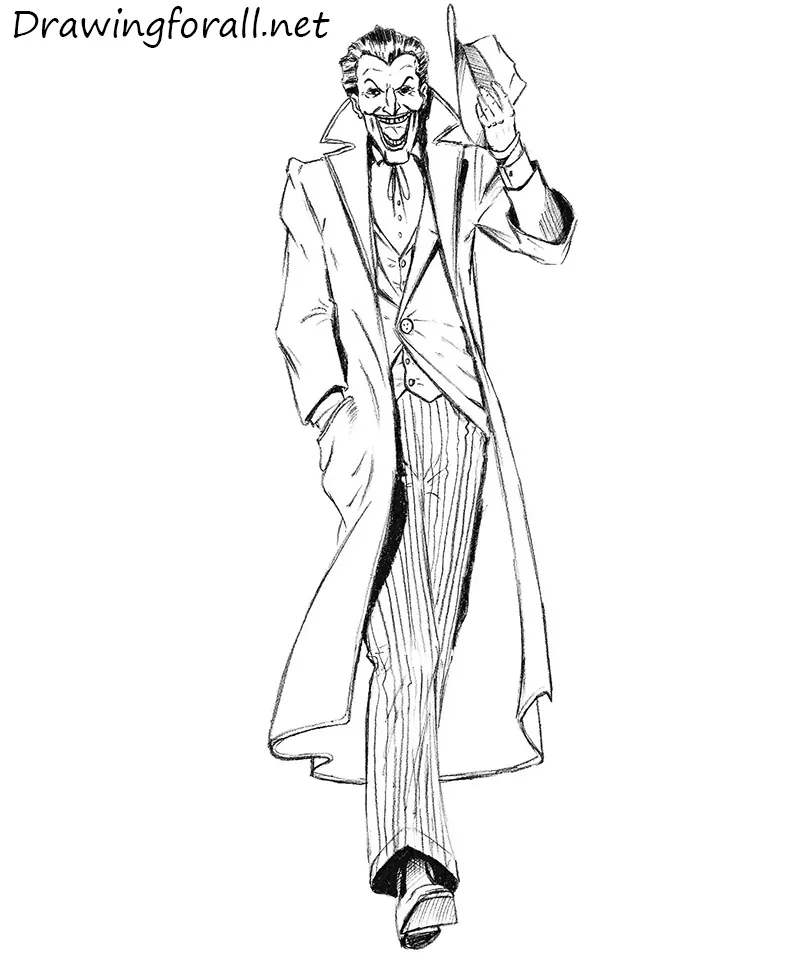
In this tutorial, we will show you how to draw the Joker – one of the most charismatic comic book villains of all time.
He first appeared in comics in the 1940s. Since then, his appearance has changed little. In this tutorial, we will depict the most classic version of this insane villain.
How to draw the Joker step by step
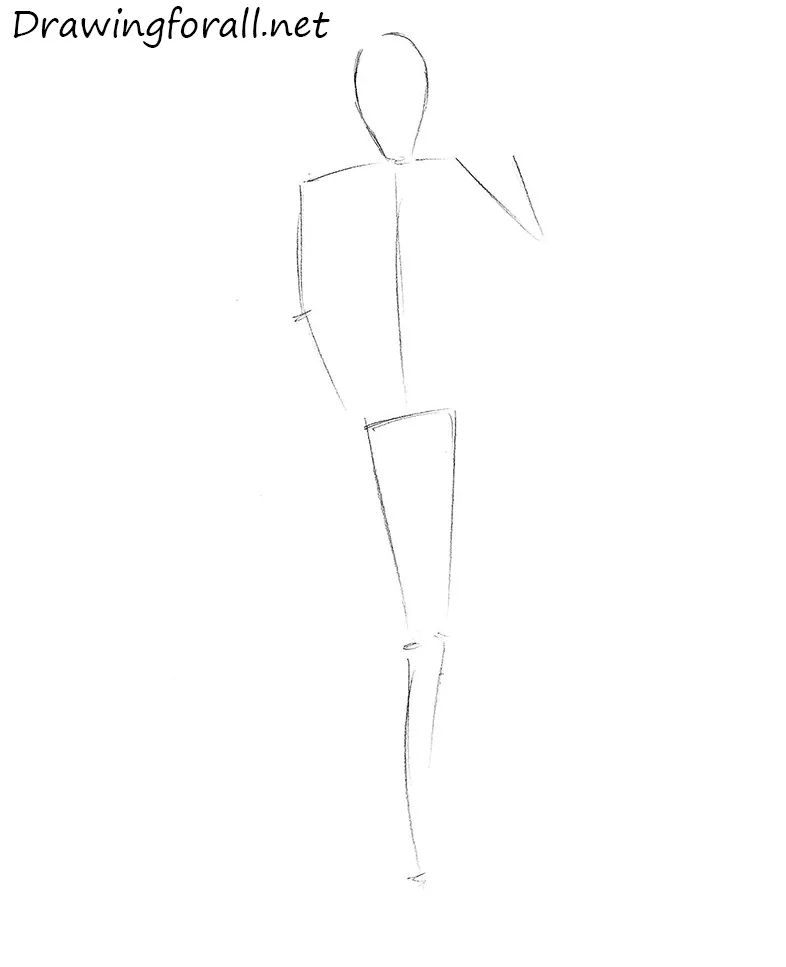
Step 1: Sketch the Joker’s skeleton and pose
Begin with a stick figure made of lines and circles. This framework will help establish the main body structure, distinctive figure, and position of the Joker on the paper. Use an elongated cylinder to outline the head, then draw the character’s skeleton with straight lines. The Joker’s height is approximately equal to eight head lengths.
Step 2: Add volume to the villain’s body
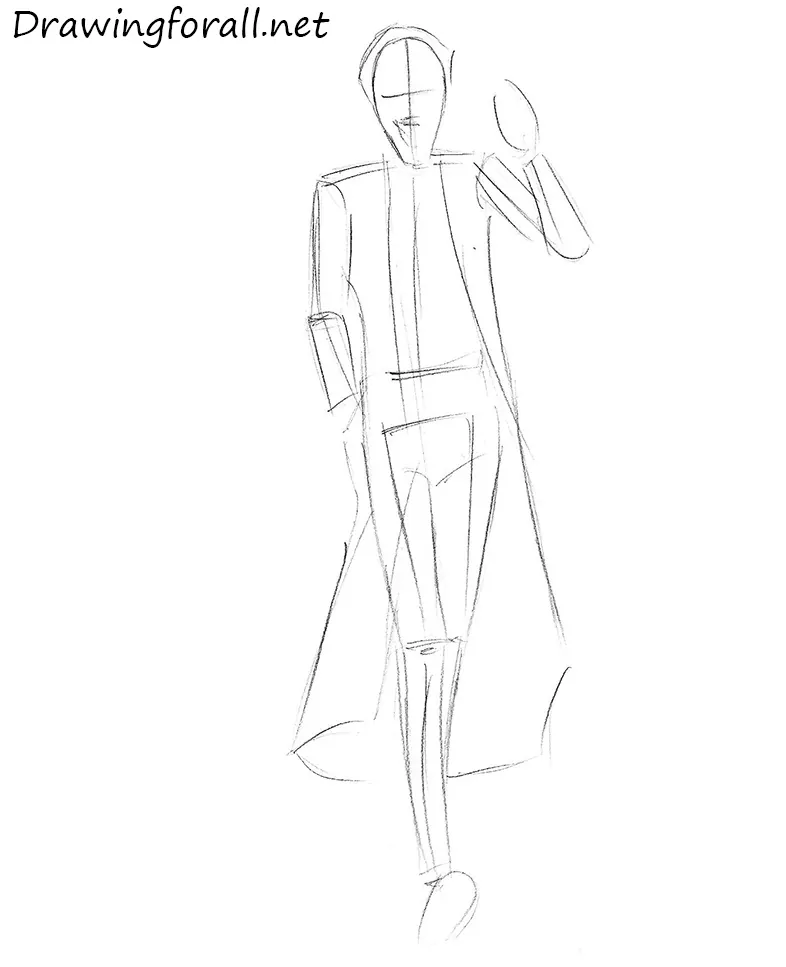
Add volume to the Joker’s body, but first mark the face. Draw a vertical facial symmetry line, a horizontal eye line, the eerie outline of the smile, and the hair contours.
Then outline the limbs and torso of the stick figure with rectangles and ovals. Follow the lines from the previous step, but remember that the hands and feet were not included in the initial framework. Use the same basic construction method as when drawing Slenderman.
Step 3: Mark the villain’s face and clothing
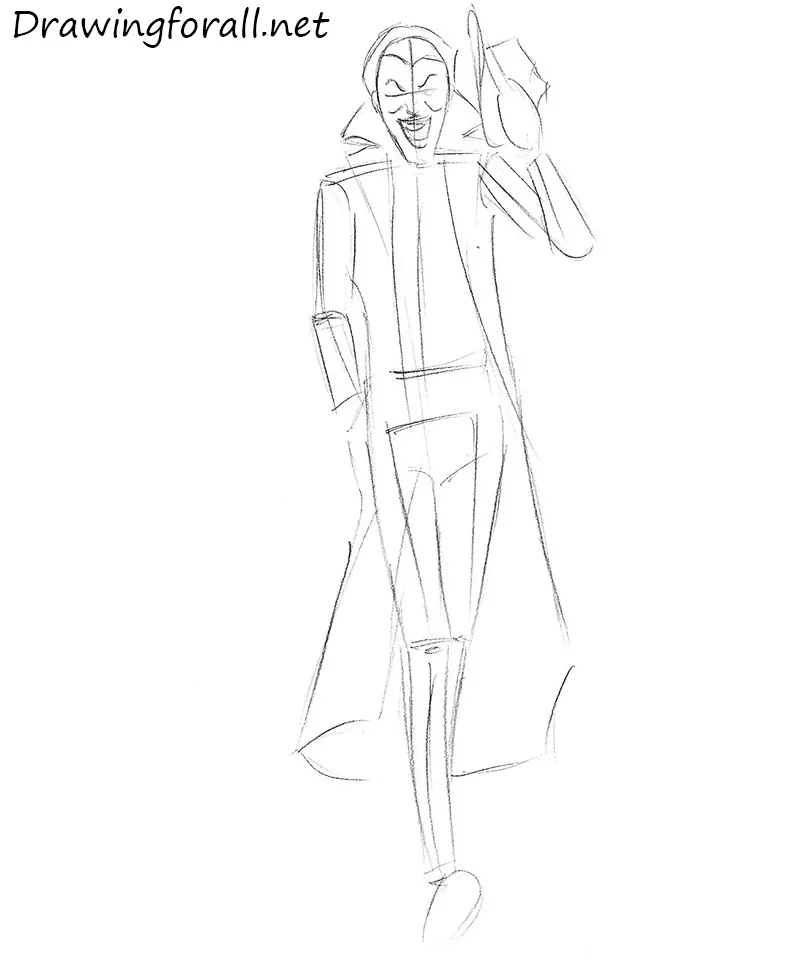
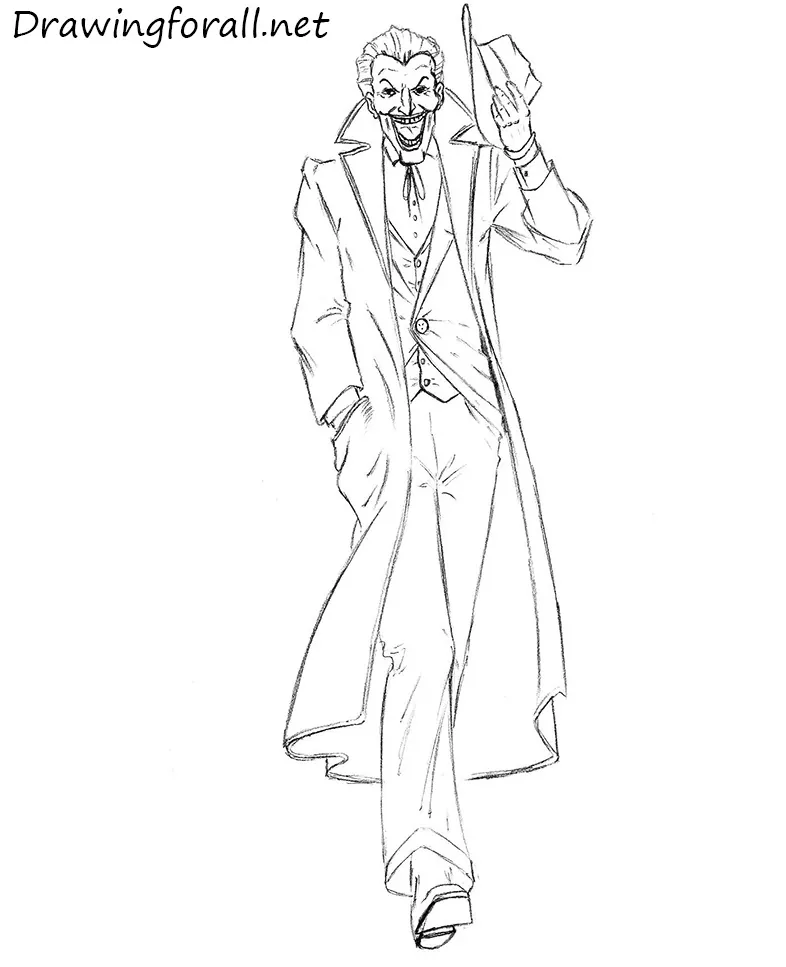
Draw the raised collar of the Joker’s coat and sketch the hairstyle. Also outline the eyebrows and lips as smooth, curved lines that converge near an imaginary point between the eyes. Add the ears and nose, then draw the hat that the Joker is holding in greeting.
Step 4: Refine the Joker’s face
Use the guidelines from the previous steps to draw the Joker’s face. Draw the hair from the roots toward the ends. When drawing the eyes, add the wrinkles at their corners, which convey the tension caused by his unnatural smile.
Also draw the large, pointed nose and ears. Remember that the tip of the nose should align with the lower edges of the ears. Outline the mouth in an unnatural smile and add the wrinkles around it.
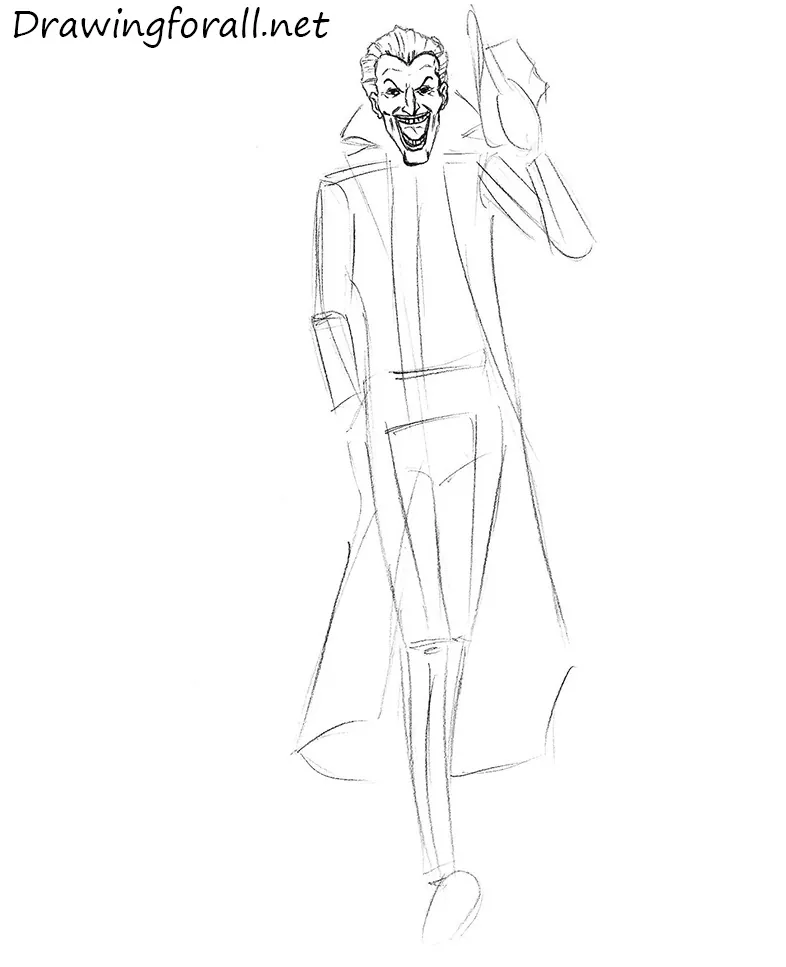
Step 5: Outline the Joker’s coat
Erase the extra construction lines from the Joker’s coat and refine its contours. Pay attention to the strong widening of the sleeves. First outline the pockets and coat lapels, then add the fabric folds. Most of the folds are located around the elbows and pockets. Draw them with smooth lines.
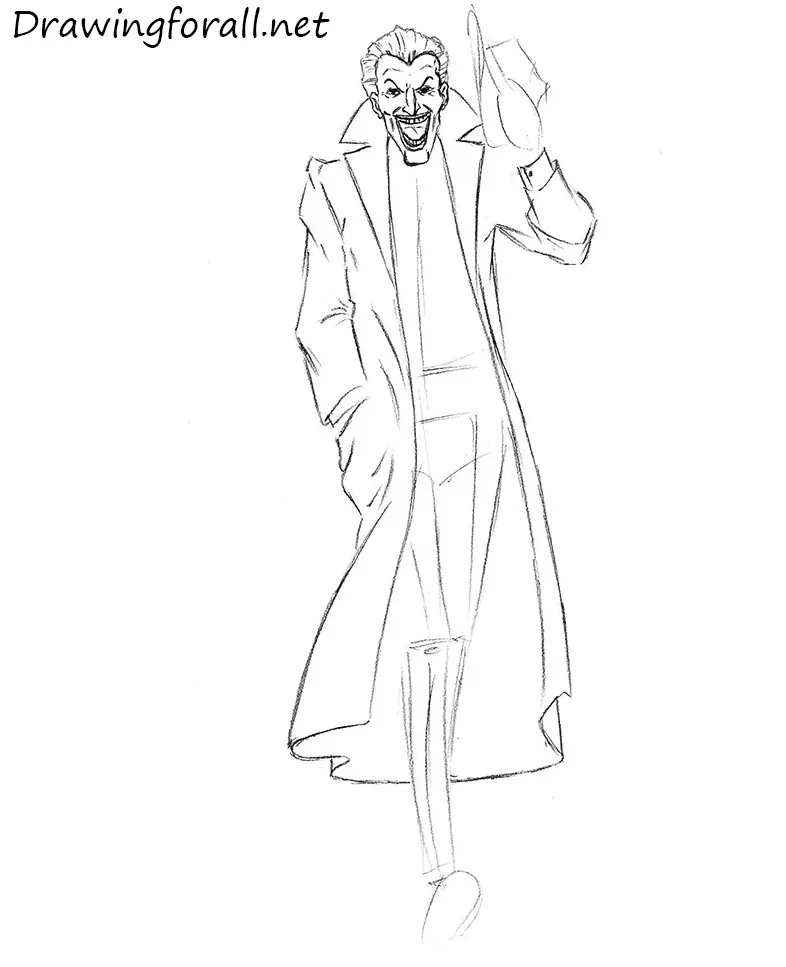
Step 6: Detail the villain’s hat and hand
Now add several subtle but important details. Draw the seams on the Joker’s coat. Use smooth lines to refine the hat, then draw the gloved hand holding it. Outline the knuckles and tendons visible through the glove.
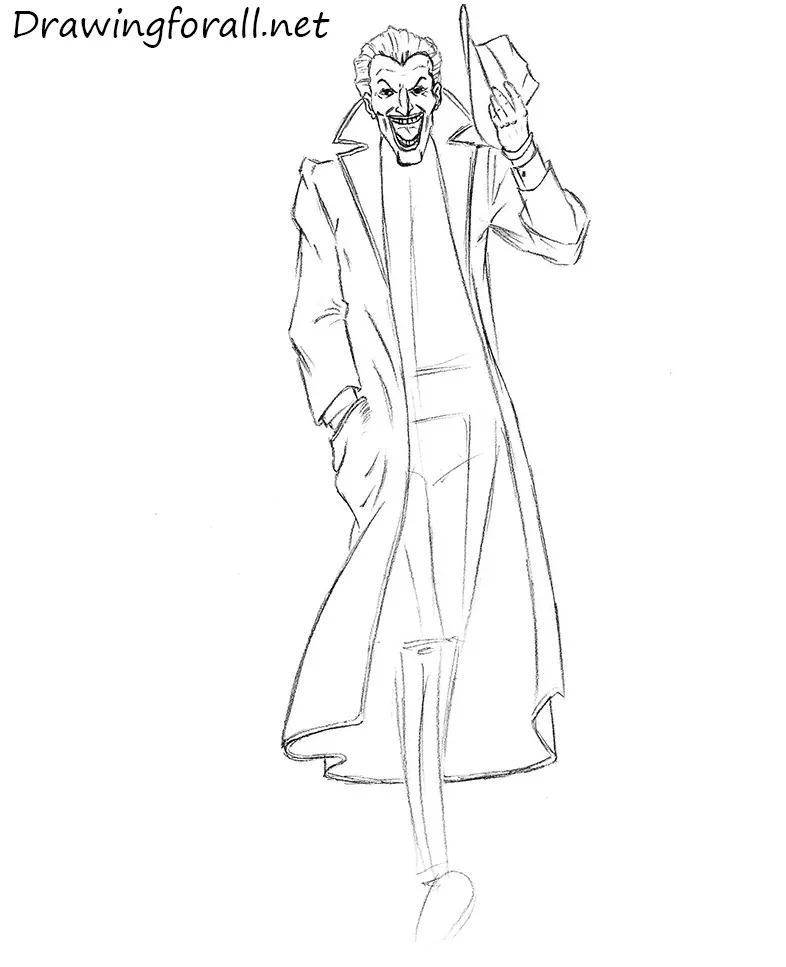
Step 7: Draw the Joker’s clothing
This stage may seem complicated, but it becomes clear when the layers are separated. The Joker wears several layers of clothing: a coat, a jacket, a vest, and a shirt. Draw them from the outside inward. First outline the coat fastened with one large button, noting the folds extending from it, then draw the vest and shirt.
Add the tie and buttons, then draw several folds where the fabric is compressed.
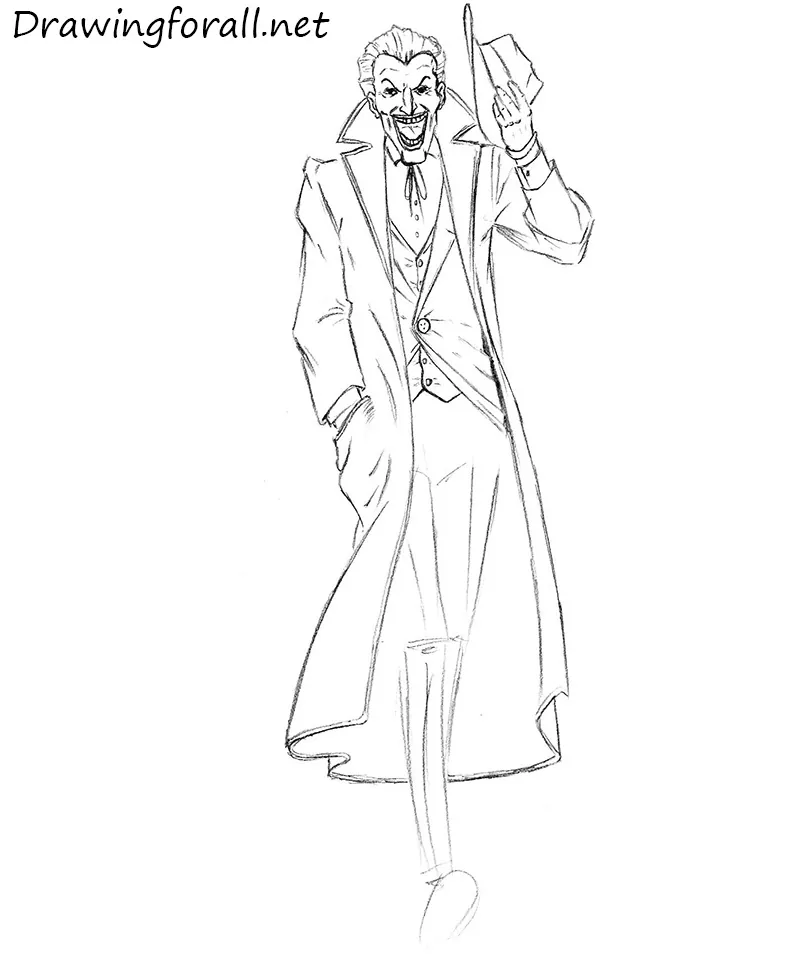
Step 8: Refine the legs and shoes
Erase the extra guidelines from the Joker’s legs and refine their contours. Use several straight lines to draw the folds in the pants. Then outline the soles of the shoes. Each visible lower section consists of a large trapezoid and a small semicircle.
Step 9: Add stripes and comic book shadows
Use long lines to draw stripes on the Joker’s pants. Add shadows in a contrasting comic-book style. First outline the shadow shapes, then fill them with dense, dark shading.
This tutorial showed you how to draw the Joker, one of the most iconic villains in DC Comics. If you’d like to continue with another legendary character from the same universe, try drawing Batman.
You can also explore our collection of comic book drawing tutorials to learn how to draw many more heroes and villains from both DC and Marvel.



Awesome! When I drew it, I couldn’t get the face right. This one was fun!