How to Draw the Earth
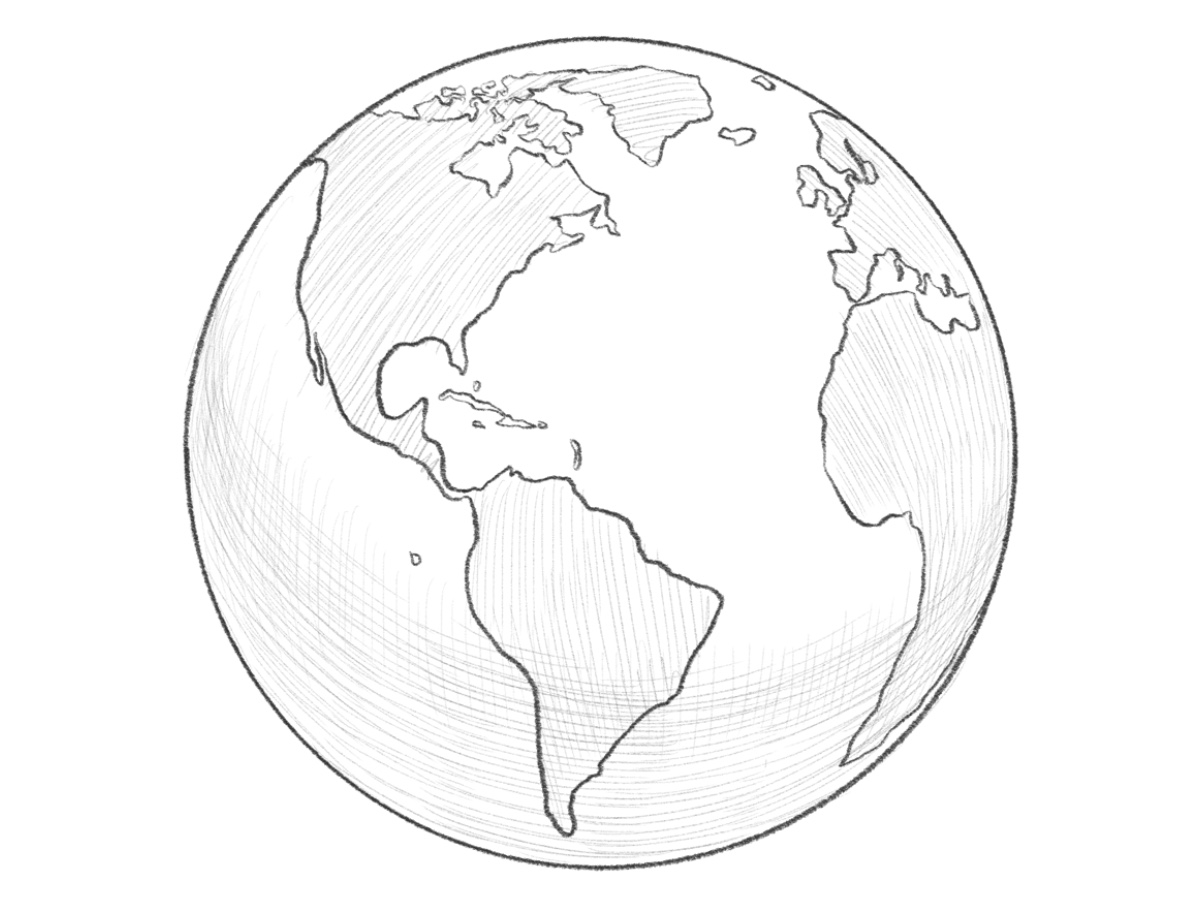
In this lesson, we’ll show you how to draw planet Earth, our shared home, in a three-dimensional and realistic style.
The Earth, like any other planet, is essentially a perfect sphere with a textured surface. Each planet has its own unique texture and details, and Earth’s are especially distinctive – with natural transitions between land and water, as well as the recognizable shapes of continents and large islands.
In this step-by-step tutorial, we’ll carefully recreate the outlines of our planet and give it a three-dimensional, realistic appearance.
How to draw the Earth step by step
Step 1: Sketch the basic guidelines for the planet
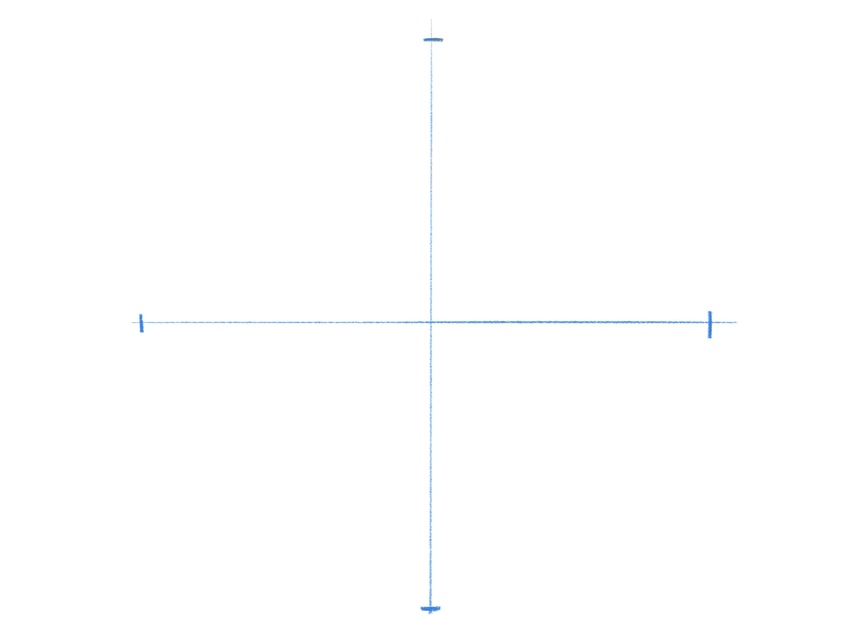
To draw planet Earth, start by drawing a sphere. To make it perfectly round and symmetrical, use light construction lines. First, draw a straight vertical line, then add a horizontal line crossing it at the center. Next, mark short perpendicular dashes at equal distances from the center – these will help you define the outer edges of the future sphere.
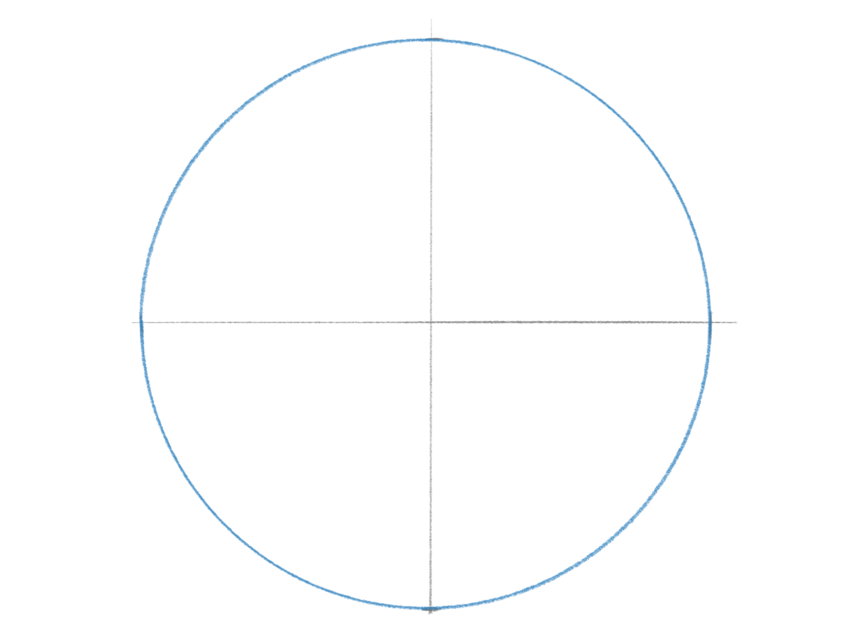
Step 2: Draw the sphere of the Earth
Now outline the sphere of the planet itself using the guidelines from the previous step. Focus on the horizontal, vertical, and short perpendicular marks, and connect them smoothly with a continuous curved line, keeping an equal distance from the center along the entire radius. For a perfectly round shape, you can use a compass, but for better hand control and drawing practice, it’s strongly recommended to draw it freehand.
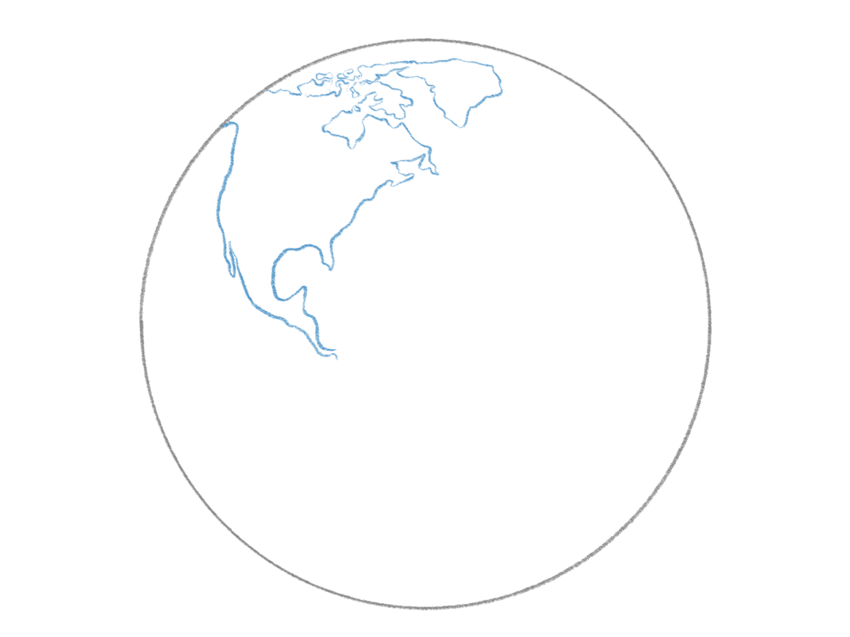
Step 3: Draw the outline of North America
Now it’s time to start adding the continents, beginning from the top and gradually moving downward as you draw the Western Hemisphere. Using a mix of slightly jagged and smooth but natural lines, carefully outline the shape of North America. At this stage, you can choose to depict the opposite hemisphere or experiment with an unusual viewing angle of planet Earth – for example, focusing on the North or South Pole.
Step 4: Illustrate the shape of South America
Continue the outline from the previous step and carefully draw the shapes of South America, tapering smoothly toward the bottom to the continent. When sketching the continents, focus on their basic silhouettes and use slightly jagged, angular lines moderated by smooth curves to keep the coastline natural – similar to how it would appear from space.
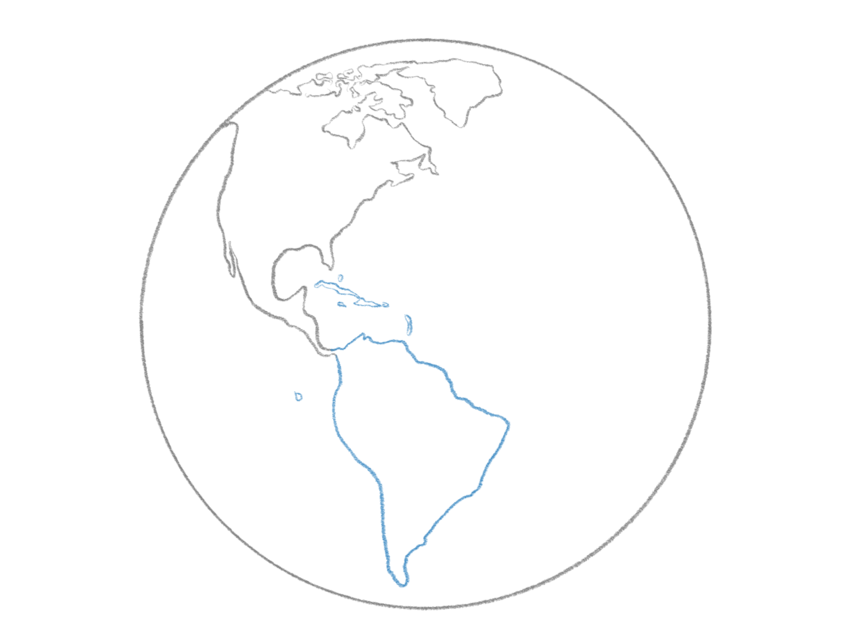
Step 5: Add Africa and part of Europe
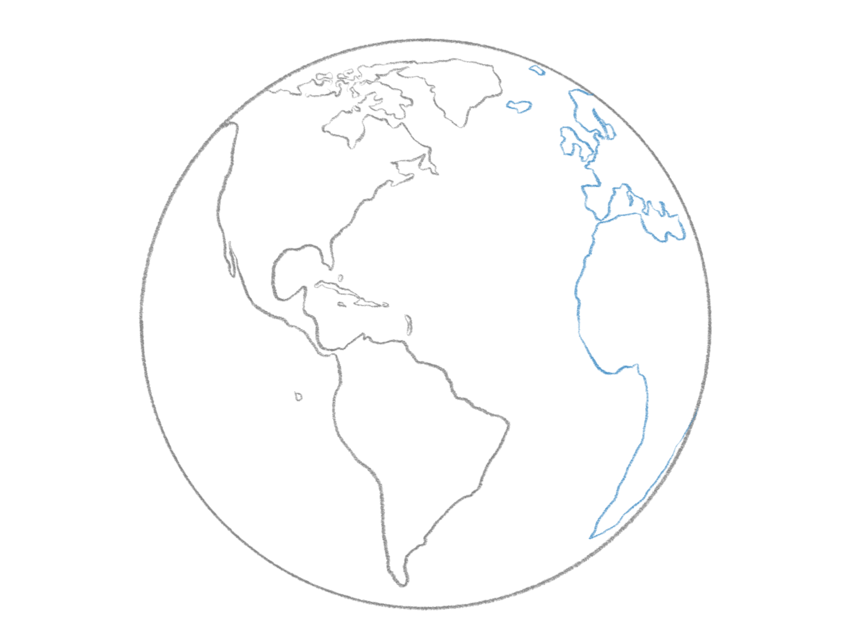
We chose this angle and viewpoint of our planet Earth so that both the Western Hemisphere and part of the Eastern one are visible. Using the same smooth, slightly jagged lines, carefully draw the visible part of the African continent along with the edge of Europe. As you draw the continents, keep in mind the Earth’s curvature so the planet doesn’t appear flat, and the landmasses look natural and three-dimensional.
Step 6: Add hatching to separate land and water
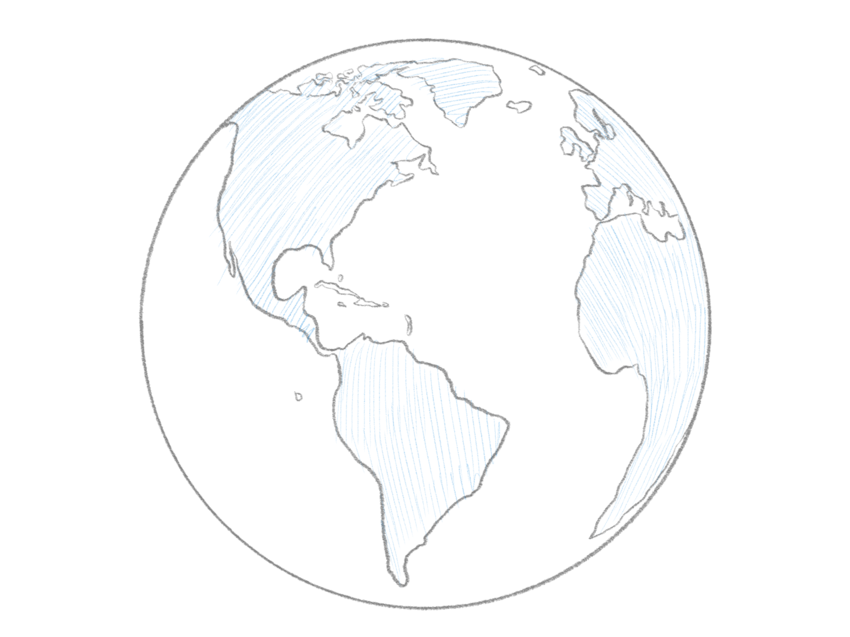
Now let’s begin adding tone to the drawing of planet Earth by separating the water from the land. Using smooth and even hatching, carefully shade all the continents to create a subtle contrast between the two surfaces. You can also lightly shade the water areas, but make sure the land remains slightly darker than the oceans so the elements don’t blend together into one uniform shape.
Step 7: Draw shadows on the Earth
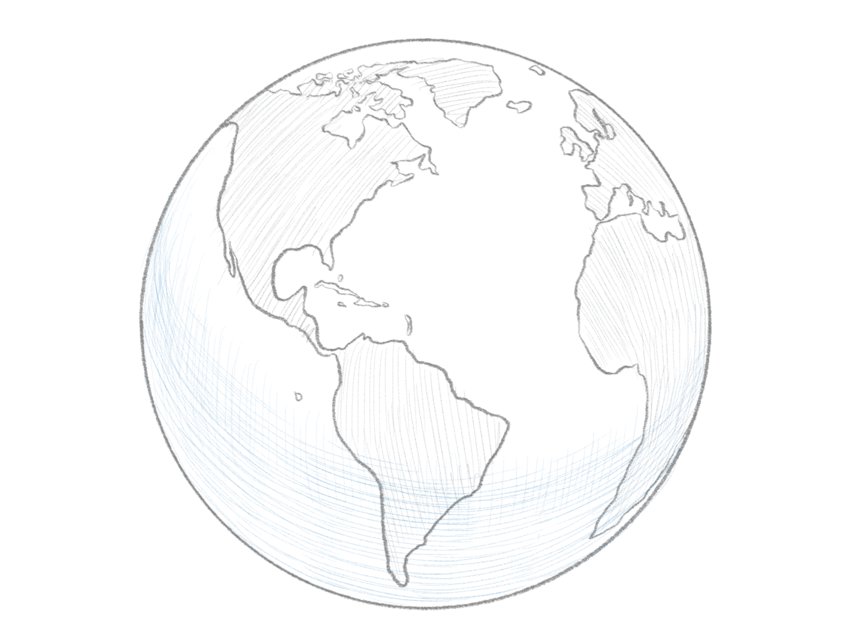
Now, taking lighting into account and remembering the basic principles of light and shadow, apply shading to the lower left part of planet Earth, leaving the upper right area illuminated. This contrast will give your drawing a three-dimensional and realistic appearance. You can also add more midtones and soft shadows to enhance the sense of volume and make the planet look even more lifelike.
Step 8: Finalize the Earth drawing
Now it’s time to compete the Earth sketch and bring everything together for the finished result. Carefully erase any remaining unnecessary lines or marks, then check your Earth sketch for symmetry and proportion. You can look at it in a mirror or view it from a short distance – about an arm’s length away – to spot any inaccuracies. Compare your drawing with your reference or an image from the internet, and make any final adjustments or additions needed to complete the picture.
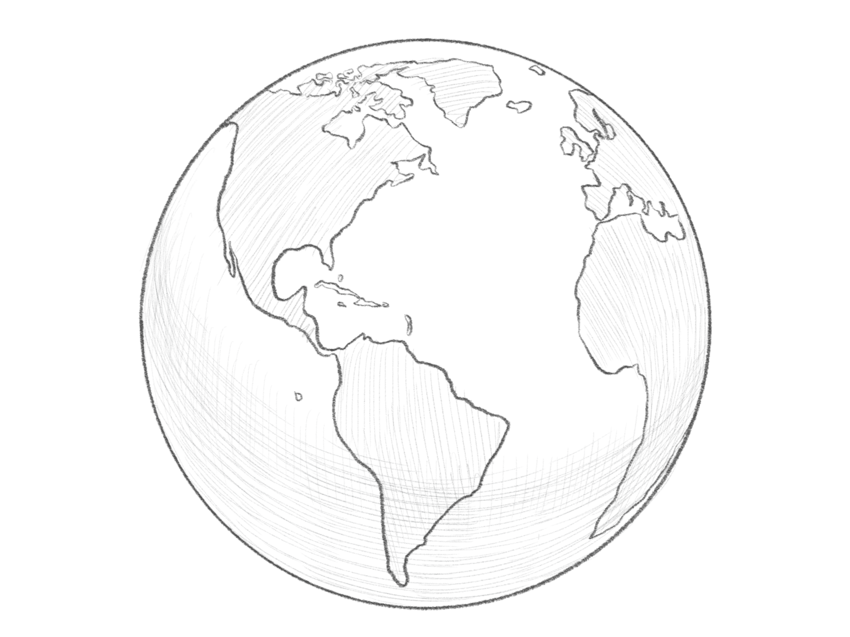
This was a drawing lesson on planet Earth, created in a dimensional and realistic style, as we usually do.
However, it’s important to remember that this exercise doesn’t have to end with the final drawing shown in the last step.
There is always room for improvement, adjustments, and refinements to give your artwork a more complete three-dimensional or simplified appearance.
You can also try drawing planet Earth again by following the same steps above but choosing a different angle or adding clouds covering parts of the planet.
Alternatively, instead of pencil shading like in our example, you can color your finished drawing using the classic Earth tones with any tools and materials you prefer.
Another great idea is to draw a globe, giving it an even more realistic and rounded look by applying the knowledge gained from this lesson. Depict all the same details as in the steps but include a stand, as typical for a globe.
Of course, you can expand your composition by drawing outer space – for instance, add the Sun, the Milky Way in the background, or other planets to create a more complex scene.
You could even draw a spaceship flying away from Earth toward the viewer to make the artwork more unique.
And finally, for new drawing lessons and additional materials, don’t forget to follow us on social media and visit our website regularly – we’re always creating new and interesting tutorials just for you.

