How to Draw Sub-Zero
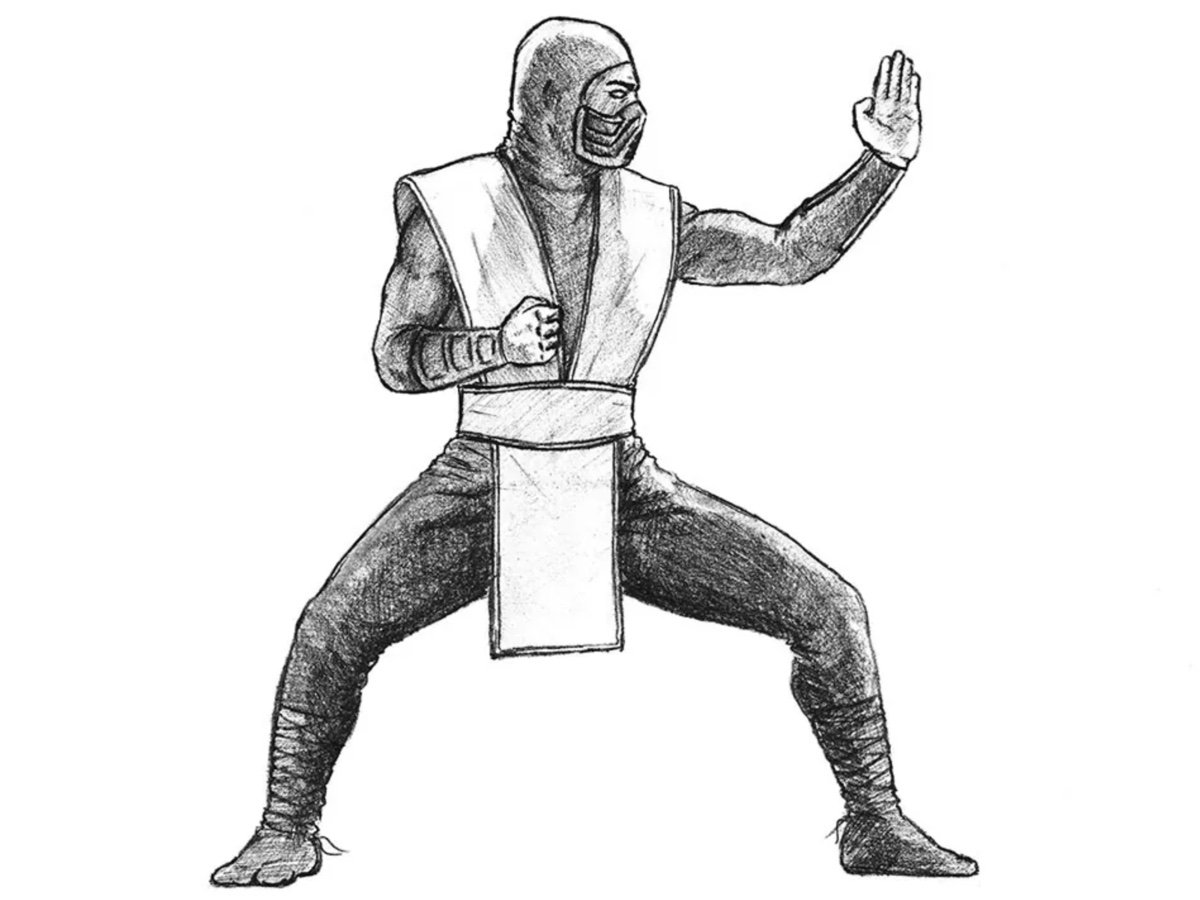
This is a tutorial on one of the most famous characters from Mortal Kombat, and here we will show you how to draw Sub-Zero from the 1995 Movie.
There are two Sub-Zero in Mortal Kombat – the masked and unmasked. Both are the ninjas in blue suits that have the ability to generate and control the power of ice, although they were both born in the world of ordinary people.
Besides that, this character exists in a huge number of interpretations across dozens of video games, movies, comics, and other media.
In this lesson, we want to show you how to draw Sub-Zero from the version our team likes most, but the principles you’ll learn here can be applied to drawing any interpretation of this ninja fighter.
How to draw Sub-Zero step by step
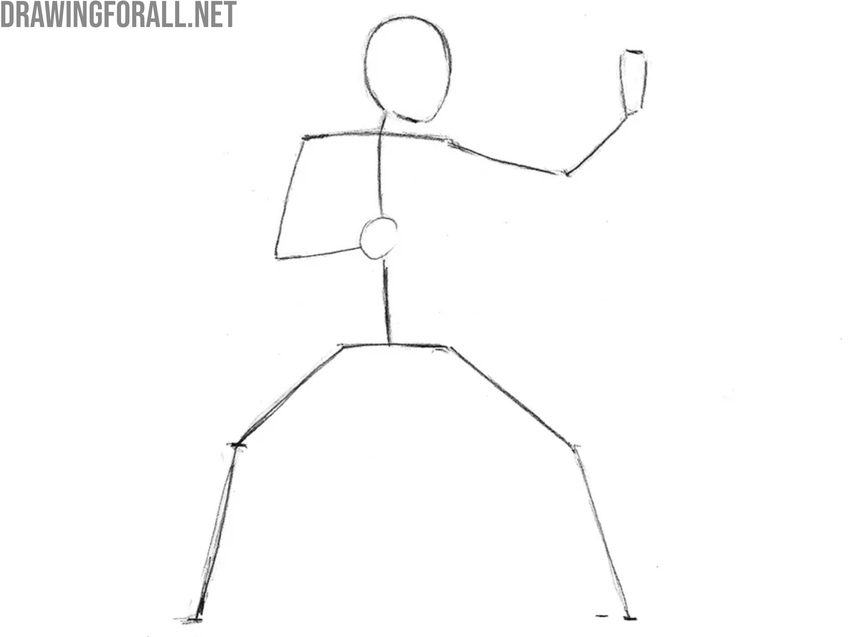
Step 1: Sketch the basic proportions of the ninja
First of all, draw the general proportions and pose of Sub-Zero. Note that Sub-Zero is in a ready stance – he is slightly crouched, his arms are bent at the elbows, and his head is slightly tilted forward. Begin with the head by sketching an oval as a guideline. After that, use simple lines to indicate the spine, arms, and legs. Remember one of the basic proportion rules: the average human figure is about seven heads tall.
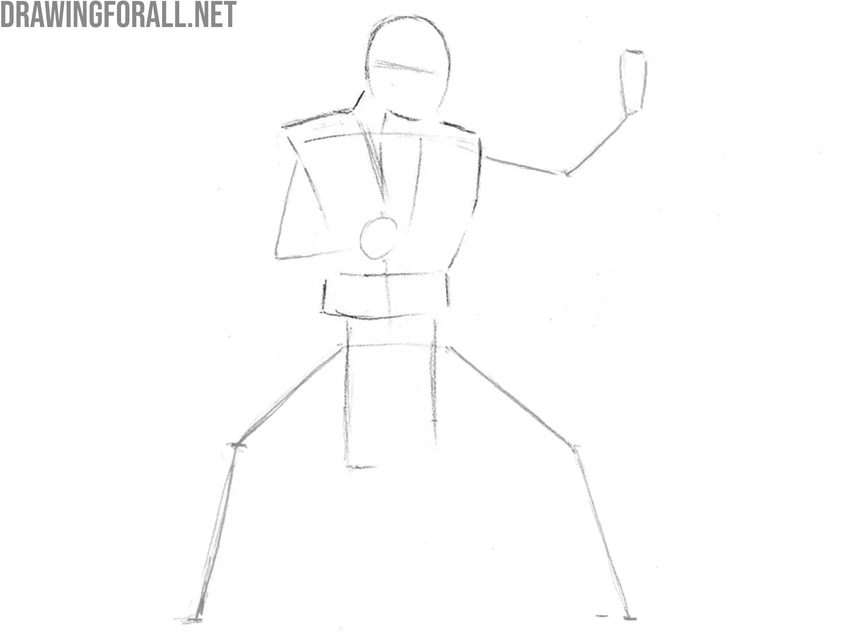
Step 2: Mark the ninja vest and eye line
From this step, start adding volume to Sub-Zero’s body using simple geometric shapes. Add mass to the upper torso, defining its basic form. First, mark the eye line – place it roughly in the middle of the oval. After that, outline the upper section of the vest. In the next steps, focus on conveying its structure and texture, keeping in mind that the material is quite rigid and layered.
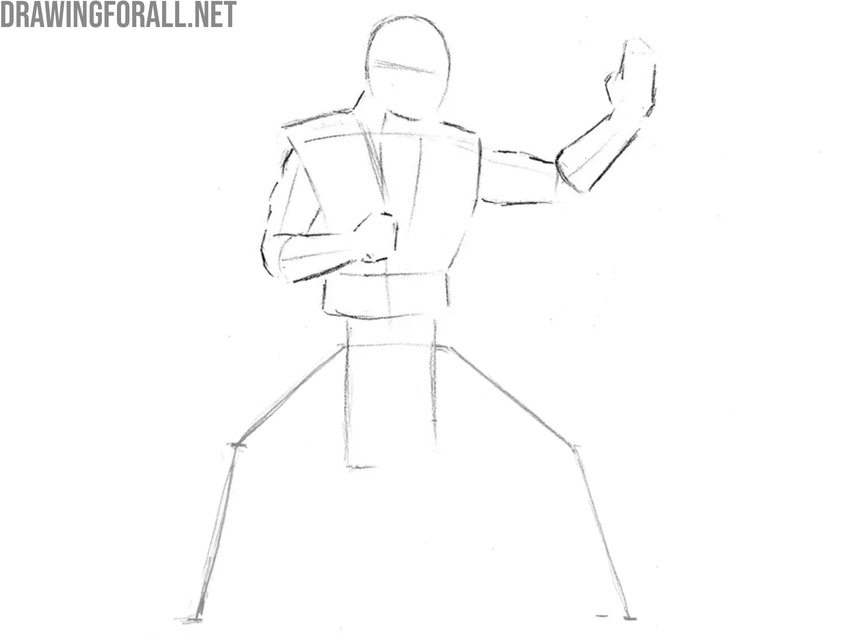
Step 2: Add volume to Sub-Zero’s arms
Now add volume to the limbs, starting with the arms. Keep basic human body proportions in mind as you block in the upper arms first, then illustrate the forearms, and finish by outlining the fists. Use smooth, light lines, and gradually mark the contours of the clothing and the combat bracers on the wrists.
Step 4: Sketch the ninja legs and feet
Now add volume to the lower part of Sub-Zero’s body. Begin by sketching the belt with two slightly curved lines and outline the lower section of the vest as an elongated rectangle. After that, build the legs using cylindrical shapes to establish their form. Add the knees with simple circular shapes and sketch the feet. Keep in mind that the right foot is facing toward the viewer, while the left is turned to the side.
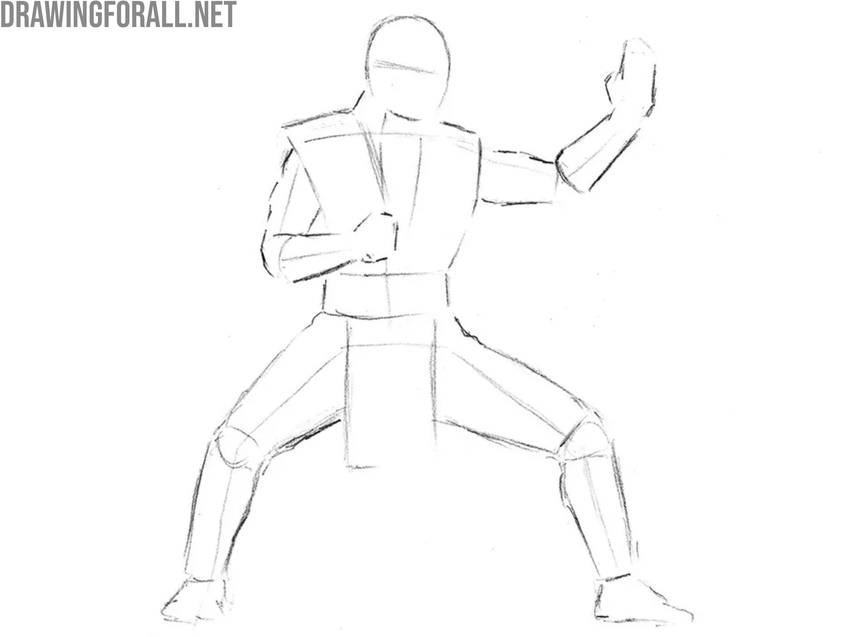
Step 5: Draw out the head of Sub-Zero
With the basic shapes and guidelines in place, start applying more pressure to your pencil or switch to a darker one to define the lines more clearly. First, trace the ninja’s head – remember, the head is not a perfect circle. Draw out the neck and add a few folds to indicate the fabric. Sketch the shapes of the nose and chin beneath the mask. Then draw a line above the eye line to mark the opening of the hood.

Step 6: Detail the eyes, hood, and mask
Now refine and draw the head of Sub-Zero in detail. Use the eye line from the earlier step to draw the eye, shaping it as a narrowed oval. Add the eyebrow with a curved line and keep Sub-Zero’s expression intense and focused. Place a few wrinkles above the brow and beneath the eye. Draw the ear under the hood, making sure the top aligns with the eyebrow and the bottom aligns with the tip of the nose. After that, outline the mask. Sub-Zero has many mask designs – from the simple version in the first Mortal Kombat to the highly detailed versions in modern games. Since we are drawing the movie version, keep the mask consistent with the film design. Add the folds along the lower edge of the mask to define its structure.
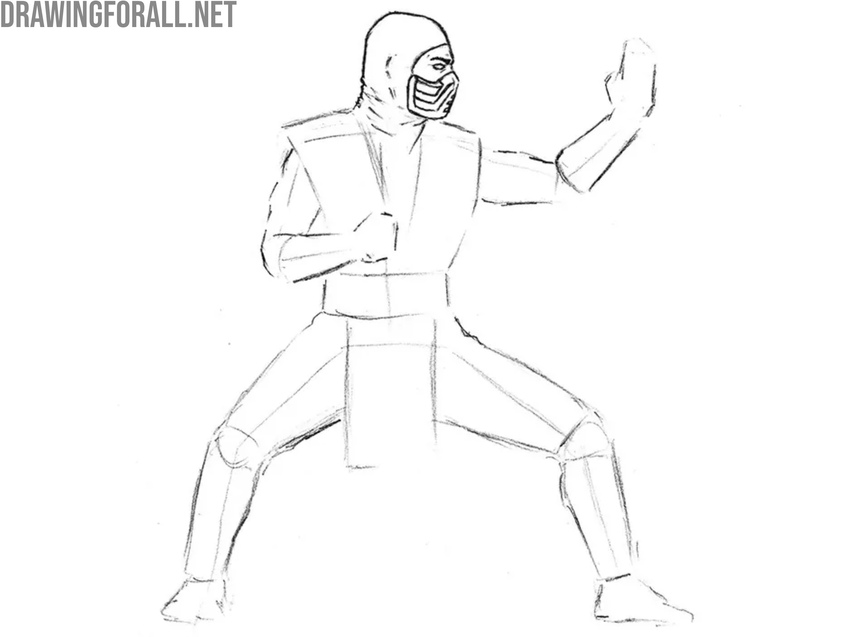
Step 7: Finalize the vest of the ninja
Now, move on to the torso. Strengthen the ninja vest outlines and define the shape of the shoulders. Note that the belt at the center of the abdomen is slightly wider than it is at the sides. Draw the ninja vest, keeping the body’s proportions and volume in mind so the garment sits naturally and realistically on the torso. Then darken the lower, hanging section of the vest and proceed to the next step.
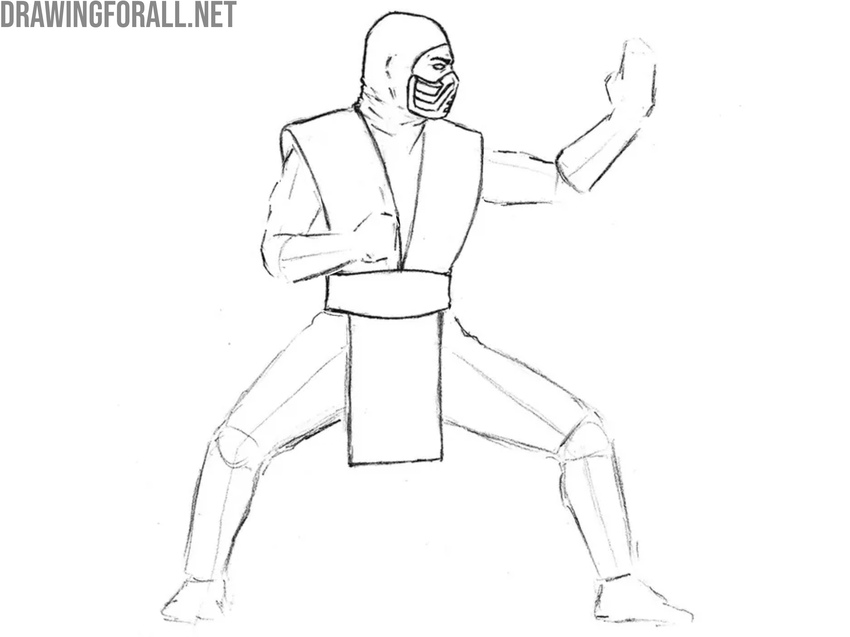
Step 8: Trace the arms and warrior bracers
At this step, start drawing Sub-Zero’s arms. Begin with the deltoid on the right arm (the left deltoid is covered by the vest). Shape it as a semicircle covered with fabric. Then define the biceps, triceps, elbow, and forearm. Keep in mind that the arms widen around the mid-biceps and the forearms narrow toward the hands. Add folds in the elbow and armpit areas. Outline the sleeve protectors and move on to the hands.
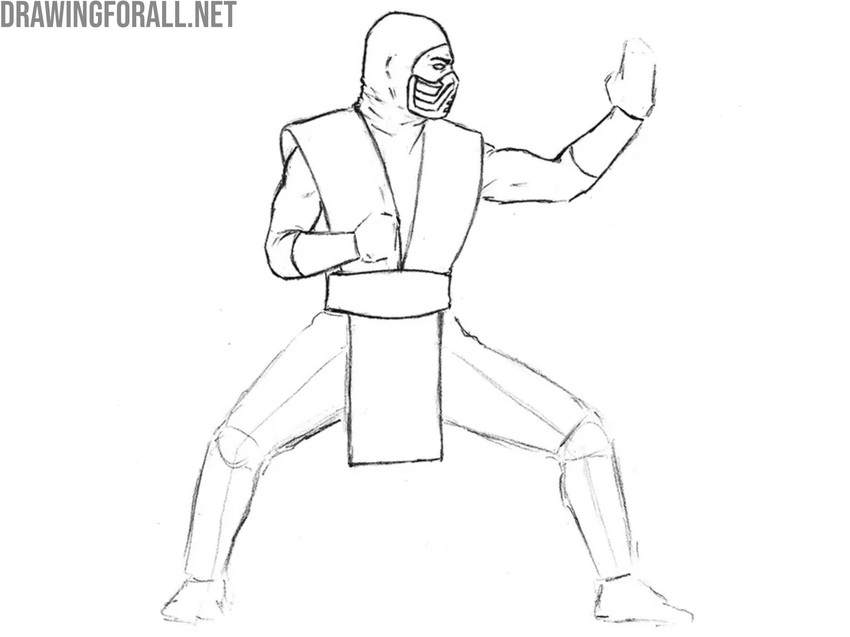
Step 9: Draw out the hands of Sub-Zero
First, draw the hand clenched into a fist by shaping the back of the palm, the knuckles, and the clenched fingers. Then draw the left hand of the ninja with an open palm and straight fingers. Try to accurately and convincingly define all the contours of the fist and hand, marking the inner folds of the palm and smaller details if you want your Sub-Zero drawing to look more realistic.
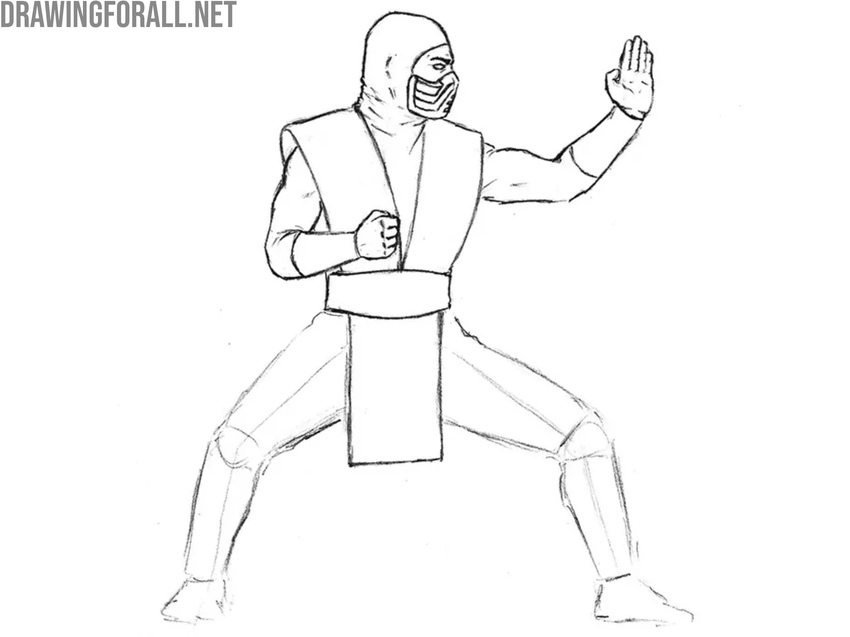
Step 10: Detail the upper legs and add folds
The upper part of Sub-Zero is complete, so begin working on the lower part. The pose and basic volume of the legs are already established from earlier steps, and now you should add the details. Define the form of the pelvis and upper legs by indicating the thigh muscles, keeping their underlying structure clear. Use a few short lines to indicate the folds in the upper leg area so you can show where the fabric is compressed and stretched.
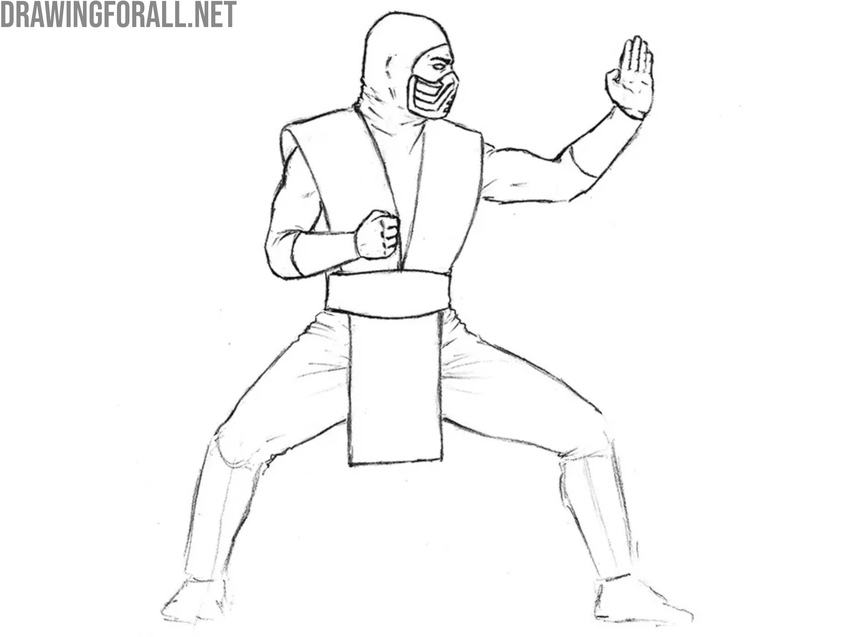
Step 11: Draw out the lower legs of Sub-Zero
Now about the folds of tissue – they are formed in the places where the fabric is pulled tight or compressed. Draw the remaining folds, using simple lines. In the same step, draw wide strips of cloth on the shins of Sub-Zero. Erase all guidelines, draw the feet and move to the last step.

Step 12: Apply realistic shadows to the ninja
Look at your Sub-Zero drawing and determine the direction of the light. In our example, the light source is behind the warrior, so hatch the inner areas of the head and body while leaving a narrow band of light around the silhouette. Begin with the head, shading the inner section and keeping a thin highlight along the edge. Add a shadow band on the chest using light, even hatching. Apply shadows to the arms and legs in the same manner as you did on the head. To make the figure more convincing, deepen the shadows in the folds and leave brighter areas on the raised parts of the body.
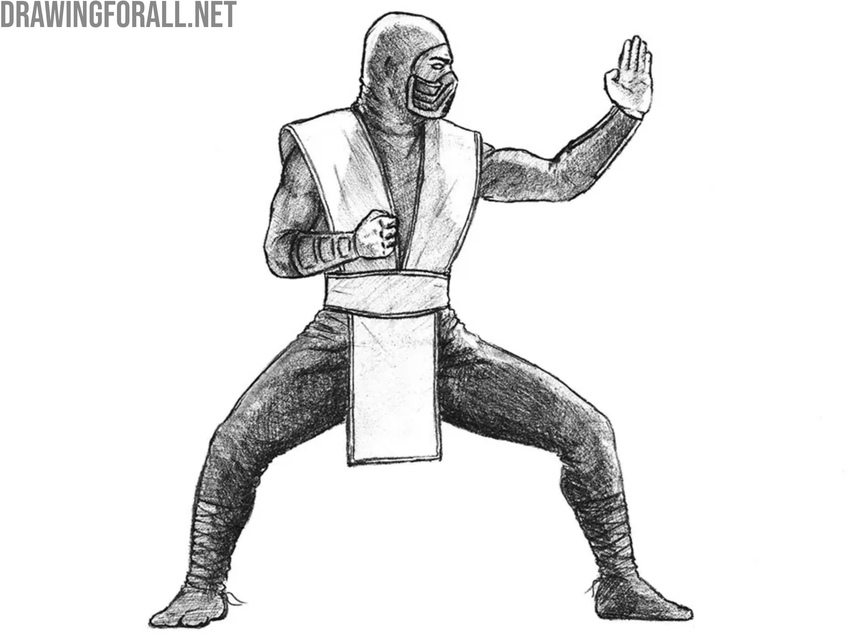
This lesson was fairly detailed and realistic, using many classical academic art principles to show you how to draw Sub-Zero from the iconic film of the 1990s.
As mentioned at the beginning, these steps can be applied to drawing this ice-wielding ninja from any game or movie. You can also try illustrating him without the mask, including the canonical scar on one side of his face.
It is also important to note that all the ninjas in Mortal Kombat are drawn using very similar construction principles.
This means you can draw Scorpion using nearly the same approach, or draw Reptile to study how to depict all three of the classic color-coded ninjas from the Mortal Kombat universe.
In addition, it’s worth noting that this lesson is strongly based on our ninja drawing tutorial, where we explain all the fundamental principles of depicting shadow-warrior characters. Be sure to review that lesson as well to further broaden your skills.
To explore other characters from this universe, visit our Games category, where you will also find many additional characters from other titles.


That’s amazing! Thank you for this tutorial.
Thanks, Mike. Glad this tutorial was helpful.
Yes I like to draw a subzero.
Nice, Andy. We’ve got a few similar characters on the site – feel free to check them out.
mine came out horrible but oh well
Happens to everyone. Try it again and again, until you get a good result.
IT IS LIKE AN ARTIST DRAWING BUT SHADING IS SUPER TOUGEST
Shading is always the hardest part. You can visit our article about light and shadow to learn more about it.
my eye is horrible but very well
It’s ok at first. Just keep drawing and visit our tutorial on drawing eyes to learn more about it.
my eye is horrible but awesome
Cool
it is not you just can’t draw
I am a student who has benefited from this lesson. Nice drawing
Glad it helped, thank you.
I made it easier than I thought 💪🧑🦱🤳
🥷🥷🥷🌬️🌬️❄️
Nice work – always good to hear when the steps were easy and useful.