How to Draw Anime Eyes

This step-by-step tutorial will show you how to draw anime eyes and explain all the nuances of drawing this part of the face in this style, a skill that forms the foundation of drawing anime and manga characters.
As you know, anime is a rather unusual style. Many artists simplify details such as clothing, interiors, and even character faces. However, one element in anime is almost always drawn with particular care.
We are talking about the eyes. In anime, the eyes often convey the character’s mood and the overall atmosphere of the image. This is one of the most important elements when drawing any anime character.
Despite their stylization, anime eyes are drawn according to the same core principles as realistic eyes, but with their own nuances, which we will explain in this step-by-step tutorial.
How to draw anime eyes step by step
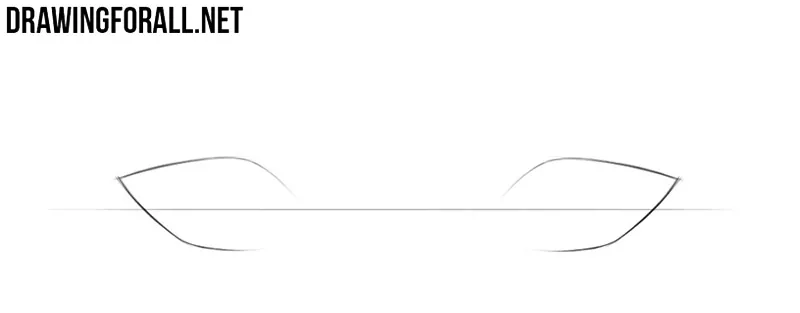
Step 1: Sketch the horizontal guideline
The eyes should lie on the same plane. This is one of the basic rules for drawing eyes in many styles. Therefore, first determine the approximate placement of the anime eyes and draw a horizontal guideline. You can also sketch shorter marks to indicate their position.

Step 2: Draw outlines of the anime eyes
After indicating the approximate location of the eyes, you can draw the contours of this part of the face. Choose the eye shape based on your preferred style. These can be vertically elongated eyes or more realistic horizontal ones. We chose an almond-shaped eye design, which is quite common in anime that use more complex drawing techniques.
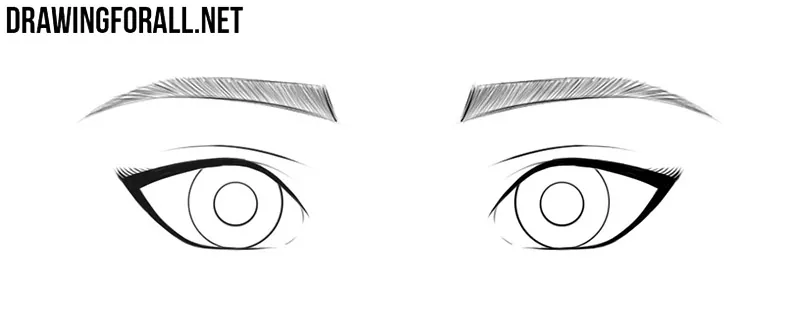
Step 3: Add the pupils and irises
Now that we have the approximate outer contours of the eyes, we can move on to the main internal details. The eye consists of several layers that cover the light-refracting structures. Externally, we see part of the choroid called the iris, which determines the eye color. Inside the iris is an opening called the pupil. Draw these two elements, keeping in mind that the position of the pupils determines both the direction and the emotional tone of the gaze, making this a very important detail.

Step 4: Sketch the eyebrows
Another feature that affects the direction and expression of the gaze is the eyebrows. Draw the outlines of the anime eyebrows, keeping them symmetrical as mirror reflections of each other. The eyebrows are wider in the central part and taper toward the sides. You can choose the shape according to your preference, but keep in mind that their position will influence the character’s emotional expression.

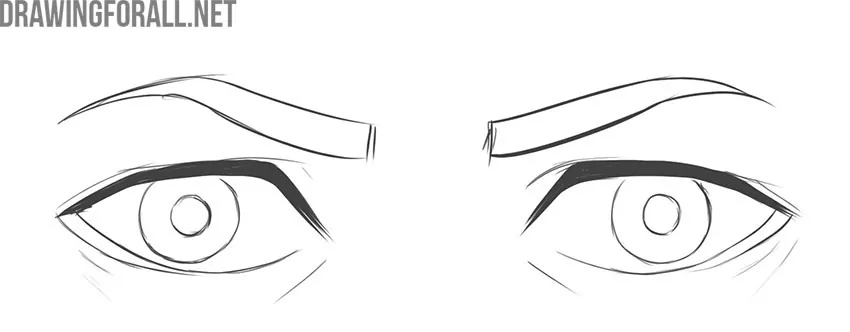
Step 6: Draw the eyelashes and add folds
Now make the gaze more expressive. To do this, add the contours of the eyelashes, thickening the eye outlines from the previous steps. Then draw short eyelashes at the corners of the eyes. You can adjust the thickness and length of the individual eyelashes.

Step 6: Detail the eyebrows
Now make the anime character’s eyebrows more complete and refined. To do this, add single-layer hatching within the eyebrow contours. As you move toward the sides, the strokes should become more diagonal. This simple hatching will represent the eyebrow hairs.
Step 7: Add shadows and highlights to the anime eyes
Use hatching to give the anime eye drawing a more finished appearance. First, fill in the pupils with the darkest, most saturated hatching. Be sure to leave a small white highlight inside each pupil to represent the reflection of light. Next, add hatching inside the iris. You can create a large crescent-shaped highlight at the bottom of the iris, as shown in the example. Use lighter hatching for the rest of the iris for a more convincing look.

Key principles of drawing anime eyes
Now let’s talk about the nuances of drawing anime eyes and what makes them convincing despite strong stylization.
The most important thing to keep in mind when drawing anime eyes, as well as other facial features and the body, is that this style is still part of the visual arts.
This means that anime and manga, like almost any stylized interpretation of the real world, follow the fundamental principles of drawing. The eyes are no exception.
Even though everything in this style is simplified, the basic eye anatomy should still be respected. The eye is a sphere surrounded by eyelids, with the eyebrows above and the bridge of the nose between them.

This simple combination creates the recognizable volume that should be preserved even in anime style. You do not need to draw the eyes as full spheres every time or construct detailed symmetry lines, but it is important to keep these forms in mind.
Principles of proportion, symmetry, and linear perspective are also very important. The forms should remain volumetric, even when stylized, and perspective distortion should stay believable.
However, anime stylization introduces its own nuances and makes eyes drawn in this style highly recognizable. One of the foundations of anime drawing is strong simplification.
Therefore, despite following the basic principles of drawing, anime eyes have several essential features without excessive detail.

First are the eye contours, visually formed by the eyelashes, and the eyebrows above them, which represent the hair. Their shapes can vary across different anime and characters, but the principle remains the same.
The second element is the pupils and irises, which can also vary in shape, from standard round forms to vertically elongated ones.
Practice drawing different anime eyes
Now it’s time to practice drawing anime and manga eyes in different shapes and with various expressions. For example, you can try changing the contours of the eyelids and eyebrows, as well as noticeably altering the facial expression.
By using the same steps shown above, you can achieve significantly different results.
Change the contours of the eyelids and eyebrows. Adjust the tilt of all elements as you see fit. Add folds and make the eyelashes thicker or thinner.
In this way, you can learn in practice how different facial expressions, emotions, and character traits are created in anime. Most importantly, use the steps from this tutorial while modifying only the details you need.

You have now learned the basic steps for drawing anime eyes, from outlining the shape to adding internal details, shading, and expression.
With this foundation, you can begin practicing different styles and experimenting with various eye shapes, angles, and emotions.

Keep in mind that small adjustments to the eyebrows, pupils, and eyelids can completely change the character’s expression.
Also, visit our anime drawing tutorial, where we show the basic principles of this style and demonstrate how to create authentic anime and manga characters.
Use the skills you’ve gained in this tutorial on how to draw anime eyes to make your anime drawings look really professional.
Keep refining your technique, study references, and try drawing anime eyes in a wide range of moods to build confidence and control in your sketches.


This was a super easy tutorial. Thank you…
I’m a total newbie and I could follow each step. It made sense all the way.
Thank you very much. We are glad that our drawing lessons help you.
Which personality matches these eyes?
Thank you for the post.
Thank you.
These are just average anime eyes. We did not take any specific character as a reference.
I like that you attended to do this
its cool
First time i have ever been able to draw both eyes and not have them look weird. Thanks!!!
yes same
I love this it’s amazing I learned how to do this 1st try I love this site it’s really cool
I WANT A VIDEO!!!!!
Same