How to Draw a Sunflower
Throughout this step-by-step tutorial we will show you how to draw a sunflower and add authentic texture and dimensional shadows.
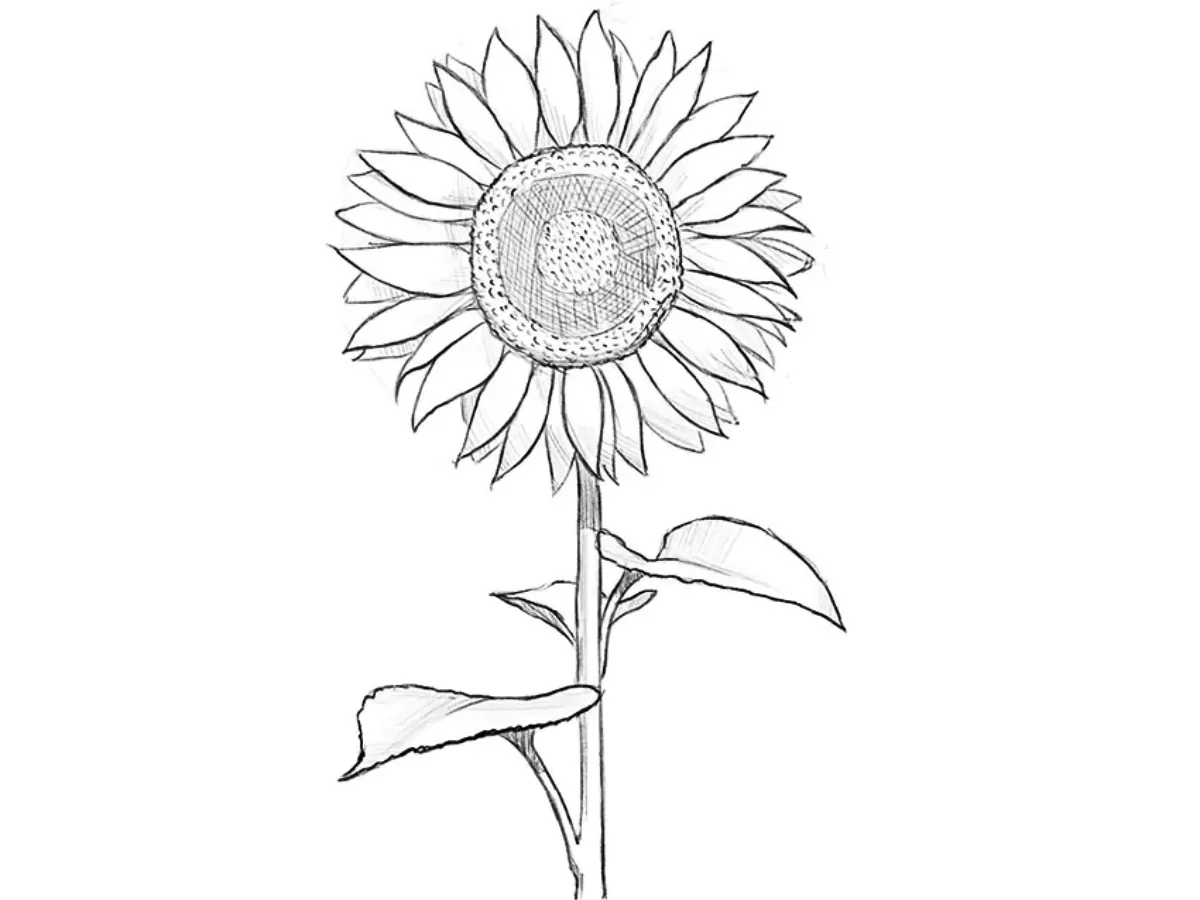
So, this drawing of a sunflower appears three-dimensional and fairly realistic. To achieve this effect, several techniques were used.
First, there is frequent use of shadows, which help create a sense of volume. For example, the shadow at the top of the stem indicates that the flower itself is positioned slightly closer to the viewer than the stem.
Also look at the shape of the sunflower leaves. In nature, there are no identical leaves that are perfectly parallel to each other. We tried to draw them with slightly different shapes and directions to make the sunflower look more natural.
What else is interesting here?
Of course, the arrangement of the petals. Don’t forget to check out my article on aerial perspective, I use it in drawing petals. The nearby petals look very detailed, clear and large. The back rows of petals are smaller in size and drawn in less detail.
How to draw a sunflower step by step
Step 1: Draw the base of the sunflower
First, draw the base of the flower and stem. Do not try to draw perfectly evenly and symmetrically – this is necessary so that you can imagine the approximate contours of the sunflower, the main shapes of the drawing, as well as the location on the sheet of paper.

Step 2: Draw the sunflower’s center
Second, draw the center part of the sunflower flower. These are several circles, each of which is inside the previous one. As I already wrote, there is no perfect symmetry in nature, so don’t draw perfect circles. Pay attention to the distance between the circles on each level.

Step 3: Draw the basic outlines of the petals
So, in this step we add the outlines of the future petals. It looks like lines that go from the center to the edges of the outer circle. Use light lines for this step, avoid any detailing – that will come a little later. An excellent way would be to draw a line not in a circle, but in opposite parts – top and bottom, left and right.

Step 4: Add the edges of the petals
In this step, finalize the edges of the petals to get the rough outline of the first row. Each petal should widen slightly towards the tips and then sharply taper to form a sharp tip. The petals don’t have to be perfectly shaped and they don’t have to be symmetrical.

Step 5: Draw the sunflower’s petal outlines
So, draw smooth rounded contours of the petals. This action places emphasis on the proximal parts of the petals. As a result, the petals should receive another narrowing – right at the junction with the flower.

Step 6: Detail the middle of the flower
Select one of the areas in the center of the flower using cross hatching. Draw one layer of shading in one direction first, and then add a second one that points in the opposite direction to form a cross. As you can see, the shading is quite dense and intense.

Step 7: Draw the contours of large sunflower seeds
Do not draw each seed separately – this is very labor-intensive. Draw the rounded outlines of several seeds, as in my example. You can arrange them in three rows, each one more distant from the center. The seeds should be spaced evenly – avoid clusters and empty spaces.

Step 8: Draw the very center of the sunflower
In the center of the flower, the seeds should be located more densely. Fill this small area with rounded dots. As with the last step, uniformity is very important. After this action you can see the realistic center of the sunflower.

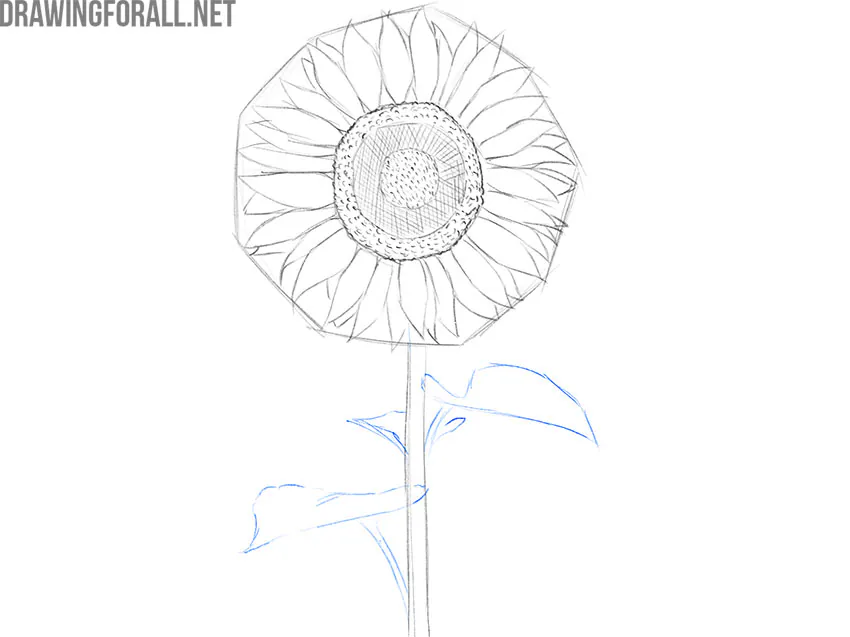
Step 9: Draw the basic sunflower leaf outlines
So, the leaves should have different contours and go in different directions. I decided to draw three leaves because this is optimal for a stem this long. The spacing between the leaves is not the same – try to make all distances and sizes unequal in all steps of drawing the leaves.
Step 10: Draw the stem of a sunflower in detail
The biggest mistake you can make here is to draw a perfectly straight stem with two parallel lines. Draw without the help of a ruler, mark small thickenings and narrowings as in my drawing. The stems that lead to the leaves are noticeably thinner compared to the main stem.

Step 11: Detail the outlines of the leaves
Draw curved outlines of the leaves that point in different directions. Note the shift in the center line on the two front leaves. Add small, not too intense serrations on the edges of the leaves. Also, draw the slightly folded edges of the leaf farthest from us.

Step 12: Erase the guidelines and trace the petals
So, now is a great stage to bring the petals to their final form. Draw only the front layer of the petals – the distant layers should be less clear to create the impression of moving away from us.

Step 13: Add shadows and highlights
To draw good shadows, first determine the exact location of the shadows. Then, draw approximate boundaries. This is a very important stage, because this is where we will form a three-dimensional image. The final step is to shade the selected areas. The densest shading is located on the stem.

Step 14: Finalize the sunflower drawing
Remove any extra lines and evaluate your drawing. Check the correct proportions and shapes, look at the entire sunflower drawing as a whole.

This sunflower drawing tutorial covered the main steps needed to draw a sunflower from start to finish.
Very similar steps are used when drawing flowers of different shapes, variations, and types. For example, we followed the same approach, with small differences, when teaching you how to draw a rose.
The same principles were also used in the lesson on how to draw a tulip.
In other words, drawing flowers usually follows similar patterns, where the artist applies basic drawing principles while adapting them to the specific shapes of a particular plant.
To learn more about drawing flowers and other plants, visit our dedicated Plants category, where you will find a lot of different beautiful and unusual objects to draw.