How to Draw a Dark Eldar
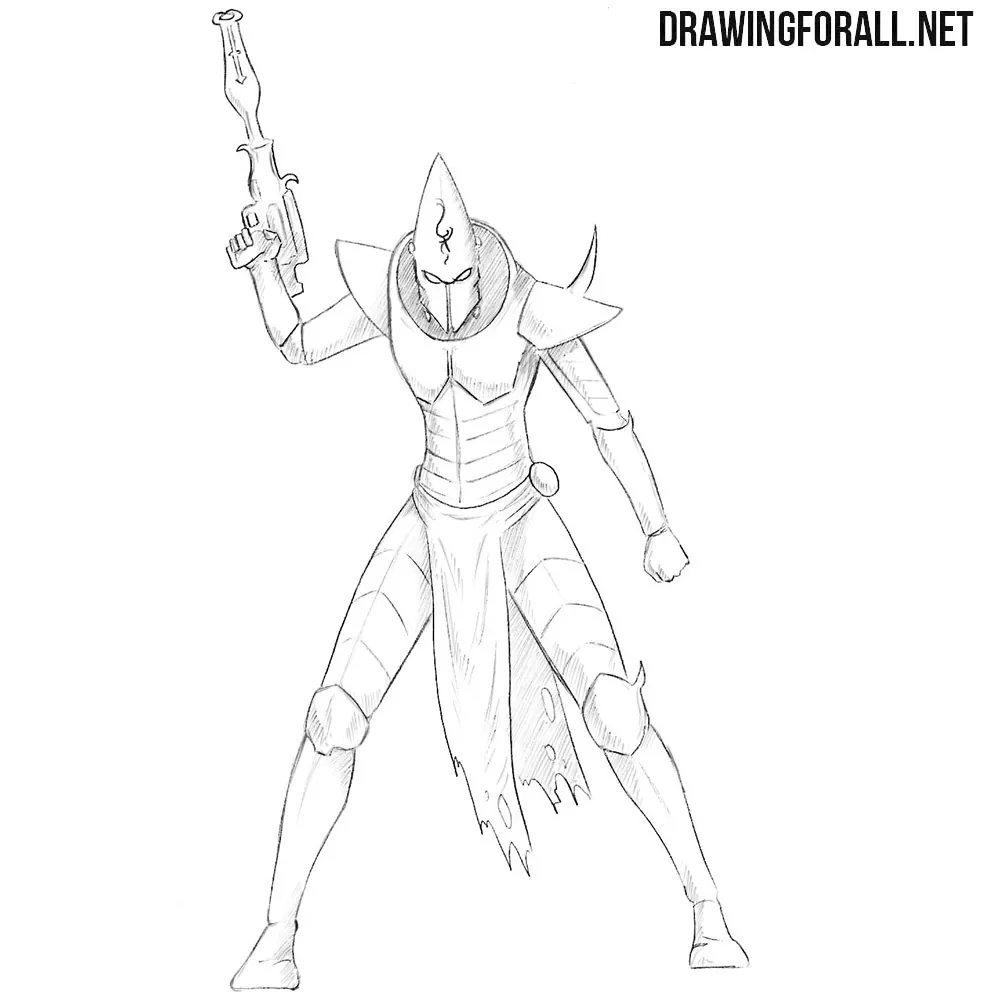
You probably know that the Eldar are the elves of the Warhammer 40,000 universe. That is why our Dark Eldar warrior will have long limbs and a slender body. This step-by-step tutorial will show you how to draw a Dark Eldar from the Warhammer 40,000 universe with his characteristic thin, elongated build and a weapon in his hands.
In our example, the character will be standing with his legs slightly apart and one arm raised with a weapon. But from the very beginning, you can indicate a different pose and try to adapt the steps of the tutorial to your own version.
How to draw a Dark Eldar step by step
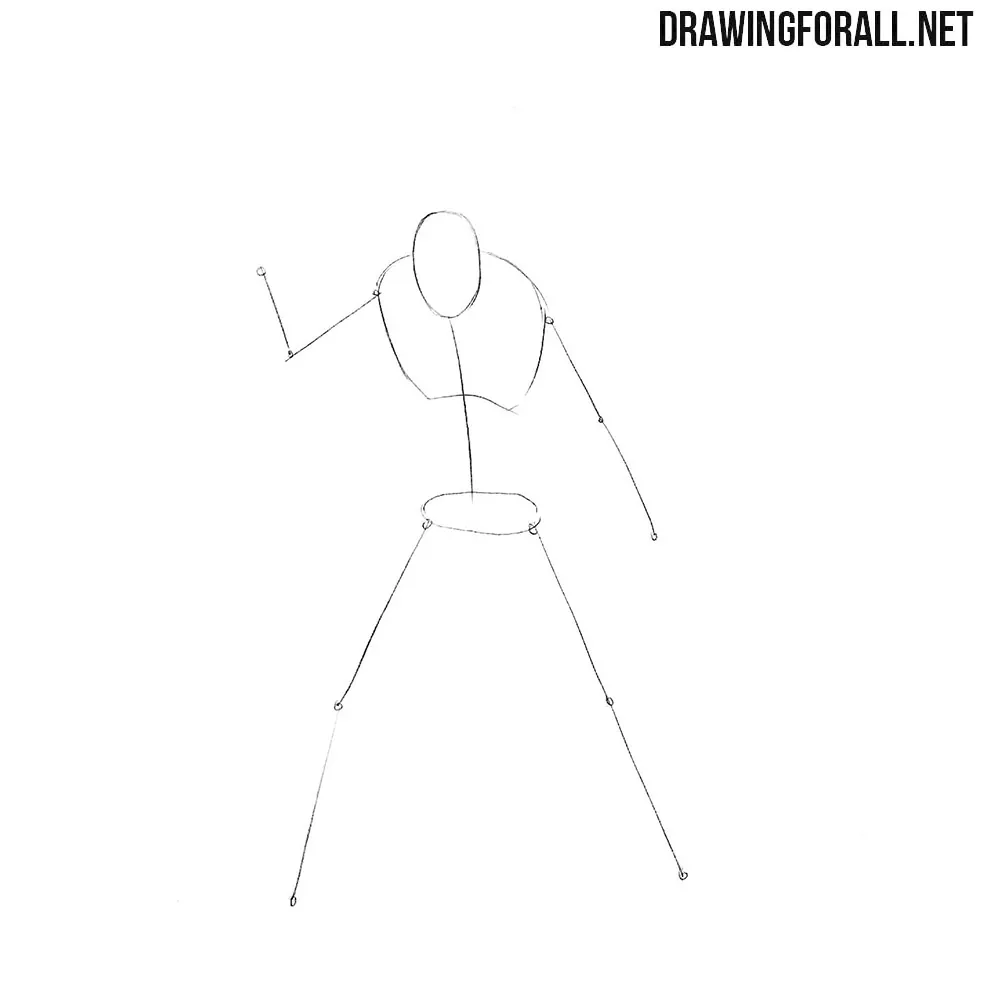
Step 1: Sketch the Dark Eldar figure
This Warhammer 40,000 character has a very tall figure, about eight head lengths in height. The pelvis and chest should both be narrow, with the chest wider than the pelvis. Keep the long limbs and slender build in mind from the beginning. The line running through the torso also sets the general gesture of the pose.
Step 2: Build the Dark Eldar’s body
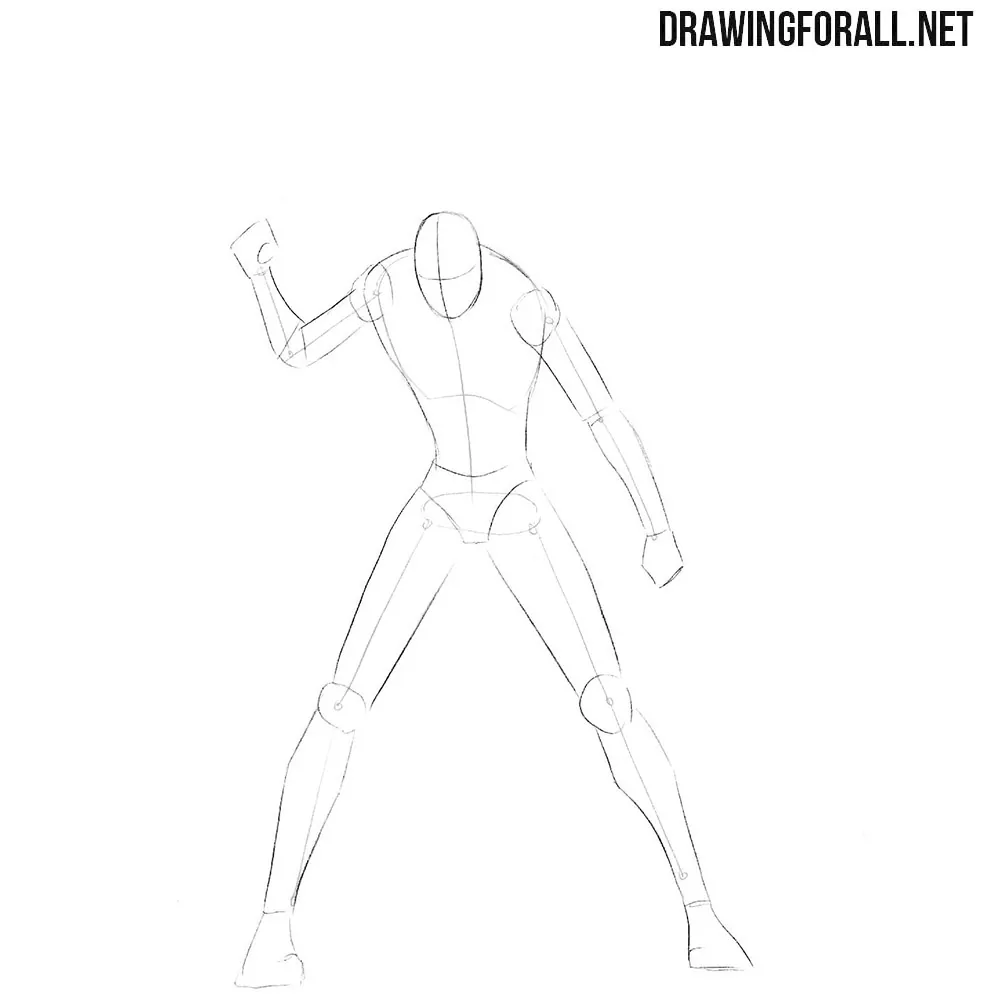
Draw an eye guideline across the head. Next, sketch the torso using simple geometric shapes. Use geometric forms for the arms and legs as well. Build the chest as a narrow tapered mass and mark the pelvis. Make the limbs long and thin, using elongated cylindrical forms. The neck is hidden from this angle.
Step 3: Sketch the gun and boots
With the Dark Eldar’s basic figure in place, add the equipment of our Warhammer 40,000 warrior. Sketch the gun in his right hand. Then move down and outline the tall boots.
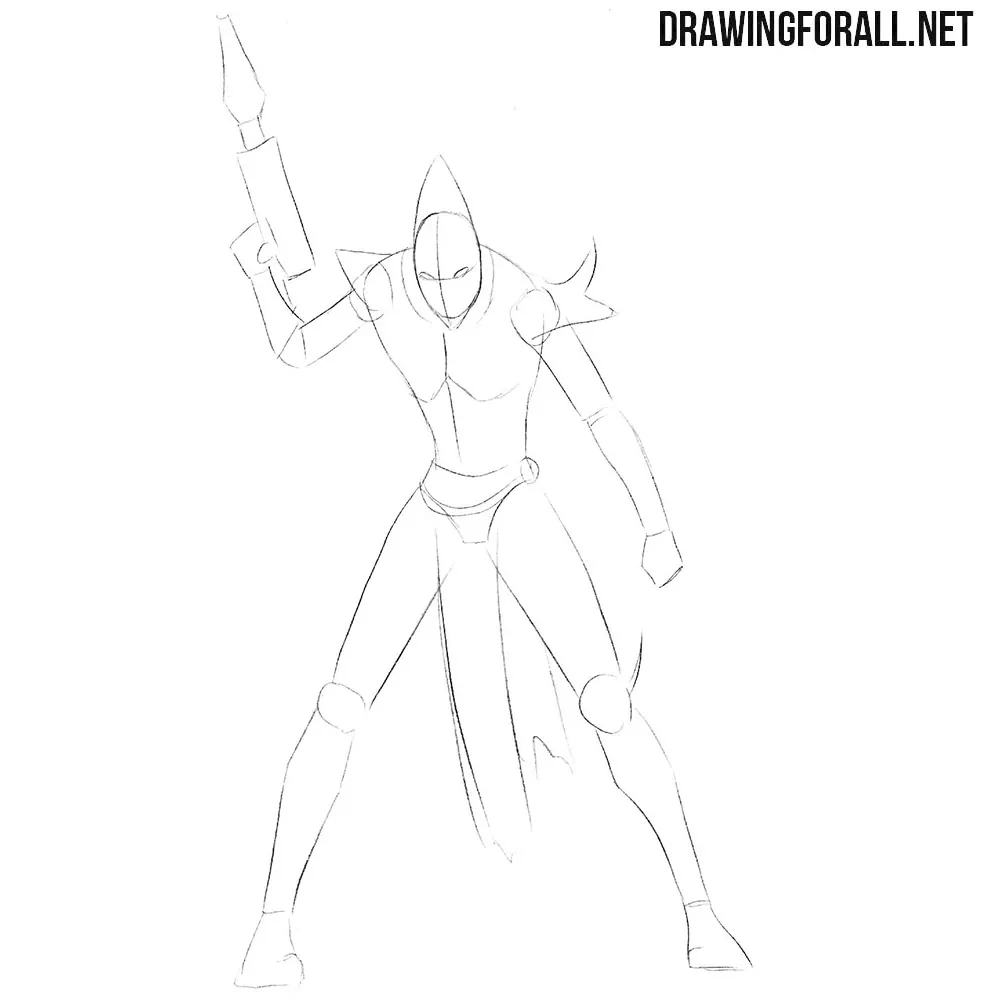
Step 4: Draw the Dark Eldar helmet
Draw the pointed helmet that completely covers the Dark Eldar’s head and face. Draw it as a long form built around the head, narrowing sharply toward the high pointed top. Outline the narrow eye lenses and the long vertical faceplate line running from the nose area toward the chin. Behind the helmet, draw the large rounded collar that frames the head and overlaps the upper part of the torso.
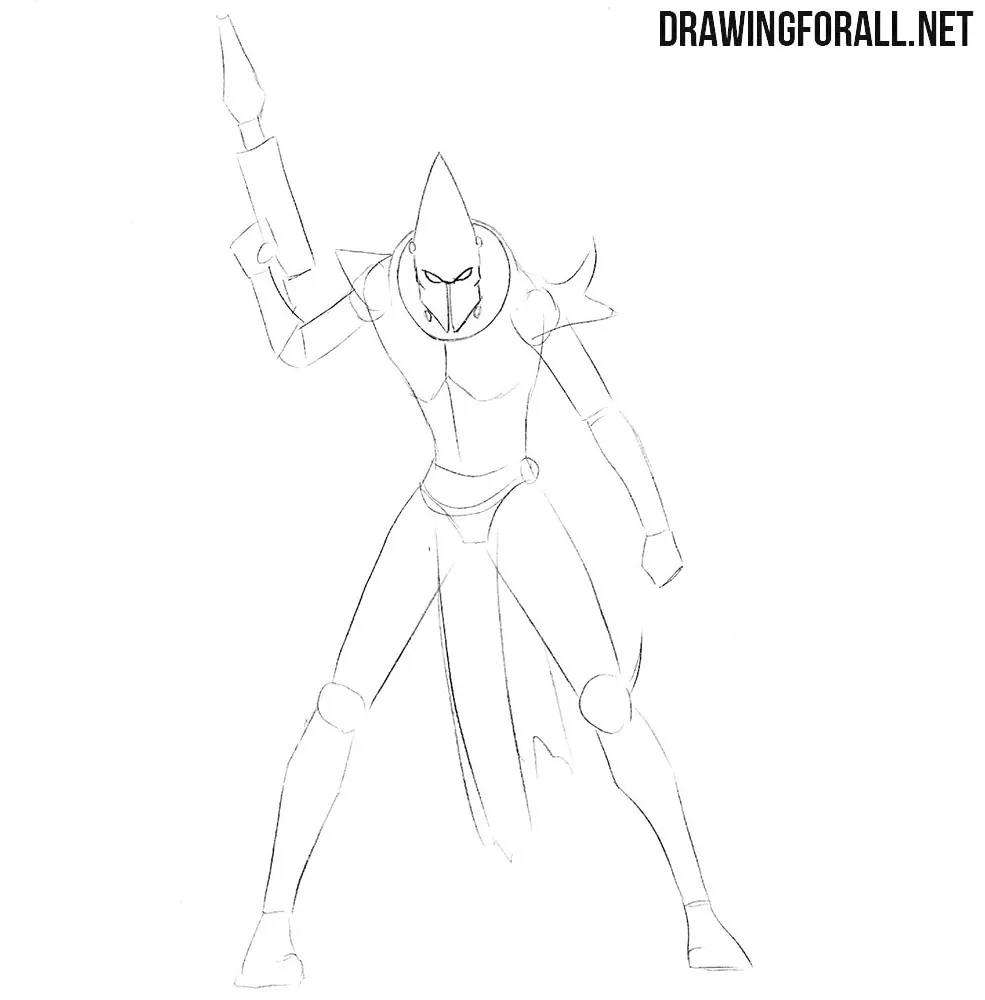
Step 5: Draw the torso armor plates
Now draw the Dark Eldar armor that protects the warrior’s torso. Add two large chest plates and the pointed shoulder armor on both sides. The shoulder plates project beyond the silhouette of the body. Then draw several smaller horizontal armor plates covering the abdomen. Erase all unnecessary construction lines from the torso.
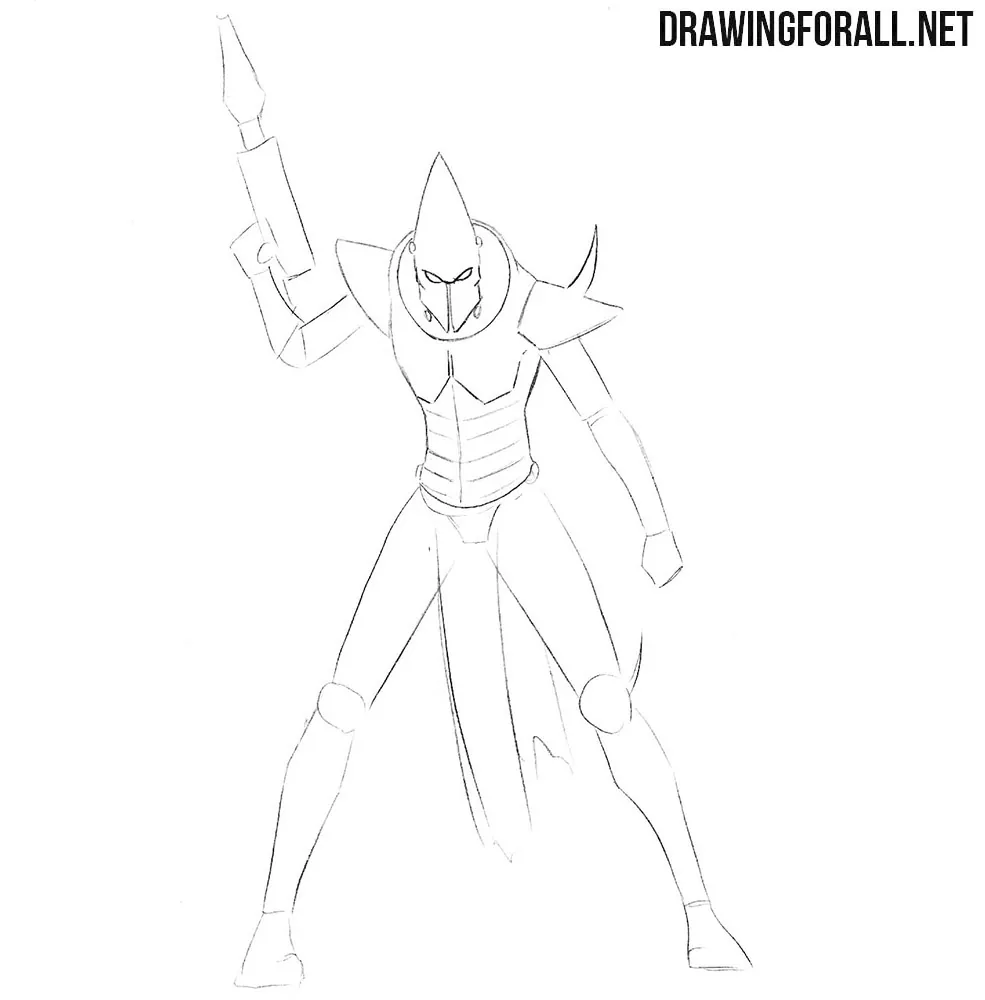
Step 6: Refine the armored arms and gun
The Warhammer warrior is armored from head to toe, so much of the underlying anatomy is covered by armor. Use curved and straight lines to draw the gun in detail in his right hand. Draw the fingers around the grip. Separate the main parts of the weapon with smooth contours. Draw his clenched left fist and refine the separate armor sections on the upper arms and forearms.
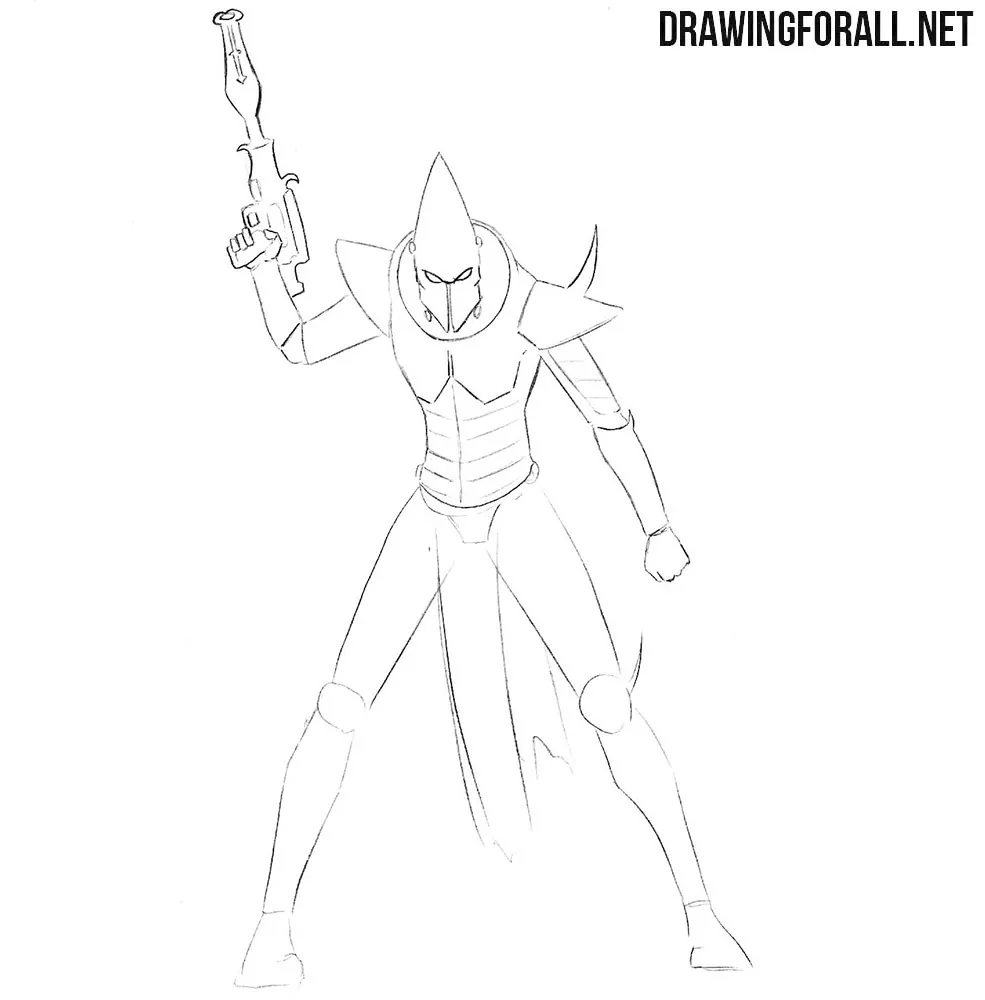
Step 7: Detail the belt and leg armor
Carefully draw the belt with its round buckle. Then refine the legs and add the knee armor and long shin armor. Place the knee plates directly over the joints. The long piece of fabric hangs from the belt in front of the inner parts of the legs. Its contours should overlap the leg armor. Draw the holes and torn edges in the long piece of tattered fabric hanging between the Dark Eldar’s legs.
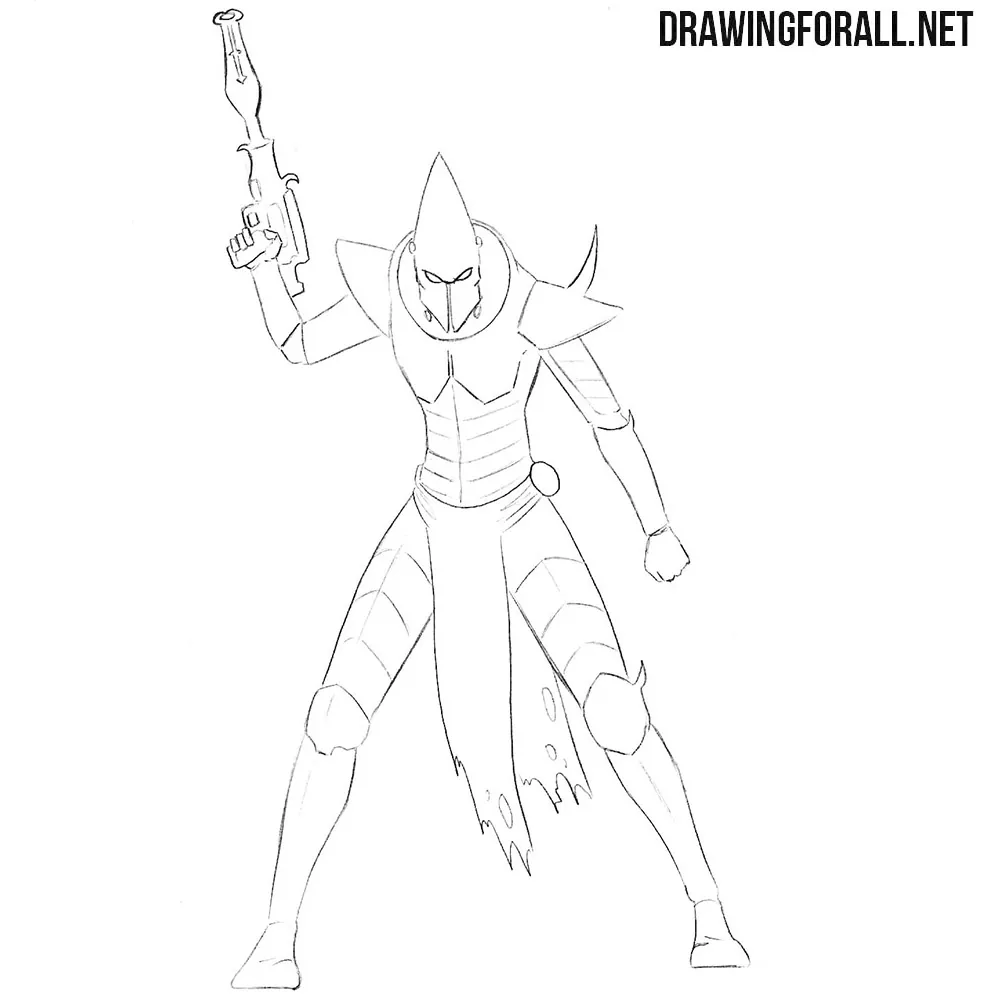
Step 8: Shade the Dark Eldar’s armor
The Dark Eldar drawing is almost finished, and we only need to add shadows. First, determine the light source. Then draw shadows using hatching on the helmet, armor plates, and fabric in the areas that receive the least light. Add deeper tone inside the large collar around the helmet, beneath the projecting shoulder plates, along the inner sides of the arms, and where the hanging fabric overlaps the legs. On the armor, change the direction of the strokes according to the plane of each separate plate. This tonal contrast will help separate the different armor sections and give the Warhammer 40,000 character more volume.
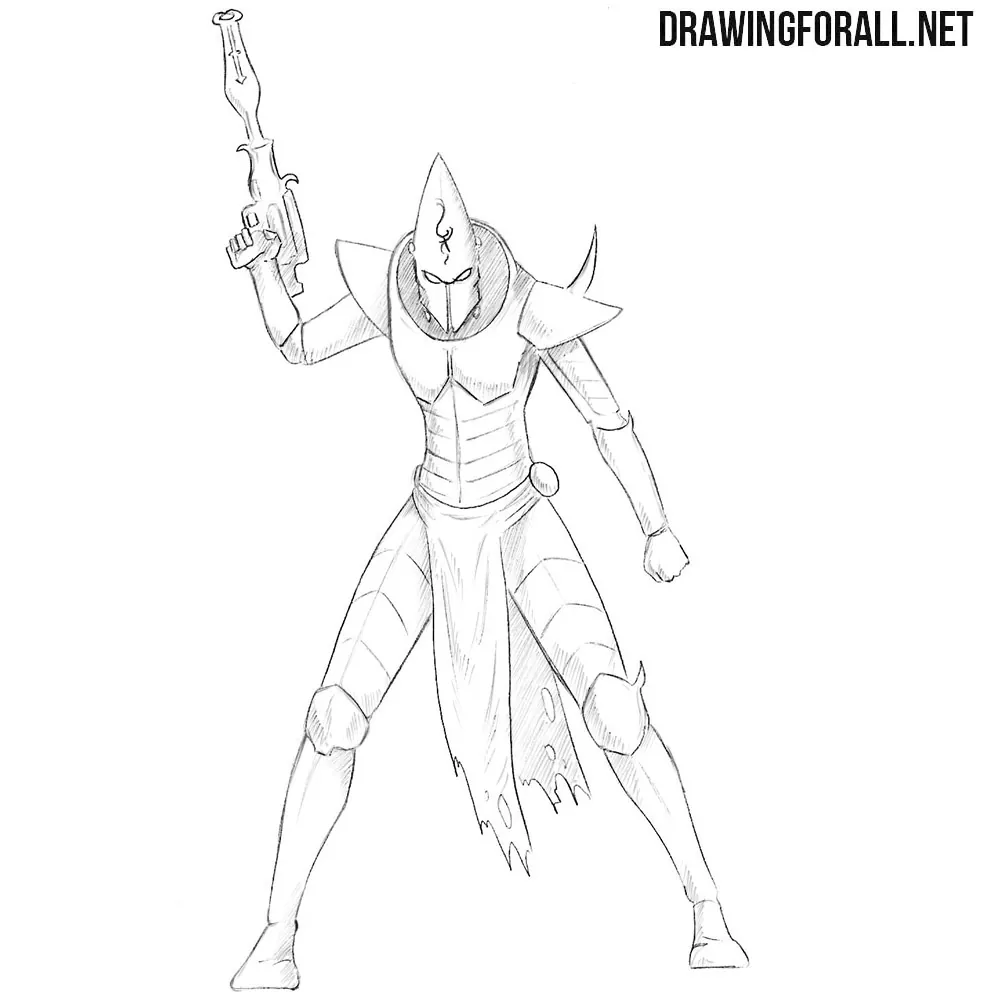
An Eldar from the Warhammer 40,000 universe has a fairly thin and elongated build, in contrast to the rougher and heavier build of the Orks. You can try drawing an Ork and notice that, despite the differences in details and body proportions, the overall sequence of steps will always remain the same.
This principle of constructing a drawing comes from the fundamentals of art and remains at the core whenever you create any drawing.
Using the same method, you can draw a Space Marine or any other character from this universe. Add the details you need and place the character in the most suitable pose. For references, you can use miniatures or simply images from the internet.