

How to Draw a Column

What do you think about the antique style in architecture? In fact, we’re talking about classicism. We love this style, and we hope you do too, because here we’ll show you how to draw a column.
Classicism is a beautiful architectural style characterized by symmetry, conciseness, and minimalist aesthetics. One of the most recognizable features of classicism is the presence of columns.
Such columns are a key element of studying academic drawing, as consistent practice allows for the development of many fundamental skills.
How to draw a column step by step
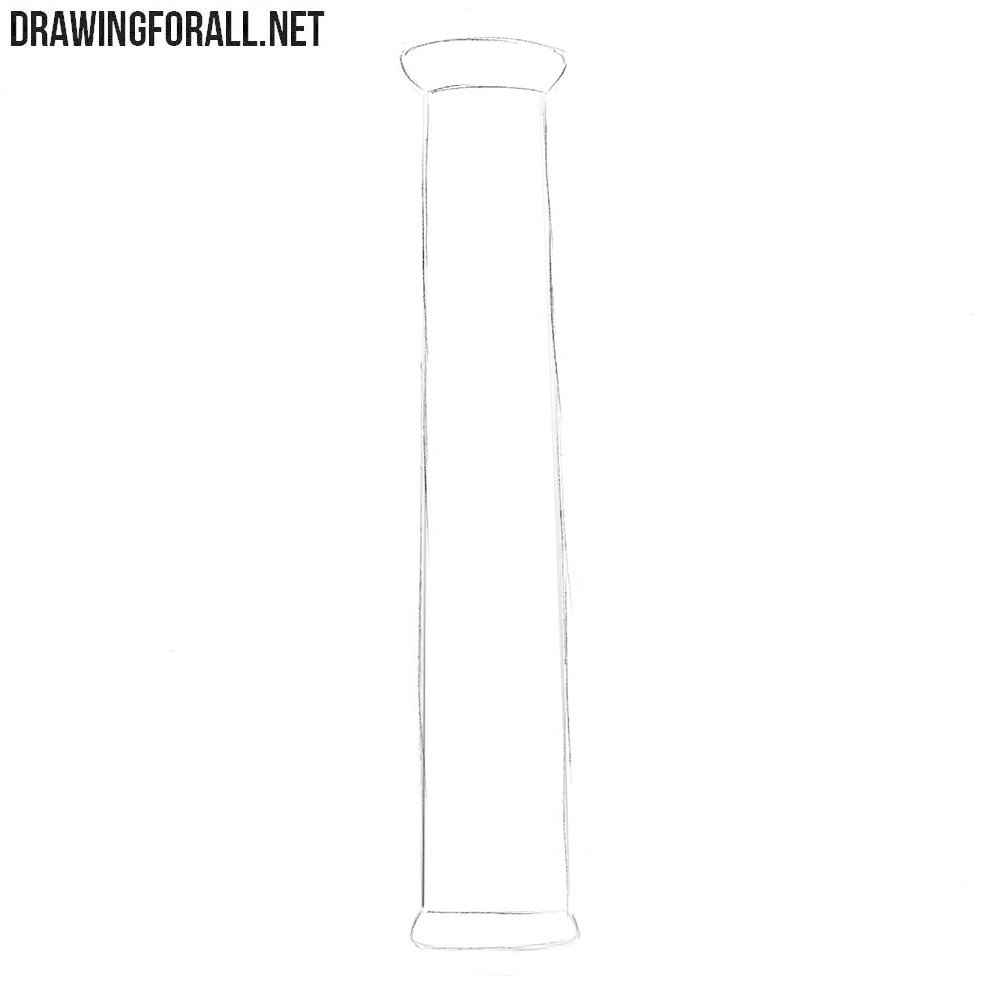
Step 1: Sketch the column shaft
Draw a tall rectangular shape for the main shaft of the column. Make its sides widen very gradually toward the bottom. In this tutorial, drawing without supporting tools is especially useful for developing accuracy and control. Try to create this shape without a ruler while keeping the sides as smooth and even as possible.

Step 2: Add the top and bottom
Draw flat horizontal forms at the top and bottom of the column shaft. The lower form should appear flatter and slightly wider than the upper one. As in the previous step, it is useful to draw these parts without a ruler or other tool. Keep the lines fairly smooth, but do not worry if they are not perfectly straight.
Step 3: Build the column bases
Now draw the rectangular sections of the upper and lower bases. Add these parts in layers, placing the wider rectangles outside the narrower forms drawn earlier. Clean lines and evenness are very important here. Ensure that the cubic shapes of the bases align with the linear perspective.

Step 4: Refine the shaft
Give the column shaft a clean, finished look by outlining it with crisp, distinct lines. Draw a small decorative ring near the top of the shaft, just below the upper base. This element adds another classical detail to the column, but you can leave it out if you prefer a simpler, more minimal design.

Step 5: Clean up the column outlines
Carefully erase the extra guidelines from the entire column drawing. Remove the parts of the shaft that are hidden behind the bases and decorative ring. Then refine the remaining contours, making the main outlines clean and clear. Check the edges of each rectangular section and correct any lines that look noticeably uneven.

Step 6: Add shadows to the column
You can leave the column without shadows, but shading will make the form appear more complete. Apply a narrow strip of light hatching along one side of the shaft. Leave a thin light area between this shadow and the outer edge of the column. Add smaller shadows beneath the projecting parts of the bases, then draw a cast shadow on the ground as the final touch.

You can use this tutorial when drawing a whole building with several columns. In that case, repeat the same basic forms while keeping the columns similar in height and width.
It is also good practice to repeat these steps while drawing a different type of column. For example, try drawing an Ionic or Corinthian column. Study reference images to see how Greek and Roman columns differ, then recreate them in your own drawing.
You can also draw a single column as a separate architectural study. In either case, we hope that you achieve an excellent result.



Thank you so much, this really helped me with drawing a roman house for school. Thank you
This was super helpful!! I love drawing pillars and it was super nice to learn from here. It turned out so good and my son loved his drawing of a dang pillar. Thanks!! This was supeerrrrrrrrrrrr 😉 helpful. *wink* *wink* Thanks!