

How to Draw a Cartoon Monkey
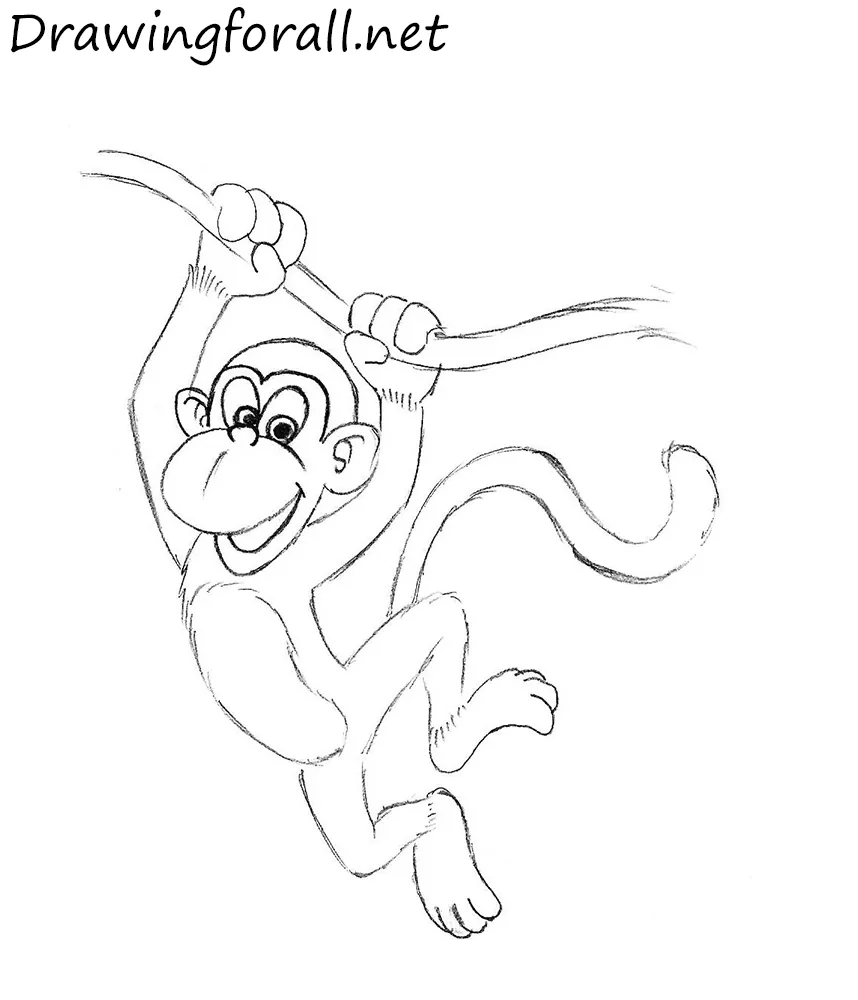
On our site, we continue to create drawing tutorials for beginners and children. Here, we have prepared a very simple tutorial focused on how to draw a cartoon monkey for kids.
Looking at monkeys cheerfully playing with one another, it can be difficult to believe how much we have in common with them.
According to evolutionary theory, humans and other apes share common ancestors. So, let’s start drawing.
How to draw a monkey for kids step by step
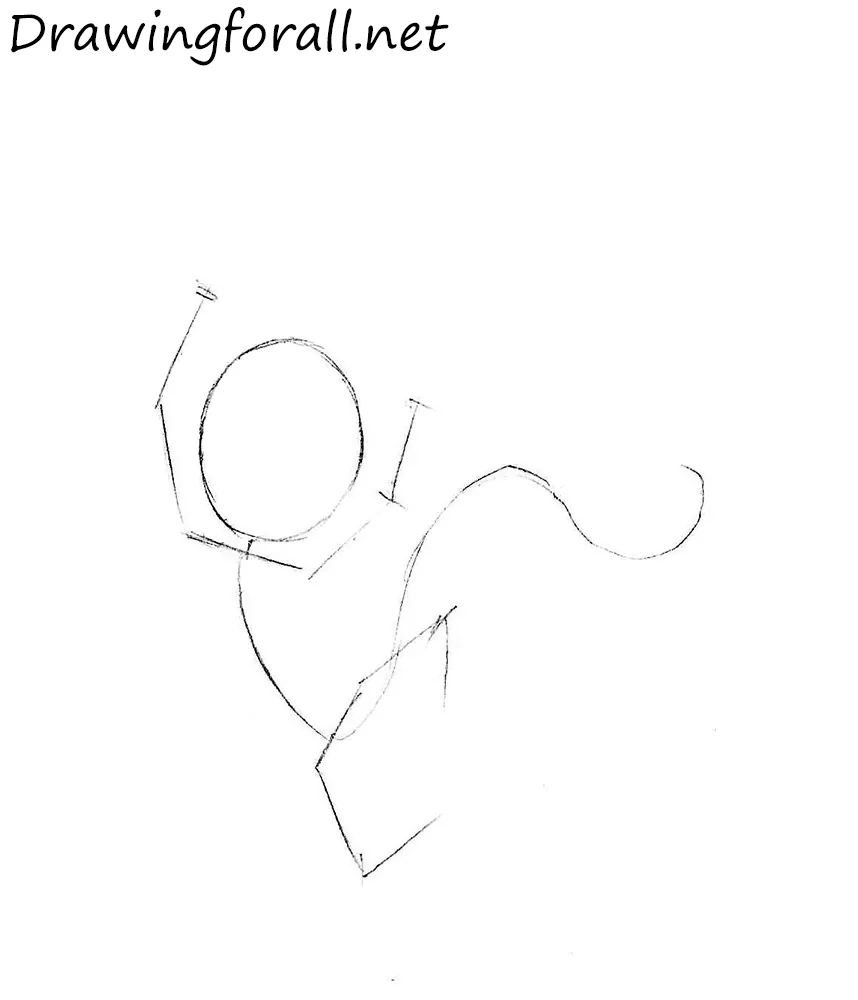
Step 1: Sketch the basic figure
From an artist’s perspective, drawing a monkey is very interesting. Even in this cartoon drawing, you can see similarities between humans and monkeys. We have already drawn animals such as cats, cows, and rabbits, but a monkey’s proportions are much closer to human proportions. First, sketch the monkey’s head as a circle. Then add the spine, which smoothly extends into the tail, using a curved line. Use short, straight lines for the arms and legs. Keep the lines light and smooth so the guidelines will be easy to erase later.
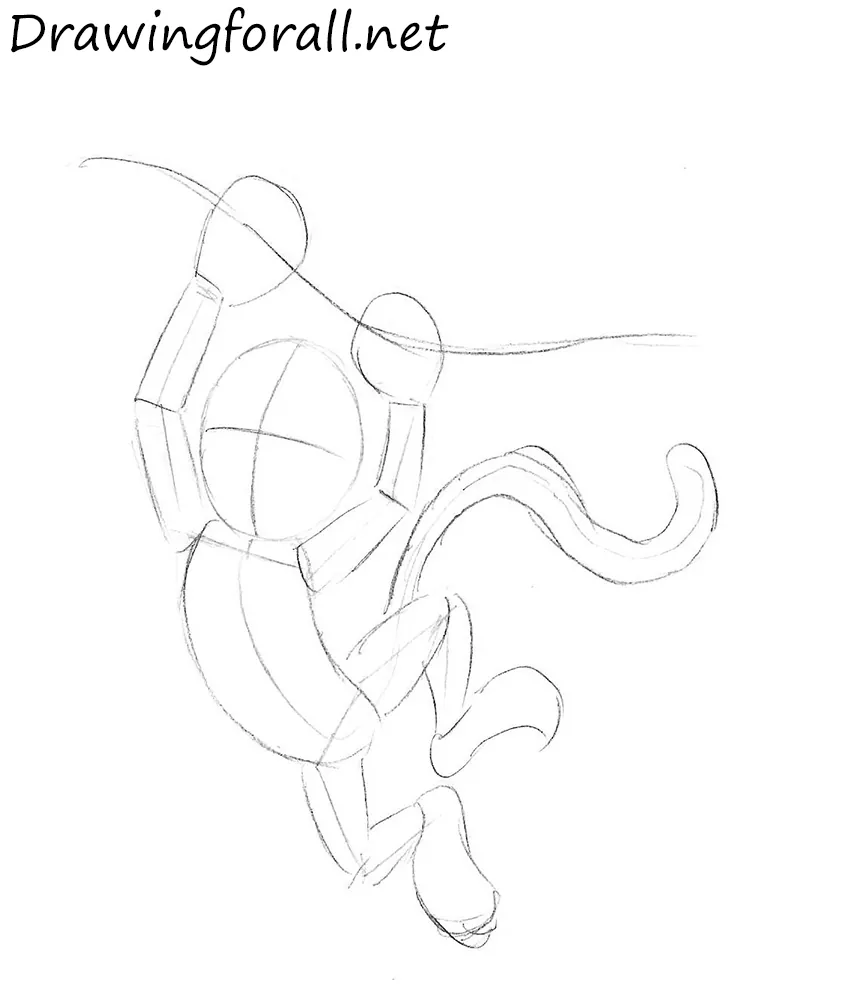
Step 2: Build the monkey’s silhouette
Now turn the monkey’s stick figure into a silhouette. Begin by marking the head with two perpendicular lines, one vertical and one horizontal. The slightly curved vertical line marks facial symmetry, while the horizontal line indicates the position of the eyes. Their curves show that the head is raised slightly and turned. Divide each arm into three clearly distinguishable parts: the upper arm, forearm, and hand. Use an elongated, curved shape for the torso. The legs also consist of three parts: the thighs, shins, and feet. Form the tail with smooth, curved lines.
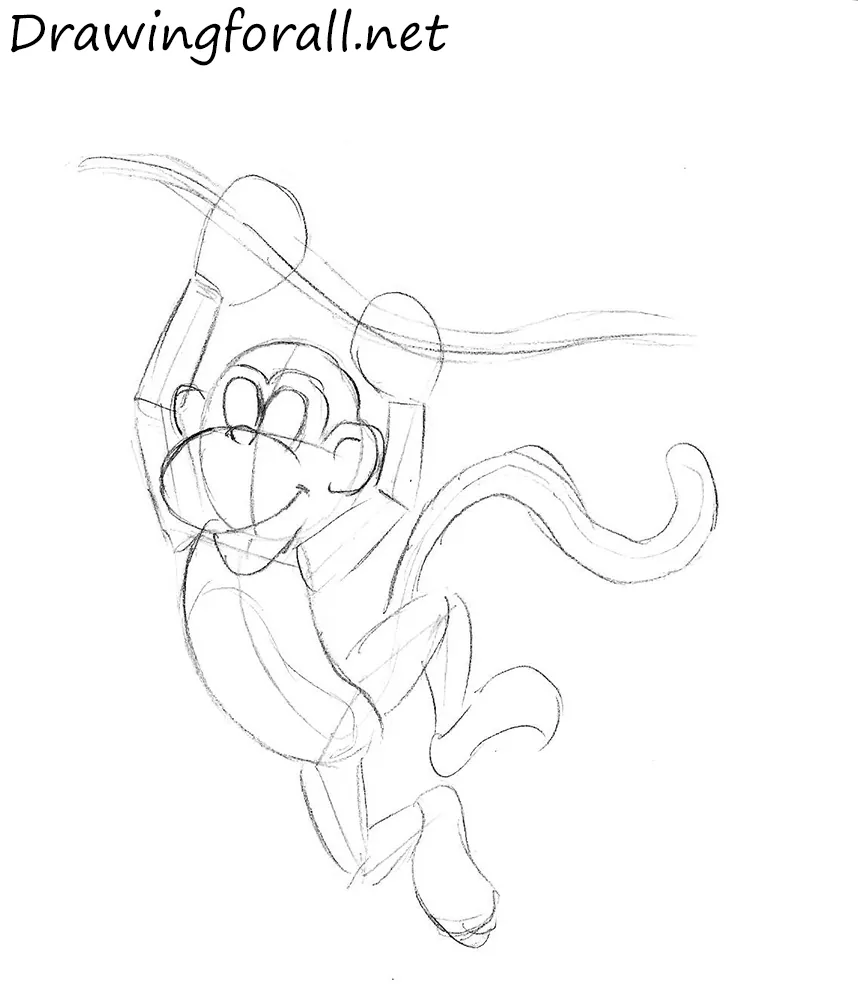
Step 3: Draw the facial features
Work on the face of the cute monkey. Using the facial guidelines, begin by drawing the cartoon eyes as two elongated ovals. Add the ears as two half-ovals, then outline the mouth. Draw the cartoon eyebrows above the eyes of the monkey in the shape of the letter M. As in human facial proportions, the upper edges of the monkey’s ears are level with the eyebrows, while the lower edges are level with the nose. Similar monkey faces appear in many cartoons.
Step 4: Refine the monkey’s face
Erase the extra lines from the head and refine the remaining contours. Add the inner ear details and sketch the small nose. Place the pupils carefully because their position determines the direction of the gaze. Also add the vertical curved line beneath the nose.
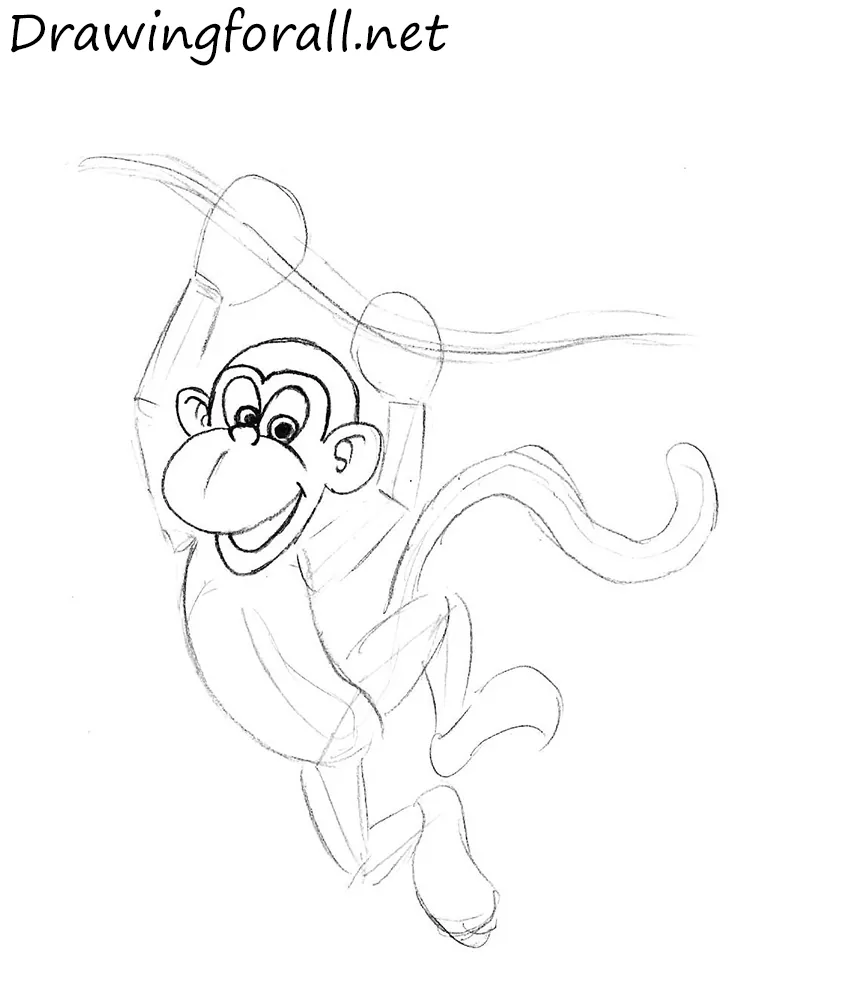
Step 5: Add the vine and hands
Outline the vine and continue by drawing the monkey’s hands and fingers. Pay close attention to their shapes and positions because they must clearly show the monkey gripping the vine. Use a few short lines to indicate the fur ending at the wrists. Erase the remaining guidelines.
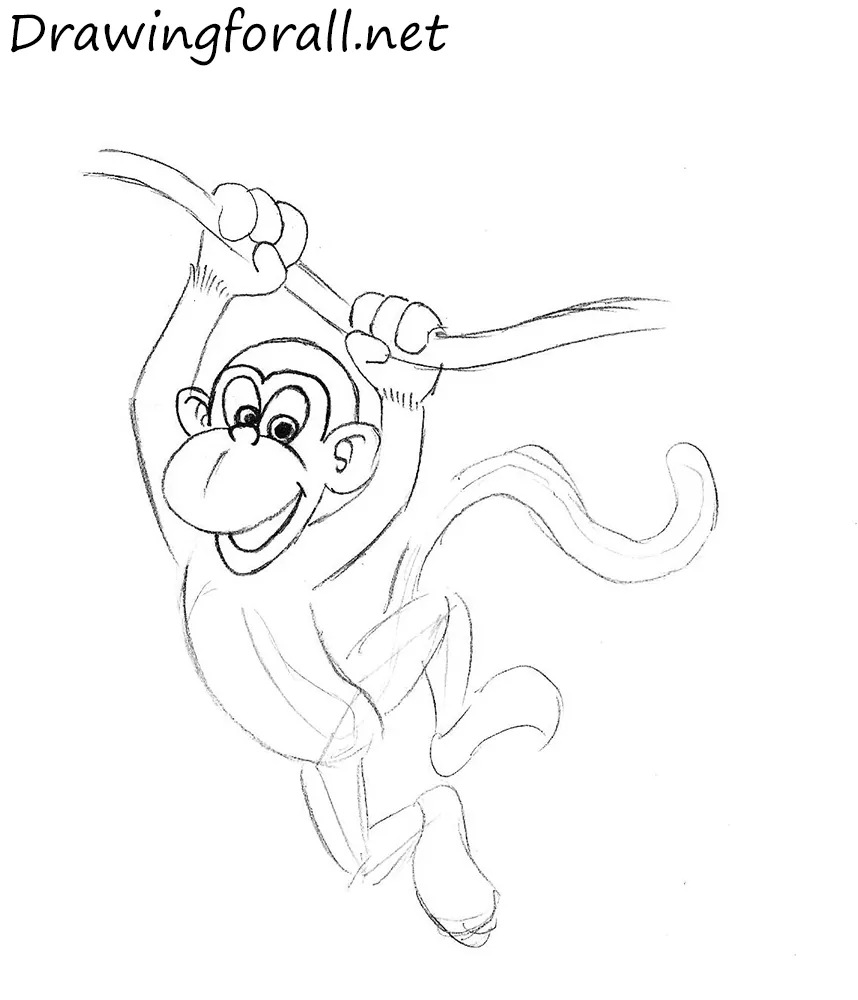
Step 6: Refine the cartoon torso details
Refine the torso as in the previous steps. In the center, add an elongated oval shape to indicate the lighter area of the belly.
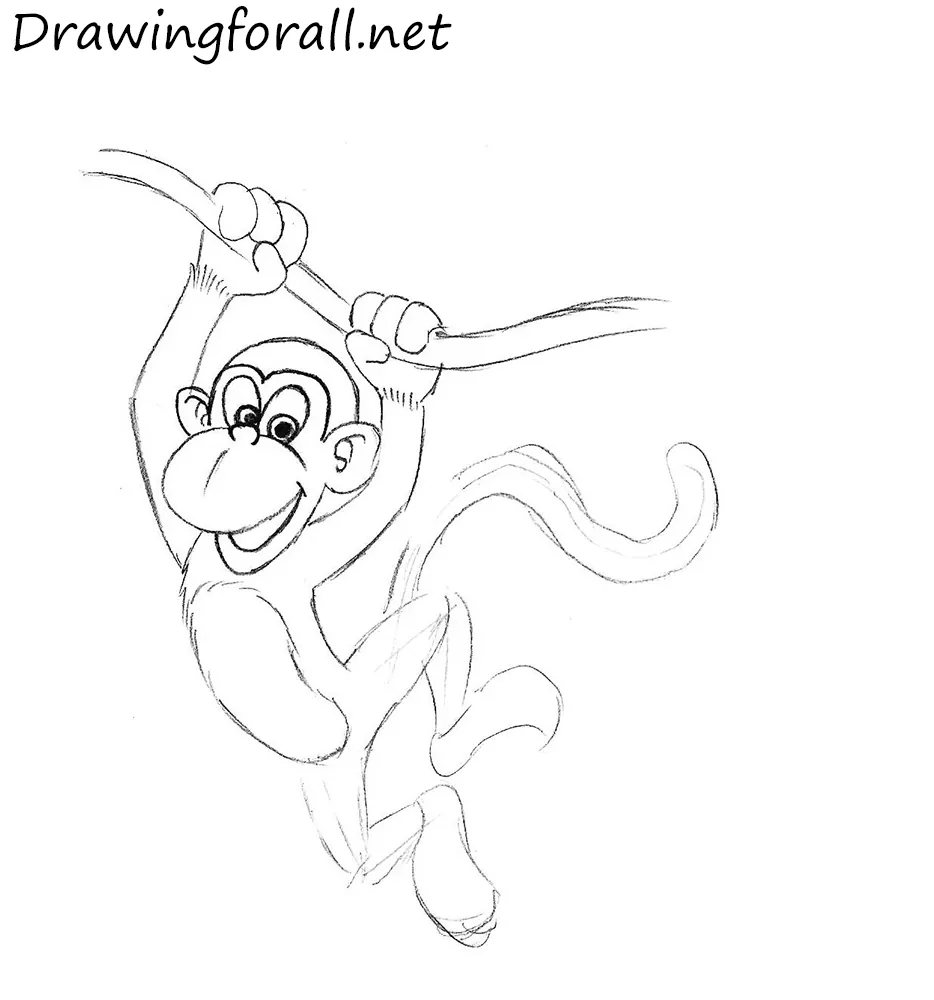
Step 7: Finish the monkey legs and tail
Complete the cartoon monkey drawing by refining the legs and tail. Examine the finished monkey and erase all excess lines and unwanted marks. Add the final touches to complete the drawing.
This drawing tutorial was prepared for you by the artists of Drawingforall.net. If you’d like to explore more easy step-by-step tutorials, be sure to visit our collection of cartoon drawing tutorials. There you’ll learn the fundamentals of this style while drawing characters from both classic and modern animated series.




Awesome stuff! Make an elephant though please!
Love this! Make a bow AND arrow and a scary clown
freeking awesome bruz
flopping dooly awesome bruz
nice