

How to Draw a Campfire
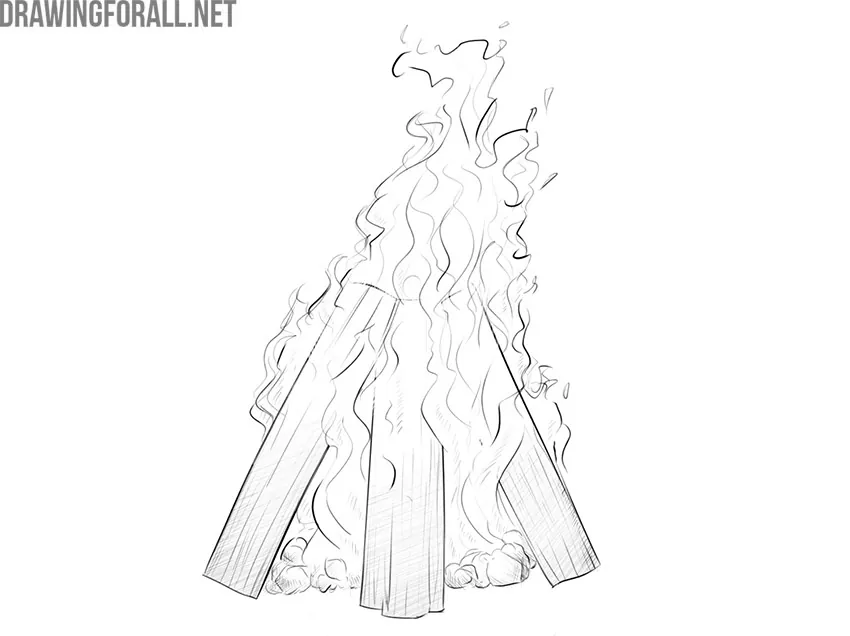
Do you like hiking? One of the best things about a camping trip is a campfire. It is often around the campfire that the most interesting conversations take place. That is why we created this tutorial on how to draw a campfire.
In general, a campfire is a fairly complex visual object consisting of many small elements. But an artist’s task is to be able to simplify objects, removing unnecessary details and keeping the important ones. In this tutorial, we’ll show you how to do this and create a convincing campfire drawing with a pencil on paper.
How to draw a campfire step by step
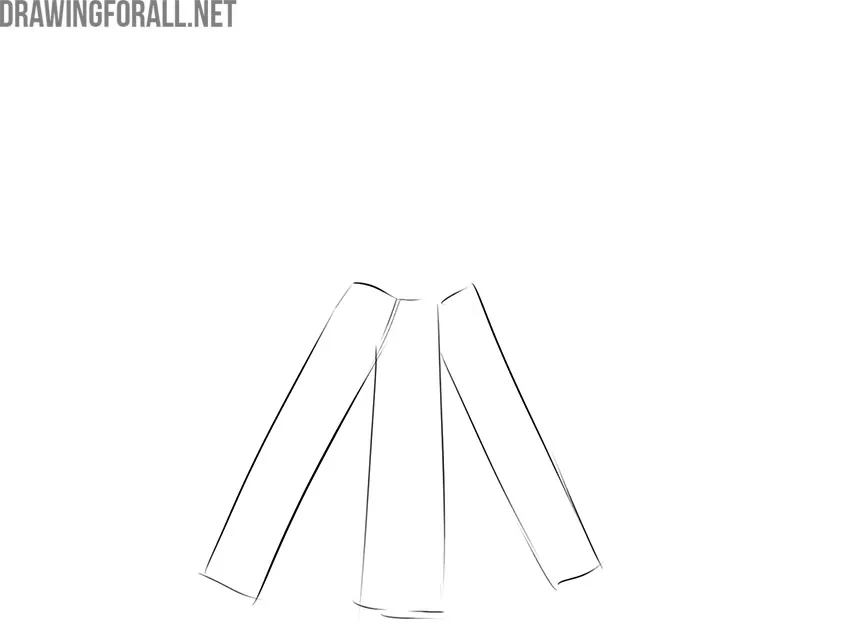
Step 1: Sketch the firewood
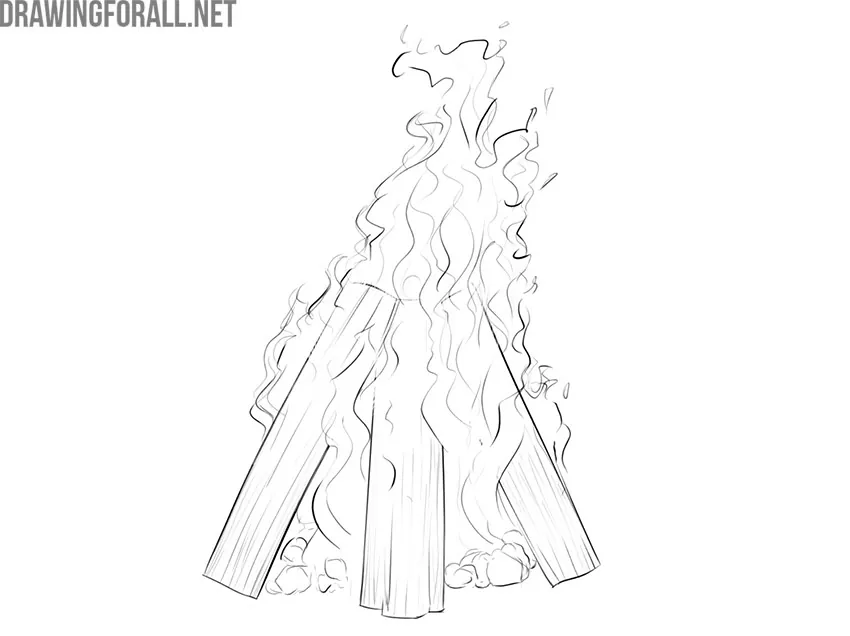
First, outline the location and shape of the firewood. In our case, these are three large logs that meet near their upper ends. You can choose any shape and thickness for the logs in your drawing. Do not make their contours perfectly straight, since slightly uneven lines will make the firewood look more natural.
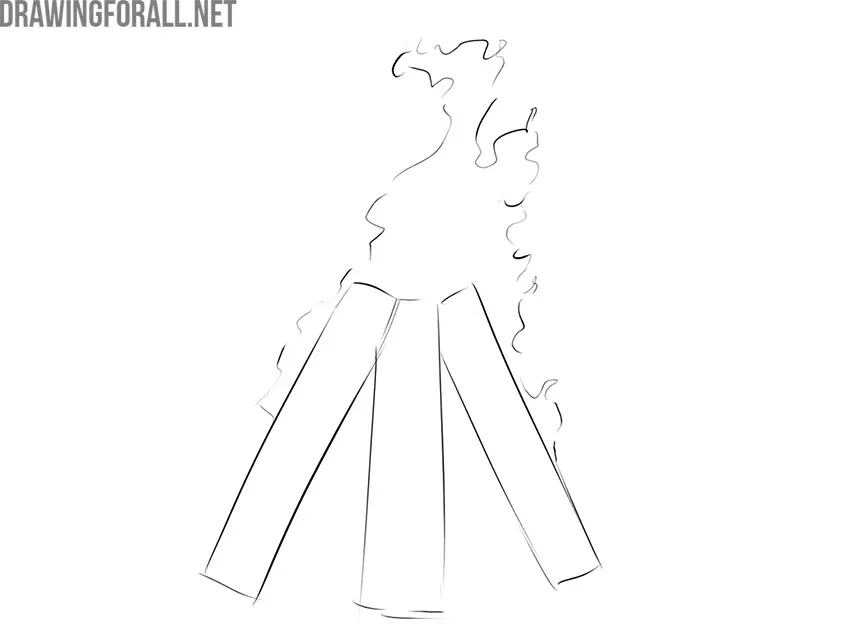
Step 2: Outline the flames
Now roughly outline the flames above the logs. If you make the flame too large, the campfire may look unnatural. Use short, wavy lines to create an irregular outline, and keep the pencil pressure light so these initial contours are easy to refine later.
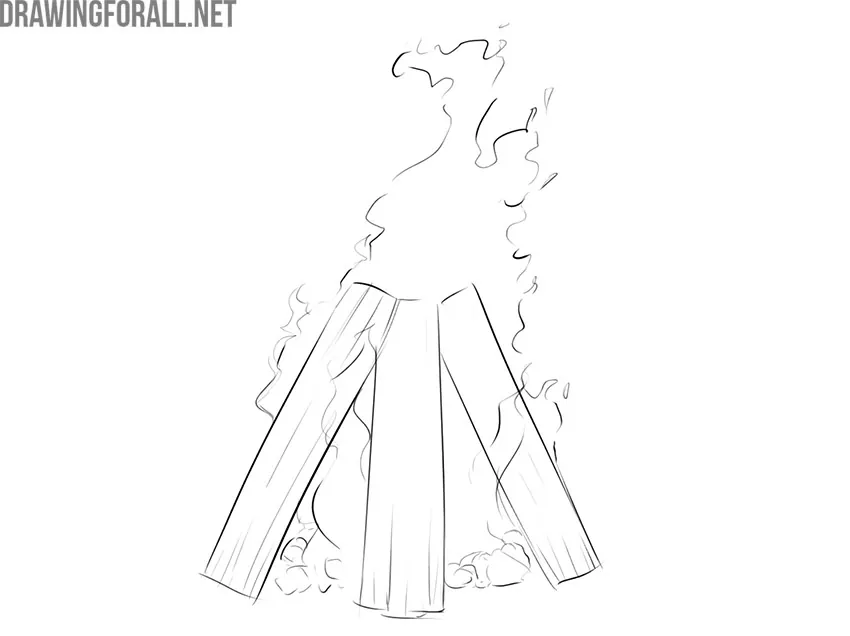
Step 3: Add the wood texture
Now that the main shapes are in place, we can work on the details. Add a wood texture to the firewood using short lines that generally follow the edges of each log. These lines should be slightly uneven rather than perfectly straight. Do not add too many of them.
Step 4: Detail the flames
Now add the details inside the fire. Draw several smooth, curved lines within the flame outline from the second step. These inner shapes will help divide the fire into separate tongues of flame.
Step 5: Add light and shadows
Fire can be difficult to draw because it involves both light and shadow. We will not add complex shading here, but we should show the basic effect of the fire as a light source. The parts of the firewood closest to the flames should remain the lightest. Avoid heavy hatching or dark shadows in the areas directly next to the fire.
It was a pretty short drawing guide. We hope you get a great result. Do not forget to leave your opinions about our work on our social networks or in the comments directly under this post. This is the best reward for our work.



This was actually a really cool tutorial. I still struggled with making it look good, but it’s WAY better than anything i would have done without the instructions. They thought of things i definitely would have forgotten, like the ombré shading on the logs.