How to Draw a Cat

This lesson will show you how to draw a cat step by step in a realistic, three-dimensional style using simple techniques.
Our team really enjoys drawing cats, so we made an effort to make this lesson in a way that helps you create convincing drawings of these animals.
We decomposed the process into the exact steps we personally use when drawing cats, and at the end we show where and how to add shading so the entire drawing appears three-dimensional and realistic.
For further practice, we also include several additional variations and exercises after the main lesson.
How to draw a cat step by step
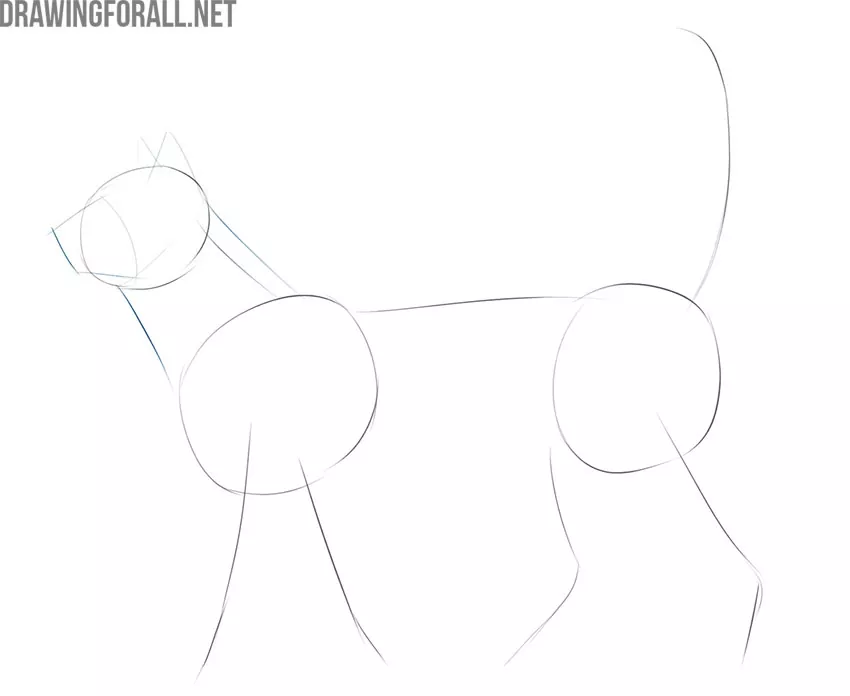
Step 1: Sketch the head and body guidelines
To build an authentic, realistic figure of a cat, you first need to sketch the basic forms that will support the entire drawing. Start by outlining the head as a circle, then draw a long line to indicate the spine. Along this line, mark the shapes of the ribcage and the pelvis.

Step 2: Mark the positions of the limbs
Next, sketch the front legs using a pair of long, smooth lines extending from the ribcage. Then outline the hind legs with slightly more curved lines coming from the pelvic area. Notice that the front and hind legs differ subtly in their curvature and structure.

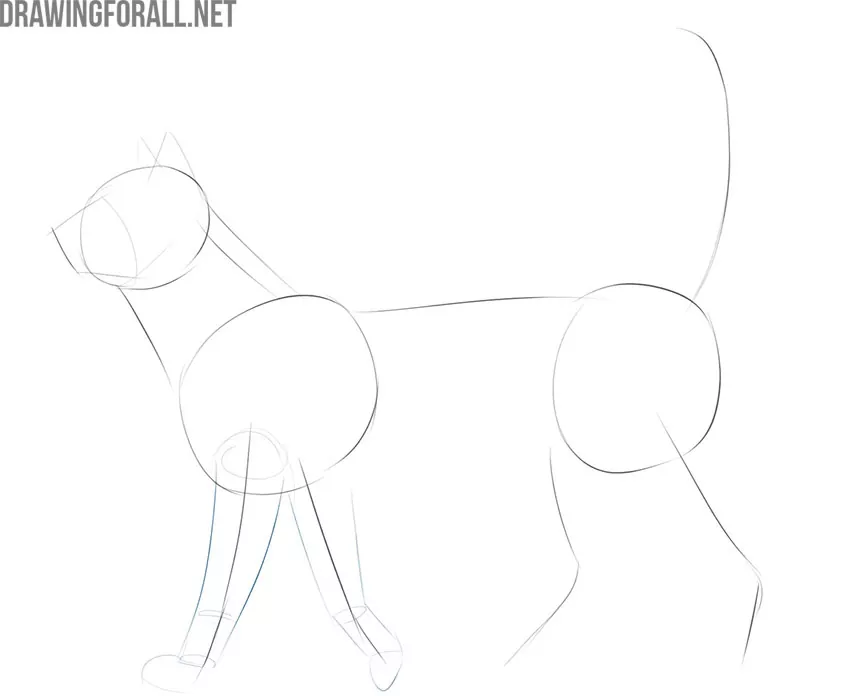
Step 3: Draw the muzzle and neck of the cat
Now gradually begin adding the main forms and volume, starting with the head. Remember that we are building three-dimensional shapes, so sketch a cylindrical muzzle on the front of the cat’s head. At the top, add the triangular ears. Use a pair of simple lines to indicate the neck, slightly widening as it moves from the head toward the torso.
Step 4: Add volume to the front legs
Next, build up volume on the front legs by adding mass around the guidelines you sketched earlier. Carefully define the natural bends of the legs and the shape of the paws. The front legs should gradually taper as they move downward.
Step 5: Connect the torso and mark the tail
Connect the ribcage and pelvis with a few simple lines to form the torso. At the back, draw the tail of the cat, using the guideline from the earlier step as a reference axis. Cats have very flexible tails, so you can adjust the curve to suit your composition.
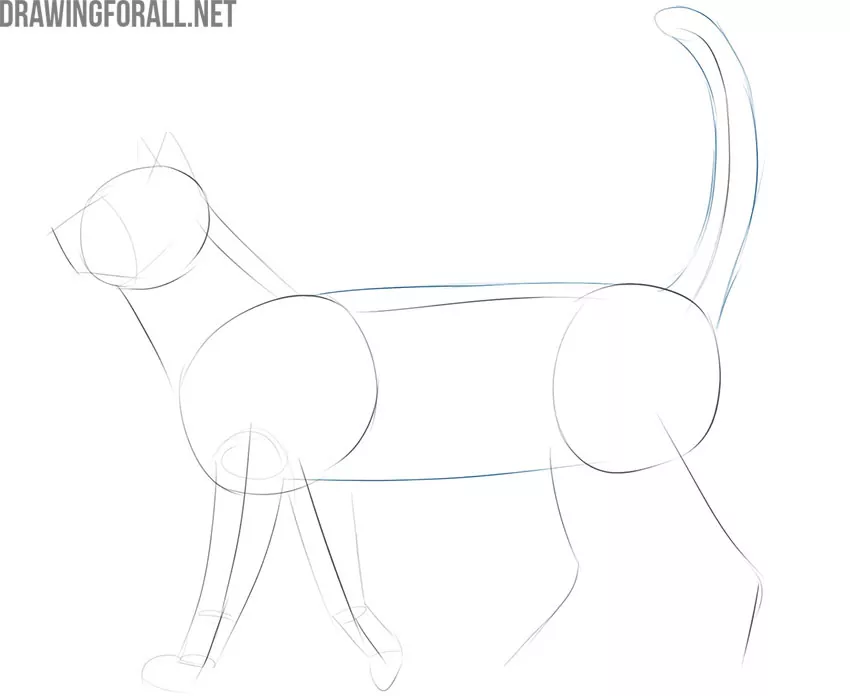
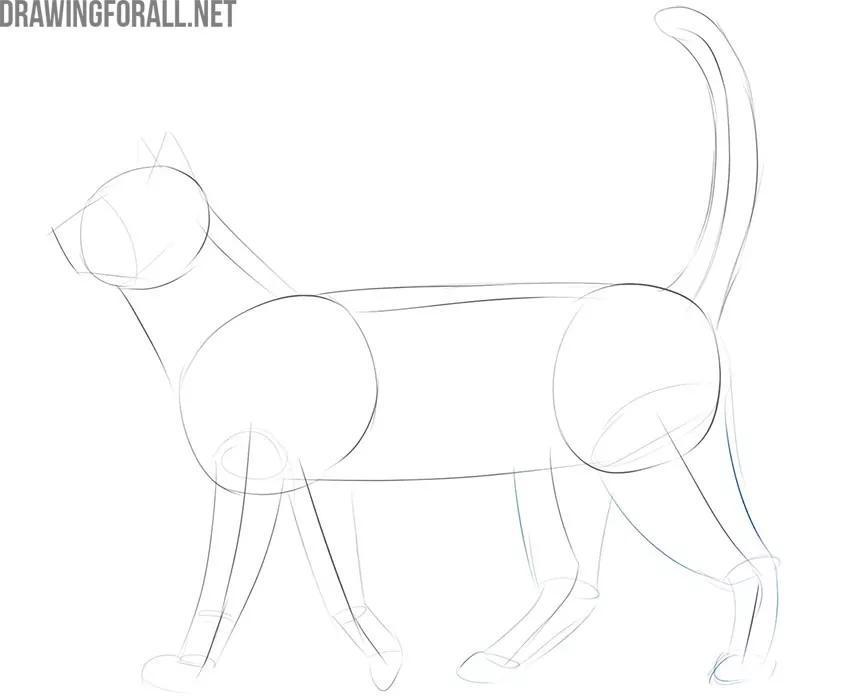
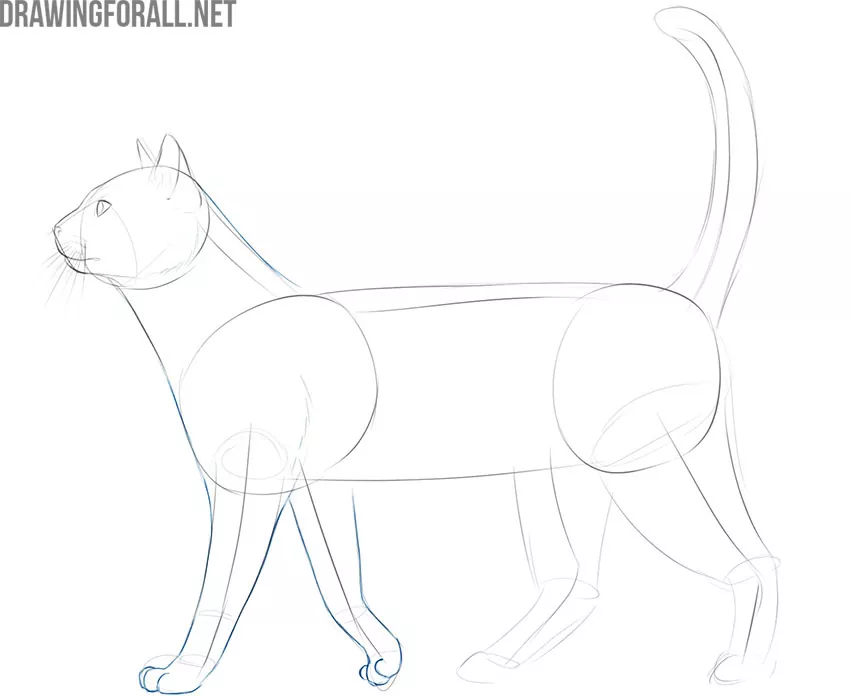
Step 6: Build the hind leg volume
To construct the hind legs, first outline the upper portions, which are noticeably more massive and rounded than the front legs. Then draw the narrowing middle and lower sections of the cat legs, ending with the paws shaped like two compact forms.
Step 7: Draw the outline of the cat head
Now begin refining the final details, returning to the head first. Use confident lines to draw the cat’s head in detail, shaping the muzzle, nose, and mouth. Trace and clarify the outlines of the ears, adding a few lines to indicate the inner structure.

Step 8: Draw the cat eye and whiskers
With several smooth strokes, draw the cat’s eye and a small pupil inside it. On the front of the muzzle, add the whiskers using a series of gently curved lines. Check the overall proportions and the accuracy of the facial features before moving on.

Step 9: Refine the neck and front legs
Using smoother, more refined lines, carefully trace the cat’s neck. You can add a bit more fur texture with short, light strokes. Then outline the front legs with clean lines and indicate the toes on the paws. Again, pay close attention to the structure of the cat’s paws and toes as you draw them.
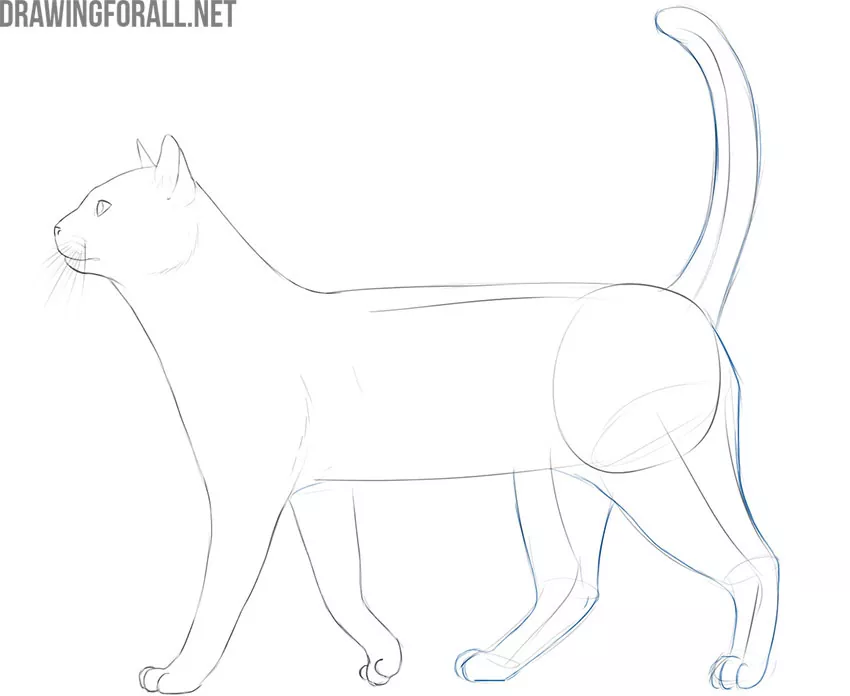
Step 10: Draw the hind legs of the cat in detail
Give the cat’s tail a more finished look by refining and correcting the shape if necessary, making the form smoother and more natural. Using similarly smooth lines, trace the hind legs, adjusting and clarifying the details as needed. Add the outlines of the toes with a few short, gentle strokes.
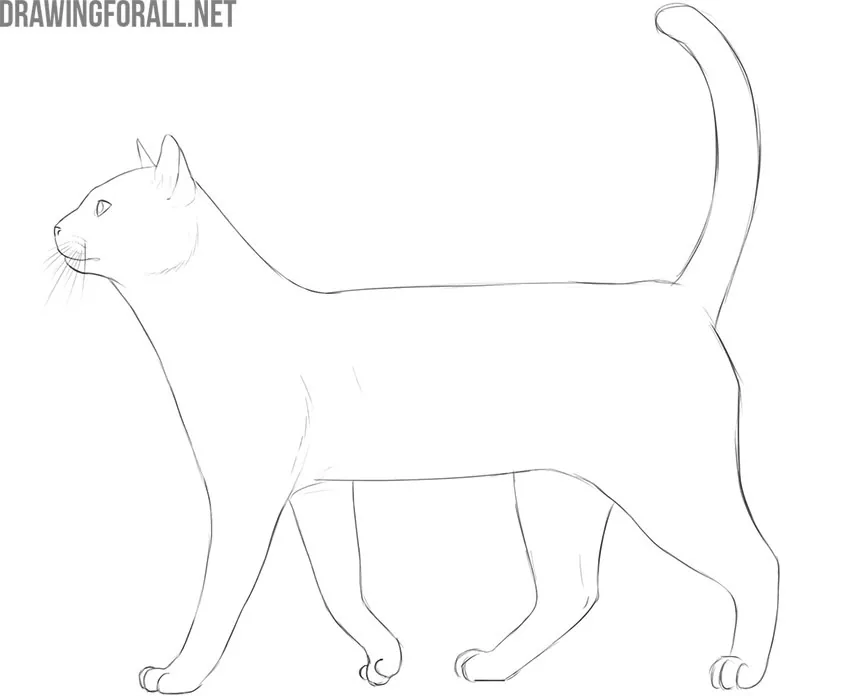
Step 11: Correct the shapes and proportions
Starting methodically from the head and moving toward the tail, carefully erase all remaining construction lines from the earlier stages. As you do this, retrace and refine the contours where necessary, correcting shapes and details. Finally, check the proportions and the overall balance of the cat’s body parts.
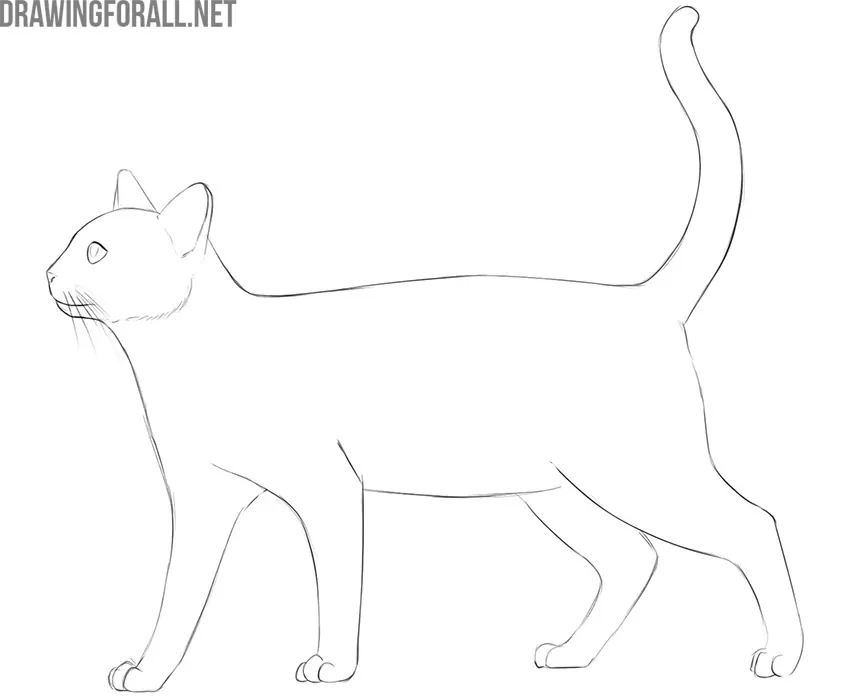
Step 12: Draw shadows on the cat body
In most situations, light falls from above, so shadows should be added to the lower planes of the cat’s body. Keep this in mind, along with the basic principles of light and shadow, and carefully begin applying even hatching to slightly darken the shaded areas for a more natural and realistic appearance. Darken the eye as well, leaving a small, subtle highlight inside.

Step 13: Review and complete the drawing
Now take a step back and review your cat drawing, correcting anything that needs adjustment. For example, you can enhance atmospheric perspective by making the ear and limbs closer to the viewer slightly darker and more contrasted. You may also choose to deepen the shadows, adding a wider tonal range for greater depth. Or you can leave the drawing as it is if you are satisfied with the result.

How to draw a cat in a different pose
Now let’s look at the entire process of drawing a cat from a slightly different perspective using another technique.
The cat here is in a similar pose, but the angle, the position of the limbs, and the turn of the head are different.
As you can see, this version follows a slightly different sequence of steps, yet the final result remains three-dimensional and realistic.
First, you still need to establish the basic placement of the head, torso, and limbs. Then carefully sketch the facial features, add volume to the limbs, and gradually begin refining the details.
In the final stage, apply simple hatching, taking into account the direction of the light and the areas that remain in shadow.

If you have mastered the sequence of steps, you can draw a cat of virtually any breed, shape, or pose. For example, you might depict a jumping cat, a sitting one, or a cat lying down.
The core structure and stages of construction will remain similar, while the specific details will vary – and those differences are important to understand and remember.
You can also convey subtle emotions and mood in your drawing, such as capturing a sense of caution in a cat’s movements as it quietly approaches its target.
In addition, once you understand the fundamentals of drawing a cat, you gain much more freedom when creating drawings of other animals, especially members of the feline family.
For example, you will be able to draw a tiger or any other animal with similar structural forms with much greater ease.
The same applies to drawing a dog. Despite their contrasting nature, these two animals are quite similar in overall structure and form from a drawing perspective.

Awesome job, but i wish there were more specific details..
I like this app it has very easy tutorials but it needs more details and cats eyes go like that I have a cat named lily and she has eyes like that
i love it
Okie so I can do a dog but I can’t do a cat. Wth
LOL
i wish i could draw like that
AYEEEEEEEE
I wish there were more defined details, i.e how would one make the cat extra fluffy all over, collar, bell even. Otherwise this is a fantastic tutorial!!
Umm what is up with those eyes?
Yea, it’s kinda creepy. But still it’s a cute kitty
but there’s nothing wrong with those poor eyes
Sad Cat
my eyes look horrible, they look sad, Asian, and scary, but no cute 🙁
Andy what is bad about being asian?
This is a great tutorial ^^ I HIGHLY recommend this site for artists and young artists! And for people who needs to draw for projects, homework, etc.
I love this website as well!
i love it
cats are life.
veeeery good tutorial 🙂
Thank you!
creepy eyes
I love this.
itchy
ya its amazing 🐈⬛🐈⬛🐈⬛🐾🐾