How to Draw Chibi Thor

The steps in this simple tutorial will show you how to draw chibi Thor – one of the members of the Avengers – in a very basic and cute style.
Unlike our Thor drawing tutorial in the comic book style, the chibi style used in this guide features heavily simplified proportions with an exaggeratedly large head in relation to the body.
At the same time, the basic recognizability of the character is preserved because the most important elements are still conveyed, even in a simplified manner.
This is especially noticeable when comic book designs are transformed into chibi versions.
That is exactly what we will be doing in this chibi Thor drawing tutorial.
How to draw chibi Thor step by step
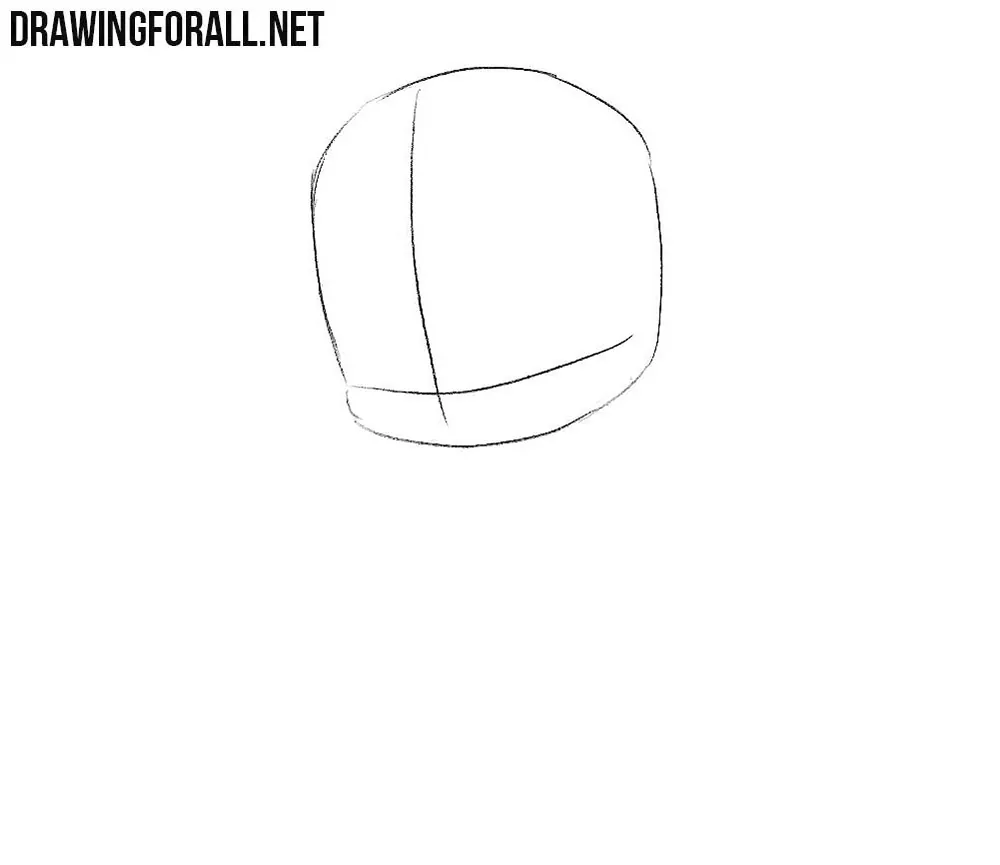
Step 1: Sketch the character’s oversized head
First of all, draw the outline of the head, remembering that it should occupy a significant portion of the page. You can give it a slightly angular appearance. Then draw the vertical symmetry line and the eye line, placing it much lower than usual.
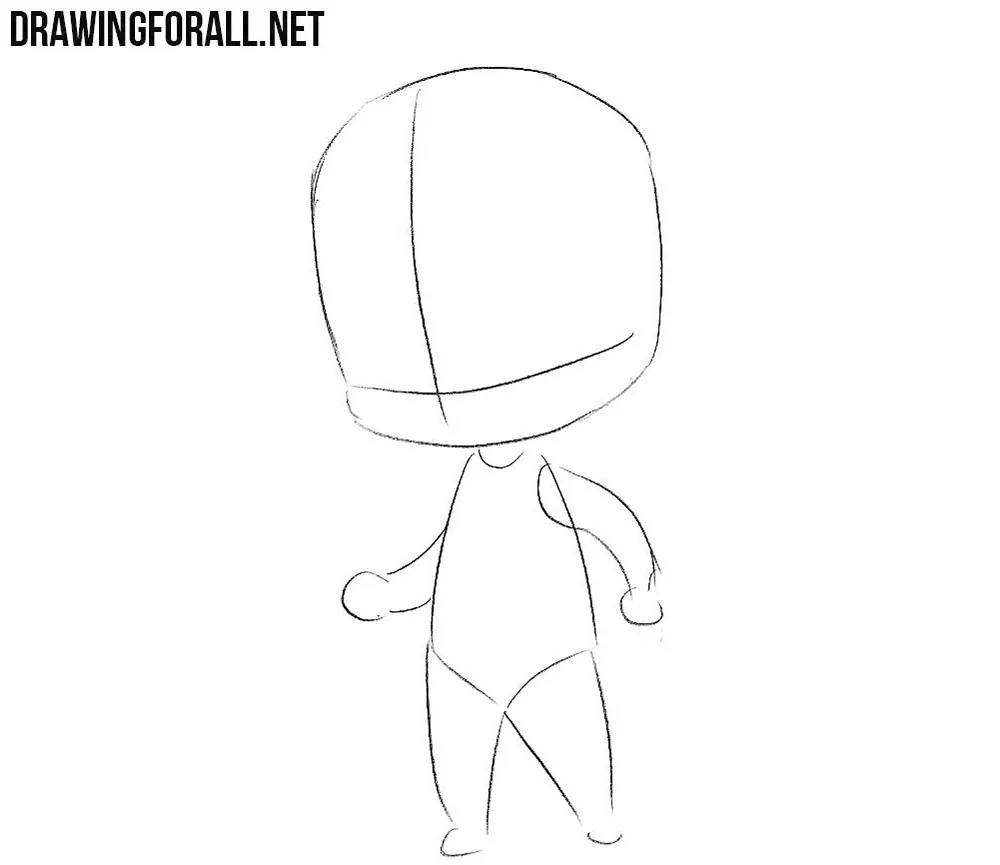
Step 2: Draw the neck and torso of chibi Thor
Directly beneath the head, indicate the neck using a small cylindrical shape. Then sketch the outline of the torso, which should be noticeably smaller than the head or approximately the same size.

Step 3: Sketch the chibi arms and legs
On the left and right sides of the upper body, sketch the outlines of the arms using very simple forms. Then draw the legs, making them rounded and cartoonish. The fists and feet should also be indicated using rounded forms without any details for now.
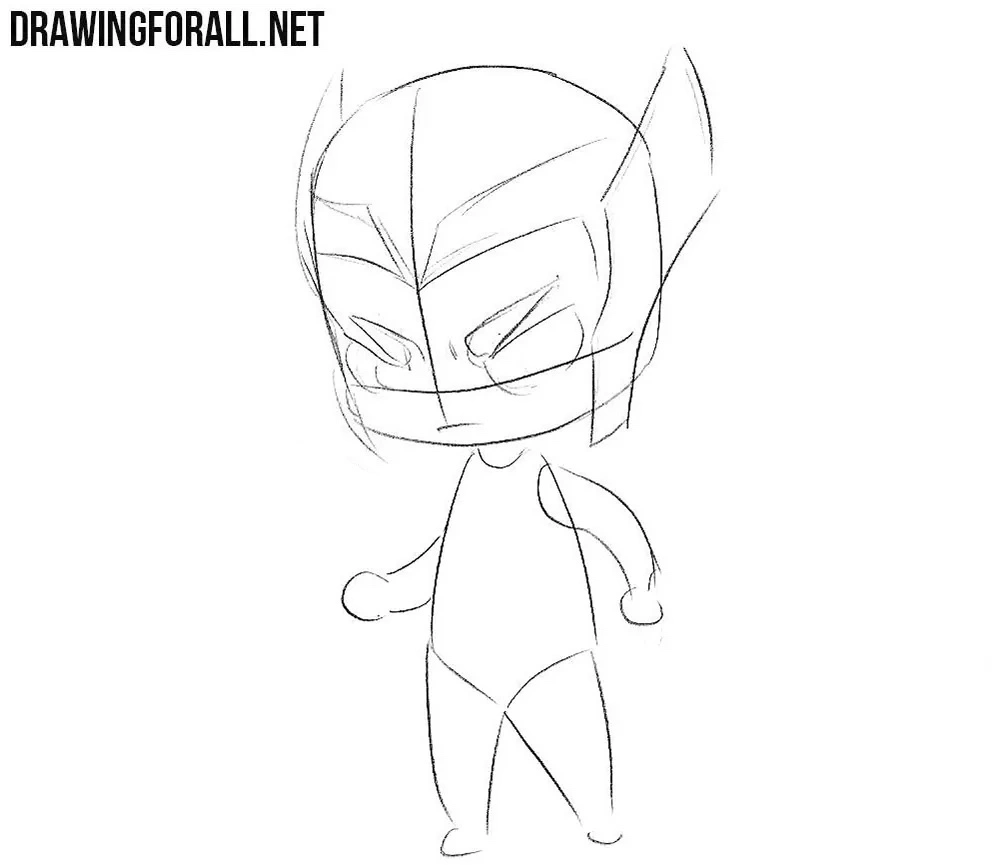
Step 4: Draw chibi Thor’s facial features
Move to the head and draw the chibi eyes using the facial guidelines sketched earlier. The eyes should be positioned very low to give the character a cute cartoon appearance. Above them, draw frowning eyebrows, and below the eyes draw the mouth. In the chibi style, drawing the nose is optional.

Step 5: Draw the chibi helmet of Thor
Now indicate the contours of the helmet above and on the sides of the face. Then draw the wings, either giving them a more modern appearance like in our example or using the classic shapes from older Marvel comics.
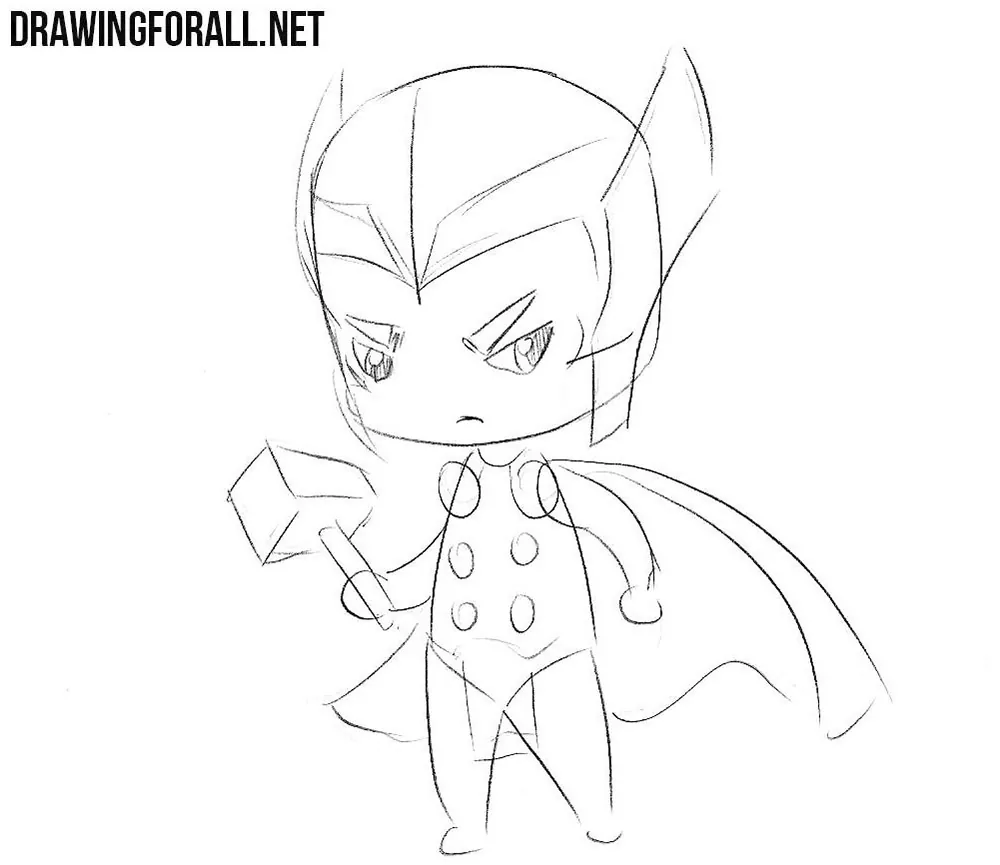
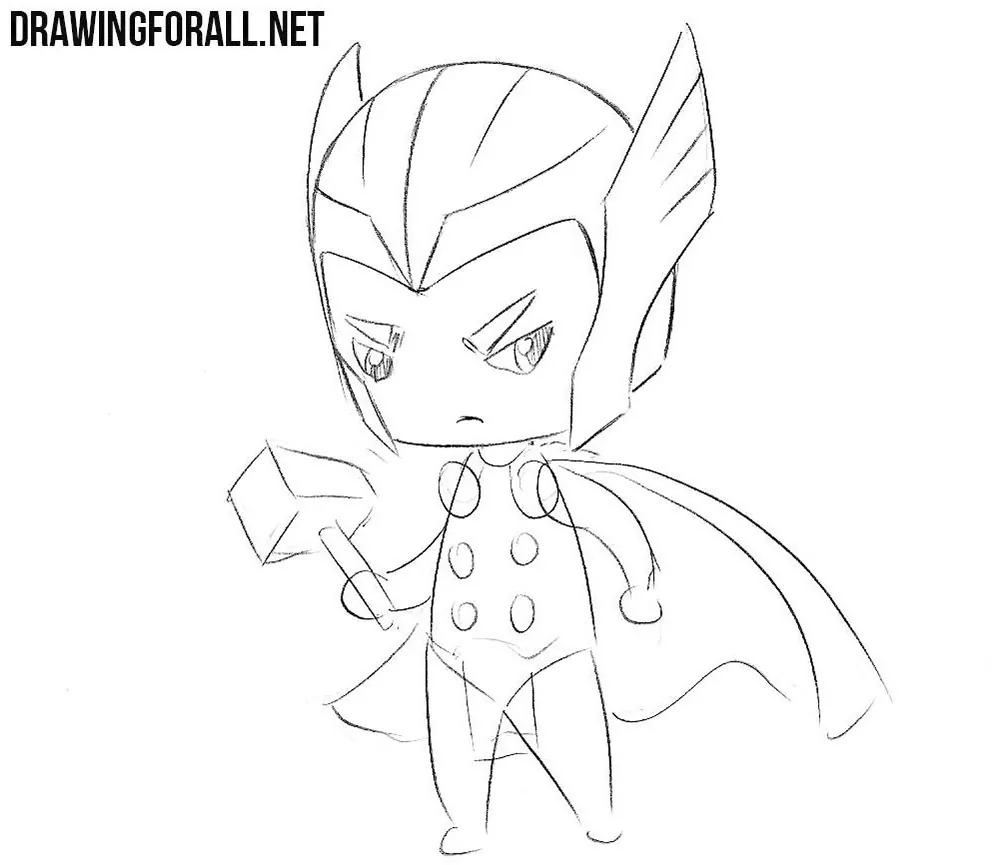
Step 6: Sketch the simplified cape and Mjolnir
On the chest, draw the decorative discs, making the upper ones slightly larger than the lower ones. Then draw the long flowing cape behind the character. Draw Mjolnir in the hand of chibi Thor.

Step 7: Complete the chibi facial features
Give the chibi eyes a cleaner and more finished appearance by adding the pupils and irises inside them. Refine the outlines of the eyebrows and mouth. Erase all the construction lines and facial guidelines from this area.
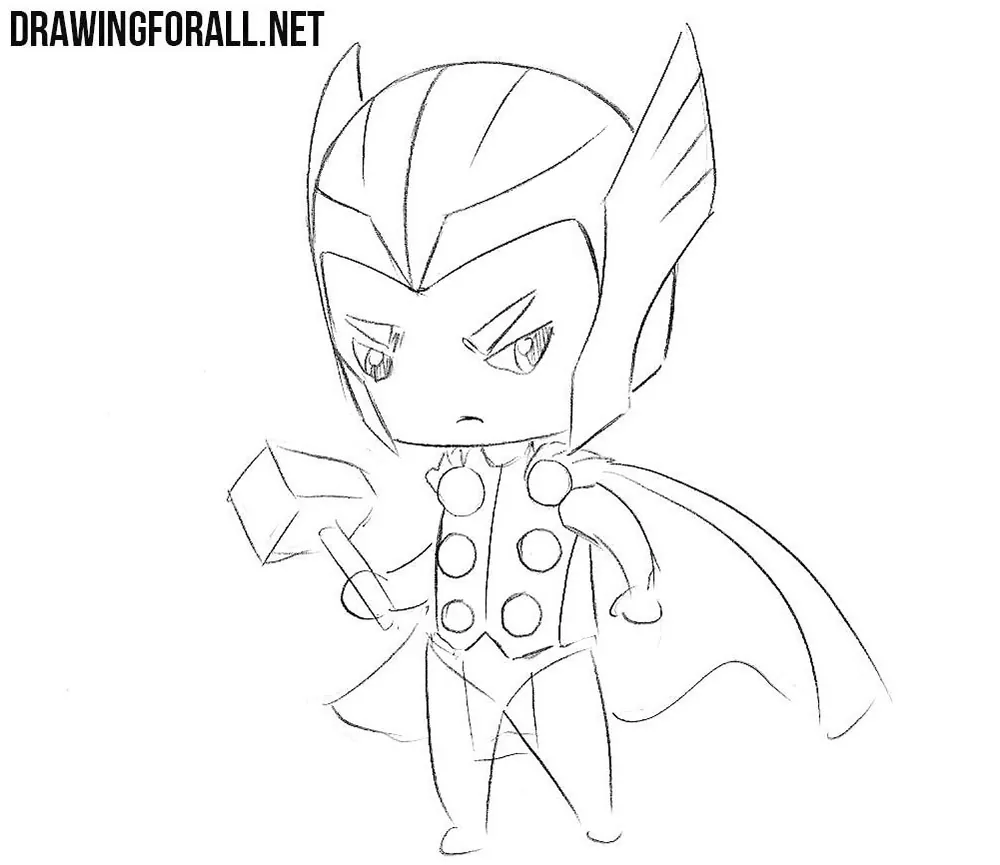
Step 8: Draw chibi Thor’s helmet in detail
Now trace the outlines of the helmet, giving them a cleaner appearance while correcting inaccuracies and adding details. Draw texture on the upper part of the helmet as well as on the wings.
Step 9: Refine chibi avenger’s torso and cape
Trace the outlines of the torso and carefully draw the chest discs in detail. Add folds to the cape near the shoulders and erase the remaining construction lines from this area as well.
Step 10: Refine chibi Thor’s limbs and hammer
Give the arms a cleaner appearance by indicating the fingers with simple forms and sketching the bracelets. Refine the cape and hammer, giving them a more finished look. Trace the outlines of the legs and add knee pads and other elements in this area.
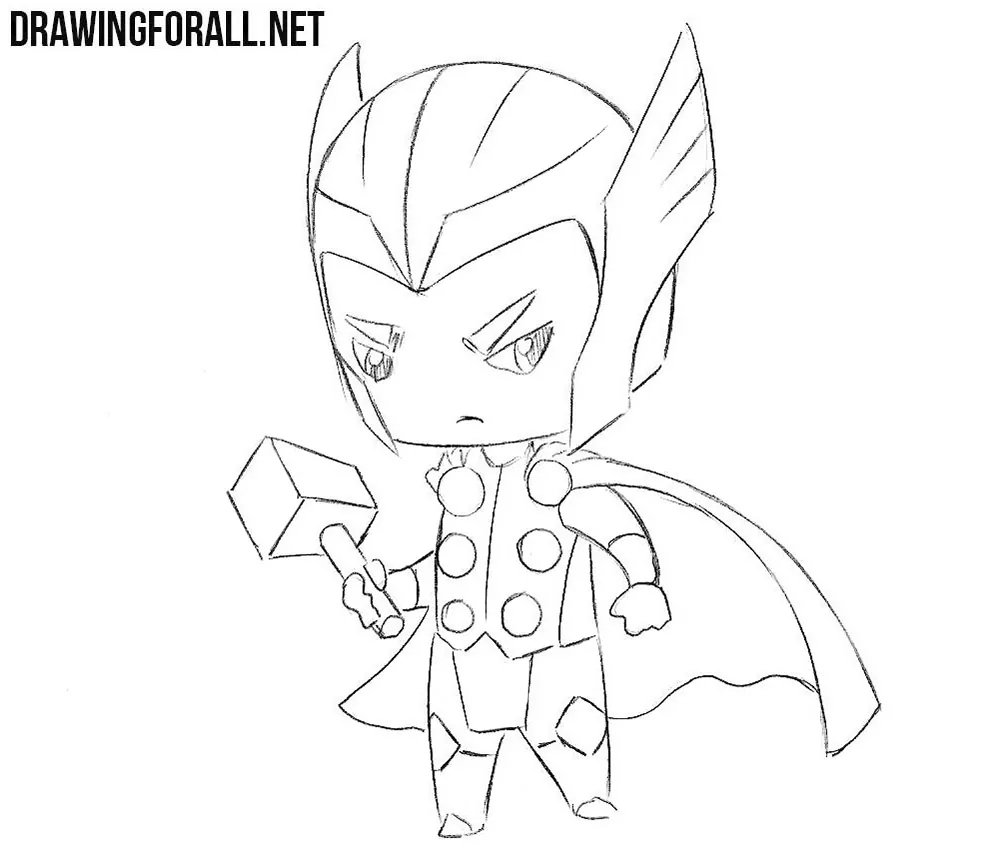
Step 11: Finalize the chibi Thor drawing
Finally, trace the entire drawing of chibi Thor, giving it a more cartoonish appearance. You can slightly vary the thickness of the lines so the drawing does not look too flat or boring. In addition, you can color your drawing or add simple hatching to create more volume.

Principles of drawing chibi superheroes
Despite all its simplicity, the chibi style is still based on the fundamental principles of character drawing. That is why, from the very beginning, we sketched the basic forms of the head, torso, and limbs before moving on to the details.
Even in the most cartoonish and simplified style, it is very important to keep the sense of volume and proportions in mind, even if those proportions are intentionally exaggerated. This is exactly what allows the drawing to look convincing and recognizable.
It is also important to remember Thor’s characteristic features. Even in such a simplified version, the character remains recognizable thanks to the winged helmet, decorative discs on the chest, cape, and Mjolnir.
These details allow the viewer to understand who is depicted, even if the style differs greatly from the classic Marvel comics.
Now try drawing chibi Thor in different poses or with different emotions. For example, you can depict him standing with the hammer raised, flying, or using lightning.
In addition, using these same principles, you can try drawing other Marvel heroes in the chibi style. Regular practice with simplified characters like these helps greatly in understanding the fundamentals of figure construction and learning how to create more professionally looking chibi drawings.


Really great😏😎🧐